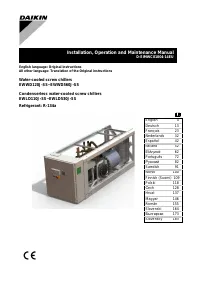
Кондиционеры Daikin EWLD-J-SS - инструкция пользователя по применению, эксплуатации и установке на русском языке. Мы надеемся, она поможет вам решить возникшие у вас вопросы при эксплуатации техники.
Если остались вопросы, задайте их в комментариях после инструкции.
"Загружаем инструкцию", означает, что нужно подождать пока файл загрузится и можно будет его читать онлайн. Некоторые инструкции очень большие и время их появления зависит от вашей скорости интернета.


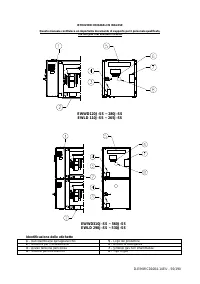
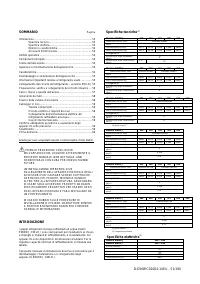


D-EIMWC01004-14EU - 6/190
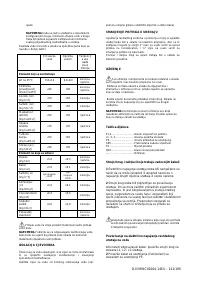
Do not purge the air with refrigerants. Use a vacuum
pump to vacuum the installation.
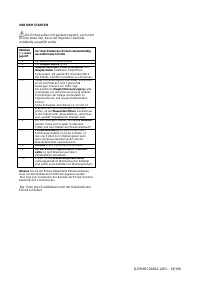
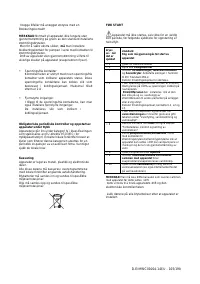
Charging the unit
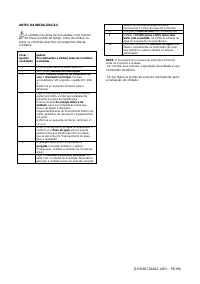
1. Perform an integral pre-start inspection like explained in
“BEFORE STARTING”.
Carefully perform all required procedures like explained
in chapters from which is referred to in chapter
“BEFORE STARTING”, but do not start the unit.
It is also necessary to read the operation manual delivered
with the unit. This will contribute to understand the operation
of the unit and its electronic controller.
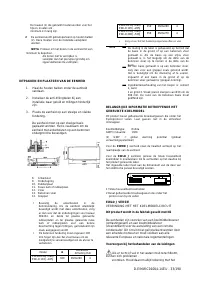
Pre-charge of refrigerant without operation of the unit
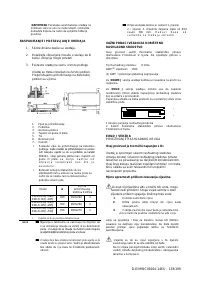
2. Use the 1/4” SAE Flare stop valve on the filter drier to
pre-charge the unit with the complete calculated pre-
charge.
Do not operate the compressor for pre-charging,
this to avoid compressor damage!
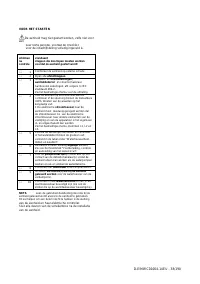
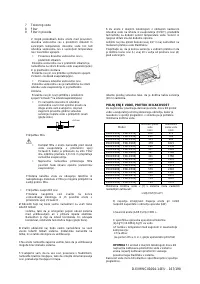
3. After completion of procedure step 2, perform an “initial
start” test:
3.1 Start the compressor and wait for the compressor to go
through the star/delta.
Carefully check during start-up.
•
that compressor is not producing any abnormal
noise or vibration;
•
that high pressure rises and low pressure drops
within 10 seconds after to evaluate if the
compressor is not operating in reverse due to
wrong wiring;
•
that no safeties are activated.
3.2 Stop the compressor after 10 seconds.
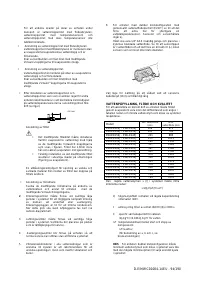
Fine-tuning of refrigerant charge while unit is in
operation
4.
Use the 1/4” SAE Flare valve on the suction for fine-
tuning of the refrigerant charge and make sure to
charge the refrigerant in its liquid state.
4.1 For fine-tuning of the refrigerant charge, the compressor
must operate at full load (100%).
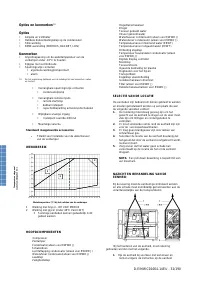
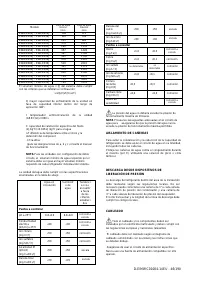
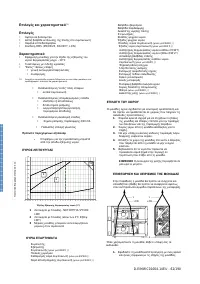
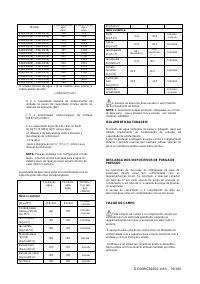
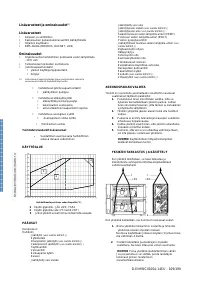
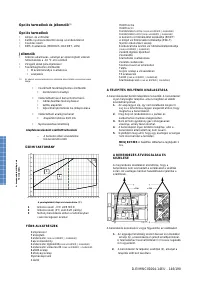
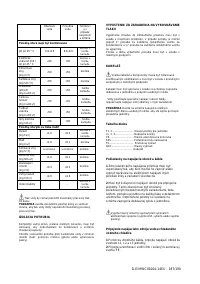
4.2 Verify the superheat and subcooling:
•
superheat must be between 3 and 8 K
•
subcooling must be between 3 and 8 K
4.3 Verify the oil sightglass. Level must be within the
sightglass.
4.4 Verify the liquid line sightglass. It should be sealed
and not indicate moisture in the refrigerant.
4.5 As long as the liquid-line sightglass is not sailed,
add refrigerant in steps of 1 Kg and wait until the
unit runs in stable conditions.
Repeat the complete procedure step 4 until the liquid line
sightglass is sealed.
The unit must have the time to stabilize which means that
this charghing has to be done in a smooth way.
5. Note down the superheat and subcoolingfor future
reference.
6. Fill out the total refrigerant charge on the unit nameplate
and on the refrigerant charge label supplied with the
product.
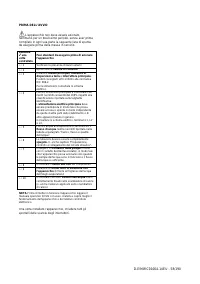
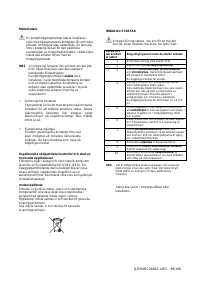
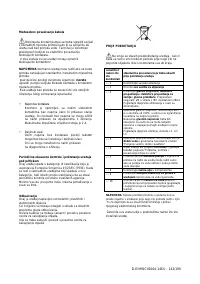
NOTE
Take care for contamination of the remote condenser
In order to avoid blocking of the system. It is
impossible for the manufacturer to control the
contamination of the “foreign” condenser of the
installer. The unit has a strict contamination level.
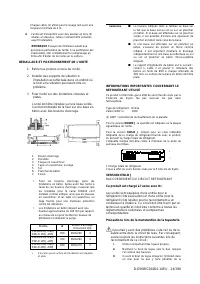
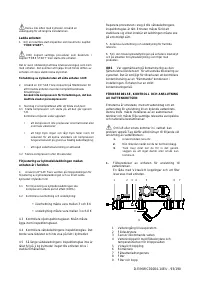
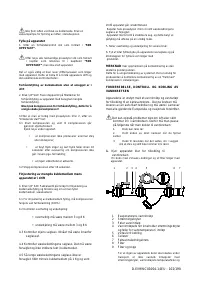
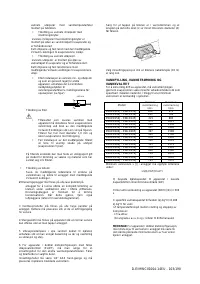
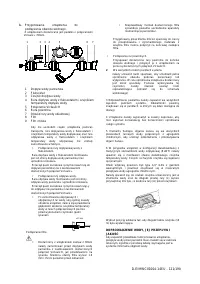
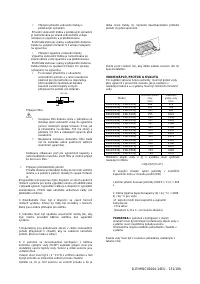
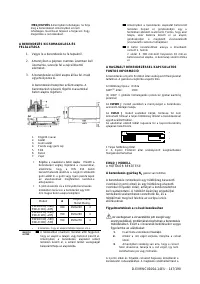
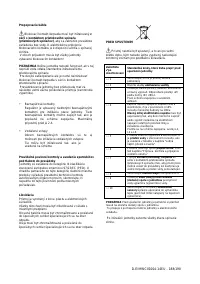
PREPARING, CHECKING AND CONNECTING THE
WATER CIRCUIT
The units are equipped with a water inlet and water
outlet for connection to a chiller water circuit. This circuit
must be provided by a licensed technician and must
comply with all relevant European and national
regulations.
If air or dirt gets in the water circuit, problems may
occur. Therefore, always take into account the
following when connecting the water circuit:
1.
Use clean pipes only.
2.
Hold the pipe end downwards when removing
burrs.
3.
Cover the pipe end when inserting it through a
wall so that no dust and dirt enter.
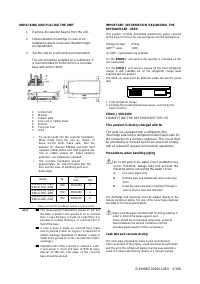
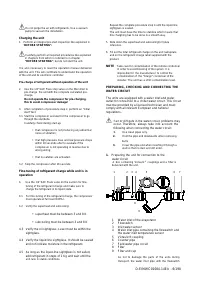
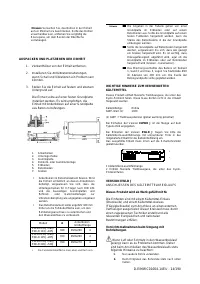
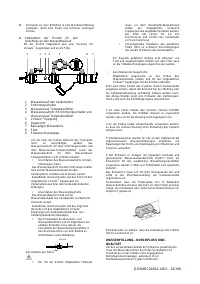
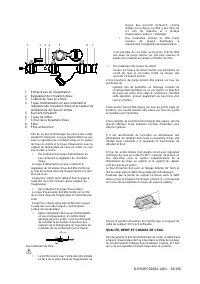
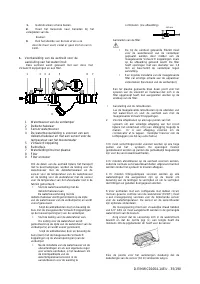
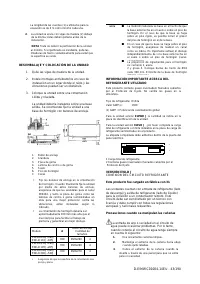
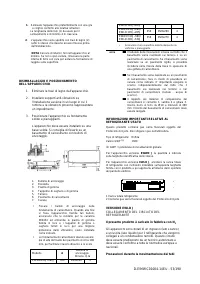
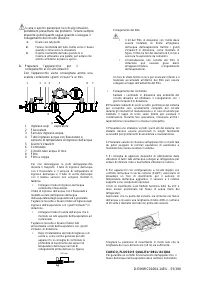
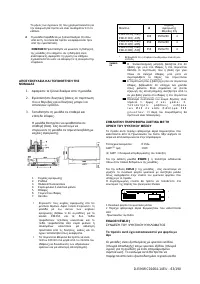
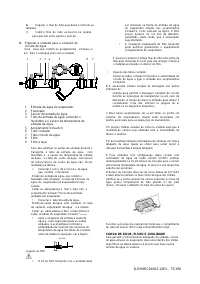
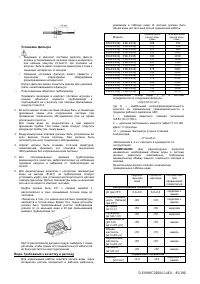
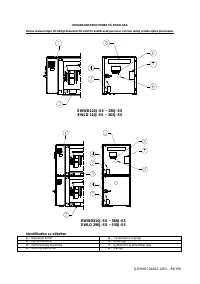
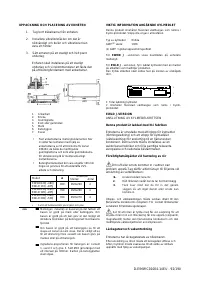
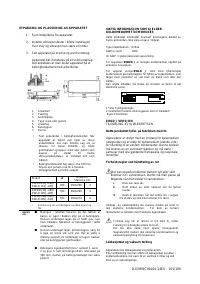
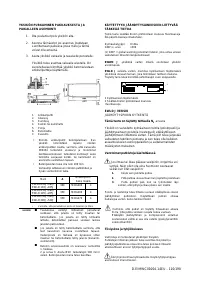
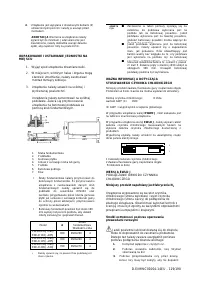
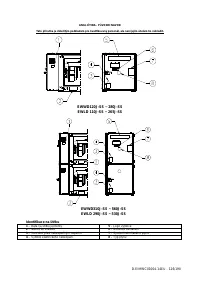
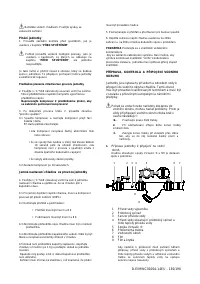
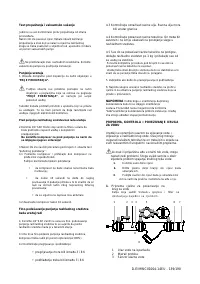
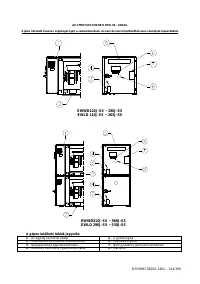
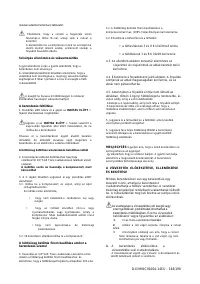
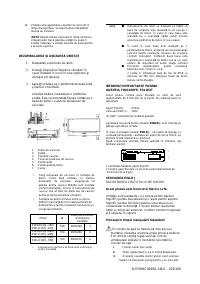
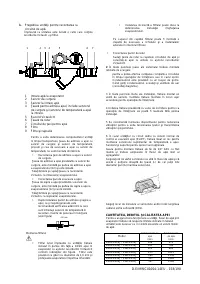
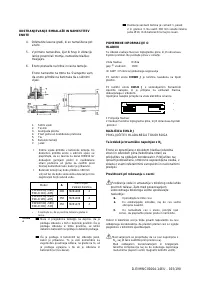
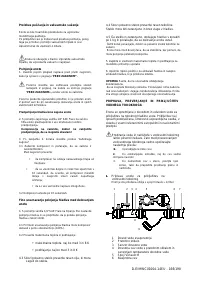
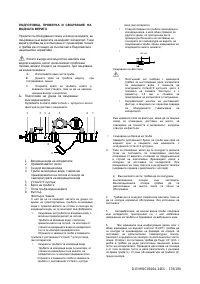
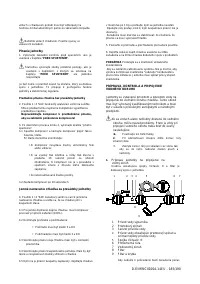
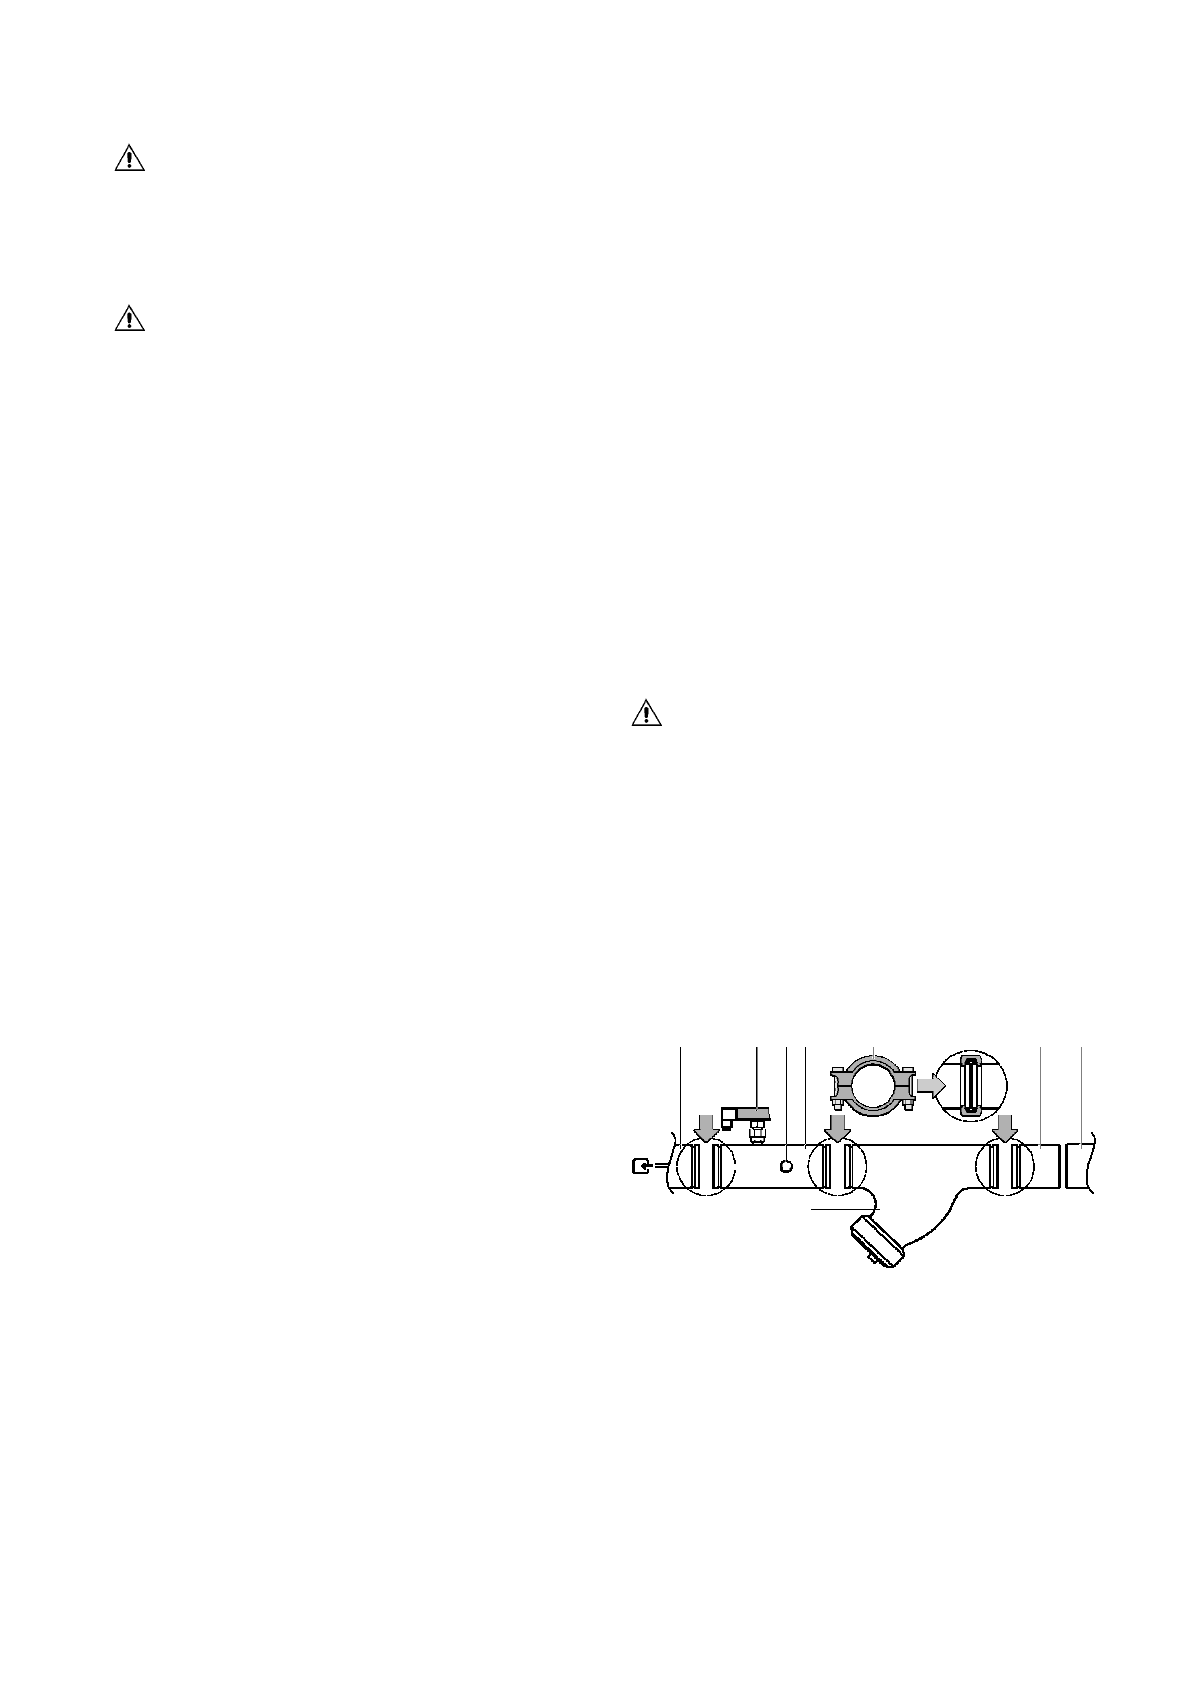
1. Preparing the unit for connection to the
water circuit
A box containing Victaulic
®
couplings and a filter is
delivered with the unit.
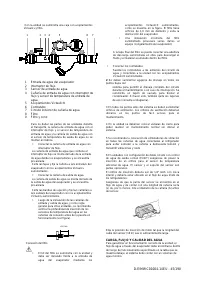
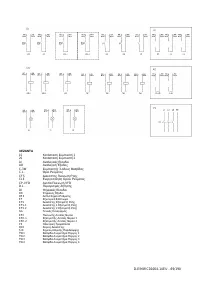
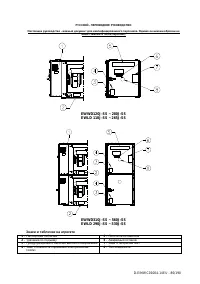
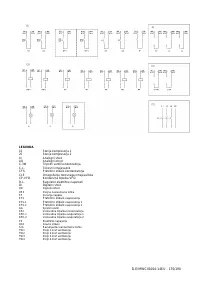
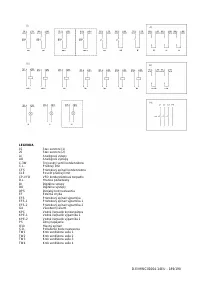
1 2 3 4 5 6 7
1
Water inlet of the evaporator
2
Flowswitch
3
Inlet water sensor
4
Water inlet pipe containing the flowswitch and
the water inlet temperature sensor
5
Victaulic® coupling
6
Counter pipe
7
Field water pipe circuit
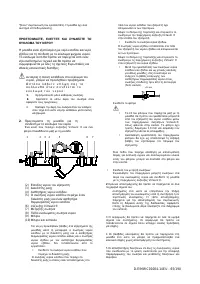
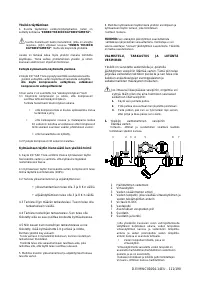
8
Filter
9
Filter and cup
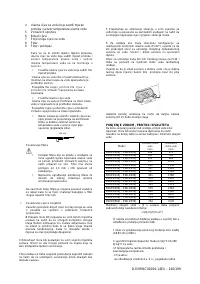
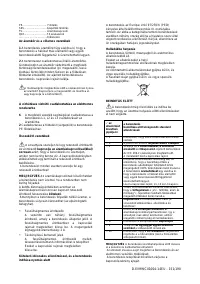
As not to damage the parts of the units during
transport, the water inlet pipe with the flowswitch
8
8
9


