Кондиционеры Daikin EWLD-J-SS - инструкция пользователя по применению, эксплуатации и установке на русском языке. Мы надеемся, она поможет вам решить возникшие у вас вопросы при эксплуатации техники.
Если остались вопросы, задайте их в комментариях после инструкции.
"Загружаем инструкцию", означает, что нужно подождать пока файл загрузится и можно будет его читать онлайн. Некоторые инструкции очень большие и время их появления зависит от вашей скорости интернета.


D-EIMWC01004-14EU - 5/190
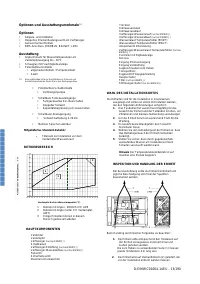
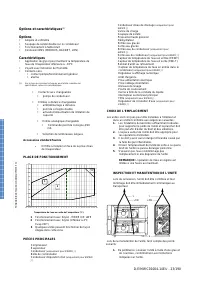
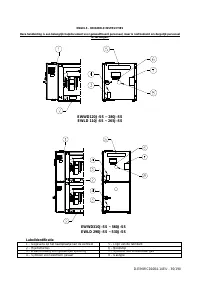
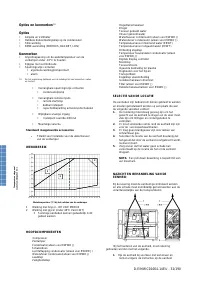
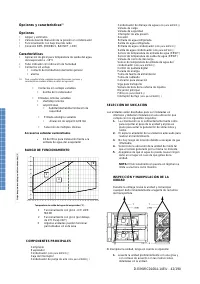
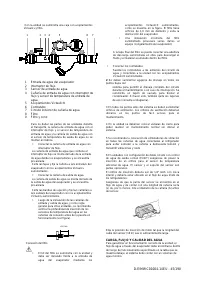
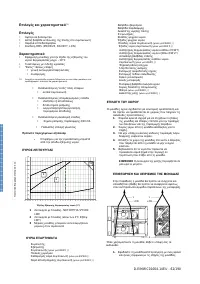
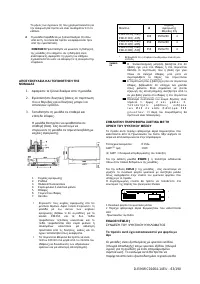
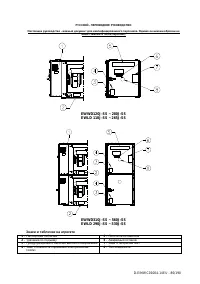
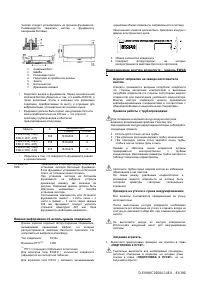
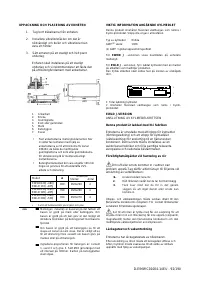
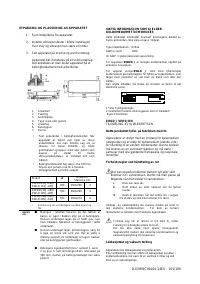
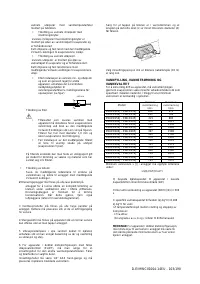
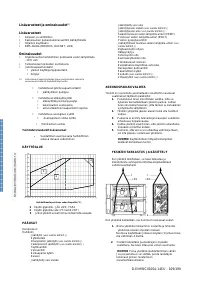
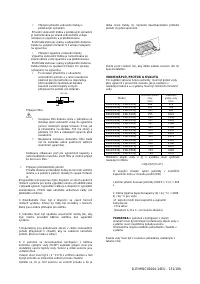
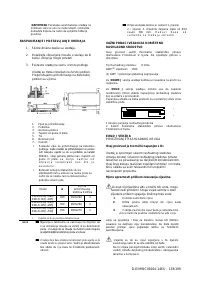
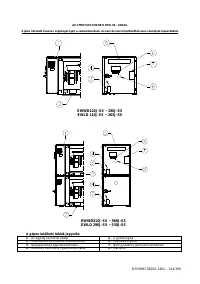
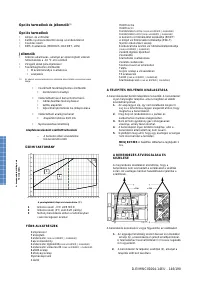
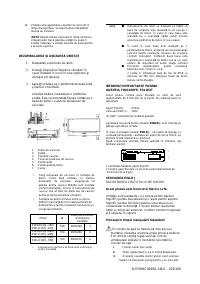
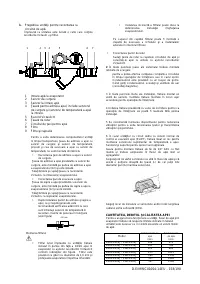
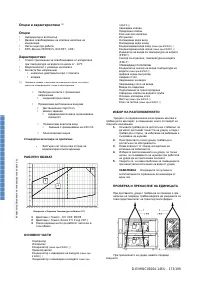
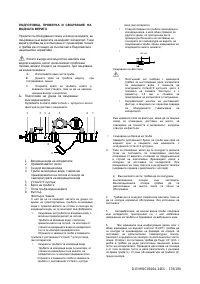
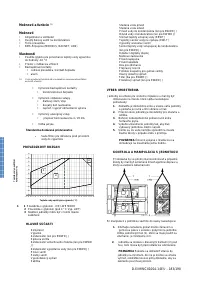
UNPACKING AND PLACING THE UNIT
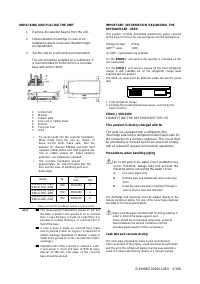
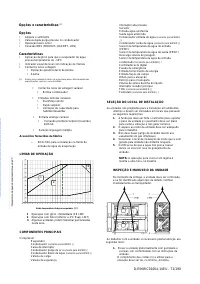
1. Remove the wooden beams from the unit.
2. Install vibration mountings in case of an
installation where noise and vibration might
an impediment.
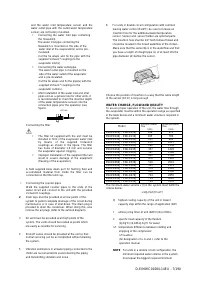
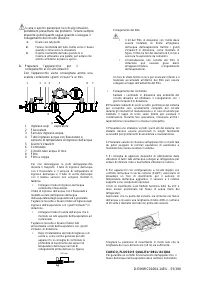
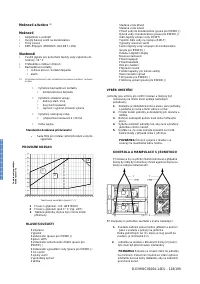
3. Set the unit on a solid and level foundation.
The unit should be installed on a solid base. It
is recommended to fix the unit on a concrete
base with anchor bolts.
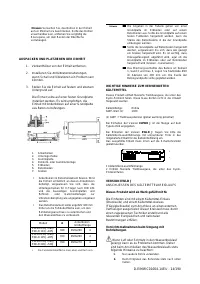
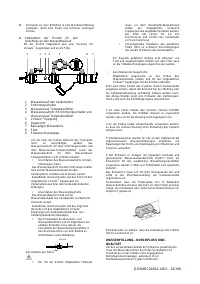
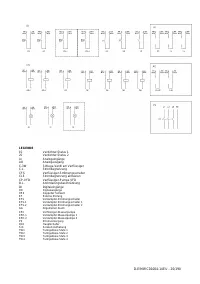
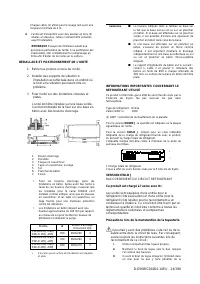
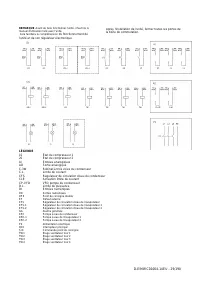
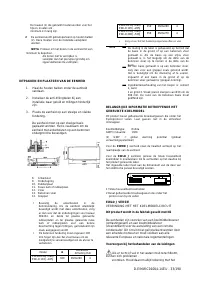
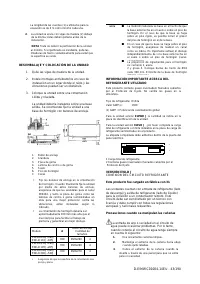
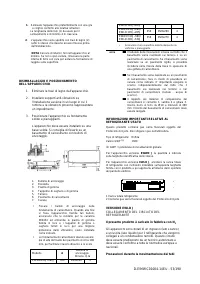
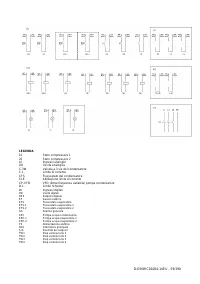
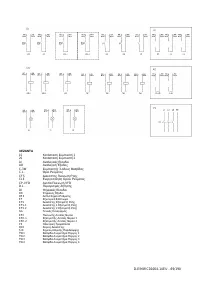
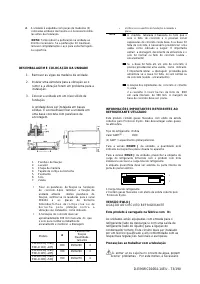
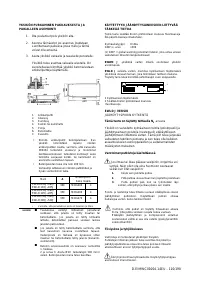
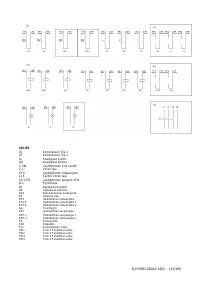
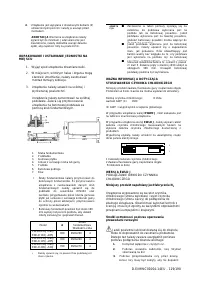
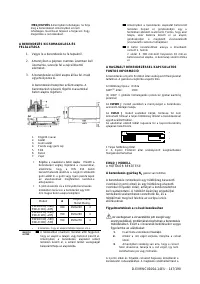
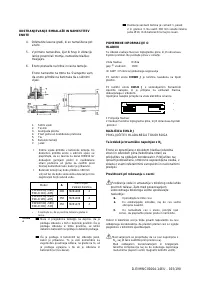
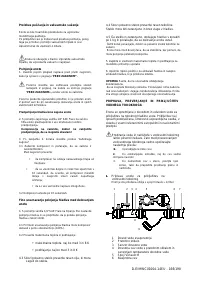
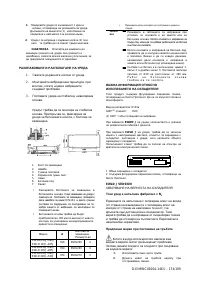
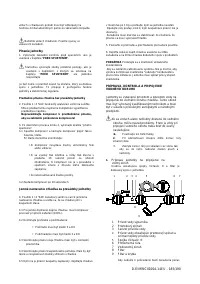
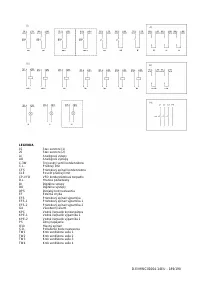
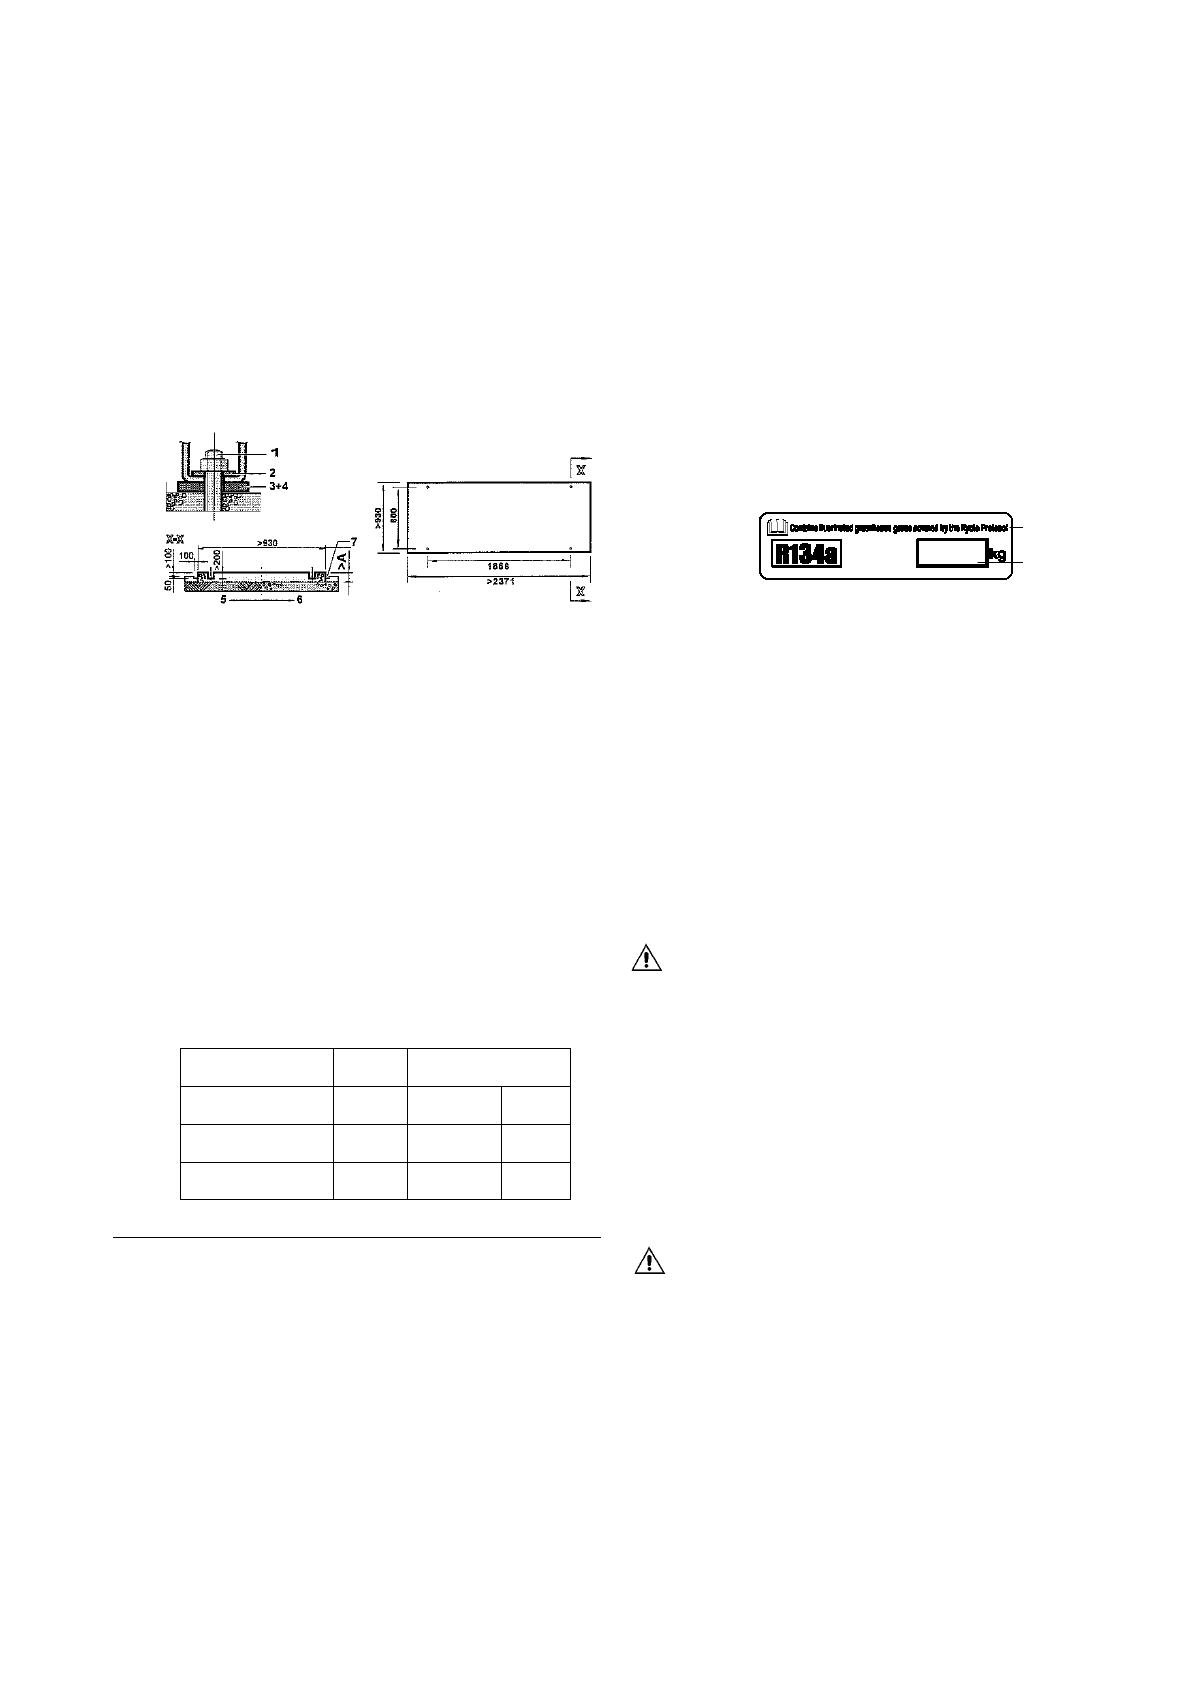
1.
Anchor bolt
2.
Washer
3.
Rubber plate
4.
Row cork or rubber sheet
5.
Ground
6.
Concrete floor
7.
Ditch
•
Fix anchor bolts into the concrete foundation.
When finally fixing the unit by means of
these anchor bolts, make sure that the
washers for channel DIN434, and both field
supplied rubber plates and field supplied raw
cork or rubber sheets for better vibration
protection, are installed as indicated.
•
The concrete foundation should
approximately be 100 mm higher than the
floor level for ease of plumbing work and
better drain.
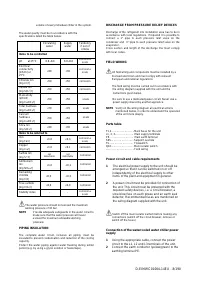
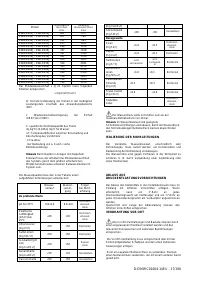
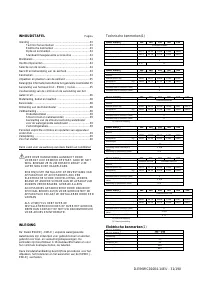
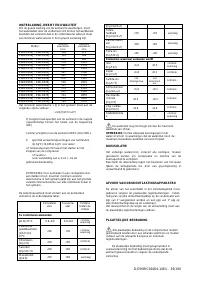
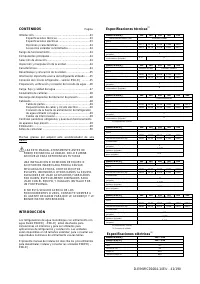
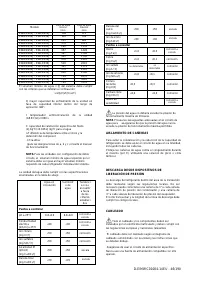
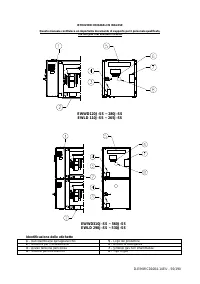
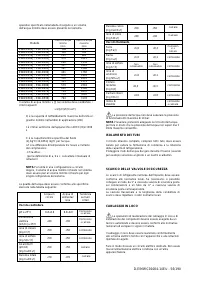
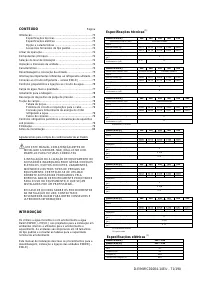
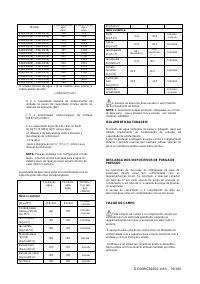
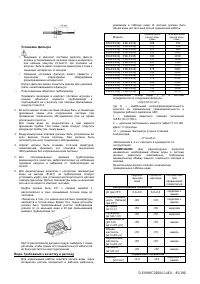
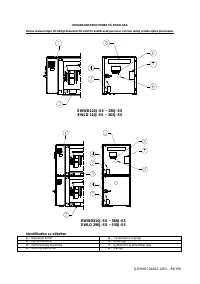
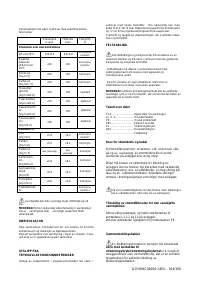
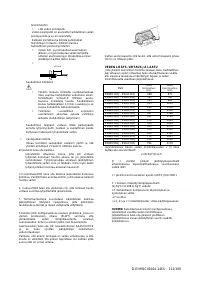
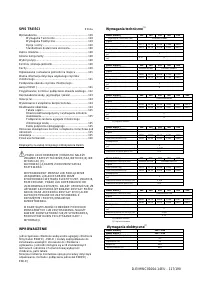
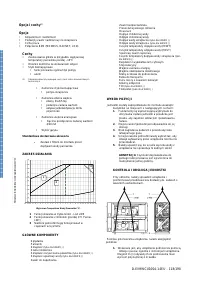
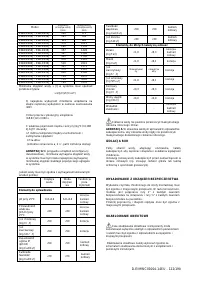
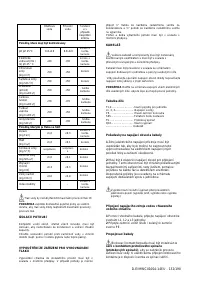
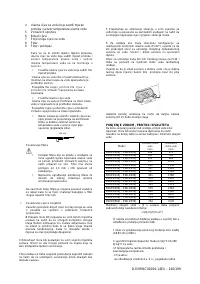
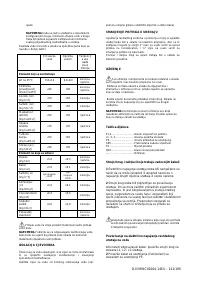
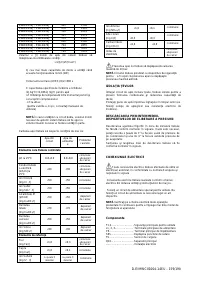
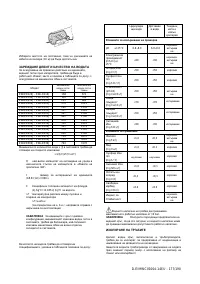
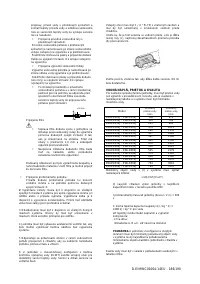
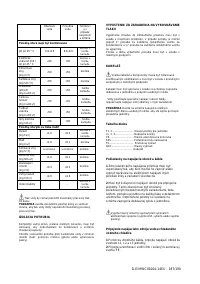
Model
A
Anchor bolt
Size Qty
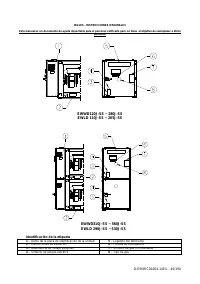
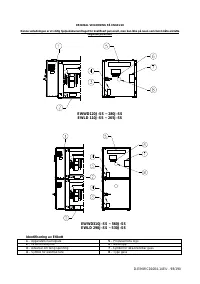
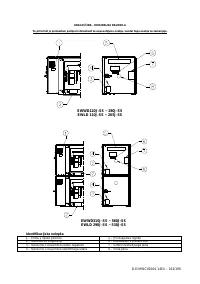
EWWD120J~180J
EWLD 110J~165J
300
M20x200
4
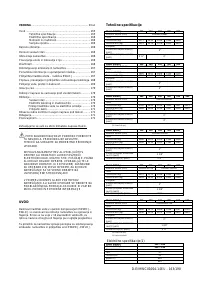
EWWD210J~280J
EWLD 195J~265J
350
M20x200
4
EWWD310J~560J
EWLD 290J~530J
350
M20x270
4
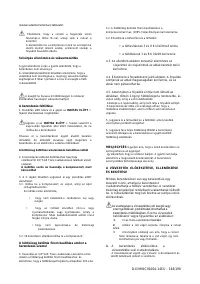
•
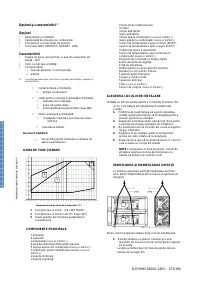
Make sure that the foundation surface is even and flat
NOTE
■
The measurement tabulated is based on the fact
the base is made in the ground or on a concrete
floor. In case the base is made on a rigid floor, it is
possible to include thickness of concrete floor in
that of the base.
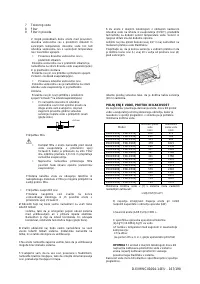
■
In case a base is made on concrete floor, make
sure to provide a ditch as shown. It is important to
extract drainage regardless of whether a base is
made in the ground or on the concrete floor (ditch-
sewerage).
■
Ingredient ratio of the concrete is: cement 1, sand
2 and gravel 3. Inser t iron bars of Ø10 at every
interval of 300 mm. The edge of the concrete
base should be planed.
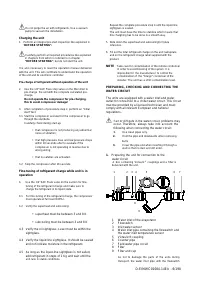
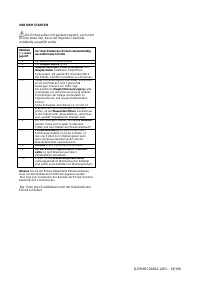
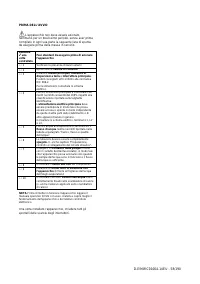
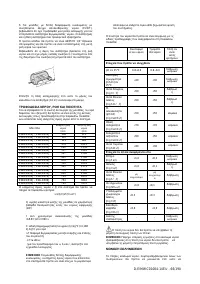
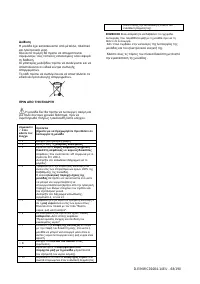
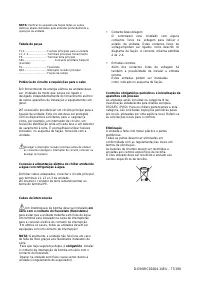
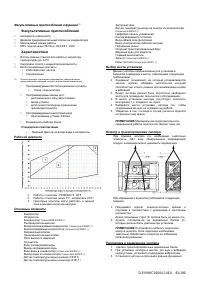
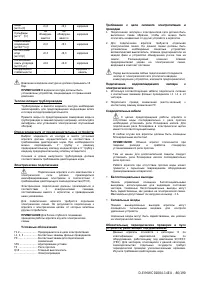
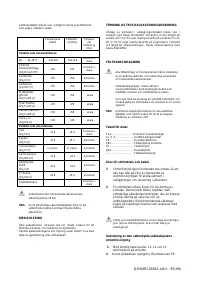
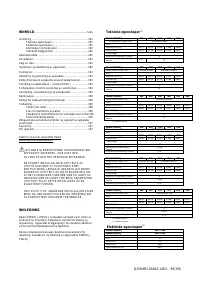
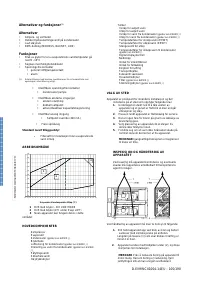
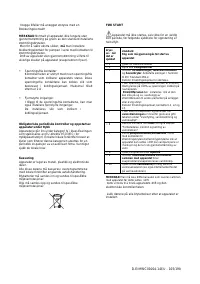
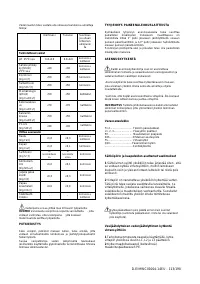
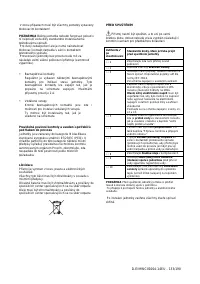
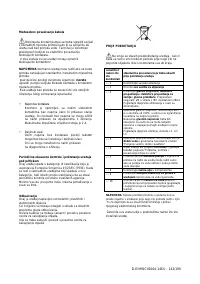
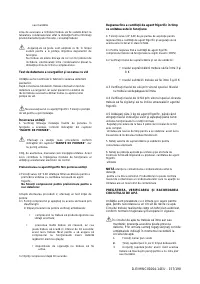
IMPORTANT INFORMATION REGARDING THE
REFRIGERANT USED
This product contains fluorinated greenhouse gases covered
by the Kyoto Protocol. Do not vent gases into the atmosphere.
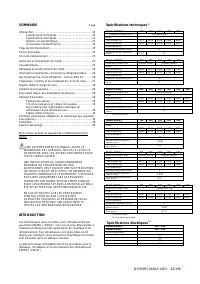
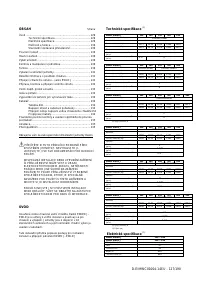
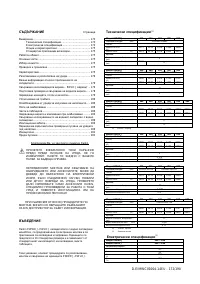
Refrigerant type:
R134a
GWP
(1)
value:
1300
(1) GWP = global warming potential
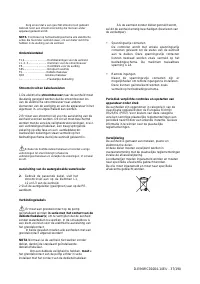
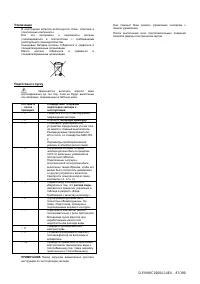
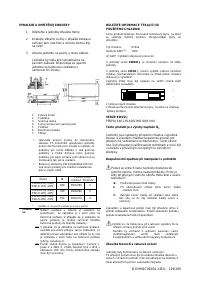
For the EWWD J unit version the quantity is indicated on the
unit name plate.
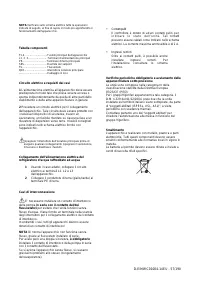
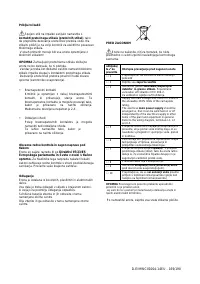
For the EWLD J unit version, please fill the total refrigerant
charge in with indelible ink on the refrigerant charge label
supplied with the product.
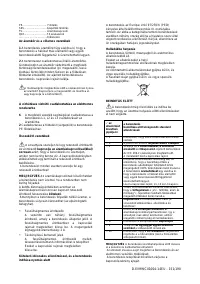
The filled out label must be adhered inside the electric panel
door.
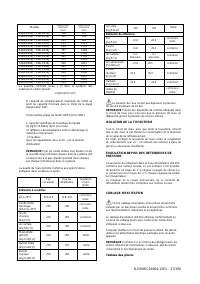
1 Total refrigerant charge
2 Contains fluorinated greenhouse gases covered by the
Kyoto Protocol
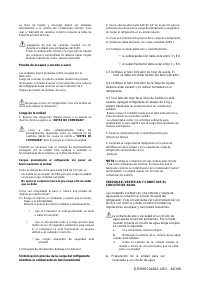
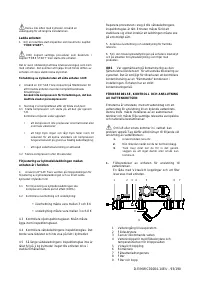
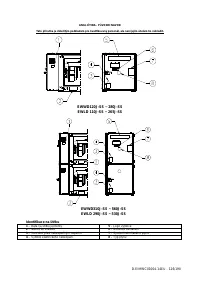
EWLD J VERSION
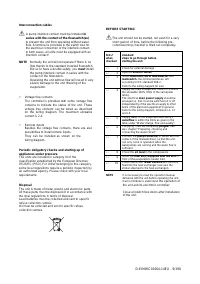
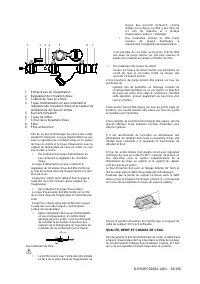
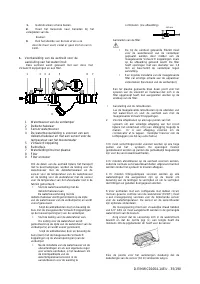
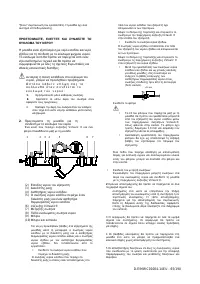
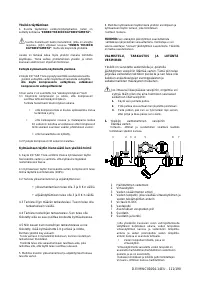
CONNECTING THE REFRIGERANT CIRCUIT
This product is factory charged with N
2
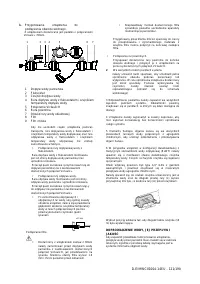
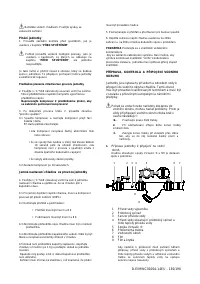
The units are equipped with a refrigerant inlet
(discharge side) and a refrigerant outlet (liquid side) for
the connection to a remote condenser. This circuit must
be provided by a licensed technician and must comply
with all relevant European and national regulations.
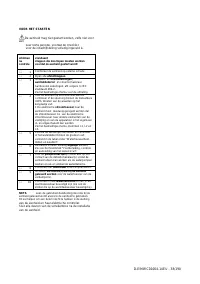
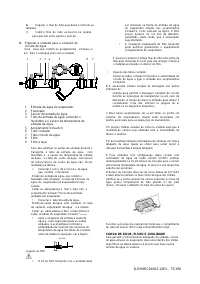
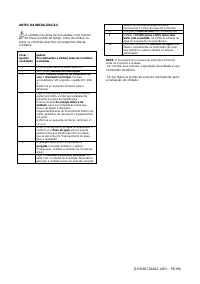
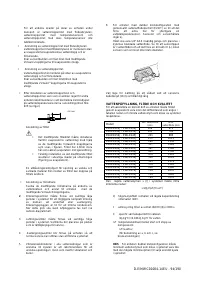
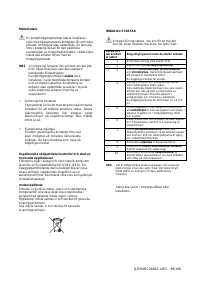
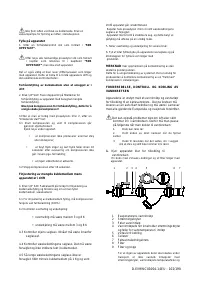
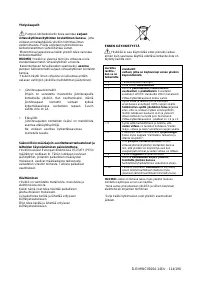
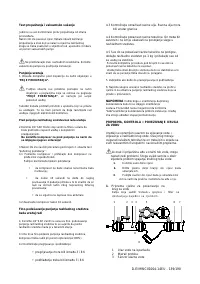
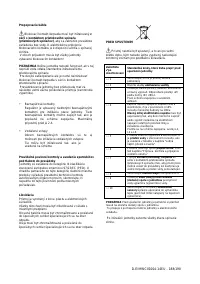
Precautions when handling piping
If air or dirt gets in the water circuit, problems may
occur. Therefore, always take into account the
following when connecting the water circuit:
1.
Use clean pipes only.
2.
Hold the pipe end downwards when removing
burrs.
3.
Cover the pipe end when inserting it through a
wall so that no dust and dirt enter.
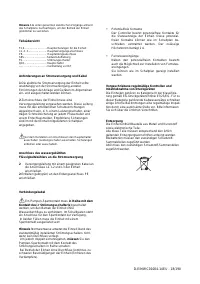
The discharge and liquid line must be welded directly to the
remote condenser piping. For use of the correct pipe diameter
see table of Technical specifications.
Make sure the pipes are filled with N
2
during welding in
order to protect the pipes against soot.
There should be no blockage (stopvalve, solenoid
valve) between the remote condenser and the
provided liquid injection of the compressor.
Leak test and vacuum drying
The units were checked for leaks by the manufacturer.
After connection of the piping, a leak test must be performed
and the air in the refrigerant piping must be evacuated to a
value of 4 mbars absolute by means of a vacuum pumps.
2
1


