
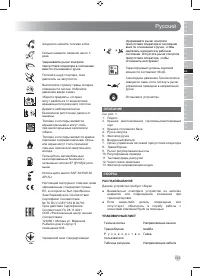
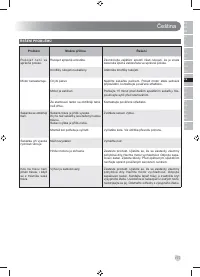
Газонокосилки Ryobi RLM4114 5133002884 - инструкция пользователя по применению, эксплуатации и установке на русском языке. Мы надеемся, она поможет вам решить возникшие у вас вопросы при эксплуатации техники.
Если остались вопросы, задайте их в комментариях после инструкции.
"Загружаем инструкцию", означает, что нужно подождать пока файл загрузится и можно будет его читать онлайн. Некоторые инструкции очень большие и время их появления зависит от вашей скорости интернета.


English
6
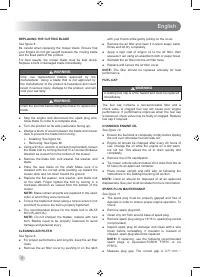
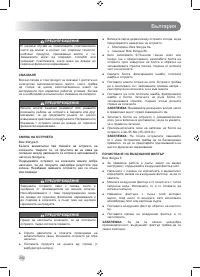
ADDING/CHECKING ENGINE OIL
See figure 3.
Engine oil has a major in
fl
uence on engine performance
and service life. For general, all-temperature use, SAE
10W-30 is recommended. Always use a 4-cycle motor oil
that meets or exceeds the requirements for API service
classi
fi
cation SJ.
NOTE:
Non-detergent or 2-cycle engine oils will damage
the engine and should not be used.
To add engine oil:
■
Ensure that the mower is level and area around oil cap/
dipstick is clean.
■
Remove the cap and seal from oil bottle.
■
Unscrew the oil cap/dipstick and remove.
■
Slowly add oil. Fill to the “Full” line on dipstick. Do not
overfill.
NOTE:
When checking the oil level, seat the dipstick in
the oil fill hole but do not screw in.
■
Reinstall the oil cap/dipstick and secure.
To check engine oil:
■
Ensure that the mower is level and area around oil cap/
dipstick is clean.
■
Remove the oil cap/dipstick. Wipe clean and reseat in
oil
fi
ll hole but do not screw in.
■
Remove the oil cap/dipstick again and check oil level.
Add oil as needed.
STARTING/STOPPING THE MOWER
See figure 3.
WARNING
Never start or run the engine inside a closed or poorly
ventilated area; breathing exhaust fumes can kill.
STARTING THE ENGINE
■
Firmly push the primer bulb 3 times.
NOTE:
This step is not usually necessary when starting
an engine that has already run for a few minutes.
■
Hold the operator presence control bar down against
the handle.
■
Pull the starter cord until the engine runs. Do not pull
the starter grip more than 4 times. Release the starter
cord slowly so the rope does not snap back.
NOTE:
It may be necessary to repeat priming steps in
cooler weather. In warmer weather, overpriming may cause
fl
ooding and engine will not start. If you do
fl
ood the engine,
wait a few minutes before attempting to start and do not
repeat priming steps.
STOPPING THE ENGINE
Release the operator presence control bar and allow the
engine to come to a complete stop.
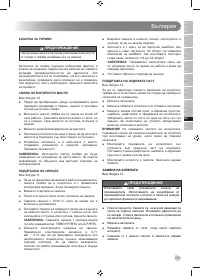
PROPELLING THE PRODUCT
See figure 4.
■
To self-propel: Hold down the operator presence control
while pulling the drive control lever towards the handle.
Release the drive control lever to stop the wheel drive.
■
To manually propel: Hold down the operator presence
control. Do not engage the drive control lever.
SETTING BLADE HEIGHT
See figure 5.
When shipped, the wheels on the mower are set to a low-
cutting position. Before using the mower for the
fi
rst time,
adjust the cutting position to the height best suited for your
lawn. The average lawn should be between 38 mm to 50
mm during cool months and between 50 mm and 76 mm
during hot months.
To set the blade height:
■
Stop the product and wait for the blade to come to a
complete stop.
■
To raise the blade height, grasp the height adjustment
lever and move it toward the back of the mower.
■
To lower the blade height, grasp the height adjustment
lever and move it toward the front of the mower.
MOWING TIPS
■
Make sure the lawn is clear of stones, sticks, wires, and
other objects that could damage the lawn mower blades
or engine. Such objects could be accidentally thrown by
the mower in any direction and cause serious personal
injury to the operator and others.
■
For best performance, always cut off one-third or less of
the total height of the grass.
■
When cutting long grass, reduce walking speed to allow
for more effective cutting and a proper discharge of the
clippings.
■
Do not cut wet grass. It will stick to the underside of the
deck and prevent proper bagging or discharge of the
grass clippings.
■
New or thick grass may require a narrower cut path.
■
When the fuel tank is empty and before refuelling, tip
the mower on the left hand side with the fuel cap at the
highest position. This will prevent fuel spillage. Remove
the spark plug lead to prevent accidental starting. The
blade is sharp, avoid contact with it. Check the blade
and underside of deck for any damage or build up of
debris. Clean if necessary. Check security of the blade
bolt.
SLOPE OPERATION
See figure 6.
■
Slopes are a major factor related to slip-and-fall


