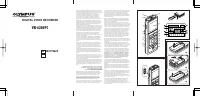
Диктофоны Olympus VN-6200PC - инструкция пользователя по применению, эксплуатации и установке на русском языке. Мы надеемся, она поможет вам решить возникшие у вас вопросы при эксплуатации техники.
Если остались вопросы, задайте их в комментариях после инструкции.
"Загружаем инструкцию", означает, что нужно подождать пока файл загрузится и можно будет его читать онлайн. Некоторые инструкции очень большие и время их появления зависит от вашей скорости интернета.


7
EN
3
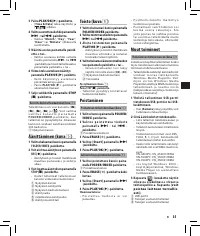
Press the
PLAY
/
OK
(
`
) button.
• [
T i m e & D a t e
] a p p e a r s o n t h e
display, and [
] flashes.
4
Press the
9
or
0
button to
select the item to set.
• S e l e c t th e i te m f r o m “
M o nt h
”,
“
D a y
” , “
Y e a r
” , “
H o u r
” a n d
“
Minute
” with a flashing point.
5
Press the
+
or – button to set.
• Follow the same steps by pressing
the
9
or
0
button to elect
the next item, and press the + or
– button to set.
6
Press the
PLAY
/
OK
(
`
) button to
complete the setup screen.
• The clock will star t from the set
date and time.
• Press the
PL AY
/
O K
(
`
) b ut to n
according to the time signal.
7
Press the
STOP
(
4
) button to close
the menu mode.
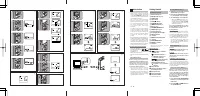
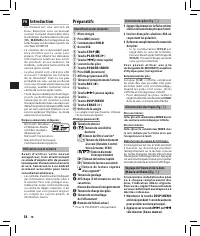
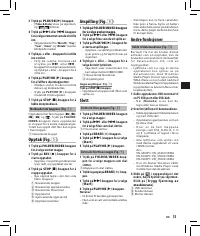
Notes on the Folders (Fig.
4
)
T h e r e co r d e r p r ov i d e s f i ve f o l d e r s ,
[
F
] , [
G
] , [
H
] , [
I
] a n d [
] . To
c h a n g e t h e f o l d e r s e l e c t i o n , p r e s s
the
FOLDER
/
INDEX
button while the
recorder is stopped. Up to a total of 200
files can be recorded in each folder.
1
Current folder
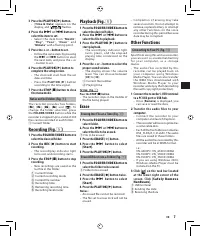
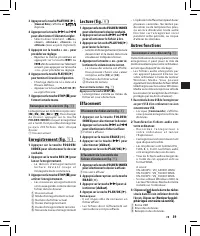
Recording (Fig.
5
)
1
Press the
FOLDER
/
INDEX
button to
select the desired folder.
2
Press the
REC
(
s
) button to star t
recording.
• T h e re co rd /p lay in di c ato r li ght
turns red, and recording starts.
3
Press the
STOP
(
4
) button to stop
recording.
• New recordings are saved as the
last file in the folder.
1
Current folder
2
Current recording mode
3
Current file number
4
Recording time
5
Remaining recording time
6
Recording level meter
Playback (Fig.
6
)
1
Press the
FOLDER
/
INDEX
button to
select the desired folder.
2
Press the
9
or
0
button to
select the file to playback.
3
Press the
PL AY
/
OK
(
`
) button to
start playback.
• T h e re co rd /p lay in di c ato r li ght
t u r n s g r e e n , a n d t h e e l a p s e d
playing time is indicated on the
display.
4
Press the
+
or
–
button to select the
proper sound volume.
• T h e d i s p l ay s h ow s t h e vo l u m e
level. You can choose b et ween
[
00
] to [
30
].
1
Current file number
2
Playing time
To Stop: (Fig.
7
)
Press the
STOP
(
4
) button.
• The recorder stops in the middle of
the fi le being played.
Erase
Erasing One File at a Time (Fig.
8
)
1
Press the
FOLDER
/
INDEX
button to
select folder.
2.
Press the
9
or
0
button to
select the file to be erased.
1
File to be erased
3
Press the
ERASE
(
s
) button.
4
P r e s s t h e
9
b u t t o n t o s e l e c t
[
Start
].
5
Press the
PLAY
/
OK
(
`
) button.
Erase All Files from a Folder (Fig.
9
)
1
Press the
FOLDER
/
INDEX
button to
select the folder to be erased.
1
Folder to be erased
2
Press the
ERASE
(
s
) button twice.
3
P r e s s t h e
9
b u t t o n t o s e l e c t
[
Start
].
4
Press the
PLAY
/
OK
(
`
) button.
Notes:
• An erased fi le cannot be restored.
• The fi le set to erase lock will not be
erased.
• Co m p l e t i o n o f e r a s i n g m ay t a ke
several seconds. Do not attempt to
remove, replace batter y or attempt
any other f unc tio ns o n the voice
recorder during this period because
data may be corrupted.
Other Functions
Connecting to Your PC (Fig.
p
)
Apart from using this unit as a recorder,
you can use it as an external memor y
f o r y o u r c o m p u t e r , a s a s t o r a g e
device.
• T h e a u d i o f i l e s r e co r d e d b y t h i s
r e c o r d e r c a n b e p l ay e d b a c k o n
y o u r c o m p u t e r u s i n g W i n d o w s
Media Player. You can also transfer
t h e WM A f i l e s d o w n l o a d e d w i t h
W i n d o w s M e d i a P l a y e r t o y o u r
recorder and enjoy them (excluding
fi les with copyright protection).
1
Connect the recorder ’s USB terminal
to a PC USB port or USB hub.
• Once [
Remote
] is displayed, you
can save or read the data.
2
Tr a n s f e r t h e a u d i o f i l e s t o y o u r
computer.
• C o n n e c t t h e r e c o r d e r t o y o u r
computer and launch Explorer.
• The recorder will be recognized as
a removable disk.
• Each of the five folders is named as
DSS_FLDA, B, C, D and E. The audio
files are saved in these folders.
• All the audio files recorded by this
recorder will be in WMA format.
i.e.:
VN- 6500PC:
VN_650001.WMA
VN-5500PC:
VN_ 550001.WMA
VN-3500PC:
VN_ 350001.WMA
• If you are using Windows 20 0 0,
Windows Media Player must be
installed on the PC.
3
Clic k [
] on t he t as k b a r l oc ate d
a t t h e l o w e r - r i g h t c o r n e r o f t h e
s c r e e n . C l i c k [
S a f e l y R e m o v e
Hardware
].
1
USB terminal
2
Sending the date
3
Receiving the data

