
Пылесос Dyson V7 Animal (SV11) - инструкция пользователя по применению, эксплуатации и установке на русском языке. Мы надеемся, она поможет вам решить возникшие у вас вопросы при эксплуатации техники.
Если остались вопросы, задайте их в комментариях после инструкции.
"Загружаем инструкцию", означает, что нужно подождать пока файл загрузится и можно будет его читать онлайн. Некоторые инструкции очень большие и время их появления зависит от вашей скорости интернета.


36
37
1
2
3
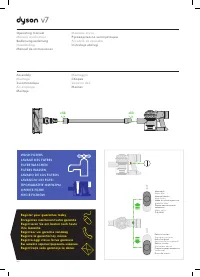
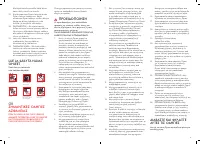
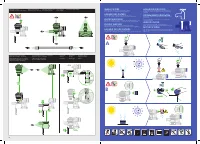
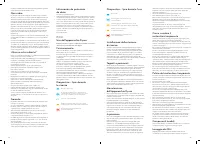
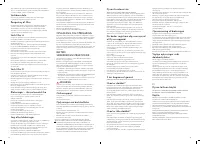
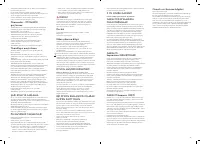
Direct drive cleaner head: clearing obstructions
Brosse à entraînement direct : Élimination des obstructions
Elektrobürste mit Direktantrieb: Blockierungen beseitigen
Gemotoriseerde vloerzuigmond: verstoppingen verwijderen
Cepillo Direct-drive: eliminación de obstrucciones
Testina di pulizia ad azionamento diretto: rimozione delle ostruzioni
Насадка с прямым приводом: устранение засоров
Čistilna glava pogona: odstranitev blokad
Elektroszczotka Direct-drive: usuwanie blokad.
EN
Using your Dyson appliance
Please read the ‘Important Safety Instructions’ in this Dyson
operating manual before proceeding.
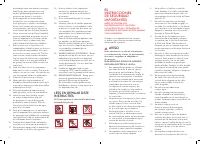
Operation
• Do not use outdoors or on wet surfaces or to vacuum water or other
liquids – electric shock could occur.
• Ensure the appliance remains upright in use and in storage. Dirt
and debris may be released if it is turned upside down.
• Do not operate while checking for blockages.
• For domestic indoor and car use only. Do not use it whilst the car is
in motion or while driving.
• To operate the Max mode, locate the switch on the top of the
appliance. Slide the switch to the Max mode position.
• To switch off Max mode, slide the switch back to the Powerful
Suction mode position.
• This product has carbon fibre brushes. Take care if coming into
contact with them, as they may cause minor skin irritation. Wash
your hands after handling the brushes.
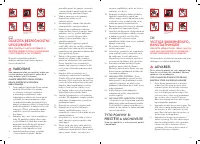
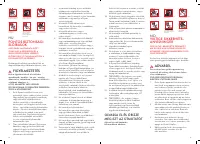
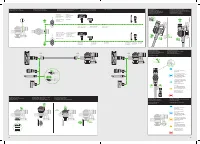
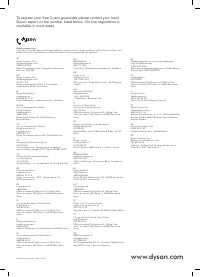
Diagnostics – Lights
during charging
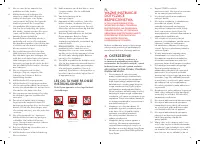
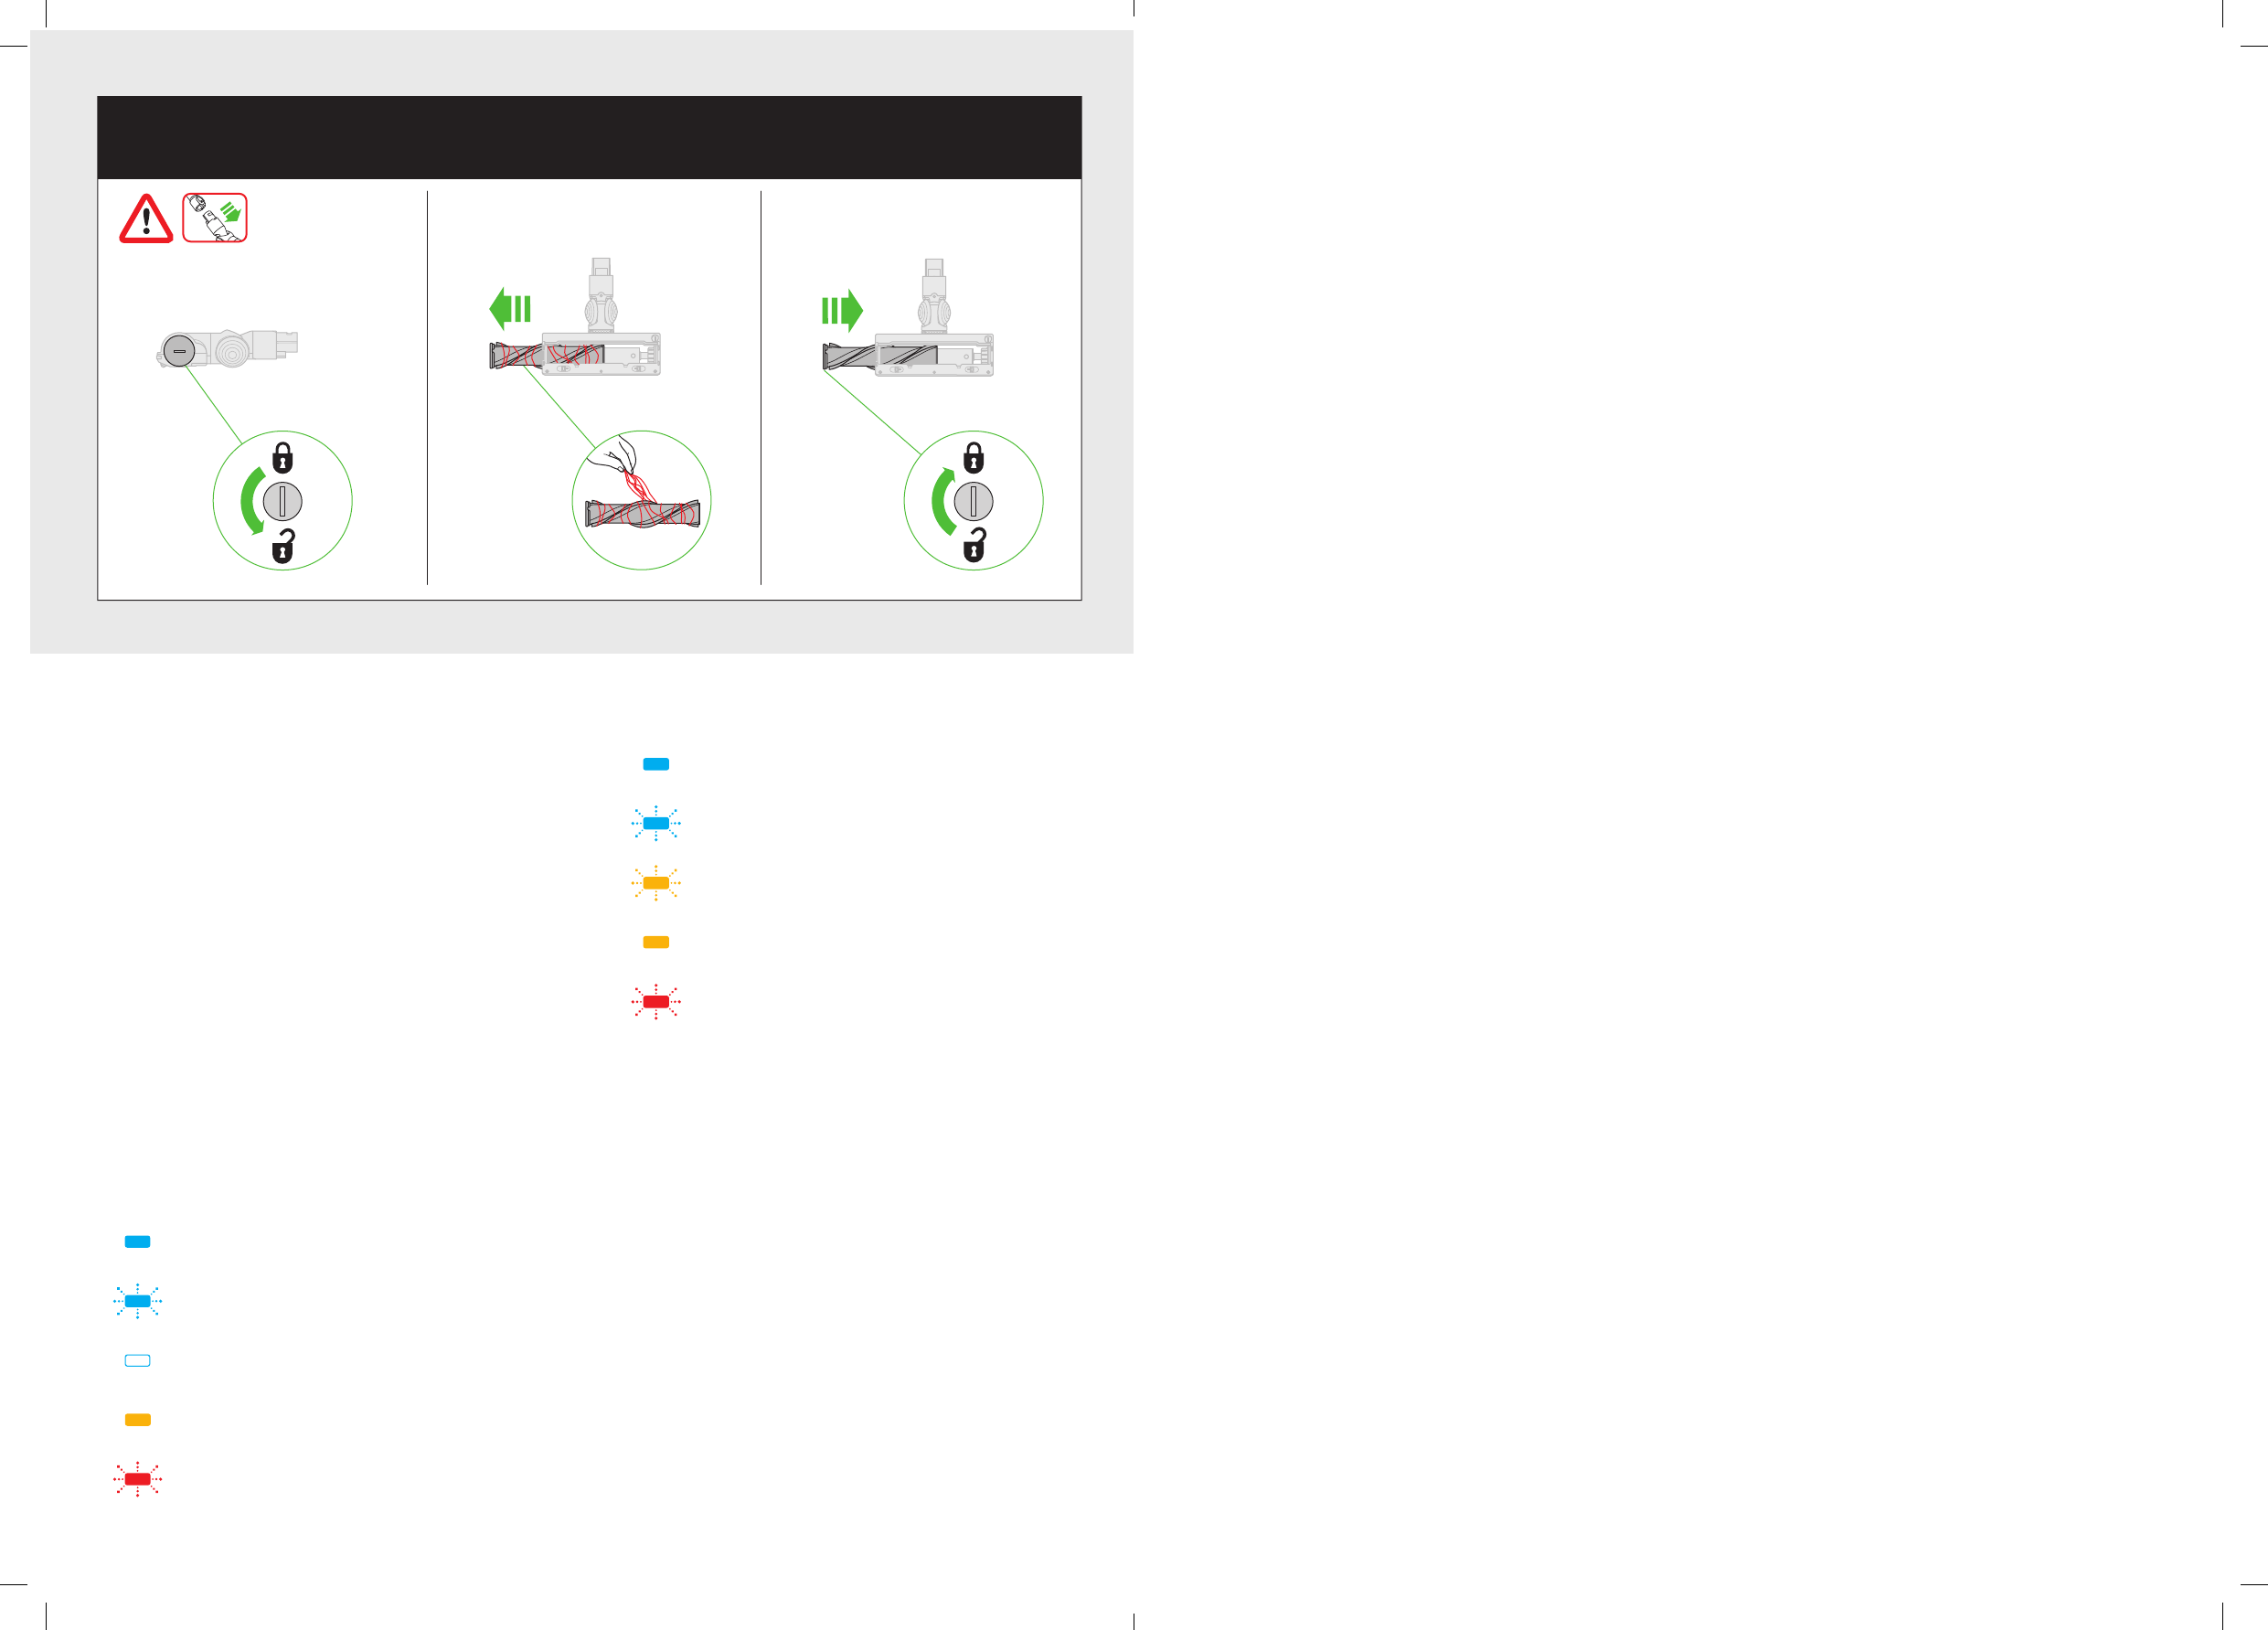
Diagnostics – during use
Docking station installation
• Use appropriate mounting hardware for your wall type and ensure
that the docking station is mounted securely. Ensure no pipe work
(gas, water, air) or electrical cables, wires or ductwork are located
directly behind the mounting area. The docking station must be
mounted in accordance with regulations and applicable codes/
standards (state and local laws may apply). Dyson recommends the
use of protective clothing, eyeware and materials when installing the
docking station.
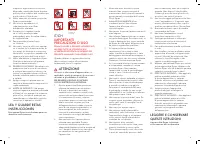
Carpets or hard floors
• Before vacuuming your flooring, rugs and carpets, check the
manufacturer’s recommended cleaning instructions.
• The brush bar on the appliance can damage certain carpet types
and floors. Some carpets will fuzz if a rotating brush bar is used
when vacuuming. If this happens, we recommend vacuuming
without the motorised floor tool and consulting with your
flooring manufacturer.
• Before vacuuming highly polished floors, such as wood or lino, first
check that the underside of the floor tool and its brushes are free
from foreign objects that could cause marking.
Flashing red: Fault (contact Dyson Helpline).
Solid blue: Charging.
Lights off: Charging complete.
Flashing blue – Not charging – Re-fit charger or try
another socket. If warning light persists, contact the
Dyson Helpline.
Solid amber: Not charging, temporary fault
(e.g. too hot/cold).
Flashing red: Fault (contact Dyson Helpline).
Solid blue: 'ON'.
Flashing blue: No power, charge battery.
Flashing amber: No power, temporary fault
(e.g. too hot/cold).
Solid amber: Fault (contact Dyson helpline).
Looking after your
Dyson appliance
• Do not carry out any maintenance or repair work other than
that shown in this Dyson Operating Manual, or advised by the
Dyson Helpline.
• Only use parts recommended by Dyson. If you do not this could
invalidate your guarantee.
• Store the appliance indoors. Do not use or store it below
3°C (37.4°F). Ensure the appliance is at room temperature
before operating.
• Clean the appliance only with a dry cloth. Do not use any
lubricants, cleaning agents, polishes or air fresheners on any part of
the appliance.
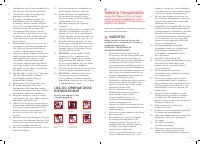
Vacuuming
• Do not use without the clear bin and filters in place.
• Fine dirt such as flour should only be vacuumed in very
small amounts.
• Do not use the appliance to pick up sharp hard objects, small toys,
pins, paper clips, etc. They may damage the appliance.
• When vacuuming, certain carpets may generate small static charges
in the clear bin or wand. These are harmless and are not associated
with the mains electricity supply. To minimise any effect from this,
do not put your hand or insert any object into the clear bin unless
you have first emptied it. Clean the clear bin with a damp cloth only.
(See ‘Cleaning the clear bin’.)
• Use extra care when cleaning on stairs.
• Do not rest the appliance on chairs, tables, etc.
• Do not press down on the nozzle with excessive force when using the
appliance as this may cause damage.
• Do not leave the cleaner head in one place on delicate floors.
• On waxed floors the movement of the cleaner head may create an
uneven lustre. If this happens, wipe with a damp cloth, polish the
area with wax, and wait for it to dry.
Emptying the clear bin
• Empty as soon as the dirt reaches the level of the MA X mark – do
not overfill.
• Ensure the appliance is disconnected from the charger before
emptying the clear bin. Be careful not to pull the 'ON' trigger.
• To make emptying the clear bin easier, it is advisable to remove the
wand and floor tool.
• To minimise dust/allergen contact when emptying, encase the clear
bin tightly in a plastic bag and empty.
• To release the dirt, hold the appliance by the handle, pull the red
lever back and lift upwards to release the cyclone. Continue until the
bin base automatically opens and releases the dirt.
• Remove the clear bin carefully from the bag.
• Seal the bag tightly, dispose as normal.
• To close, push the cyclone downwards until it is in the normal
position and manually close the base of the bin – the base will click
when it is securely in place.
Cleaning the clear bin
• Ensure the appliance is disconnected from the charger before
removing the clear bin. Be careful not to pull the ‘ON’ trigger.
• Remove the wand and floor tool.
• To remove the cyclone, hold the appliance by the handle, pull the
red lever towards you and lift upwards until the bin opens, then push
in the red button located behind the cyclone and lift the cyclone out.
• To detach the clear bin from the appliance, pull back on the red
catch located at the base, slide the clear bin down and carefully
remove forwards from the main body.
• Clean the clear bin with a damp cloth only.
• Do not use detergents, polishes or air fresheners to clean the
clear bin.
• Do not put the clear bin in a dishwasher.
• Ensure the clear bin is completely dry before replacing.
• To replace the clear bin, align the tabs on the clear bin with the
grooves on the main body and slide upwards into place until the
catch clicks.
• Slide the cyclone into the grooves of the main body and push
downwards until it is in its normal position and manually close the
base of the bin – the base will click when it is securely in place.
Washable parts
Your appliance has washable parts, which require regular cleaning.
Follow the instructions below.
Washing the filters
• Your appliance has two washable filters; wash the filters at least
once a month according to the following instructions to maintain
performance. More frequent washing may be required where the
user: vacuums fine dust, operates mainly in 'Powerful suction' mode,
or uses the machine intensively.
Washing filter A
• Ensure the appliance is disconnected from the charger before
removing the filter. Be careful not to pull the ‘ON’ trigger.
• Check and wash the filter regularly according to instructions to
maintain performance.
• The filter may require more frequent washing if vacuuming fine dust
or if used mainly in ‘Powerful suction’ mode.
• To remove the filter, lift it out of the top of the appliance.
• Wash the filter with cold water only.
• Run water over the outside of the filter until the water runs clear.
• Squeeze and twist with both hands to make sure the excess water
is removed.
• Lay the filter on its side to dry. Leave to dry completely for a
minimum of 24 hours.
• Do not put the filter in a dishwasher, washing machine, tumble
dryer, oven, microwave or near a naked flame.
• To refit, place the dry filter back into the top of the appliance. Make
sure it is seated properly.
Washing filter B
• To remove the filter, twist anti clockwise to the open position and
pull away from the appliance.
• Wash the inside of the filter under cold running water, rotating the
filter to ensure all pleats are covered.
• Gently tap the filter against the side of the sink several times to
remove any debris.
• Repeat this process 4-5 times until the filter is clean.
• Place the filter upright, with the top of the filter facing upwards, and
leave to dry completely for a minimum of 24 hours.
• To refit, return the filter to the open position and twist clockwise until
it clicks into place.
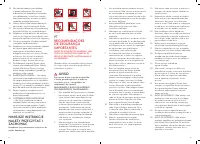
Blockages – automatic cut-out
• This appliance is fitted with an automatic cut-out.
• If any part becomes blocked the appliance may automatically
cut out.
• This will happen after the motor pulses a number of times
(i.e switches on and off in quick succession).
• Leave to cool down before looking for blockages.
• Ensure the appliance is disconnected from the charger
before looking for blockages. Failure to do so could result in
personal injury.
• Clear any blockage before restarting.
• Refit all parts securely before using.
• Clearing blockages is not covered by your guarantee.
Looking for blockages
The motor will pulse when there is a blockage. Please follow the
instructions below to locate the blockage:
• Ensure the appliance is disconnected from the charger before
looking for blockages. Be careful not to pull the ‘ON’ trigger.
Характеристики

Остались вопросы?Не нашли свой ответ в руководстве или возникли другие проблемы? Задайте свой вопрос в форме ниже с подробным описанием вашей ситуации, чтобы другие люди и специалисты смогли дать на него ответ. Если вы знаете как решить проблему другого человека, пожалуйста, подскажите ему :)


