
Пылесос Dyson DC37 Allergy Musclehead - инструкция пользователя по применению, эксплуатации и установке на русском языке. Мы надеемся, она поможет вам решить возникшие у вас вопросы при эксплуатации техники.
Если остались вопросы, задайте их в комментариях после инструкции.
"Загружаем инструкцию", означает, что нужно подождать пока файл загрузится и можно будет его читать онлайн. Некоторые инструкции очень большие и время их появления зависит от вашей скорости интернета.


31
EN
USING YOUR DYSON APPLIANCE
PLEASE READ t h E ‘ImPORt ANt SAf Et Y INSt RUCt IONS’ IN t h IS DYSON
OPER At ING mANUAL bEf ORE PROCEEDING.
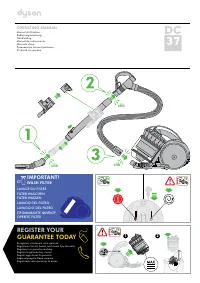
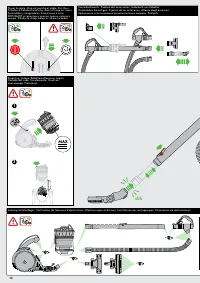
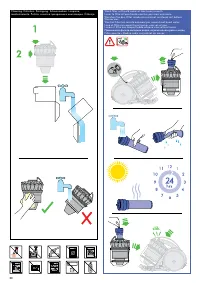
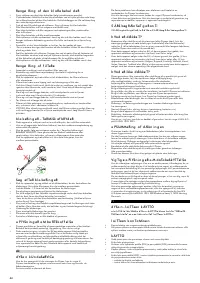
CARRYING t h E APPLIANCE
•
Carry the appliance by the main handle on the body.
•
Do not press the cyclone release button or shake the appliance when carrying or
the cyclone could disengage, fall off and cause injury.
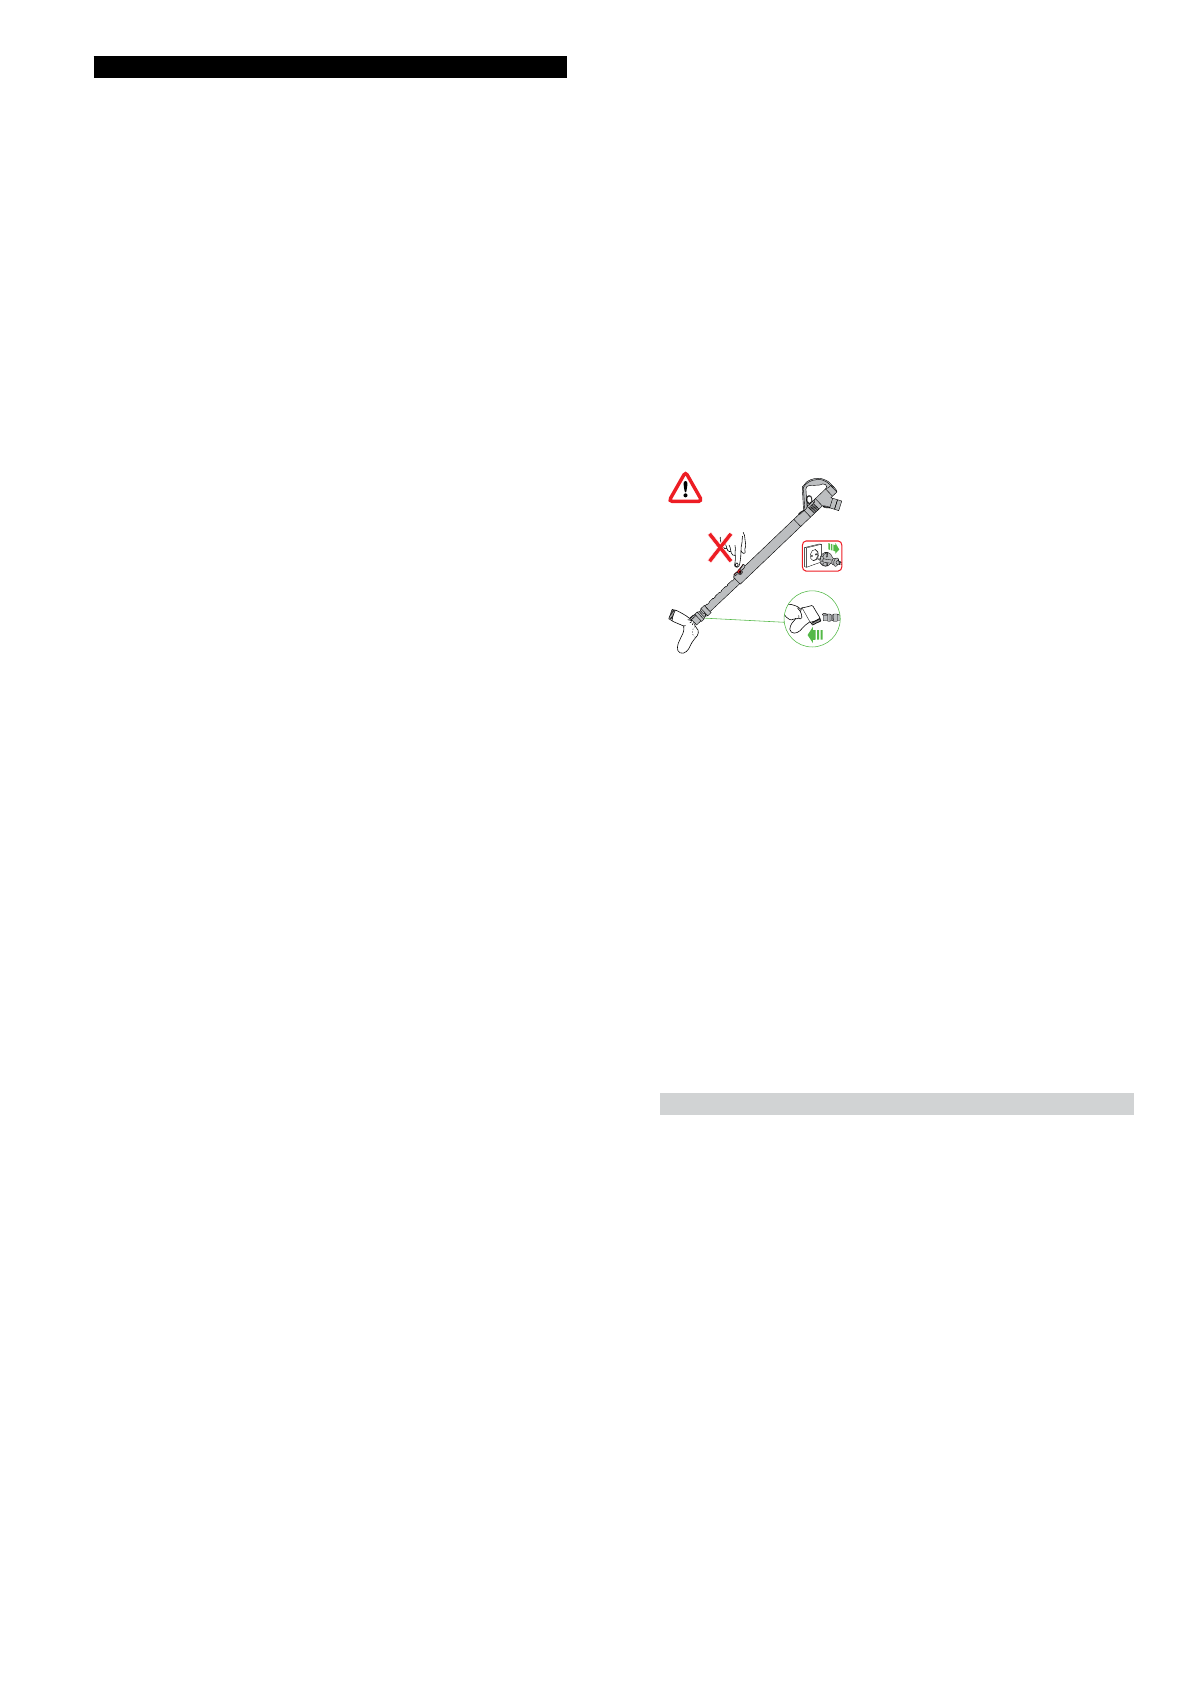
OPER At ION
•
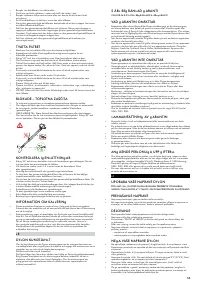
Always extend the cable fully to the red tape before use.
•
Plug the appliance into the mains electricity supply.
•
To switch ‘ON’ or ‘OFF’ press the red power button, located as shown.
•
After use: unplug, retract the cable safely, put the appliance away.
•
Switch ‘OFF’ the appliance, unplug and ensure it is upright before:
– changing or using tools
– removing the hose or air way inspection parts.
LOOk ING Af t ER YOUR DYSON APPLIANCE
•
Do not carry out any maintenance or repair work other than that shown in this
Dyson Operating Manual, or advised by the Dyson Helpline.
•
Only use parts recommended by Dyson. If you do not this could invalidate
your guarantee.
•
Store the appliance indoors. Do not use or store it below 3°C (37.4°F). Ensure
the appliance is at room temperature before operating.
•
Clean the appliance only with a dry cloth. Do not use any lubricants, cleaning
agents, polishes or air fresheners on any part of the appliance.
•
If used in a garage, always wipe the base plate and ball with a dry cloth
after vacuuming to clean off any sand, dirt, or pebbles that could damage
delicate floors.
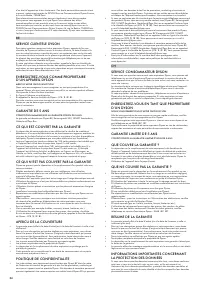
VACUUmING
•
Do not use without the clear bin and filter in place.
•
Fine dirt such as flour should only be vacuumed in very small amounts.
•
Do not use the appliance to pick up sharp hard objects, small toys, pins, paper
clips, etc. They may damage the appliance.
•
When vacuuming, certain carpets may generate small static charges in the
clear bin or wand. These are harmless and are not associated with the mains
electricity supply. To minimise any effect from this, do not put your hand or
insert any object into the clear bin unless you have first emptied it and rinsed it
out with cold water (see ‘Cleaning the clear bin’).
•
Do not work with the appliance above you on the stairs.
•
Do not put the appliance on chairs, tables, etc.
•
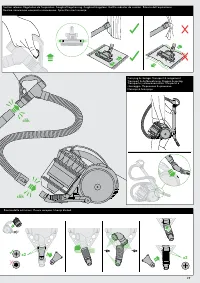
Before vacuuming highly polished floors, such as wood or lino, first check that
the underside of the floor tool and its brushes are free from foreign objects that
could cause marking.
•
Do not push hard with the floor tool when vacuuming, as this may
cause damage.
•
Do not leave the cleaner head in one place on delicate floors.
•
On waxed floors the movement of the cleaner head may create an uneven
lustre. If this happens, wipe with a damp cloth, polish the area with wax, and
wait for it to dry.
•
To reduce suction (for example, when vacuuming curtains or rugs), simply pull
the suction release trigger on the handle to reduce airflow. Alternatively, slide
open the two red tabs on the cleaner head (it is easier to open the tab from
beneath, and to close it from the top).
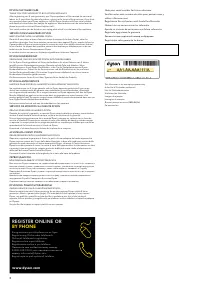
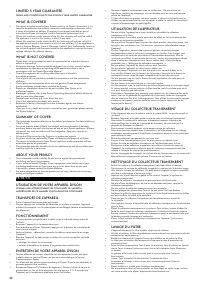
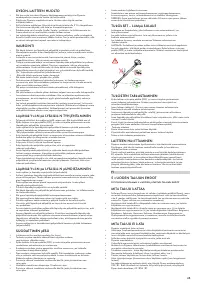
EmPt YING t h E CLEAR bIN
•
Empty as soon as the dirt reaches the level of the M A X mark – do not overfill.
•
Switch ‘OFF’ and unplug before emptying the clear bin.
•
To remove the cyclone and clear bin unit, push the release button to the side of
the carrying handle, as shown. The carrying handle will be released.
•
To release the dirt, press the red bin release button.
•
To minimise dust/allergen contact when emptying, encase the clear bin tightly in
a plastic bag and empty.
•
Remove the clear bin carefully from the bag.
•
Seal the bag tightly, dispose as normal.
•
Close the clear bin base so it clicks into place and is secure.
•
Place the clear bin and cyclone unit into position on the front of the main body
of the appliance. The recess in the base of the clear bin must fit onto the lug on
the support bracket.
•
Push the carrying handle down so it clicks into place on the top of the clear bin
and cyclone unit. Ensure it is secure.
CLEANING t h E CLEAR bIN
•
Remove the cyclone and clear bin (see ‘Emptying the clear bin’).
•
To separate the cyclone from the clear bin press the red bin release button
to open the bin base. This exposes a small silver button behind the red
opening mechanism.
•
Press the small silver button on the cyclone. Separate the cyclone from the
clear bin.
•
Clean the clear bin with cold water only.
•
Do not use detergents, polishes or air fresheners to clean the clear bin.
•
Do not put the clear bin in a dishwasher.
•
Do not immerse the whole cyclone in water or pour water into the cyclones.
•
Clean the cyclone shroud with a cloth or dry brush to remove any lint and dust.
•
Ensure the clear bin is completely dry before replacing.
•
To replace, first close the clear bin base so it clicks into place and is secure.
•
Fit the clear bin onto the cyclone. To secure it, first fit the slot on the front rim of
the clear bin onto the lug on the front of the cyclone; then push the rear of the
clear bin into place so the silver button engages and clicks into place.
•
Fit the cyclone and clear bin unit onto the appliance (see ‘Emptying the clear
bin’).
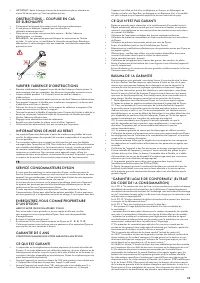
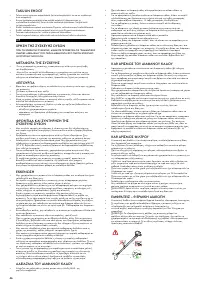
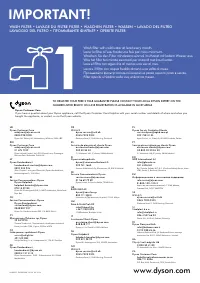
WASh ING YOUR f ILt ER
•
Your appliance has one washable filter, located as shown.
•
Check and wash the filter regularly according to instructions to
maintain performance.
•
Switch ‘OFF’ and unplug before checking or removing the filter.
•
The filter may require more frequent washing if vacuuming fine dust.
•
Wash the filter with cold water only. Hold under a tap and run water through the
open end until the water runs clear. Turn upside down and tap out.
•
Squeeze and twist with both hands to make sure the excess water is removed.
•
Run water over the outside of the filter for 15 seconds.
•
Squeeze and twist with both hands to make sure the excess water is removed.
•
Place the filter on its side to dry completely.
•
Do not put the filter in a dishwasher, washing machine, tumble dryer, oven,
microwave or near a naked flame.
•
IMPORTANT: After washing please leave at least 24 hours to dry completely
before refitting.
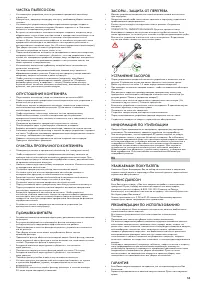
bLOCk AGES – t h ERmAL CUt -OUt
•
This appliance is fitted with an automatically resetting thermal cut-out.
•
If any part becomes blocked the appliance may overheat and automatically
cut-out.
•
If this happens, follow the instructions below in ‘Looking for blockages’.
•
NOTE: Large items may block the tools or wand inlet. If this happens, do not
operate the wand release catch. Switch ‘OFF’ and unplug. Failure to do so could
result in personal injury.
LOOk ING f OR bLOCk AGES
•
Switch ‘OFF’ and unplug before looking for blockages. Failure to do so could
result in personal injury.
•
Leave to cool down for 1-2 hours before looking for blockages.
•
Beware of sharp objects when checking for blockages.
•
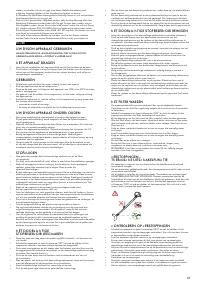
To access the flexible inspection hose beneath the clear bin, first remove the
clear bin (see above).
•
Unscrew the two Phillips screws on the clear bin locator bracket. (Do not remove
any other screws.) Remove the bracket.
•
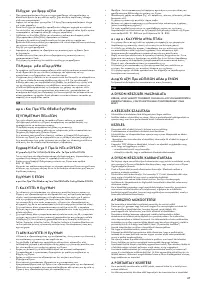
Firmly twist the flexible inspection hose away from the inlet next to the ball (do
not remove the end next to the connection for the main hose).
•
Inspect for blockages.
•
Clear any blockage before restarting.
•
Refit all parts securely before using.
•
Clearing blockages is not covered by your guarantee.
DISPOSAL INf ORmAt ION
•
Dyson products are made from high grade recyclable materials. Recycle
where possible.
•
This marking indicates that this product should not be disposed with other
household wastes throughout the EU. To prevent possible harm to the
environment or human health from uncontrolled waste disposal, recycle it
responsibly to promote the sustainable reuse of material resources. To return
your used device, please use the return and collection systems or contact
the retailer where the product was purchased. They can take this product for
environmentally safe recycling.
EN
GUAR ANt EE t ERmS AND CONDIt IONS
DYSON CUSt OmER CARE
t h ANk YOU f OR Ch OOSING t O bUY A DYSON APPLIANCE
After registering your 5 year guarantee, your Dyson appliance will be covered
for parts and labour for 5 years from the date of purchase, subject to the terms
of the guarantee. If you have any questions about your Dyson appliance, call the
Dyson Helpline with your serial number and details of where/when you bought
the appliance. Most questions can be solved over the phone by one of our
trained Dyson Helpline staff.
Alternatively, visit w w w.dyson.com for online help, general tips and useful
information about Dyson.
If your Dyson appliance needs a service, call the Dyson Helpline so we can
discuss the available options. If your Dyson appliance is under guarantee, and
the repair is covered, it will be repaired at no cost.
Your serial number can be found on your rating plate which is on the base of
the appliance.
PLEASE REGISt ER AS A DYSON
APPLIANCE OWNER
To help us ensure you receive prompt and efficient service, please register as a
Dyson appliance owner. There are two ways to do this:
•
Online at w w w.dyson.com
•
Telephone the Dyson Helpline.
This will confirm ownership of your Dyson appliance in the event of an insurance
loss, and enable us to contact you if necessary.
1
2
3
Характеристики

Остались вопросы?Не нашли свой ответ в руководстве или возникли другие проблемы? Задайте свой вопрос в форме ниже с подробным описанием вашей ситуации, чтобы другие люди и специалисты смогли дать на него ответ. Если вы знаете как решить проблему другого человека, пожалуйста, подскажите ему :)


