Проигрыватели Yamaha DV-C6860 - инструкция пользователя по применению, эксплуатации и установке на русском языке. Мы надеемся, она поможет вам решить возникшие у вас вопросы при эксплуатации техники.
Если остались вопросы, задайте их в комментариях после инструкции.
"Загружаем инструкцию", означает, что нужно подождать пока файл загрузится и можно будет его читать онлайн. Некоторые инструкции очень большие и время их появления зависит от вашей скорости интернета.


32
En
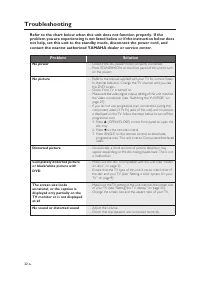
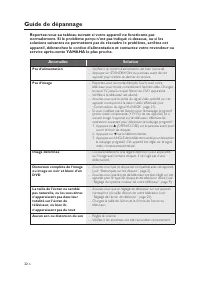
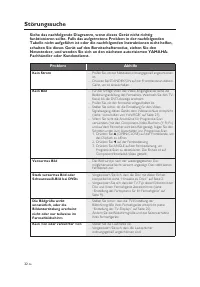
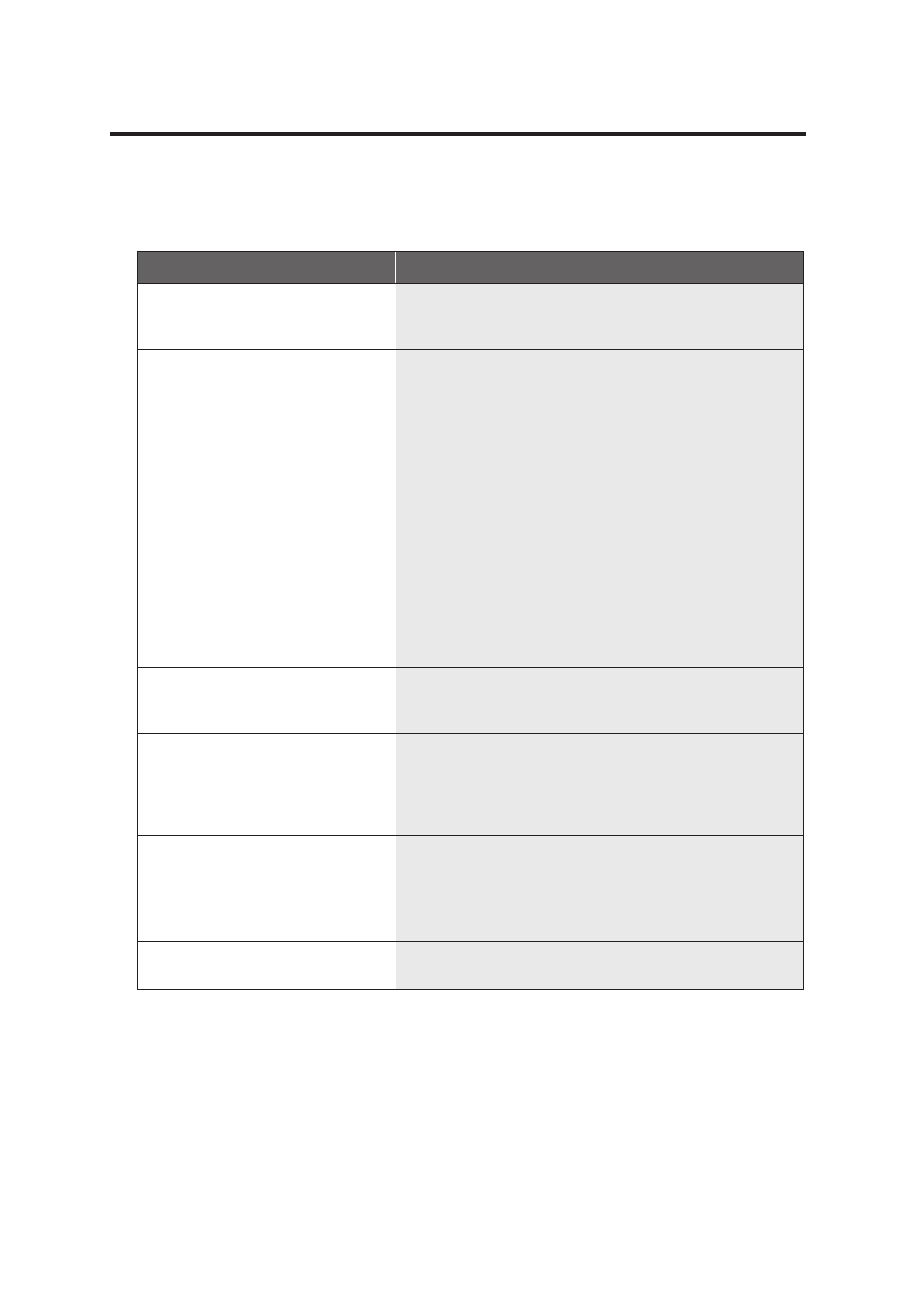
Troubleshooting
Refer to the chart below when this unit does not function properly. If the
problem you are experiencing is not listed below or if the instruction below does
not help, set this unit to the standby mode, disconnect the power cord, and
contact the nearest authorized YAMAHA dealer or service center.
Problem
Solution
No power
– Check if the AC power cord is properly connected.
– Press STANDBY/ON on the front panel of this unit to turn
on the power.
No picture
– Refer to the manual supplied with your TV for correct Video
In channel selection. Change the TV channel until you see
the DVD screen.
– Check if the TV is turned on.
– Make sure the video signal output setting of this unit matches
the video connection (see “Switching the YUV/RGB” on
page 27).
– If you do not use progressive scan connections (using the
component video (Y P
B
P
R
) jacks of this unit) and no picture
is displayed on the TV, follow the steps below to turn off the
progressive scan;
1. Press
/
(OPEN/CLOSE) on the front panel to open the
disc tray.
2. Press
1
on the remote control.
3. Press ANGLE on the remote control to deactivate
progressive scan. This unit is set to Component/Interlaced
video.
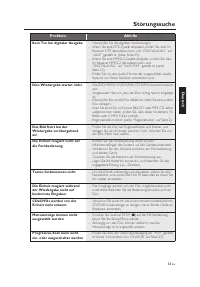
Distorted picture
– Occasionally, a small amount of picture distortion may
appear depending on the disc being played back. This is not
a malfunction.
Completely distorted picture
or black/white picture with
DVD
– Make sure the disc is compatible with this unit (see “Notes
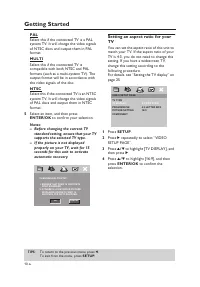
– Ensure that the TV type of this unit is set to match that of
the disc and your TV (see “Setting a color system for your
TV” on page 9).
The screen size looks
unnatural, or the caption is
displayed only partially on the
TV monitor or is not displayed
at all
– Make sure the TV setting of this unit matches the screen size
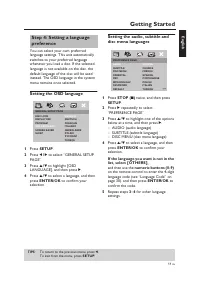
of your TV (see “Setting the TV display” on page 25).
– Change the screen size and the aspect ratio of your TV.
No sound or distorted sound
– Adjust the volume.
– Check that the speakers are connected correctly.
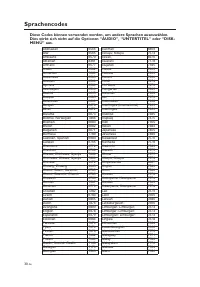
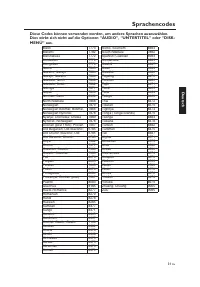
Содержание
- 113 Cодержание
- 114 Введение; Региональные коды; Очистка дисков
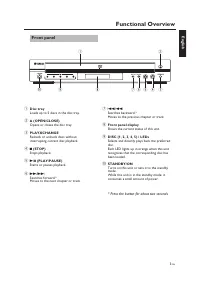
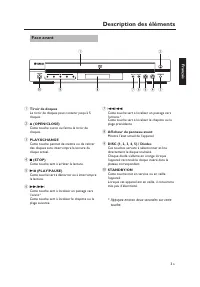
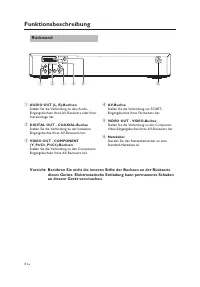
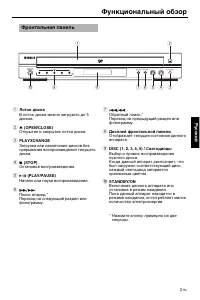
- 115 Функциональный обзор; Фронтальная панель
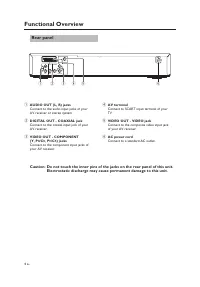
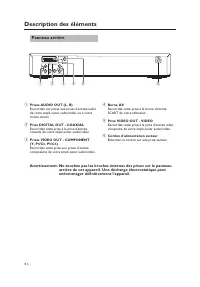
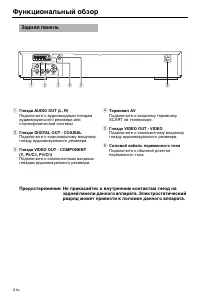
- 116 Предостережение: Не прикасайтес к внутренним контактам гнезд на; Задняя панель
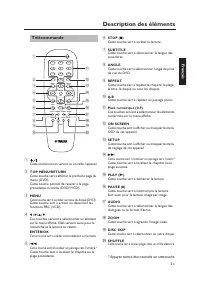
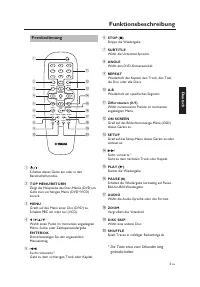
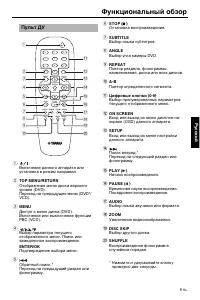
- 117 Пульт ДУ
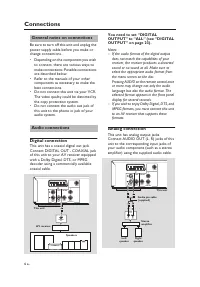
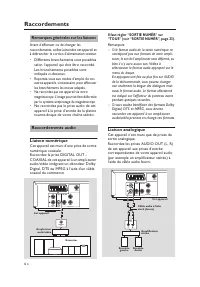
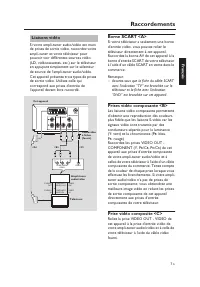
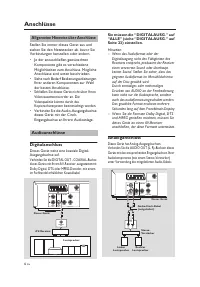
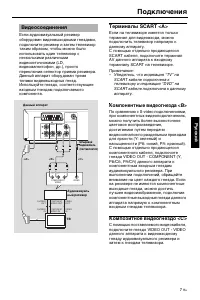
- 118 Подключения; Цифровые подключения; Аналоговое подключение
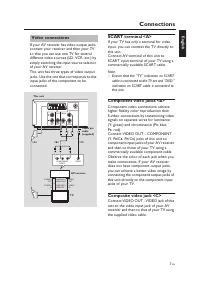
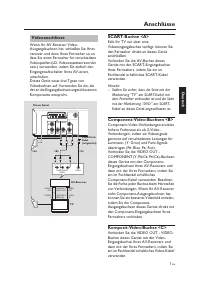
- 119 Видеосоединения
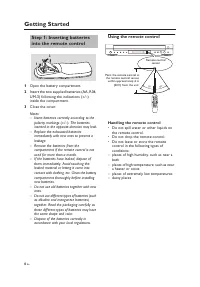
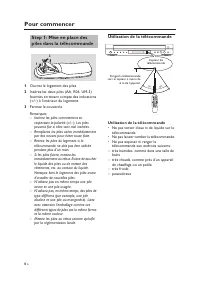
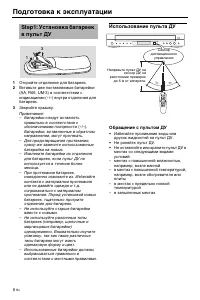
- 120 Подготовка к эксплуатации; Использование пульта ДУ; Обращение с пультом ДУ
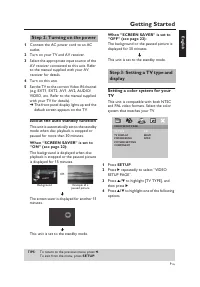
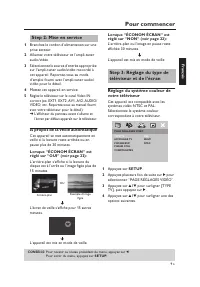
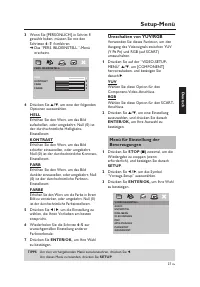
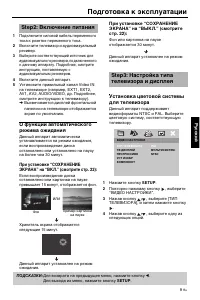
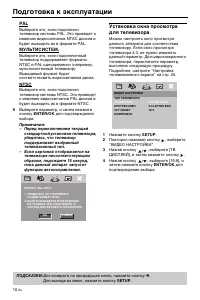
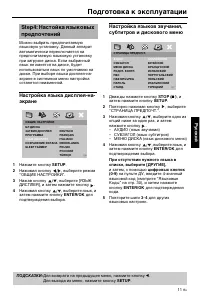
- 121 При установке “СОХРАНЕНИЕ; Step2: Включение питания
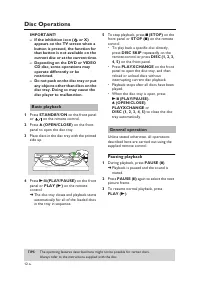
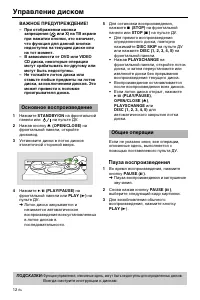
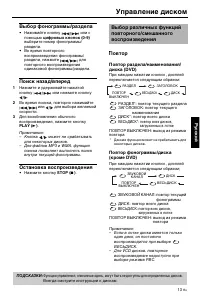
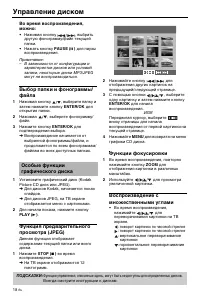
- 124 Управление диском; ВАЖНОЕ ПРЕДУПРЕЖДЕНИЕ!; Пауза воспроизведения
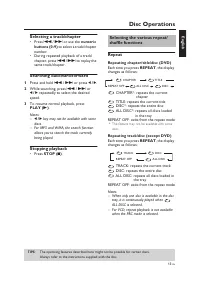
- 125 Выбор фонограммы/раздела; Остановка воспроизведения; Повтор фонограммы/диска
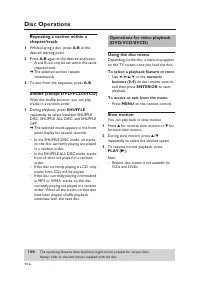
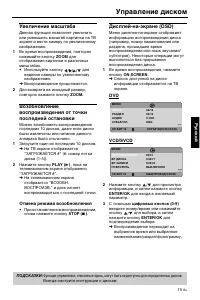
- 126 Использование меню диска; Выбор режима воспроизведения; Доступ или выход из меню
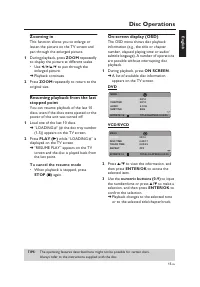
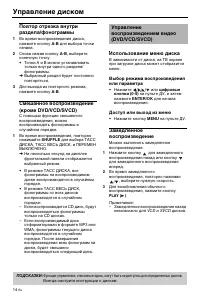
- 127 Увеличение масштаба; Отмена режима возобновления; DVD
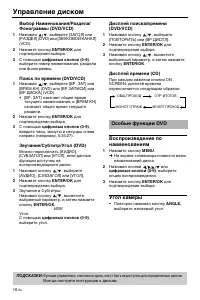
- 128 Дисплей поиска/времени; Угол камеры
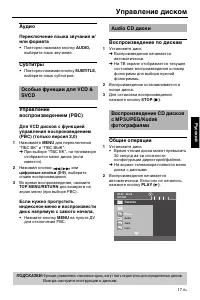
- 129 Аудио; Воспроизведение по дискам
- 130 Во время воспроизведения,; Функции фокусировки
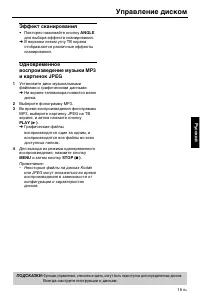
- 131 Эффект сканирования
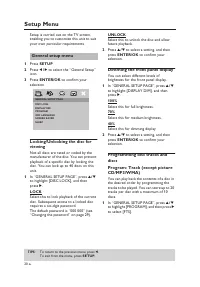
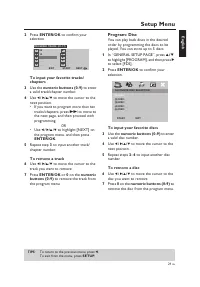
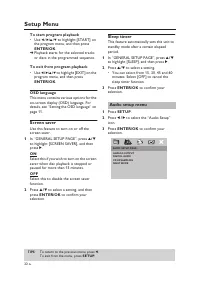
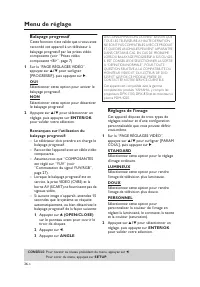
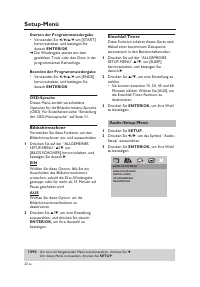
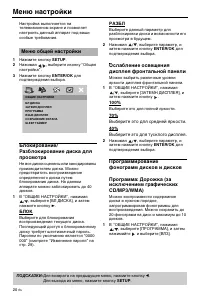
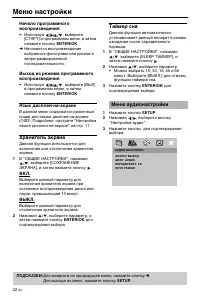
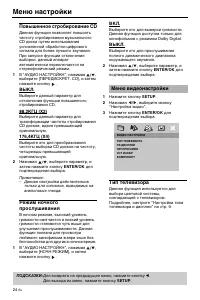
- 132 Меню настройки; БЛОК; Выберите это для средней яркости.; исключением графических
- 133 Ввод любимых фонограмм/; Удаление фонограммы; Для ввода любимых дисков
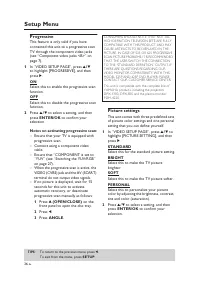
- 134 Начало программного; Хранитель экрана; Меню аудионастройки
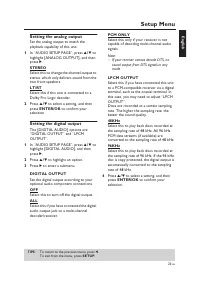
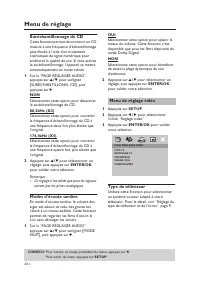
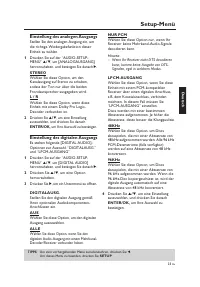
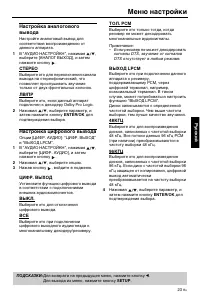
- 135 СТЕРЕО; Настройка цифрового вывода; ВСЕ
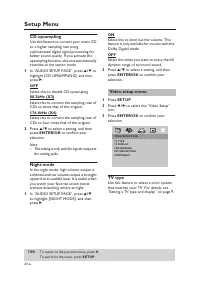
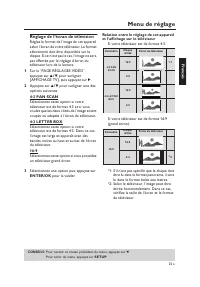
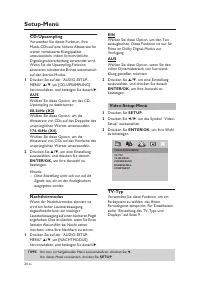
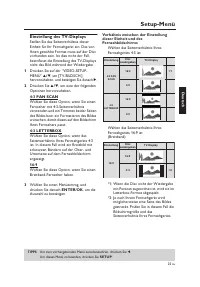
- 136 Повышенное стробирование CD; Тип телевизора
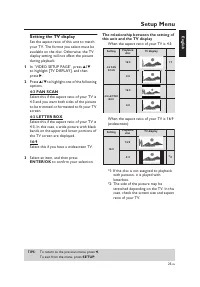
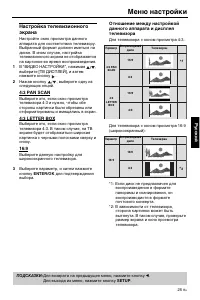
- 137 Отношение между настройкой
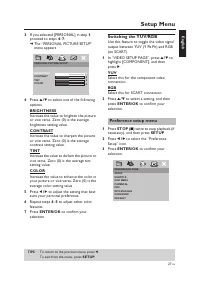
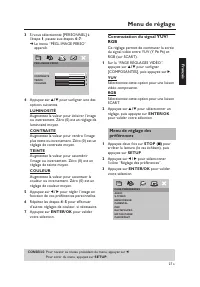
- 138 Настройки картинки
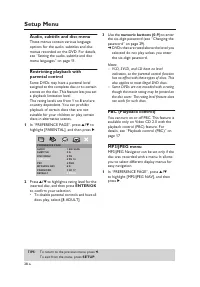
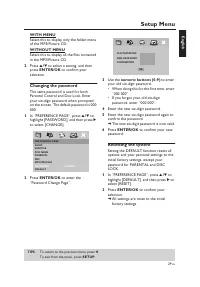
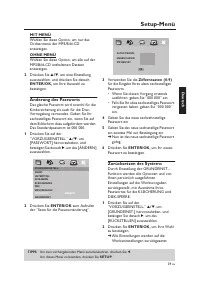
- 141 С МЕНЮ; Изменение пароля
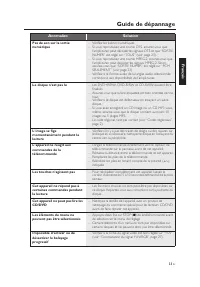
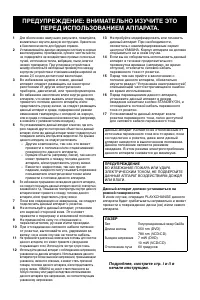
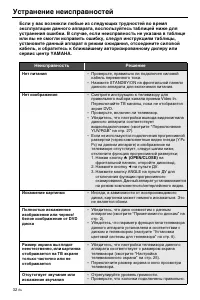
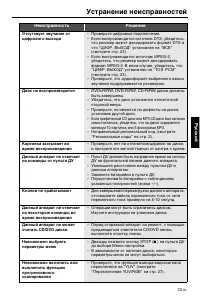
- 144 Устранение неисправностей; Если у вас возникли любые из следующих трудностей во время
- 145 Неисправность
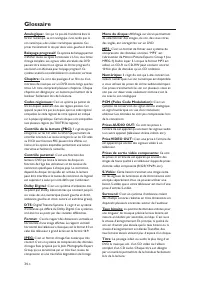
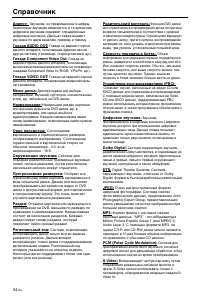
- 146 Справочник
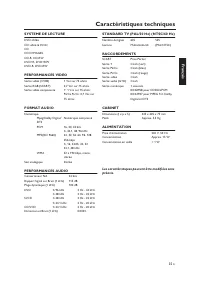
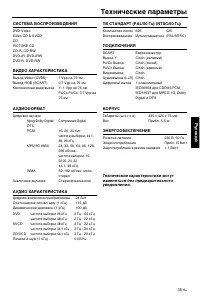
- 147 Технические параметры


