
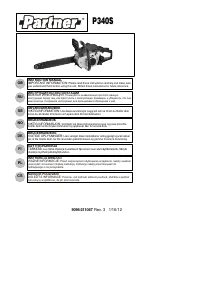
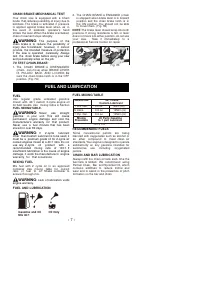
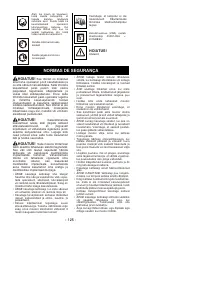
Бензопилы Partner P340S 9666990-01 - инструкция пользователя по применению, эксплуатации и установке на русском языке. Мы надеемся, она поможет вам решить возникшие у вас вопросы при эксплуатации техники.
Если остались вопросы, задайте их в комментариях после инструкции.
"Загружаем инструкцию", означает, что нужно подождать пока файл загрузится и можно будет его читать онлайн. Некоторые инструкции очень большие и время их появления зависит от вашей скорости интернета.


-- 5 --
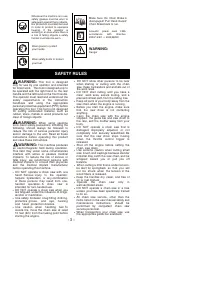
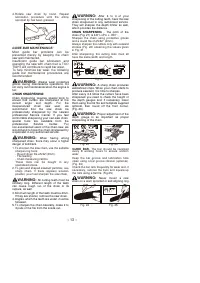
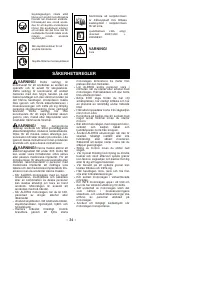
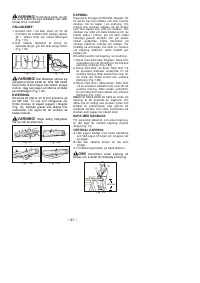
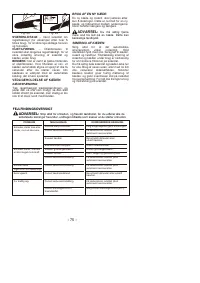
WARNING:
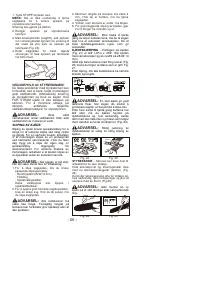
Kickback can lead to
dangerous loss of control of the chain saw
and result in serious or fatal injury to the
saw operator or to anyone standing close
by. Always be alert. Rotational kickback
and pinch-kickback are major chain saw
operational dangers and the leading cause
of most accidents.
Your Chain Saw is provided with a safety
label located on the chain brake lever/hand
guard. This label, along with the safety
instructions on these pages, should be
carefully read before attempting to operate
this unit.
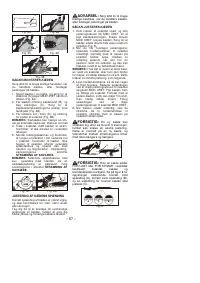
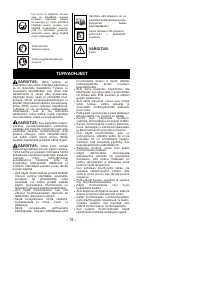
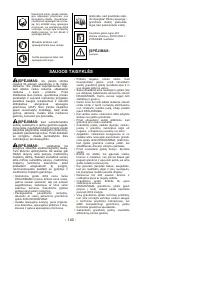
IMPORTANT SAFETY
ASSEMBLY INSTRUCTIONS
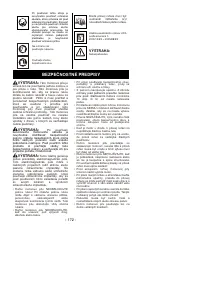
WARNING:
RED Used to warn that
an unsafe procedure should not be
performed.
WARNING:
DO NOT start saw
engine until unit is properly prepared.
WARNING:
Always wear protective
gloves when handling chain.
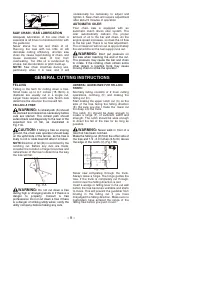
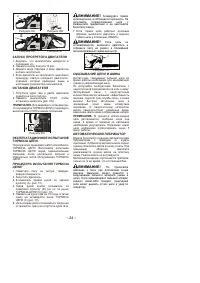
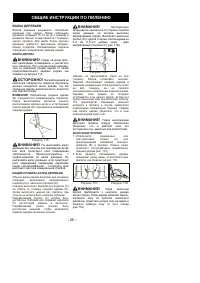
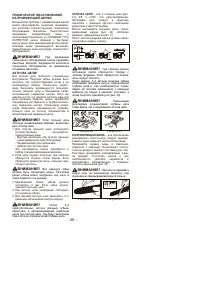
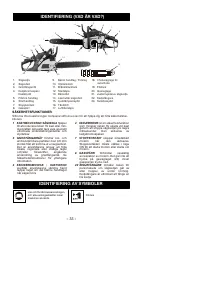
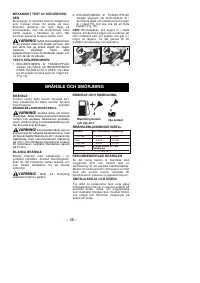
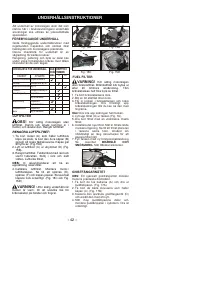
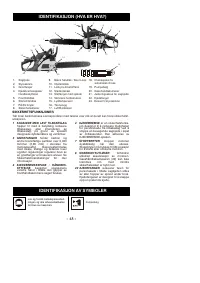
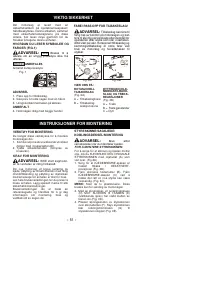
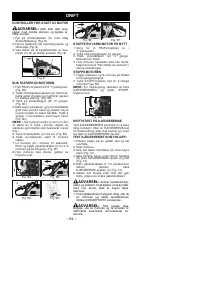
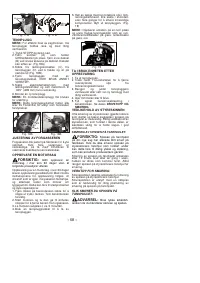
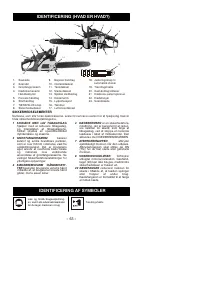
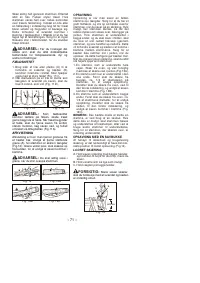
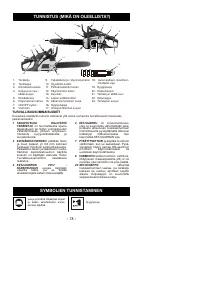
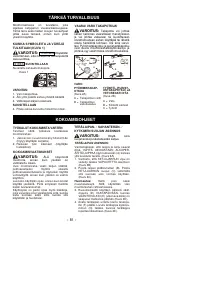
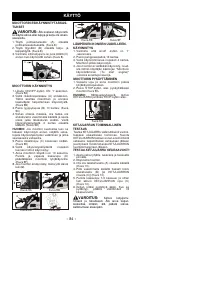
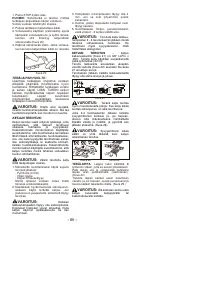
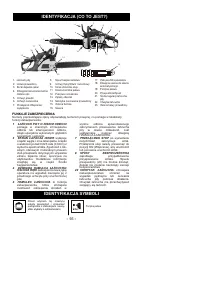
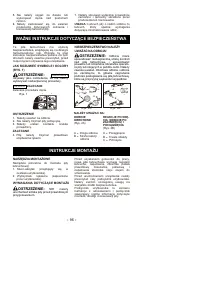
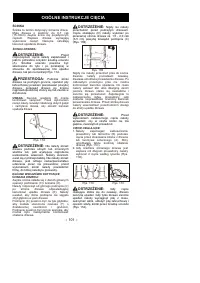
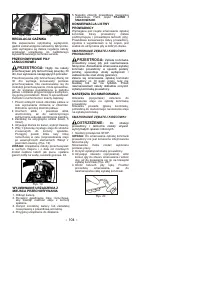
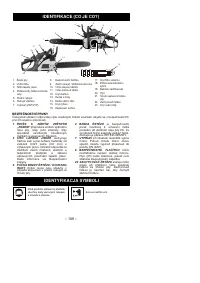
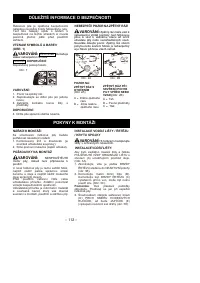
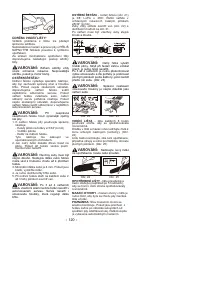
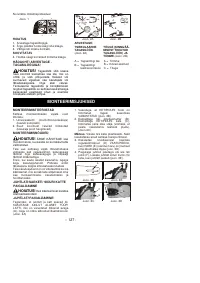
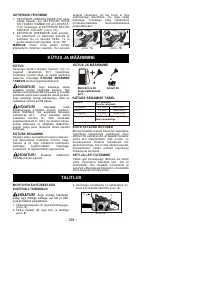
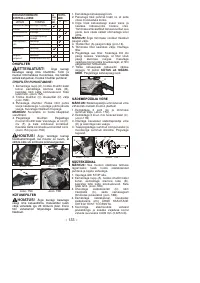
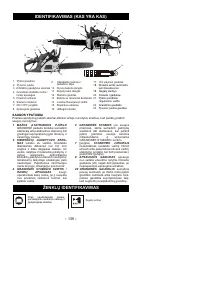
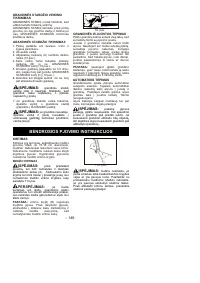
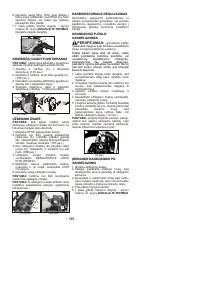
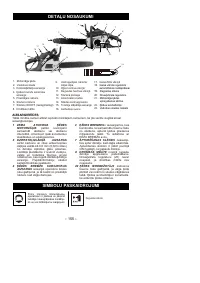
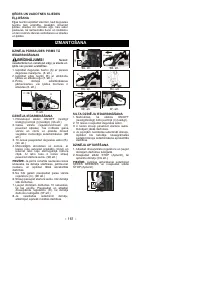
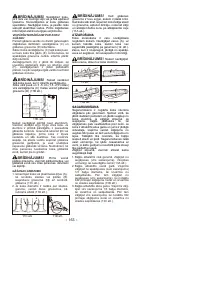
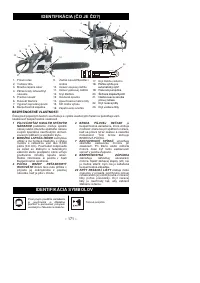
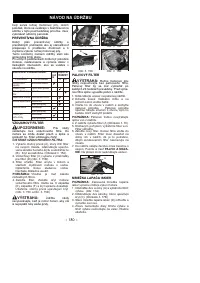
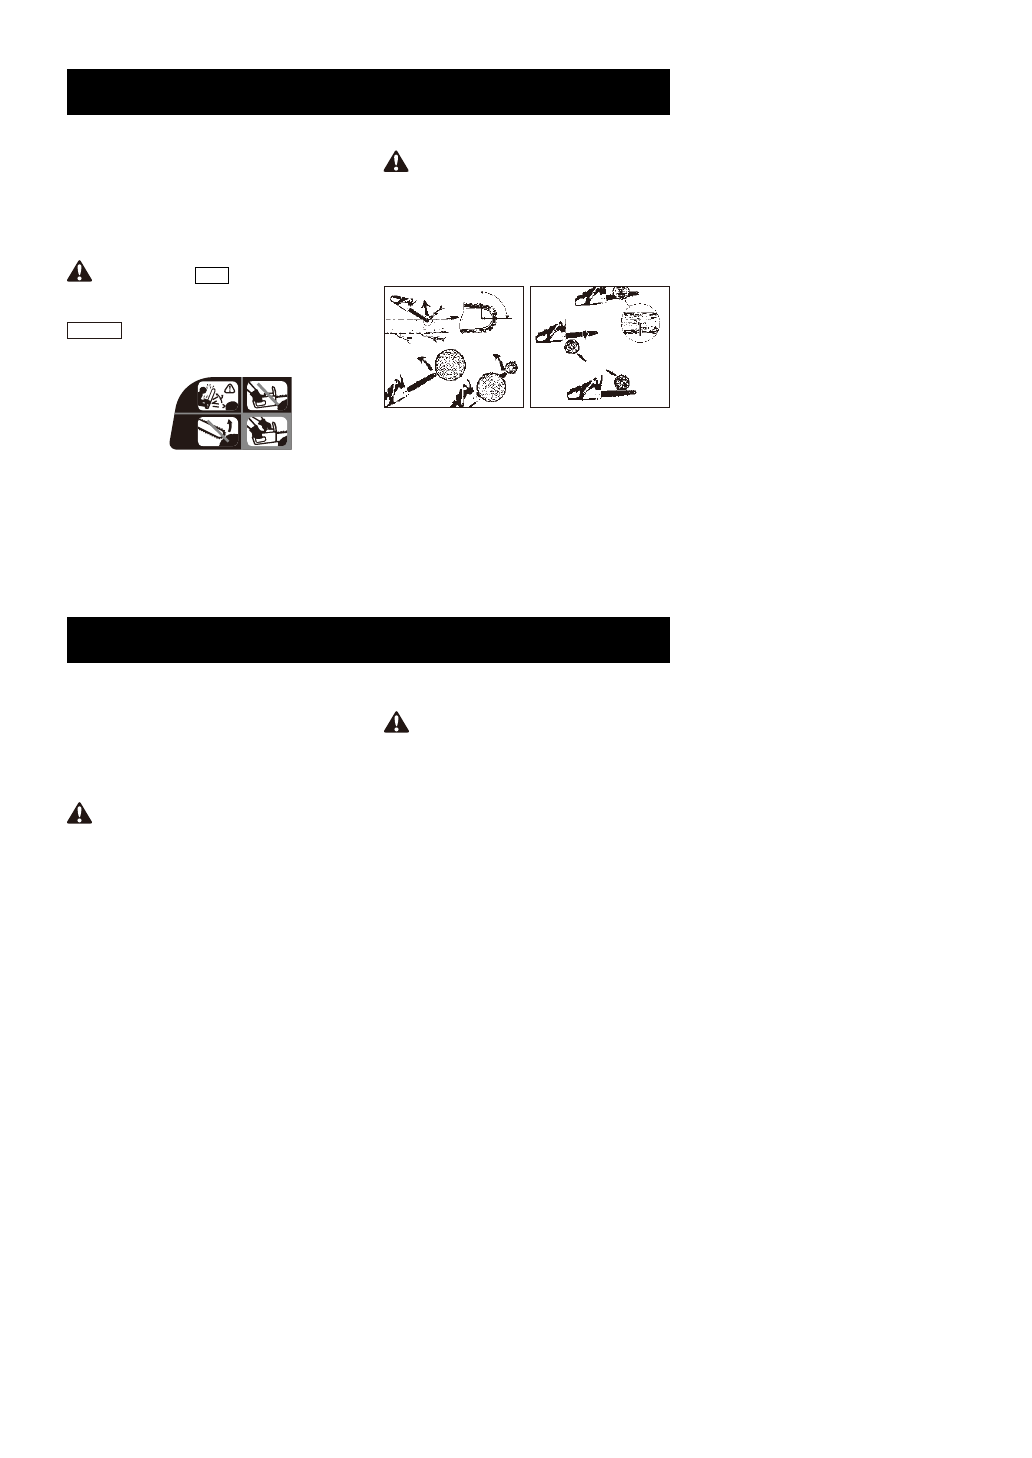
HOW TO READ SYMBOLS AND
COLORS (FIG.1)
WARNING
1. Beware of kickback.
2. Do not attempt to hold saw with one
hand.
3. Avoid bar nose contact.
RECOMMENDED
4. Hold saw properly with both hands.
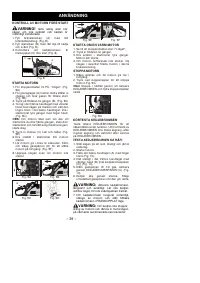
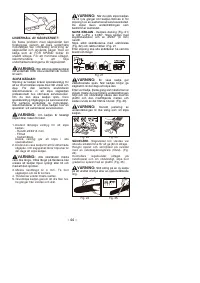
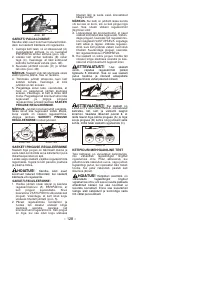
You will need these tools to assemble your
chain saw:
1. Combination wrench-screwdriver (cont-
ained in your user’s kit).
2. Heavy duty work gloves (user supplied).
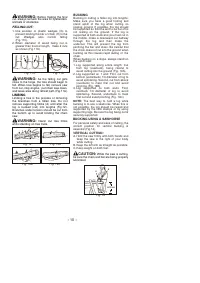
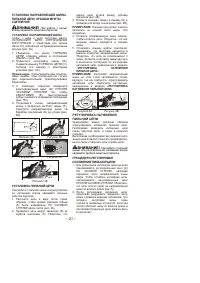
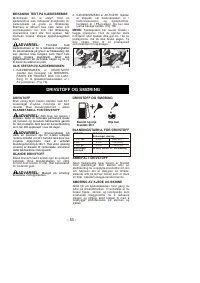
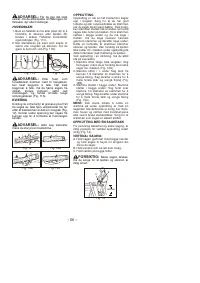
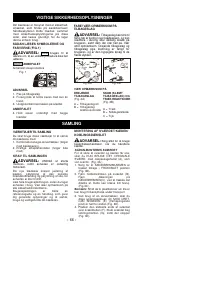
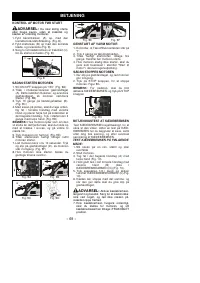
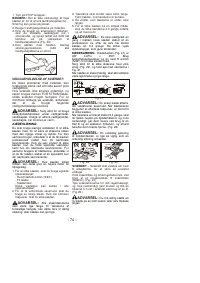
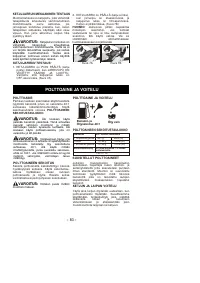
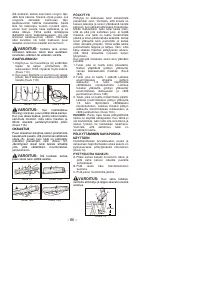
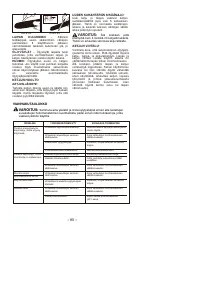
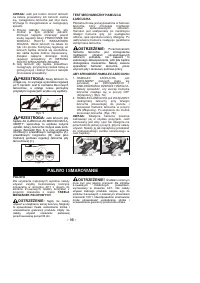
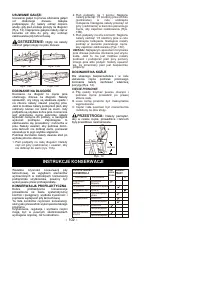
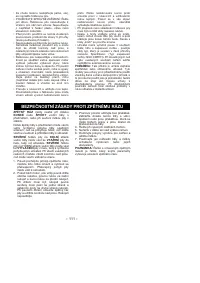
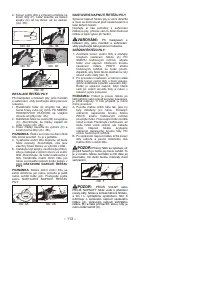
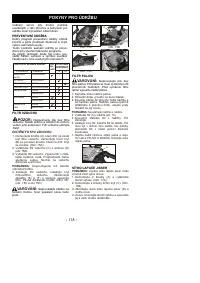
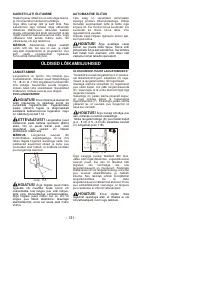
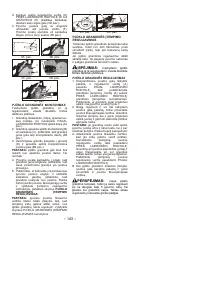
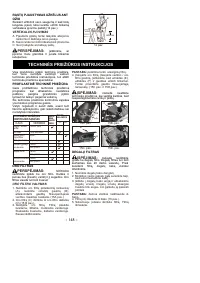
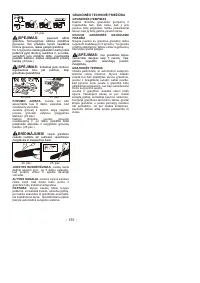
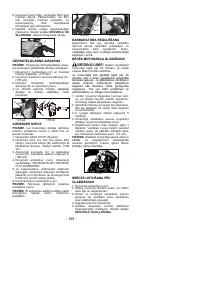
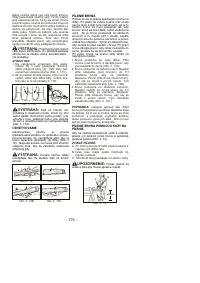
TO INSTALL GUIDE BAR:
To ensure the bar and chain receive oil,
ONLY USE THE ORIGINAL STYLE BAR
with the oil passage hole (A) as illustrated
above. (Fig.3A)
1. Make sure the CHAIN BRAKE lever is
pulled back into the DISENGAGED
position (Fig. 3B)
2. Remove
the
bar
retaining
nut
(B). Remove the CHAIN BRAKE cover
(C) by pulling straight out, some force
may be required. (Fig.3C).
Note:
Discard the two plastic washers. They
are only used for shipping the chain saw.
3. Using a screwdriver, turn the adjustm-
ent screw (D) COUNTERCLOCKWISE
until the TANG (E) (projecting prong) is to
the end of its travel (Fig. 3D).
4. Place the slotted end of the guide bar
over the bar bolt (F). Slide guide bar
behind clutch drum (G) until the guide
bar stops (Fig.3E).
Your new chain saw will require adjustment
of chain, filling the fuel tank with correct fuel
mixture and filling the oil tank with lubricating
oil before the unit is ready for operation.
Read the entire user manual before
attempting to operate your unit. Pay
particular
attention
to
all
safety
precautions.
Your user manual is both a reference guide
and handbook provided to furnish you
with general information to assemble,
operate and maintain your saw.
GREEN
RECOMMENDED
Recommended cutting procedure.
1
2
3
4
Fig. 1
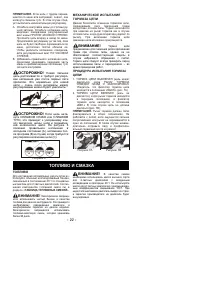
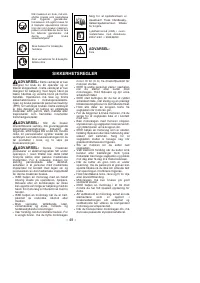
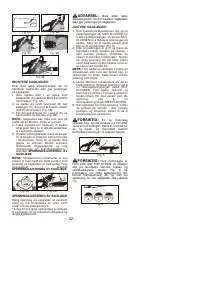
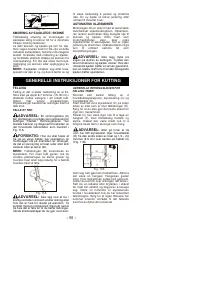
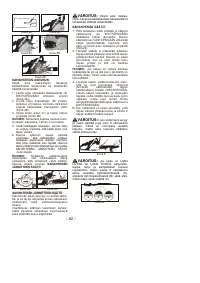
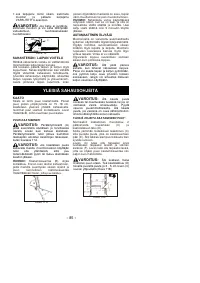
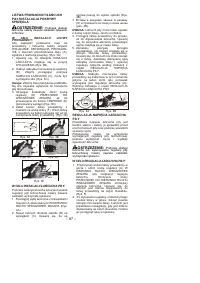
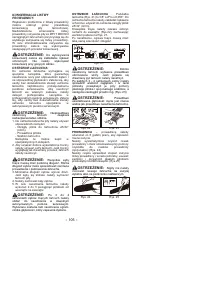
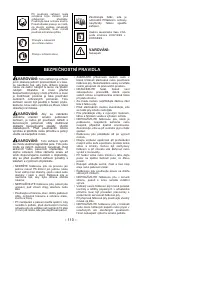
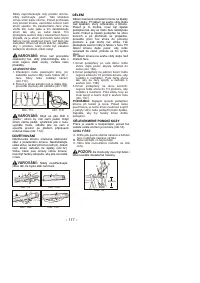
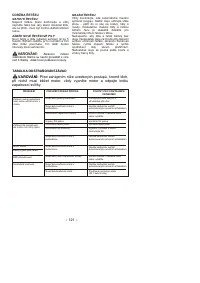
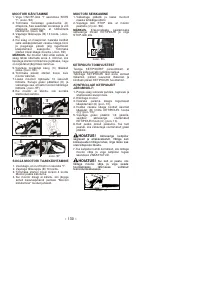
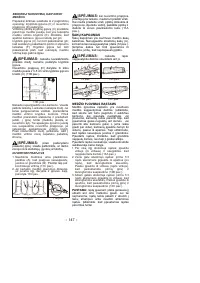
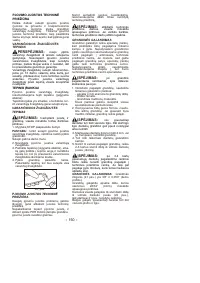
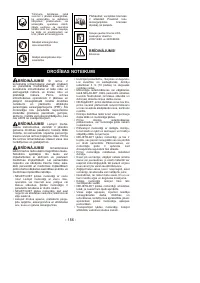
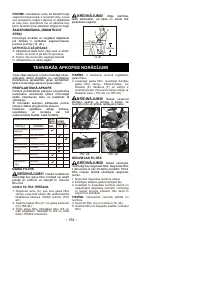
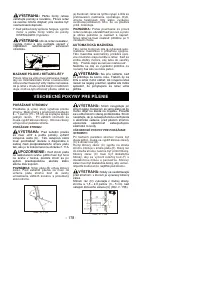
DANGER! BEWARE OF KICKBACK!
Fig. 2A
A
A
B
A
A
B
C
Fig. 2B
BEWARE OF:
ROTATIONAL
KICKBACK
(Fig. 2A)
A = Kickback path
B = Kickback
reaction zone
THE PUSH (PINCH
KICKBACK) AND
PULL REACTIONS
(Fig. 2B)
A = Pull
B = Solid objects
C = Push
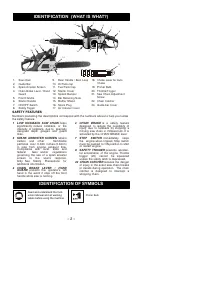
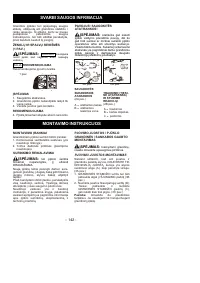
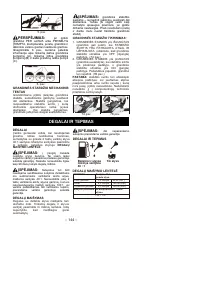
TOOLS FOR ASSEMBLY
ASSEMBLY REQUIREMENTS
GUIDE BAR / SAW CHAIN / CLUTCH
COVER INSTALLATION
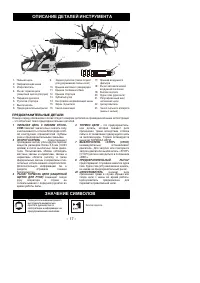
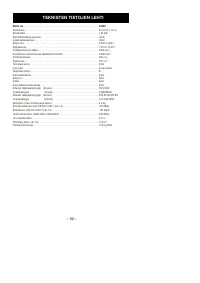
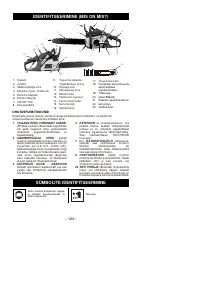
Содержание
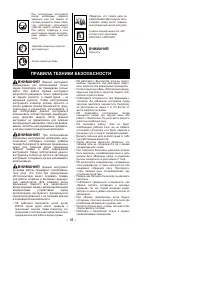
- 18 ПРЕДОХРАНИТЕЛЬНЫЕ ДЕТАЛИ
- 19 ПРАВИЛА ТЕХНИКИ БЕЗОПАСНОСТИ
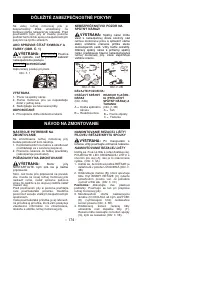
- 21 ЗНАЧЕНИЕ СИМВОЛОВ И ЦВЕТОВОЙ; ПРЕДУПРЕЖДЕНИЕ; ИНСТРУМЕНТЫ ДЛЯ СБОРКИ
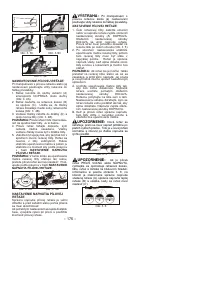
- 22 УСТАНОВКА ПИЛЬНОЙ ЦЕПИ; РЕГУЛИРОВКА НАТЯЖЕНИЯ; УСТАНОВКА НАПРАВЛЯЮЩЕЙ ШИНЫ,; РЕГУЛИРОВКА
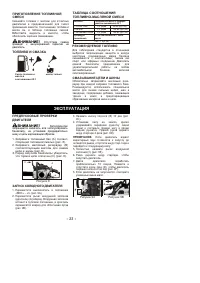
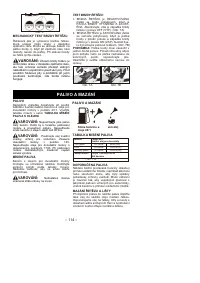
- 23 ТОПЛИВО И СМАЗКА; ТАБЛИЦА ТОПЛИВНЫХ СМЕСЕЙ; МЕХАНИЧЕСКОЕ ИСПЫТАНИЕ; ПРОЦЕДУРА ИСПЫТАНИЯ ТОРМОЗА; ТОПЛИВО
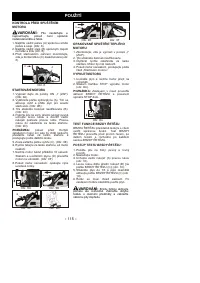
- 24 ЭКСПЛУАТАЦИЯ
- 26 ОБЩИЕ ИНСТРУКЦИИ ПО ПИЛЕНИЮ; ВАЛКА ДЕРЕВЬЕВ
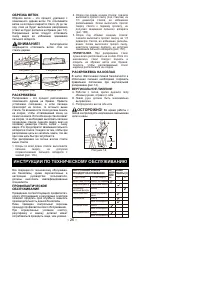
- 27 ИНСТРУКЦИИ ПО ТЕХНИЧЕСКОМУ ОБСЛУЖИВАНИЮ; ВРЕМЯ; КОНТРОЛЬНЫЙ СПИСОК; ОБРЕЗКА ВЕТОК; ВЕРТИКАЛЬНОЕ ПИЛЕНИЕ
- 28 ПРОЦЕДУРА ОЧИСТКИ
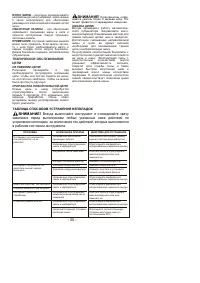
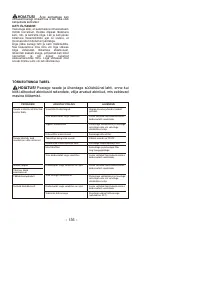
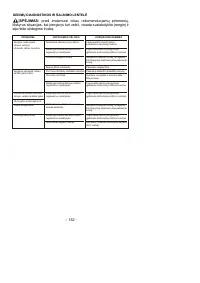
- 31 ИЗНОС ШИНЫ; Всегда выключайте инструмент и отсоединяйте свечу; ТАБЛИЦА СПОСОБОВ УСТРАНЕНИЯ НЕПОЛАДОК
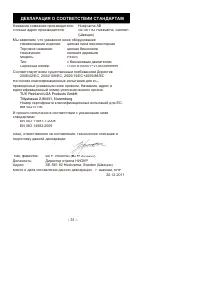
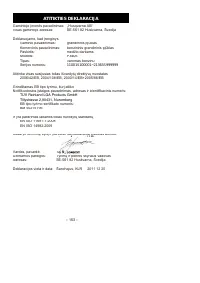
- 32 ДЕКЛАРАЦИЯ О СООТВЕТСТВИИ СТАНДАРТАМ
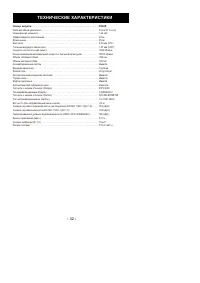
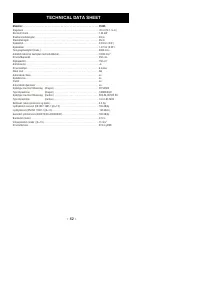
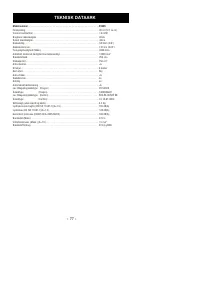
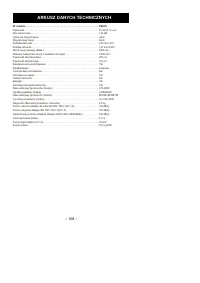
- 33 ТЕХНИЧЕСКИЕ ХАРАКТЕРИСТИКИ


