
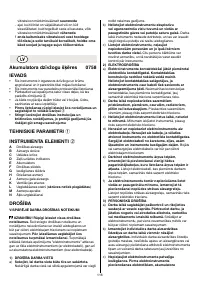
Триммеры Набор аккумуляторных инструментов SKIL F0150078AR - инструкция пользователя по применению, эксплуатации и установке на русском языке. Мы надеемся, она поможет вам решить возникшие у вас вопросы при эксплуатации техники.
Если остались вопросы, задайте их в комментариях после инструкции.
"Загружаем инструкцию", означает, что нужно подождать пока файл загрузится и можно будет его читать онлайн. Некоторые инструкции очень большие и время их появления зависит от вашей скорости интернета.


7
•
Do not use charger when cord or plug is damaged; cord
or plug should be replaced immediately at one of the
oicially registered SKIL Service Stations
•
Do not use battery when damaged; it should be
replaced immediately
•
Do not disassemble charger or battery
•
Do not attempt to recharge non-rechargeable batteries
with the charger
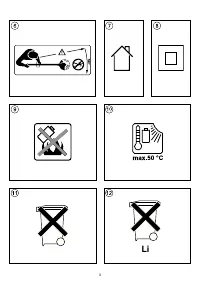
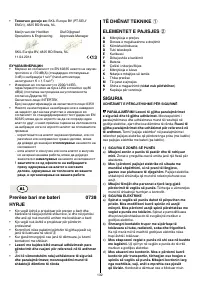
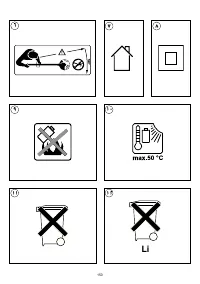
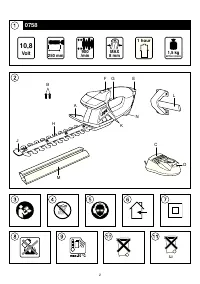
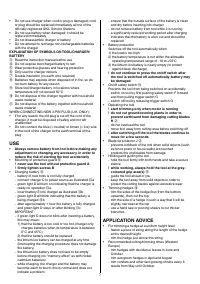
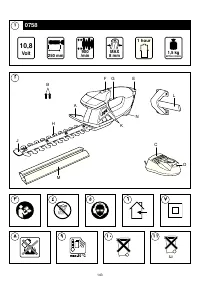
EXPLANATION OF SYMBOLS ON TOOL/CHARGER/
BATTERY
③
Read the instruction manual before use
④
Do not expose tool/charger/battery to rain
⑤
Wear protective glasses and hearing protection
⑥
Only use the charger indoors
⑦
Double insulation (no earth wire required)
⑧
Batteries may explode when disposed of in ire, so do
not burn battery for any reason
⑨
Store tool/charger/battery in locations where
temperature will not exceed 50°C
⑩
Do not dispose of the charger together with household
waste material
⑪
Do not dispose of the battery together with household
waste material
WHEN CONNECTING NEW 3-PIN PLUG (U.K. ONLY):
•
If for any reason the old plug is cut of the cord of the
charger, it must be disposed of safely and not left
unattended
•
Do not connect the blue (= neutral) or brown (= live) wire
in the cord of the charger to the earth terminal of the
plug
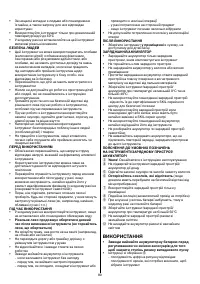
USE
•
Always remove battery from tool before making any
adjustment or changing any accessory, in order to
reduce the risk of starting the tool accidentally
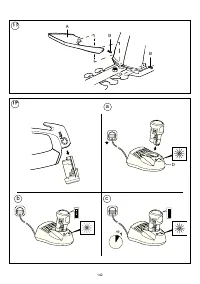
•
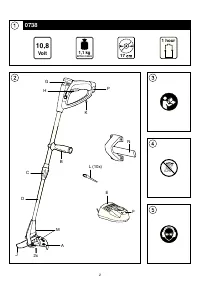
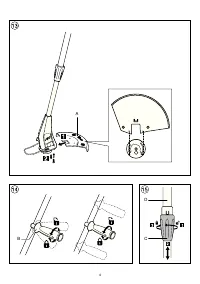
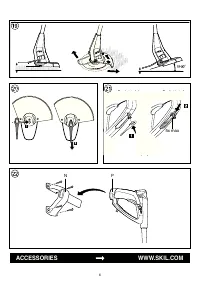
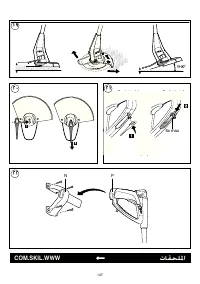
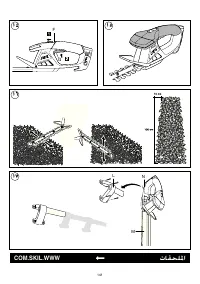
Mounting of protective guard
⑫
!
never use the tool without protective guard A
!
irmly tighten screws B
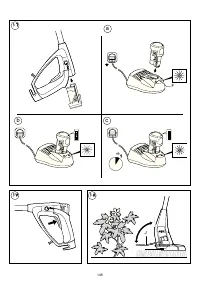
•
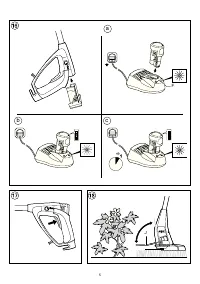
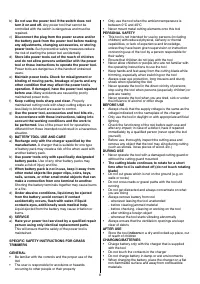
Charging battery
⑬
-
battery of new tools is not fully charged
-
connect charger C to power source as illustrated
⑬
a
-
green light D will turn on indicating that the charger is
ready for operation
⑬
a
-
insert battery E into charger as illustrated
⑬
b
-
green light D will blink indicating that the battery is
being charged
⑬
b
-
after approximately 1 hour the battery is fully charged
and green light D stays on after blinking
⑬
c
IMPORTANT:
-
if green light D does not blink after inserting a battery,
this may mean:
1) that the battery is too cold or too hot (charger only
charges batteries when its temperature is between
0°C and 45°C)
2) that the battery should be replaced
-
the lithium-ion battery can be charged at any time
(interrupting the charging procedure does not damage
the battery)
-
the lithium-ion battery does not have to be empty
before charging (no "memory-efect" as with nickel-
cadmium batteries)
-
while charging, the charger and the battery may
become warm to touch; this is normal and does not
indicate a problem
-
ensure that the outside surface of the battery is clean
and dry before inserting into charger
-
do not remove battery from tool while it is running
-
a signiicantly reduced working period after charging
indicates that the battery is worn out and should be
replaced
•
Battery protection
Switches of the tool automatically when
1) the load is too high
2) the battery temperature is not within the allowable
operating temperature range of -10 to +50°C
3) the lithium-ion battery is nearly empty (to protect
against deep discharge)
!
do not continue to press the on/of switch after
the tool is switched of automatically; battery may
be damaged
•
On/of safety switch
⑭
Prevents the tool from being switched on accidentally
-
switch on tool by irst pushing safety switch F forward
and then pulling trigger switch G
-
switch of tool by releasing trigger switch G
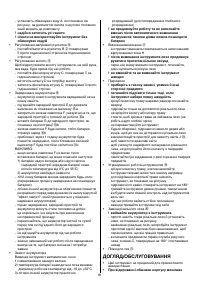
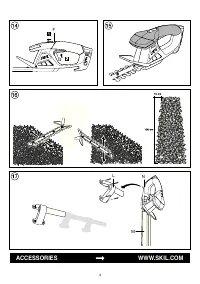
•
Operating the tool
!
start trimming only when motor is running
!
do not cut groundcovering plants in order to
prevent earth/sand from damaging cutting blades
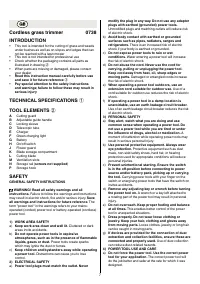
H
②
-
do not overload the tool
-
move tool away from cutting area before switching of
!
after switching of the tool the blades continue to
move for a few seconds
•
Blade tip protector J
②
-
prevents kickback of the tool when solid objects (such
as fence posts or house walls) are touched
-
protects the end blades from damage
•
Holding and guiding the tool
-
hold the tool irmly with both hands and take a secure
stance
!
while working, always hold the tool at the grey-
coloured grip area(s)
⑮
-
guide the tool ahead of you
-
keep the tool away from solid objects in order to
protect the cutting blades against excessive wear
•
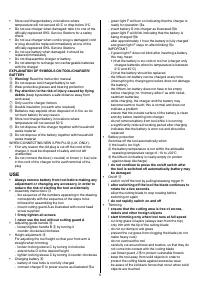
Trimming hedges
⑯
-
trim the sides of the hedge irst (from the bottom
upwards), then cut the top
-
trim the side of a hedge in such a way that it will be
slightly narrower at the top
-
use a hand saw or pruning shears to cut thicker
branches
APPLICATION ADVICE
•
For trimming a hedge at a uniform height level
-
fasten a piece of string along the length of the hedge
at the desired height
-
trim the hedge just above this string
•
Recommended cutting/trimming times (Western
Europe)
-
trim hedges with deciduous leaves in June and
October
-
trim evergreen hedges in April and August
-
trim conifers and other fast-growing shrubs every 6
weeks from May until October


