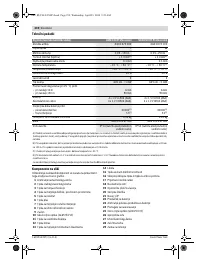
Измерительные приборы Bosch GLM 250 - инструкция пользователя по применению, эксплуатации и установке на русском языке. Мы надеемся, она поможет вам решить возникшие у вас вопросы при эксплуатации техники.
Если остались вопросы, задайте их в комментариях после инструкции.
"Загружаем инструкцию", означает, что нужно подождать пока файл загрузится и можно будет его читать онлайн. Некоторые инструкции очень большие и время их появления зависит от вашей скорости интернета.


22
| English
1 609 92A 0KT | (23.4.14)
Bosch Power Tools
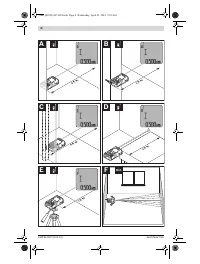
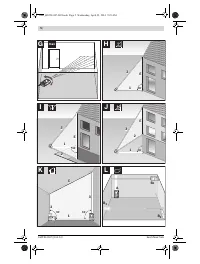
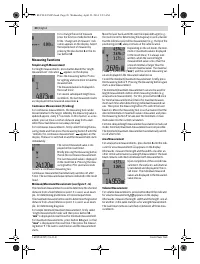
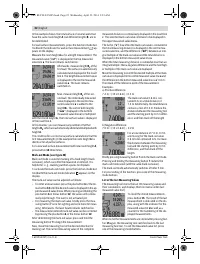
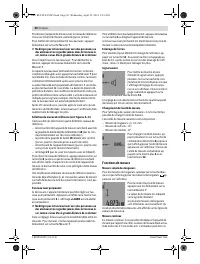
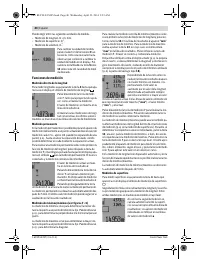
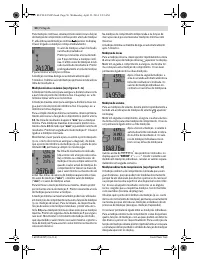
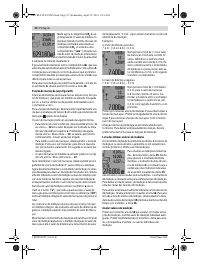
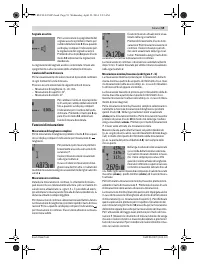
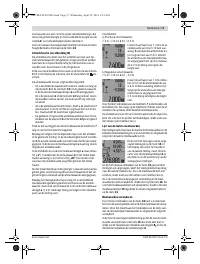
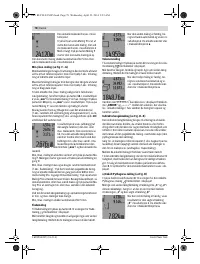
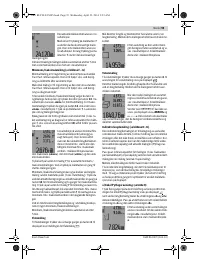
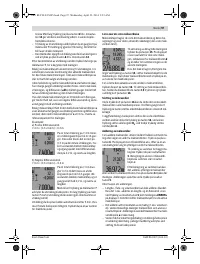
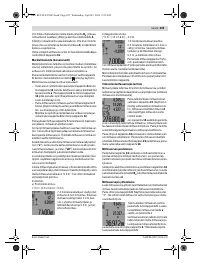
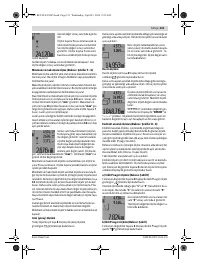
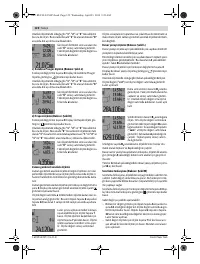
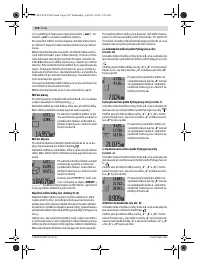
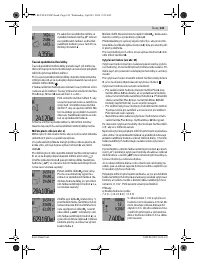
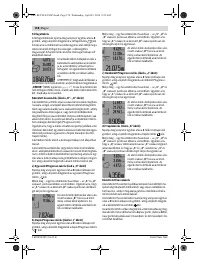
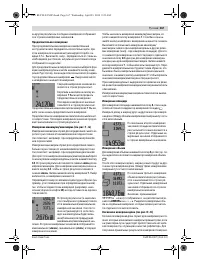
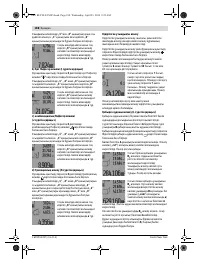
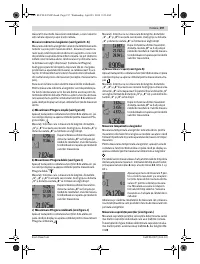
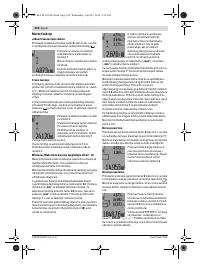
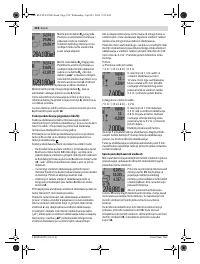
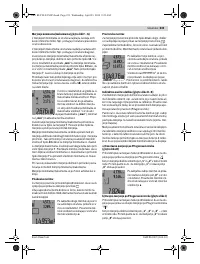
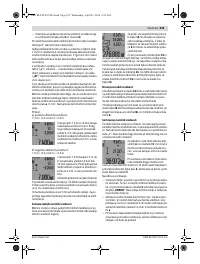
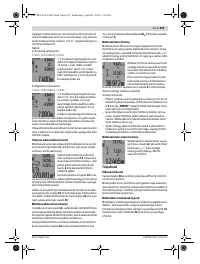
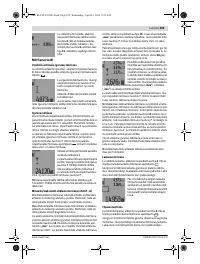
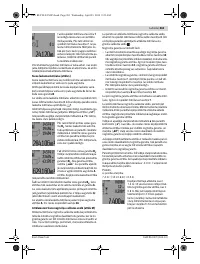
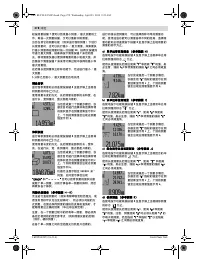
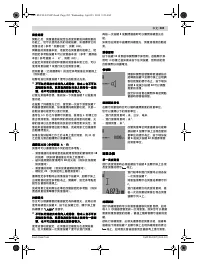
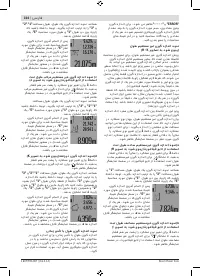
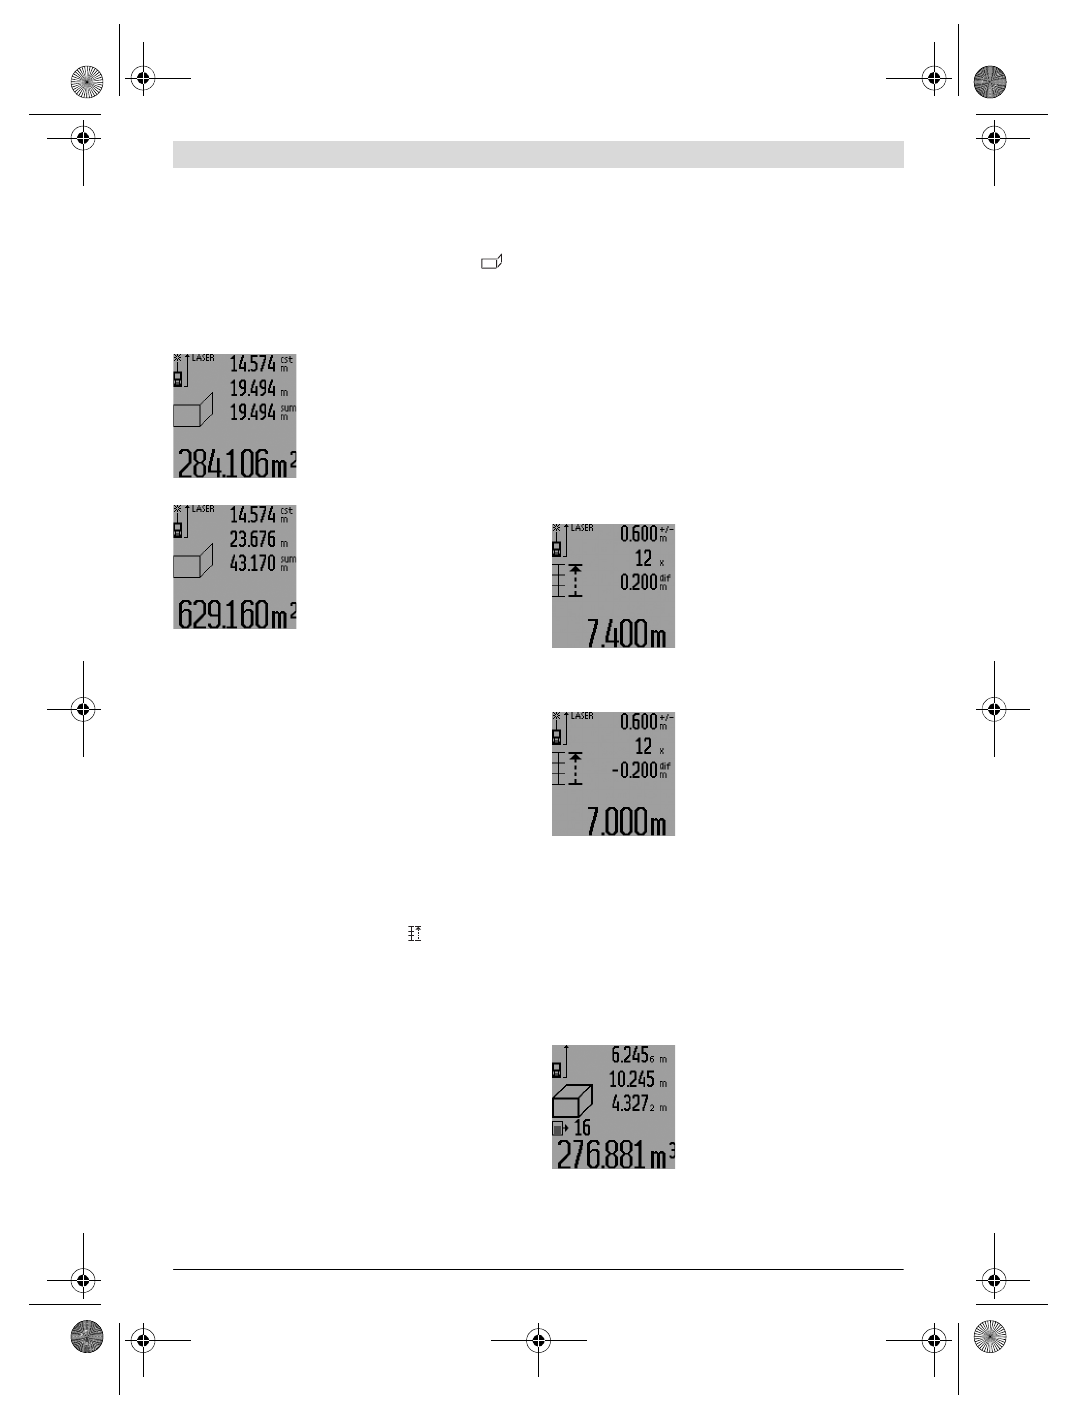
In the example shown, the total surface of several walls that
have the same room height
A
, but different lengths
B
, are to
be determined.
For wall surface measurements, press the function-mode but-
ton
3
until the indicator for wall surface measurement
ap-
pears on the display.
Measure the room height
A
as for a length measurement. The
measured value (
“cst”
) is displayed in the top measured-
value line
a
. The laser remains switched on.
Afterwards, measure length
B
1
of the
first wall. The surface is automatically
calculated and displayed in the result
line
c
. The length measurement value
is displayed in the centre measured-
value line
a
. The laser remains
switched on.
Now, measure length
B
2
of the sec-
ond wall. The individually measured
value displayed in the centre mea-
sured-value line
a
is added to the
length
B
1
. The sum of both lengths
(
“sum”
, displayed in the bottom
measured-value line
a
) is multiplied
with the stored height
A
. The total surface value is displayed
in the result line
c
.
In this manner, you can measure any number of further
lengths
B
X
, which are automatically added and multiplied with
height
A
.
The condition for a correct area/surface calculation is that the
first measured length (in the example the room height
A
) is
identical for all partial surfaces.
For a new wall surface measurement with new room height
A
,
press button
16
three times.
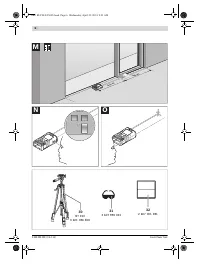
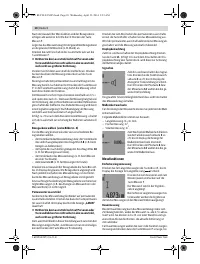
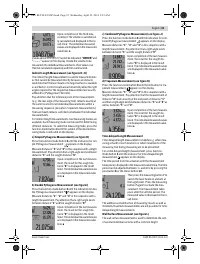
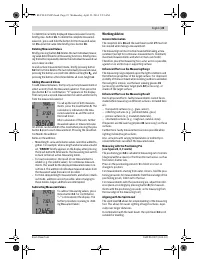
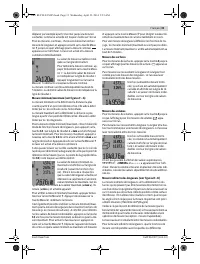
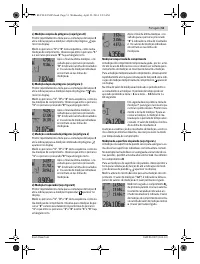
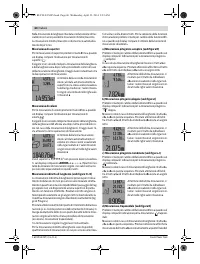
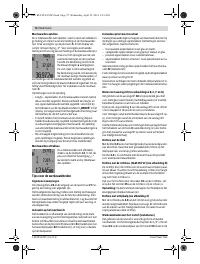
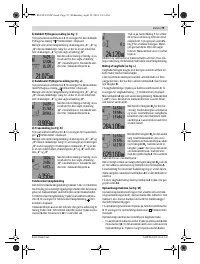
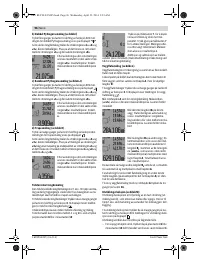
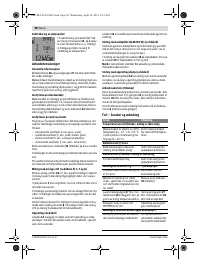
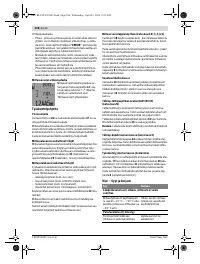
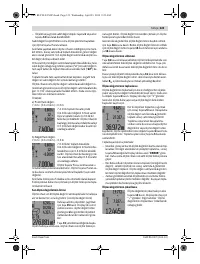
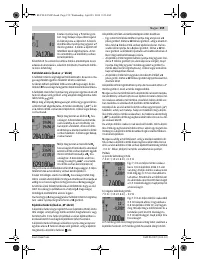
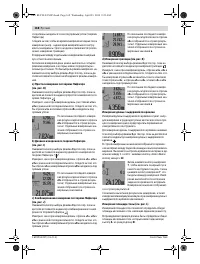
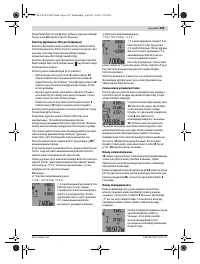
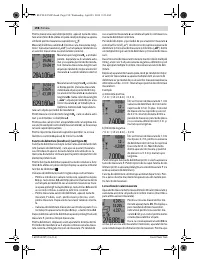
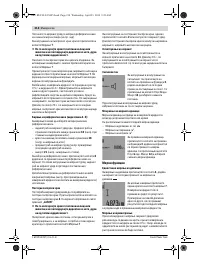
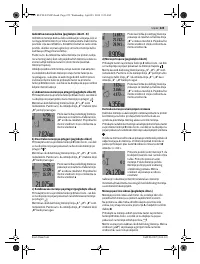
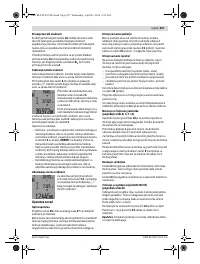
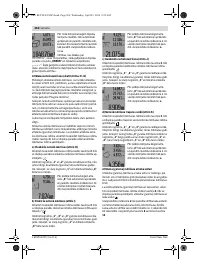
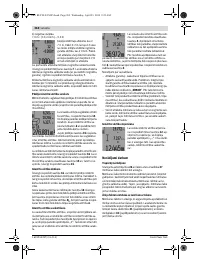
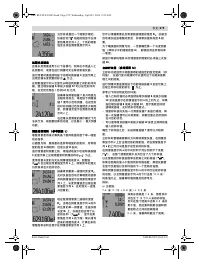
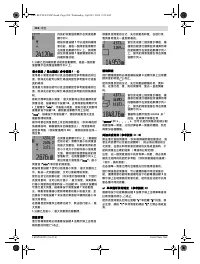
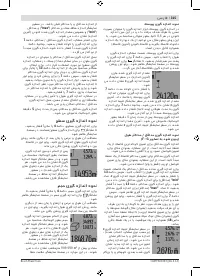
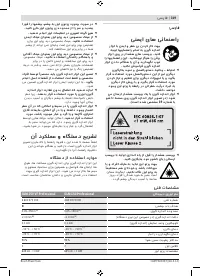
Mark-out Mode (see figure M)
Mark-out mode is used for marking off a fixed length (mark-
out value), which can either be measured or entered. It is
helpful for, e. g., marking partition spaces for drywalls.
To activate the mark-out mode, press the function-mode but-
ton
3
until the mark-out mode indication appears on the
display.
The mark-out value can be adjusted as follows:
– To enter a known value, press the plus button
6
or the mi-
nus button
12
until the desired value is displayed in the up-
per measured-value line
a
. When pressing and holding the
plus button
6
or minus button
12
, the values will continu-
ously skip through. The laser is not activated yet.
– For measuring the mark-out value, briefly press the mea-
suring button
7
once for sighting and once more for meas-
uring. Afterwards, the laser beam remains switched on.
– The measured or entered mark-out value can be corrected
by pressing the plus button
6
or the minus button
12
.
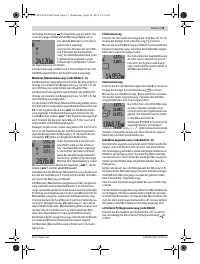
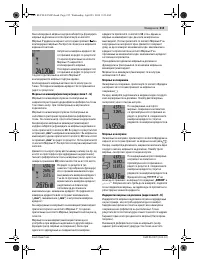
After determining the mark-out value, press and hold the
measuring button
7
to begin the measurement.
Now, move the measuring tool in the desired direction for
marking out. The current measuring value of the complete
measured distance is continuously displayed in the result line
c
. The selected mark-out value continues to be displayed in
the upper measured-value line
a
.
The factor (
“x”
) how often the mark-out value is contained in
the total measuring distance is displayed in the centre mea-
sured-value line, and the difference (
“dif”
) between an inte-
gral multiple of the mark-out value and the total distance is
displayed in the bottom measured-value line
a
.
When the total measuring distance is somewhat less than an
integral multiple, then a negative difference and the next high-
er multiple of the mark-out value are displayed.
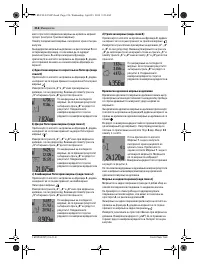
Move the measuring tool until the desired multiple of the mark-
out value is displayed in the centre measured-value line
a
and
the difference in the bottom measured-value line is
a
“0.0 m”.
Then mark off the reference point of the measurement.
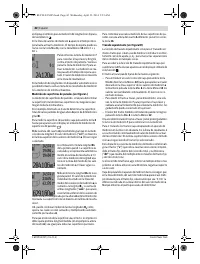
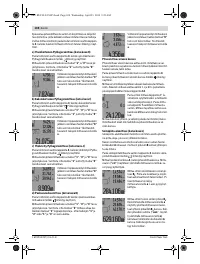
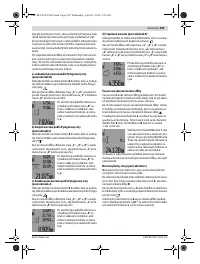
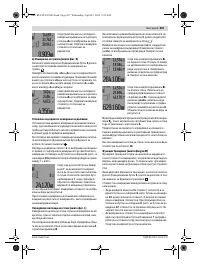
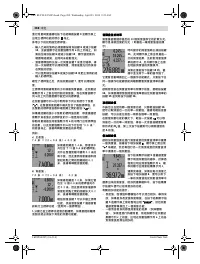
Examples:
a) Positive difference:
7.4 m = (12 x 0.6 m) + 0.2 m
The mark-out value 0.6 m is con-
tained 12 x in a total distance of
7.4 m. Additionally, the total distance
contains a rest of 0.2 m. Reduce the
distance between the measuring tool
and the starting point by 0.2 m differ-
ence, and then mark off the length.
b) Negative difference:
7.0 m = (12 x 0.6 m) – 0.2 m
For a total distance of 7.0 m, 0.2 m
are missing for the mark-out value
0.6 m to be contained 12 x. Increase
the distance between the measuring
tool and the starting point by 0.2 m
difference, and then mark off the
length.
Briefly pressing measuring button
7
ends the mark-out mode.
Pressing and holding the measuring button
7
restarts the
mark-out mode anew (with the same mark-out value).
The mark-out mode automatically switches off after 5 min.
For prior exiting of the function, press one of the measuring-
mode buttons.
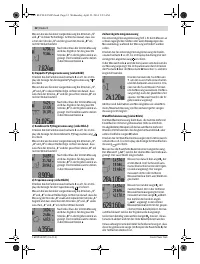
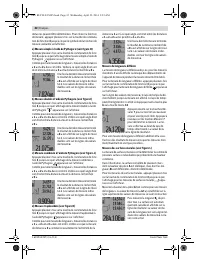
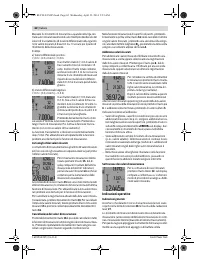
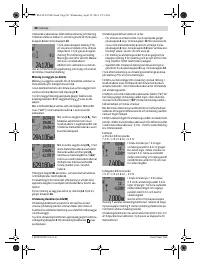
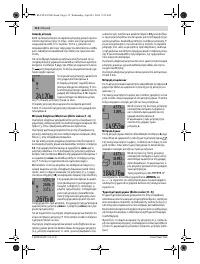
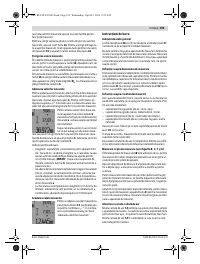
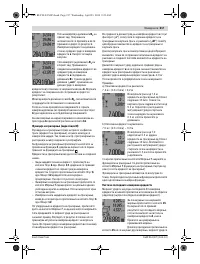
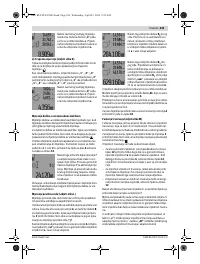
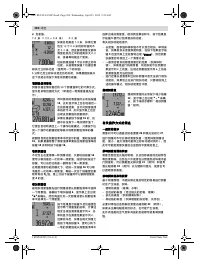
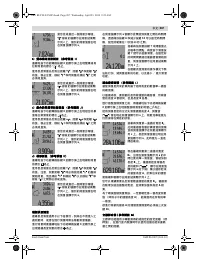
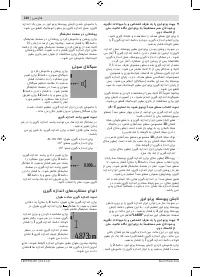
List of the last Measuring Values
The measuring tool stores the last 30 measuring values and
their calculations, and displays them in reverse order (last
measured value first).
To recall the stored measurements,
press button
15
. The result of the last
measurement is indicated on the dis-
play, along with the indicator for the
measured-value list
d
as well as a
counter for the numbering of the dis-
played measurements.
When no further measurements are stored after pressing but-
ton
15
again, the measuring tool switches back to the last
measuring function. To exit the measured-value list, press
one of the measuring-mode buttons.
OBJ_BUCH-947-005.book Page 22 Wednesday, April 23, 2014 9:23 AM
Содержание
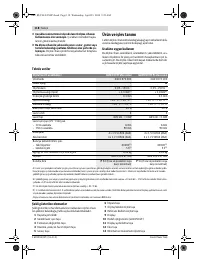
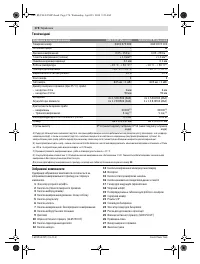
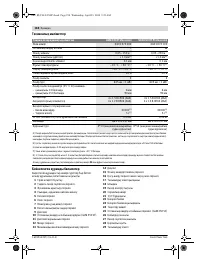
- 164 Технические данные; Цифровой лазерный дальномер
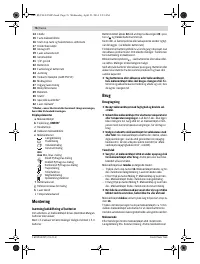
- 165 Элементы индикации; Сборка; Установка/замена батареек; Работа с инструментом; Эксплуатация; включения
- 166 Режимы измерений
- 168 Измерение длины с выдержкой по времени
- 169 «cst»
- 170 Указания по применению
- 171 Выверка уровня; Неисправность – Причины и устранение; Причина
- 172 Контроль точности измерительного инструмента; Техобслуживание и сервис; Техобслуживание и очистка; Россия; Беларусь; Утилизация
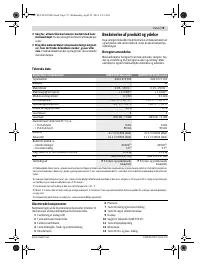
Характеристики

Остались вопросы?Не нашли свой ответ в руководстве или возникли другие проблемы? Задайте свой вопрос в форме ниже с подробным описанием вашей ситуации, чтобы другие люди и специалисты смогли дать на него ответ. Если вы знаете как решить проблему другого человека, пожалуйста, подскажите ему :)


