Измерительные приборы Bosch GLM 250 - инструкция пользователя по применению, эксплуатации и установке на русском языке. Мы надеемся, она поможет вам решить возникшие у вас вопросы при эксплуатации техники.
Если остались вопросы, задайте их в комментариях после инструкции.
"Загружаем инструкцию", означает, что нужно подождать пока файл загрузится и можно будет его читать онлайн. Некоторые инструкции очень большие и время их появления зависит от вашей скорости интернета.


English |
21
Bosch Power Tools
1 609 92A 0KT | (23.4.14)
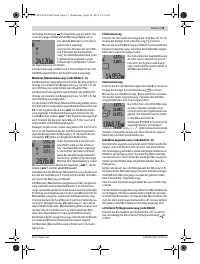
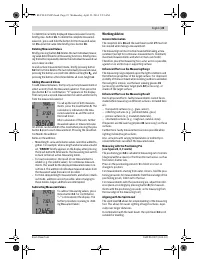
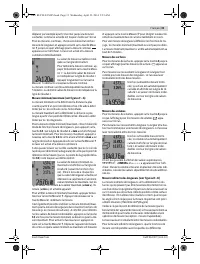
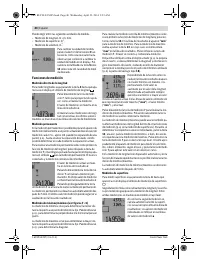
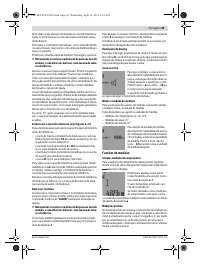
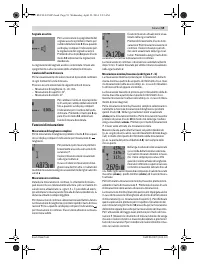
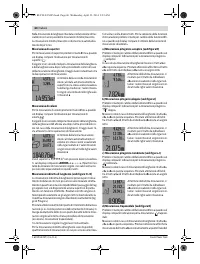
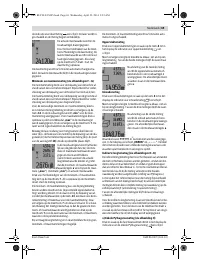
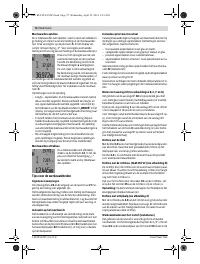
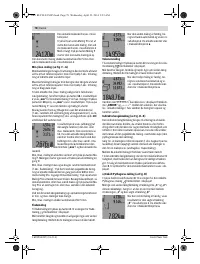
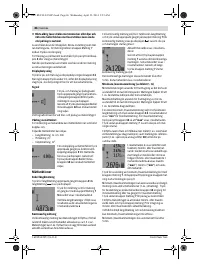
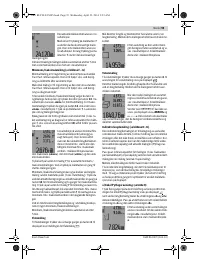
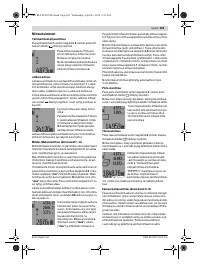
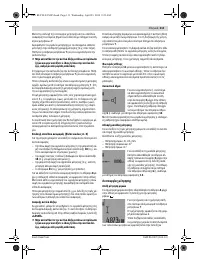
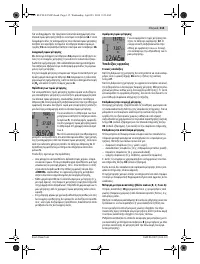
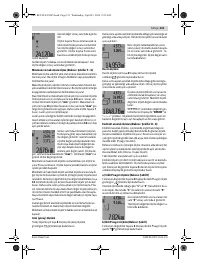
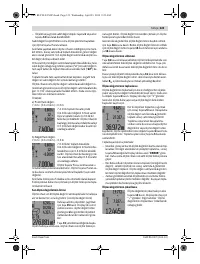
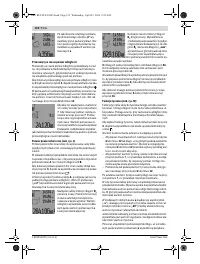
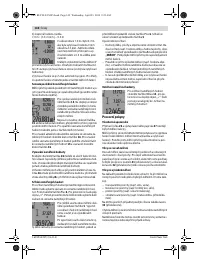
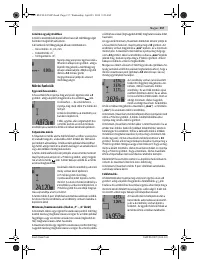
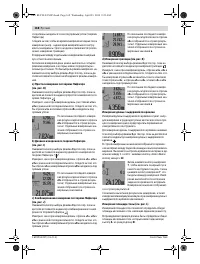
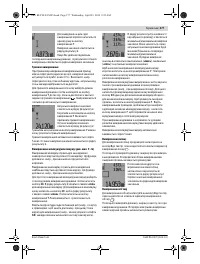
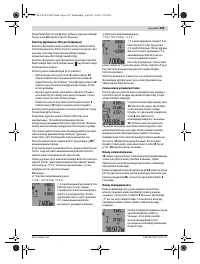
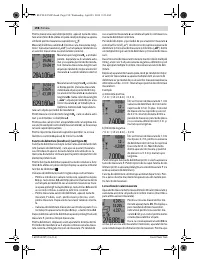
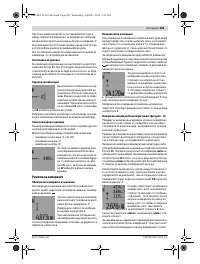
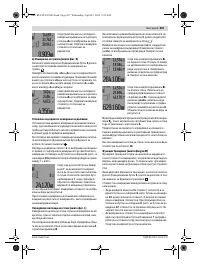
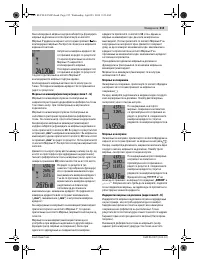
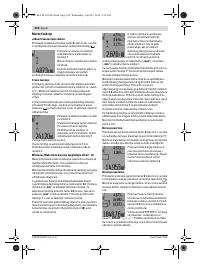
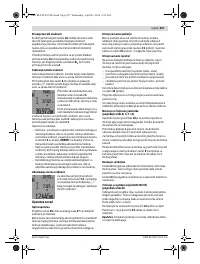
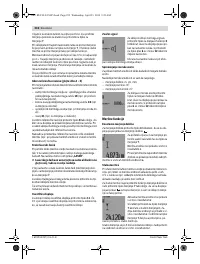
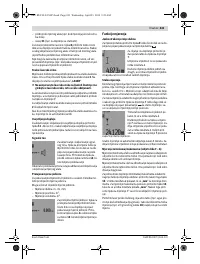
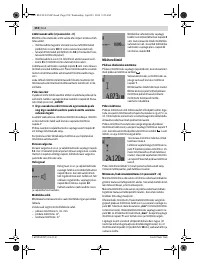
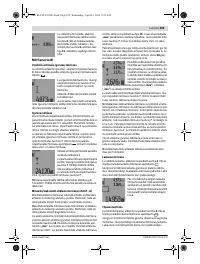
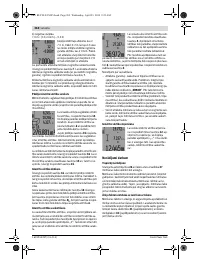
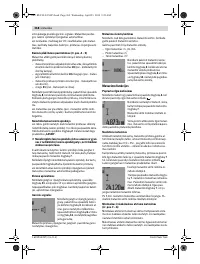
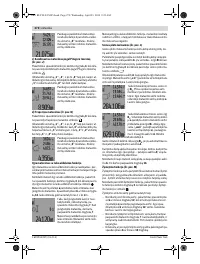
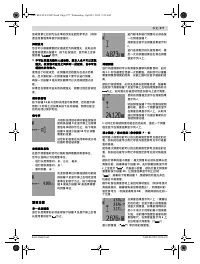
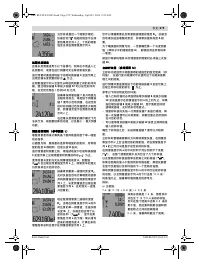
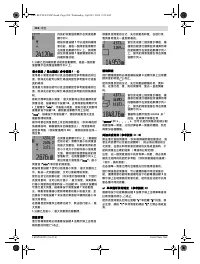
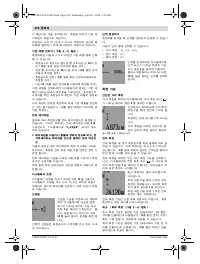
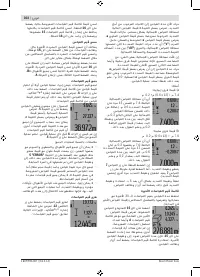
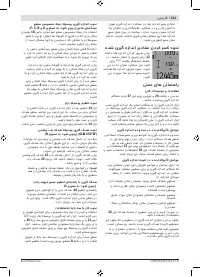
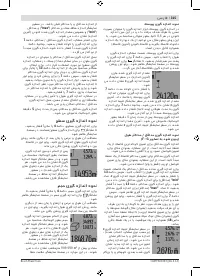
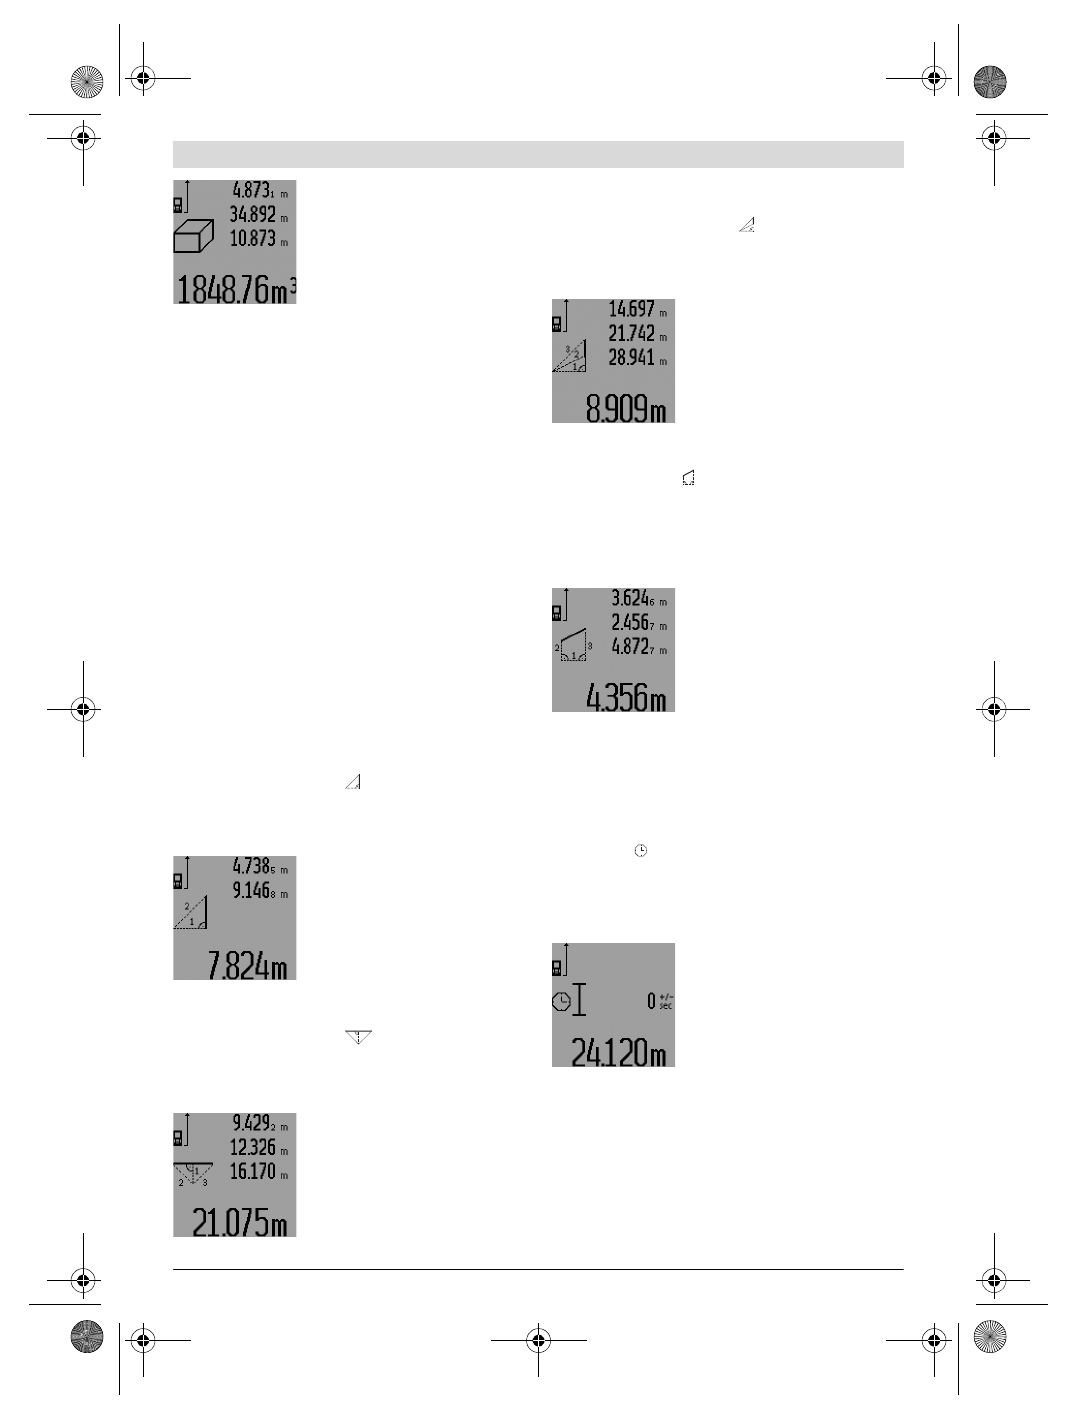
Upon completion of the third mea-
surement, the volume is automatical-
ly calculated and displayed in the re-
sult line
c
. The individual measured
values are displayed in the measured-
value lines
a
.
Values above 999 999 m
3
cannot be indicated;
“ERROR”
and
“– – – – ”
appear on the display. Divide the volume to be
measured into individual measurements; their values can
then be calculated separately and then summarized.
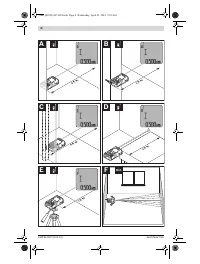
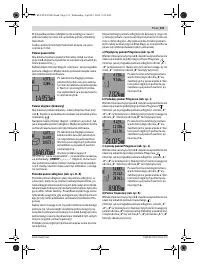
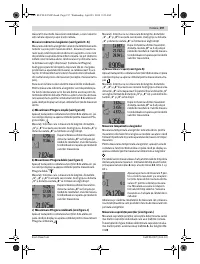
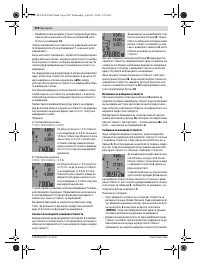
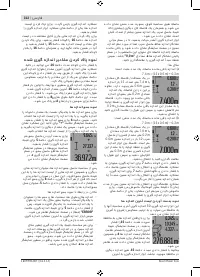
Indirect Length Measurement (see figures H – K)
The indirect length measurement is used to measure distanc-
es that cannot be measured directly because an obstacle
would obstruct the laser beam or no target surface is available
as a reflector. Correct results are achieved only when the right
angles required for the respective measurement are exactly
adhered to (Pythagorean Theorem).
Pay attention that the reference point of the measurement
(e. g. the rear edge of the measuring tool) remains exactly at
the same location for all individual measurements within a
measuring sequence (exception: trapezium measurements).
The laser beam remains switched on between the individual
measurements.
For indirect length measurements, four measuring modes are
available. Each measuring mode can be used for determining
different distances. To select the measuring mode, press the
function-mode button
3
until the symbol of the desired mea-
suring mode is indicated on the display.
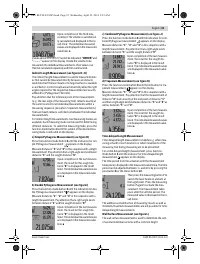
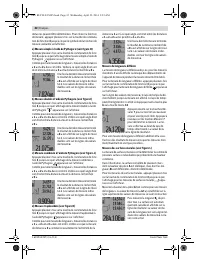
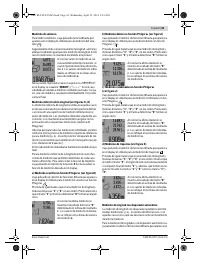
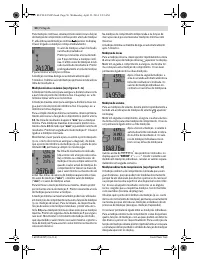
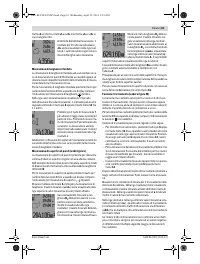
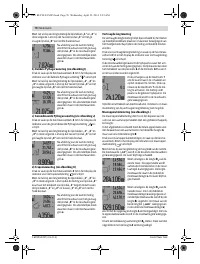
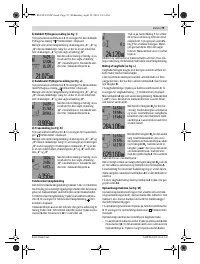
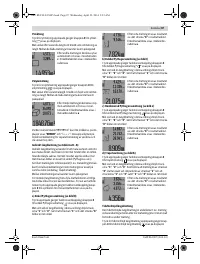
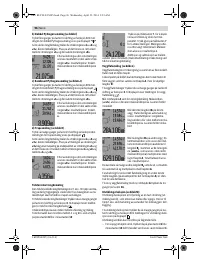
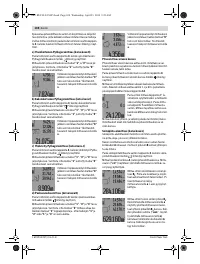
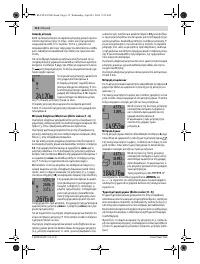
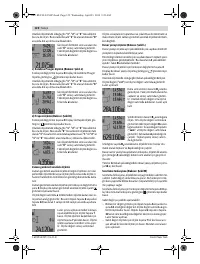
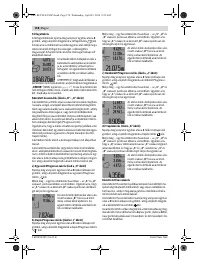
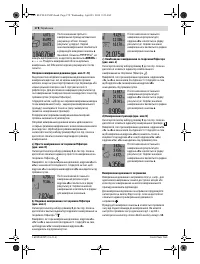
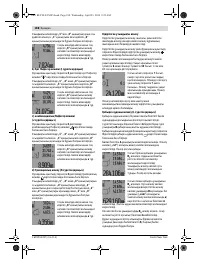
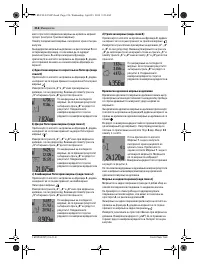
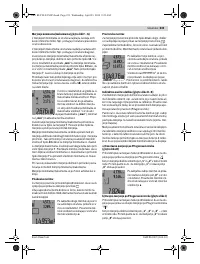
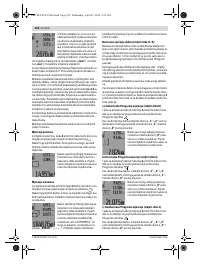
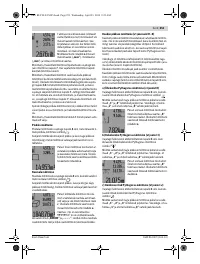
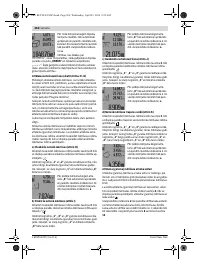
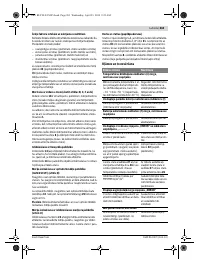
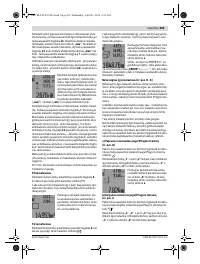
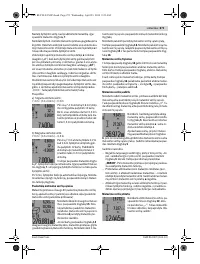
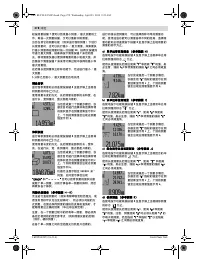
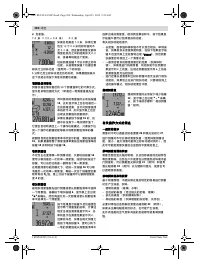
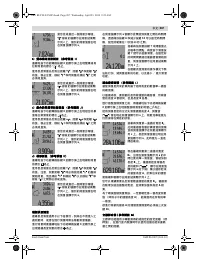
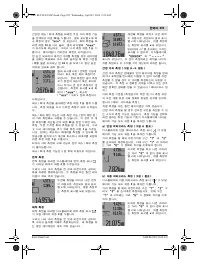
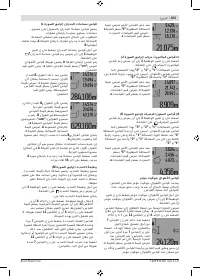
a) Simple Pythagoras Measurement (see figure H)
Press the function-mode button
3
until the indication for sim-
ple Pythagoras measurement
appears on the display.
Measure distances
“1”
and
“2”
in this sequence with a length
measurement. Pay attention that a right angle exists between
distance
“1”
and the sought distance
“E”
.
Upon completion of the last measure-
ment, the result for the sought dis-
tance
“E”
is displayed in the result
line
c
. The individual measured values
are displayed in the measured-value
lines
a
.
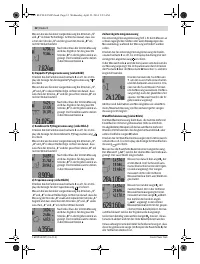
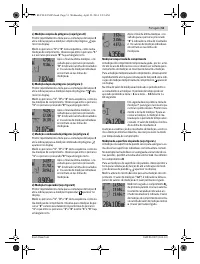
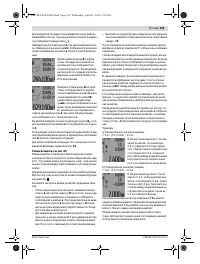
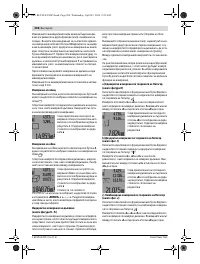
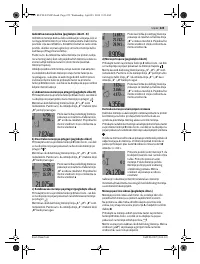
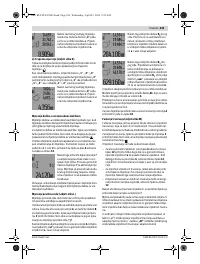
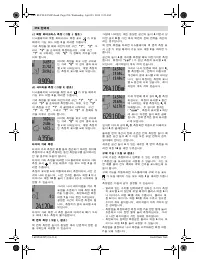
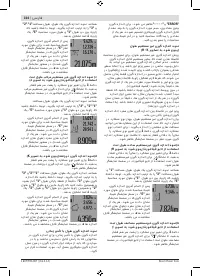
b) Double Pythagoras Measurement (see figure I)
Press the function-mode button
3
until the indication for dou-
ble Pythagoras measurement
appears on the display.
Measure distances
“1”
,
“2”
and
“3”
in this sequence with a
length measurement. Pay attention that a right angle exists
between distance
“1”
and the sought distance
“E”
.
Upon completion of the last measure-
ment, the result for the sought dis-
tance
“E”
is displayed in the result
line
c
. The individual measured values
are displayed in the measured-value
lines
a
.
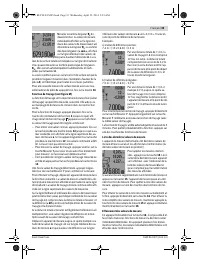
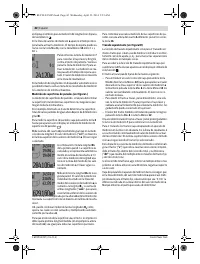
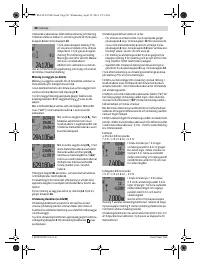
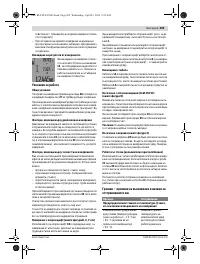
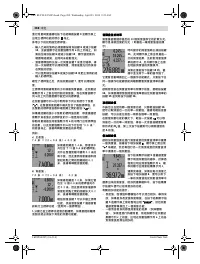
c) Combined Pythagoras Measurement (see figure J)
Press the function-mode button
3
until the indication for com-
bined Pythagoras measurement
appears on the display.
Measure distances
“1”
,
“2”
and
“3”
in this sequence with a
length measurement. Pay attention that a right angle exists
between distance
“1”
and the sought distance
“E”
.
Upon completion of the last measure-
ment, the result for the sought dis-
tance
“E”
is displayed in the result
line
c
. The individual measured values
are displayed in the measured-value
lines
a
.
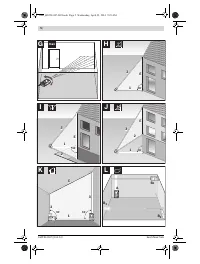
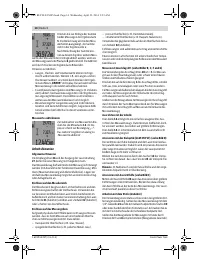
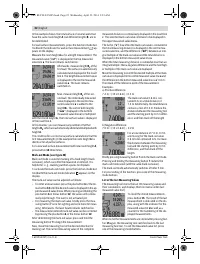
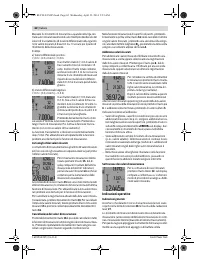
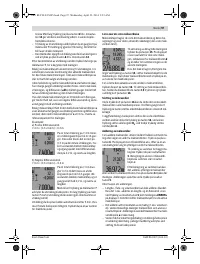
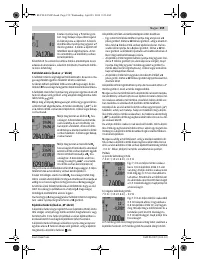
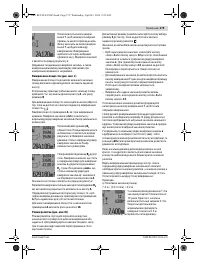
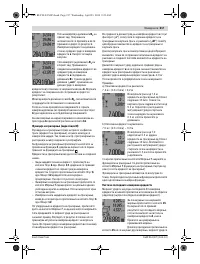
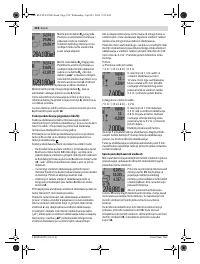
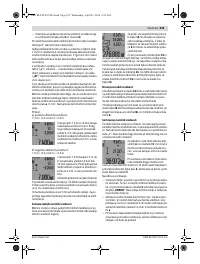
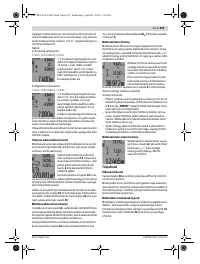
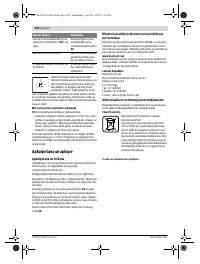
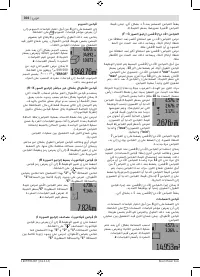
d) Trapezium Measurement (see figure K)
Press the function-mode button
3
until the indication for tra-
pezium measurement
appears on the display.
Measure distances
“1”
,
“2”
and
“3”
in this sequence with a
length measurement. Pay attention that the measurement of
distance
“3”
starts exactly at the end point of distance
“1”
and that a right angle exists between distances
“1”
and
“2”
as
well as between
“1”
and
“3”
.
Upon completion of the last measure-
ment, the result for the sought dis-
tance
“E”
is displayed in the result
line
c
. The individual measured values
are displayed in the measured-value
lines
a
.
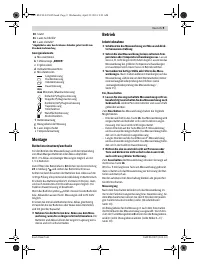
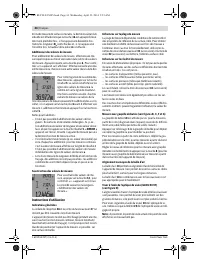
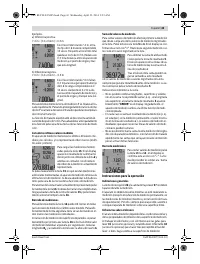
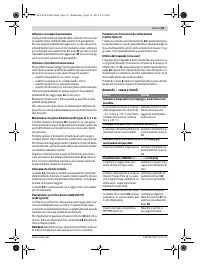
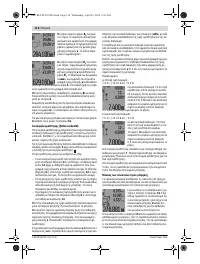
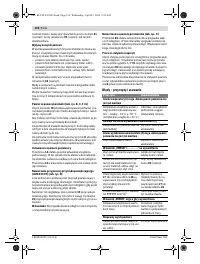
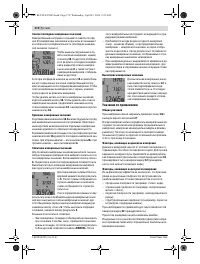
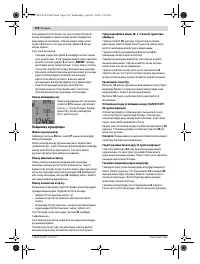
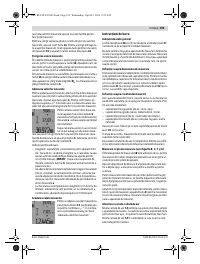
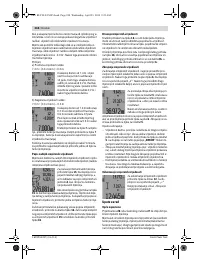
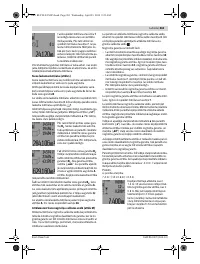
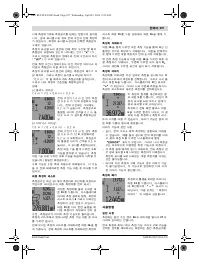
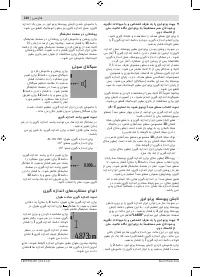
Time-delayed Length Measurement
Time-delayed length measurement is helpful e. g. when mea-
suring at hard to reach locations or when movements of the
measuring tool during measuring are to be prevented.
For a time-delayed length measurement, press function-
mode button
3
until the indicator for time-delayed length
measurement appears on the display.
The time period from the actuation until the measurement
takes place is displayed in the measured-value line
a
. The time
period can be adjusted between 1 s and 60 s by pressing the
plus button
6
or the minus button
12
.
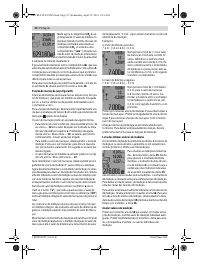
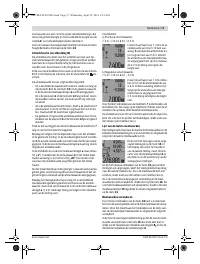
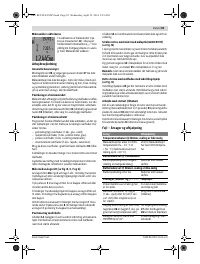
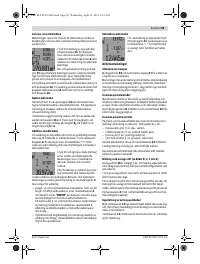
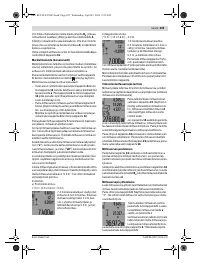
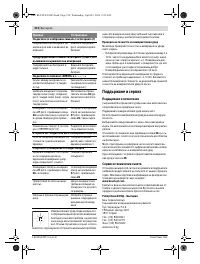
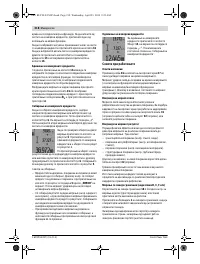
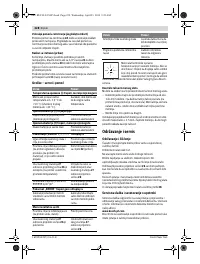
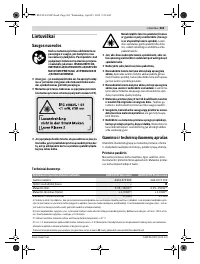
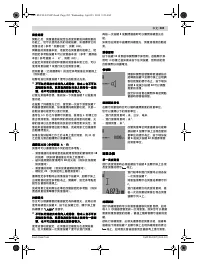
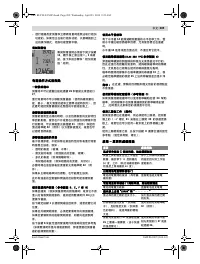
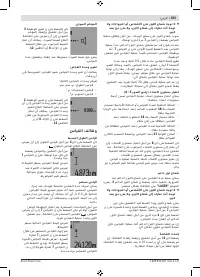
Then press the measuring button
7
to
switch the laser beam on and aim at
the target point. Press the measuring
button
7
again to actuate the mea-
surement. The measurement takes
place after the set time period. The
measured value is displayed in the re-
sult line
c
.
The addition and subtraction of measuring results as well as
minimum/maximum measurements are not possible for time-
delayed length measurements.
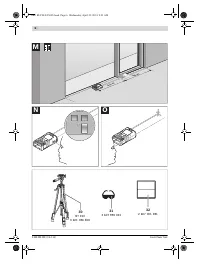
Wall Surface Measurement (see figure L)
The wall surface measurement is used to determine the sum
of several individual surfaces with a common height.
1
2
1
3
2
1
3
2
1
3
2
OBJ_BUCH-947-005.book Page 21 Wednesday, April 23, 2014 9:23 AM
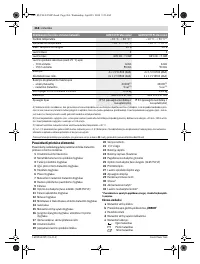
Содержание
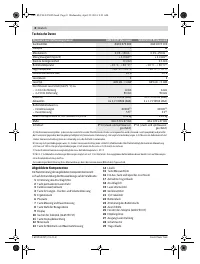
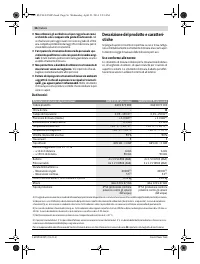
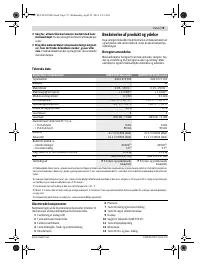
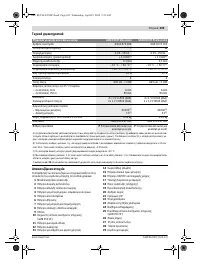
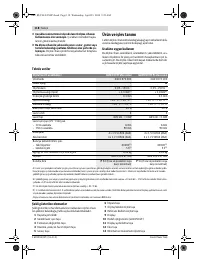
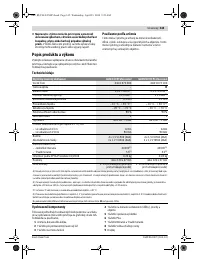
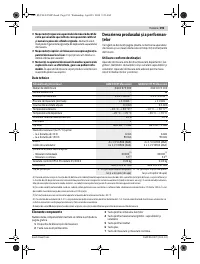
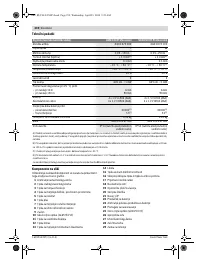
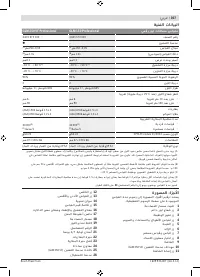
- 164 Технические данные; Цифровой лазерный дальномер
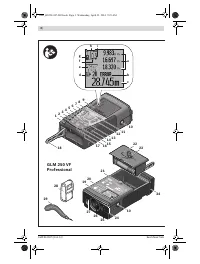
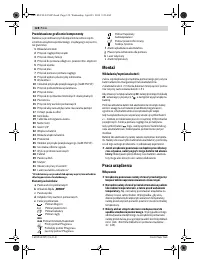
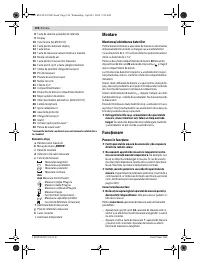
- 165 Элементы индикации; Сборка; Установка/замена батареек; Работа с инструментом; Эксплуатация; включения
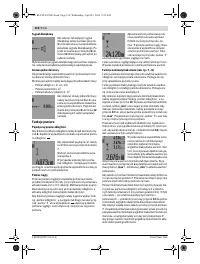
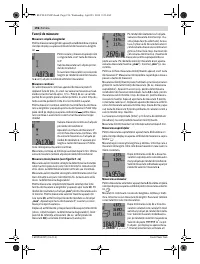
- 166 Режимы измерений
- 168 Измерение длины с выдержкой по времени
- 169 «cst»
- 170 Указания по применению
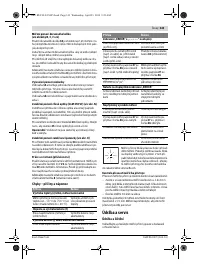
- 171 Выверка уровня; Неисправность – Причины и устранение; Причина
- 172 Контроль точности измерительного инструмента; Техобслуживание и сервис; Техобслуживание и очистка; Россия; Беларусь; Утилизация
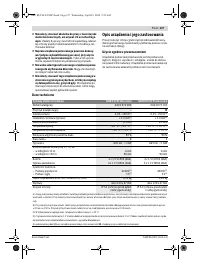
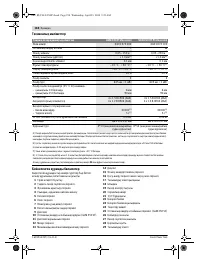
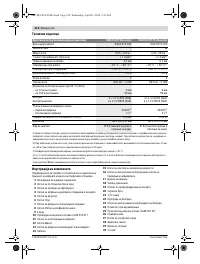
Характеристики

Остались вопросы?Не нашли свой ответ в руководстве или возникли другие проблемы? Задайте свой вопрос в форме ниже с подробным описанием вашей ситуации, чтобы другие люди и специалисты смогли дать на него ответ. Если вы знаете как решить проблему другого человека, пожалуйста, подскажите ему :)


