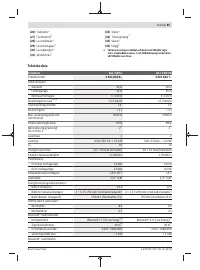
Измерительные приборы Bosch GLL 3-80 - инструкция пользователя по применению, эксплуатации и установке на русском языке. Мы надеемся, она поможет вам решить возникшие у вас вопросы при эксплуатации техники.
Если остались вопросы, задайте их в комментариях после инструкции.
"Загружаем инструкцию", означает, что нужно подождать пока файл загрузится и можно будет его читать онлайн. Некоторые инструкции очень большие и время их появления зависит от вашей скорости интернета.


English |
21
Immediately replace a faulty rechargeable battery or any
empty batteries.
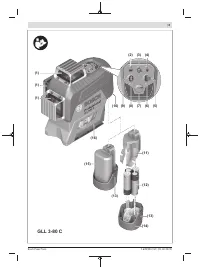
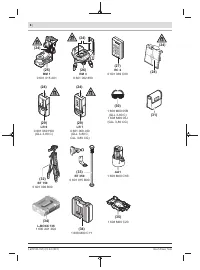
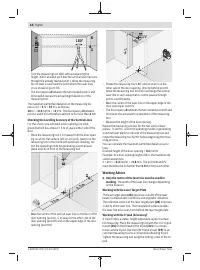
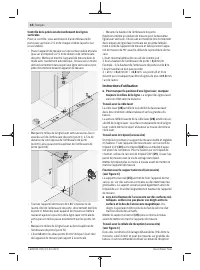
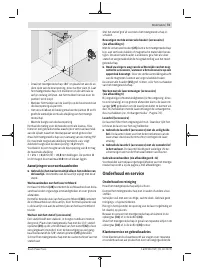
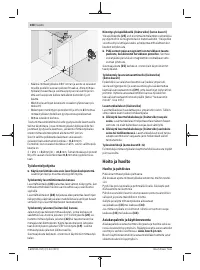
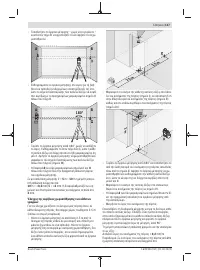
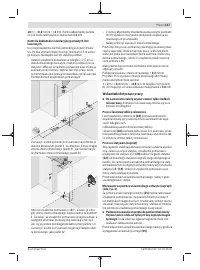
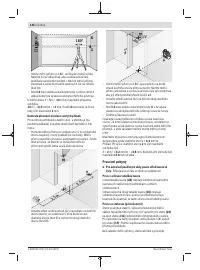
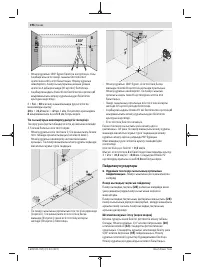
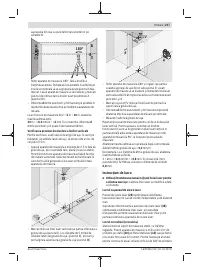
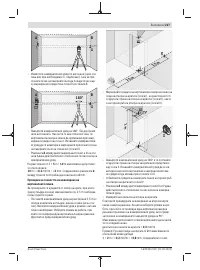
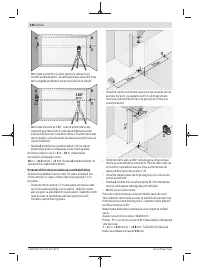
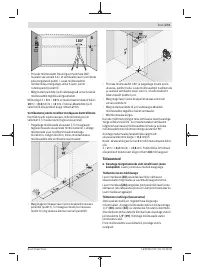
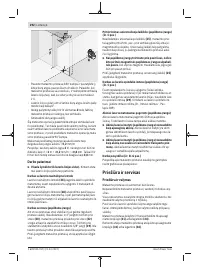
Changing the Coin Cell (see figure A)
The measuring tool is fitted with a coin cell
(21)
so that date
and time can be saved for the
CAL guard
function without
having a battery pack or batteries inserted.
In order to change the coin cell, remove the battery pack or
the entire battery adapter.
Pull the button cell holder
(22)
out of the button cell
port
(23)
. Remove the empty button cell
(21)
and insert a
new button cell. Ensure that the polarity is correct according
to the illustration on the button cell holder (the positive ter-
minal of the button cell must be facing upwards).
With the button cell fitted, slide the button cell holder
(22)
into the port
(23)
. Ensure that the button cell holder is inser-
ted correctly and fully, as otherwise protection from dust
and splashes is no longer guaranteed.
For initial start up, remove the protective film from the but-
ton cell
(21)
. To do this, follow the same steps as when
changing the button cell.
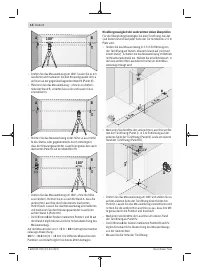
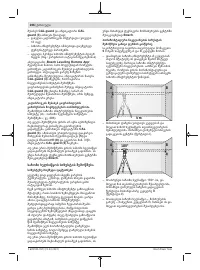
Operation
Starting Operation
u
Protect the measuring tool from moisture and direct
sunlight.
u
Do not expose the measuring tool to any extreme tem-
peratures or fluctuations in temperature.
For example,
do not leave it in a car for extended periods of time. If it
has been subjected to significant fluctuations in temper-
ature, first allow the measuring tool to adjust to the ambi-
ent temperature and then always carry out an accuracy
check before continuing work (see "Accuracy Check of
the Measuring Tool", page 23).
The precision of the measuring tool may be compromised
if exposed to extreme temperatures or fluctuations in
temperature.
u
Avoid substantial knocks to the measuring tool and
avoid dropping it.
Always carry out an accuracy check
before continuing work if the measuring tool has been
subjected to severe external influences (see "Accuracy
Check of the Measuring Tool", page 23).
u
Switch the measuring tool off when transporting it.
The pendulum unit is locked when the tool is switched off,
as it can otherwise be damaged by big movements.
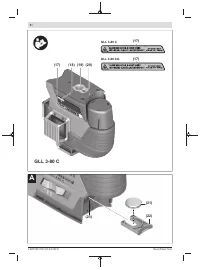
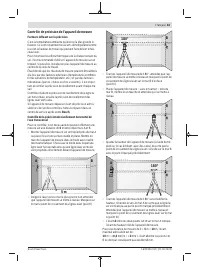
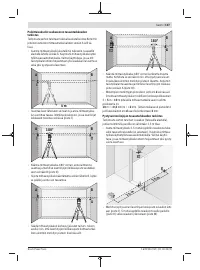
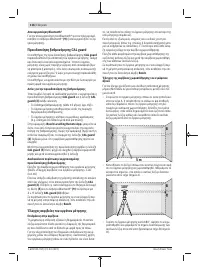
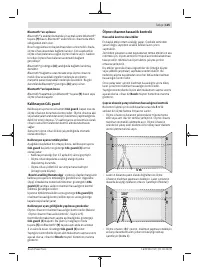
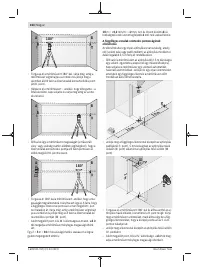
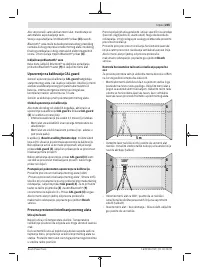
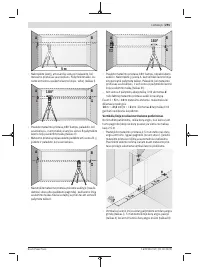
Switching On/Off
To
switch on
the measuring tool, slide the on/off
switch
(16)
to the "
On
" position (for working with the pen-
dulum lock) or to the "
On
" position (for working with
automatic levelling). As soon as it is switched on, the meas-
uring tool emits laser lines from the outlet apertures
(1)
.
u
Do not direct the laser beam at persons or animals and
do not stare into the laser beam yourself (even from a
distance).
To
switch off
the measuring tool, slide the on/off switch
(16)
to the
Off
position. The pendulum unit is locked when
the tool is switched off.
u
Never leave the measuring tool unattended when
switched on, and ensure the measuring tool is
switched off after use.
Others may be blinded by the
laser beam.
If the maximum permitted operating temperature of
40
°C is
exceeded, the tool shuts down to protect the laser diode.
Once it has cooled down, the measuring tool is operational
again and can be switched back on.
If the temperature of the measuring tool is approaching the
maximum permissible operating temperature, the laser lines
will gradually become dimmer.
The measuring tool is protected against electrostatic dis-
charge (ESD). If the measuring tool becomes electrostatic-
ally charged (e.g. when it is touched in an environment with
low humidity), it switches itself off automatically. In such
cases, switch the on/off switch
(16)
off and on again.
Deactivating the Automatic Shut-Off Function
If no button on the measuring tool is pressed for approx.
120
min, the measuring tool will automatically switch itself
off to preserve battery life.
To switch the measuring tool back on after it has been auto-
matically switched off, you can either slide the on/off switch
(16)
to the "
Off
" position first and then switch the measur-
ing tool back on, or press either the laser mode button
(7)
or
the receiver mode button
(5)
once.
To deactivate the automatic shut-off function, hold down the
laser mode button
(7)
for at least 3 s (with the measuring
tool switched on). If the automatic shut-off function is deac-
tivated, the laser beams will flash briefly as confirmation.
To activate the automatic shut-off function, switch the meas-
uring tool off and on again.
Deactivating the Signal Tone Function
The signal tone function is always activated once the meas-
uring tool is switched on.
To deactivate or activate the signal tone function, simultan-
eously press the laser mode button
(7)
and the receiver
mode button
(5)
and hold them down for at least 3 s.
Three short signal tones will sound as confirmation both
when the signal tone function is activated and deactivated.
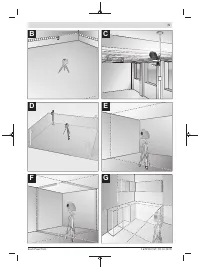
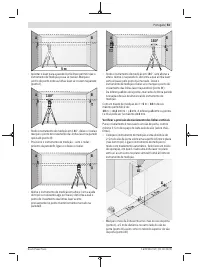
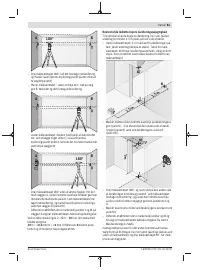
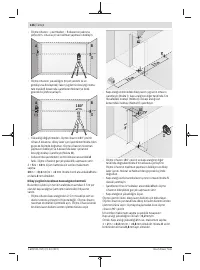
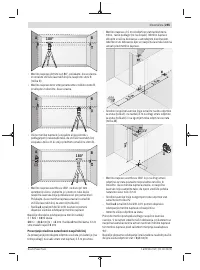
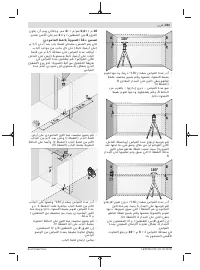
Operating Modes
The measuring tool has several operating modes which you
can switch between at any time. These are for:
– Generating a horizontal laser plane,
– Generating a vertical laser plane,
– Generating two vertical laser planes,
– Generating a horizontal laser plane and two vertical laser
planes.
After you switch it on, the measuring tool generates a hori-
zontal laser plane. To change the operating mode, press the
laser mode button
(7)
.
Bosch Power Tools
1 609 92A 7GY | (21.04.2022)
Содержание
- 167 Указания по технике безопасности
- 168 Описание продукта и услуг; Применение по назначению
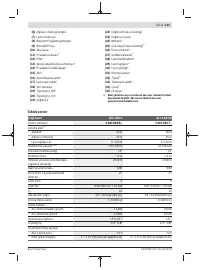
- 169 Технические данные
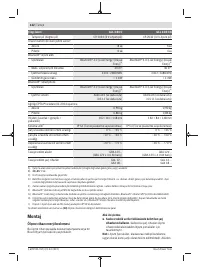
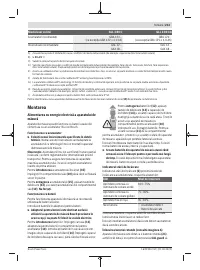
- 171 Сборка; Питание измерительного инструмента
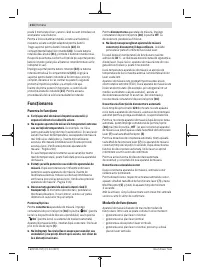
- 172 Работа с инструментом; Включение инструмента
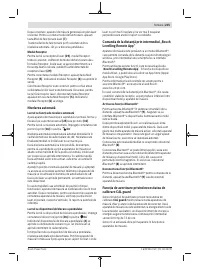
- 176 Указания по применению; Техобслуживание и сервис; Техобслуживание и очистка
- 177 Транспортировка; Українська; Вказівки з техніки безпеки
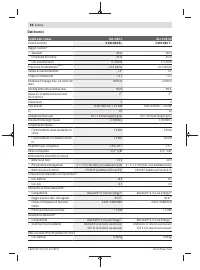
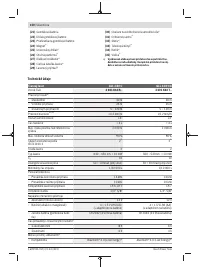
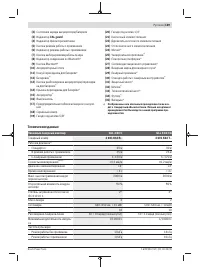
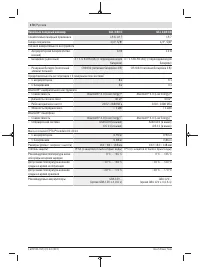
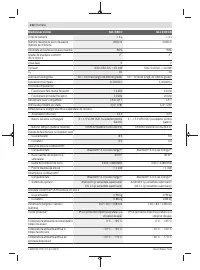
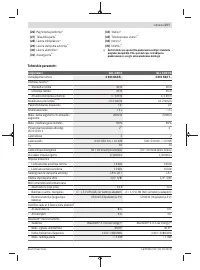
Характеристики

Остались вопросы?Не нашли свой ответ в руководстве или возникли другие проблемы? Задайте свой вопрос в форме ниже с подробным описанием вашей ситуации, чтобы другие люди и специалисты смогли дать на него ответ. Если вы знаете как решить проблему другого человека, пожалуйста, подскажите ему :)


