Видеокамеры JVC GZ-HM970 - инструкция пользователя по применению, эксплуатации и установке на русском языке. Мы надеемся, она поможет вам решить возникшие у вас вопросы при эксплуатации техники.
Если остались вопросы, задайте их в комментариях после инструкции.
"Загружаем инструкцию", означает, что нужно подождать пока файл загрузится и можно будет его читать онлайн. Некоторые инструкции очень большие и время их появления зависит от вашей скорости интернета.
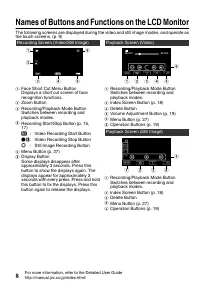

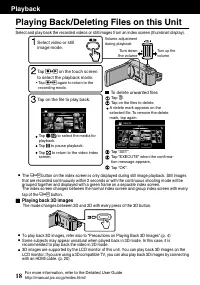


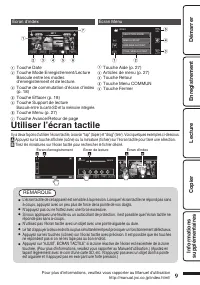
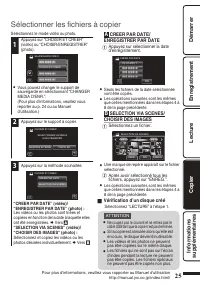

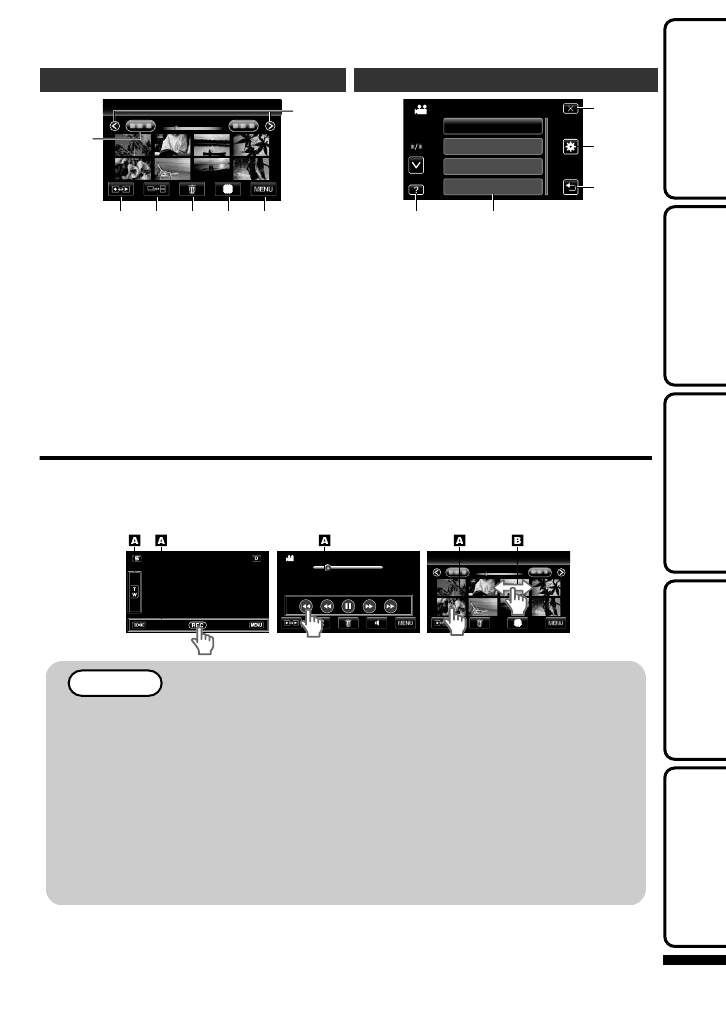
Index Screen
2011
2011
1
2
4
3
5
6
7
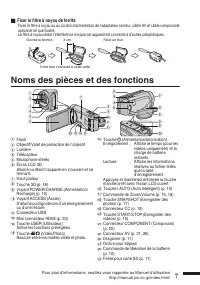
A
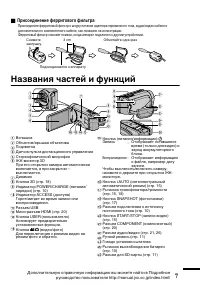
Date Button
B
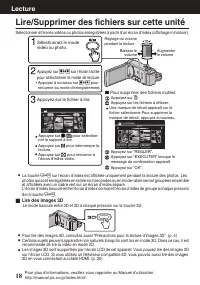
Recording/Playback Mode Button
Switches between recording and
playback modes.
C
Index Screen Switching Button (p. 18)
D
E
Playback Media Button
Switches between SD card and built-in memory.
F
G
Page Forward/Back Button
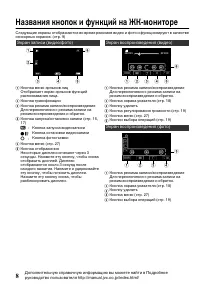
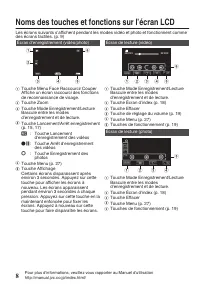
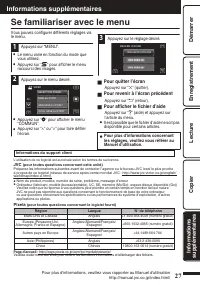
Menu Screen
5
4
3
1
2
FOCUS ASSIST COLOR
FOCUS ASSIST
FOCUS
SCENE SELECT
VIDEO
A
B
C
Return Button
D
COMMON Menu Button
E
Close Button
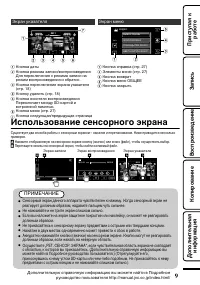
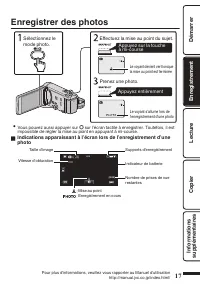
Using the Touch Screen
There are two ways to operate the touch screen, namely "tap" and "drag". The following are some examples.
A
Tap the displayed button (icon) or thumbnail (file) on the touch screen to make selection.
B
Drag the thumbnails on the touch screen to search for the desired file.
.
00:01:23
00:12:34
2011
2011
Index Screen
Playback Screen
Recording Screen
NOTE
0
The touch screen of this unit is pressure-sensitive. When the touch screen does not respond
smoothly, apply slightly more force to your fingertip.
0
Do not press or rub with excessive force.
0
If you apply a protect sheet or a sticker, the touch screen may not respond smoothly.
0
Do not operate the touch screen using an object with a sharp or hard tip.
0
Pressing two or more places at a time may cause a malfunction.
0
Tap the buttons (icons) on the touch screen accurately. The buttons may not respond if they are
not tapped on the right area.
0
Perform “TOUCH SCREEN ADJUST” if the reactive area of the screen is misaligned with the
touched area. (For details, refer to the Detailed User Guide.) (Adjust by lightly tapping with a corner
of an SD card, etc. Do not press with an object with a sharp tip or do not press hard.)
For more information, refer to the Detailed User Guide
http://manual.jvc.co.jp/index.html/
9
Getting Started
Recording
Playback
Copying
Further
Information
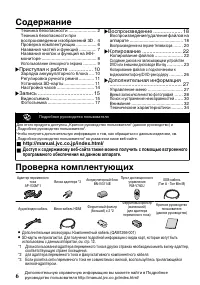
Содержание
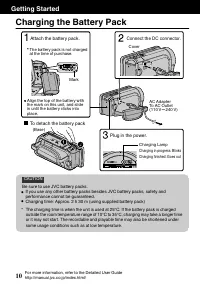
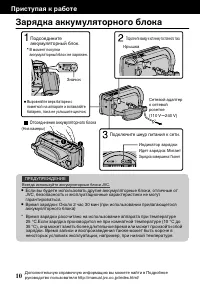
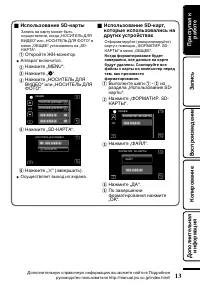
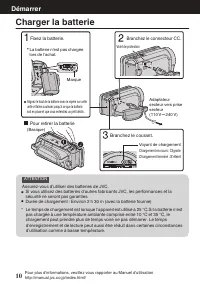
- 46 ȜɉəɨɍɓɉɉɓɓɜɕɜɔɨɛɗəɖɗɌɗɊɔɗɓɉ; Отсоединение аккумуляторного блока; Подключите шнур питания к сети.; Подключите камеру к источнику постоянного тока.; ȤəɑɚɛɜɘɉɨɓəɉɊɗɛɎ
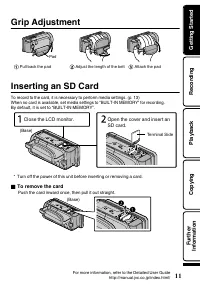
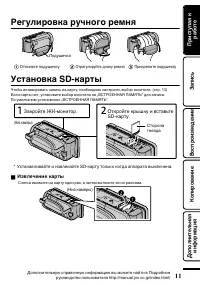
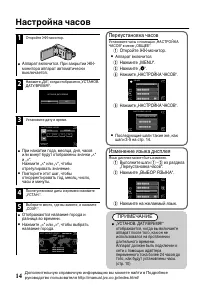
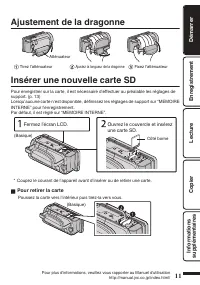
- 47 ȥɎɌɜɔɑəɗɋɓɉəɜɠɖɗɌɗəɎɕɖɨ; ȨɚɛɉɖɗɋɓɉƖɓɉəɛɤ; ȝɐɋɔɎɠɎɖɑɎɓɉəɛɤ; Ȥəɑɚɛɜɘɉɨɓ
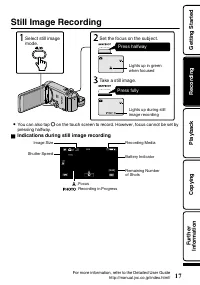
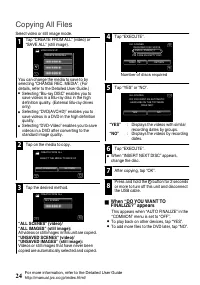
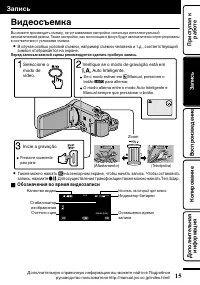
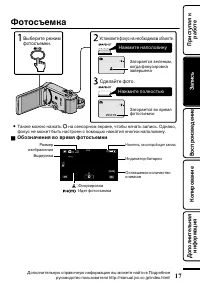
- 53 ȩɗɛɗɚɣɎɕɓɉ; Нажмите полностью; ȣɊɗɐɖɉɠɎɖɑɨɋɗɋəɎɕɨɝɗɛɗɚɣɎɕɓɑ
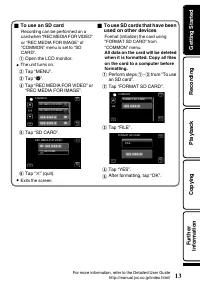
- 54 ȗɗɚɘəɗɑɐɋɎɍɎɖɑɎƭɜɍɉɔɎɖɑɎɝɉɒɔɗɋɖɉɉɘɘɉəɉɛɎ; ȗɗɚɘəɗɑɐɋɎɍɎɖɑɎ
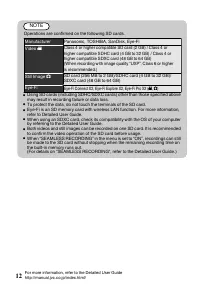
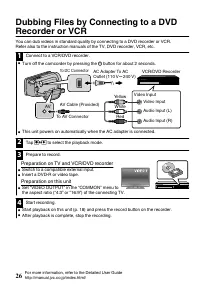
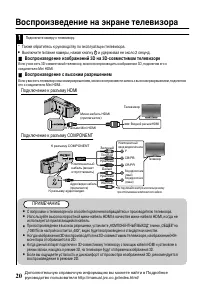
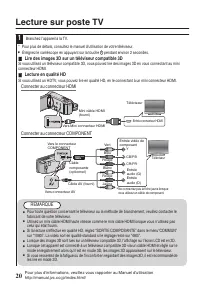
- 60 ȟɗɘɑəɗɋɉɖɑɎɋɚɎɞɝɉɒɔɗɋ; ȤəɑɘɗɨɋɔɎɖɑɑƤȗȰȪȣȧȝȧȚ
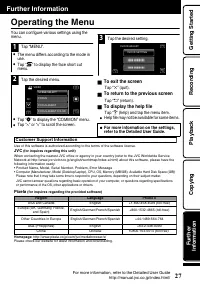
- 63 ȨɘəɉɋɔɎɖɑɎɕɎɖɧ; ȗɤɞɗɍɑɐɦɓəɉɖɉ; șɗɘɗɔɖɑɛɎɔɥɖɜɧɚɘəɉɋɗɠɖɜɧ; JVC; șɗɘɗɔɖɑɛɎɔɥɖɉɨɑɖɝɗəɕɉɟɑɨ
- 68 ȗɖɑɕɉɖɑɎ


