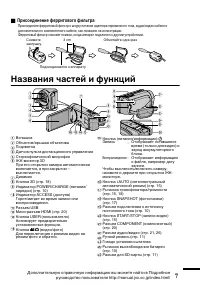
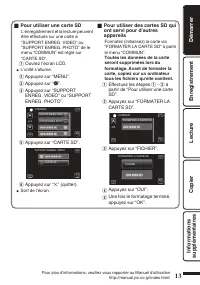
Видеокамеры JVC GZ-HM970 - инструкция пользователя по применению, эксплуатации и установке на русском языке. Мы надеемся, она поможет вам решить возникшие у вас вопросы при эксплуатации техники.
Если остались вопросы, задайте их в комментариях после инструкции.
"Загружаем инструкцию", означает, что нужно подождать пока файл загрузится и можно будет его читать онлайн. Некоторые инструкции очень большие и время их появления зависит от вашей скорости интернета.

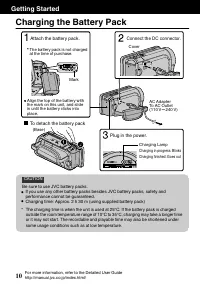
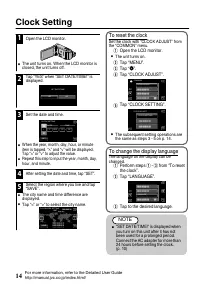


NOTE
0
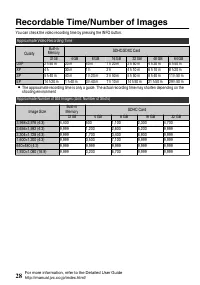
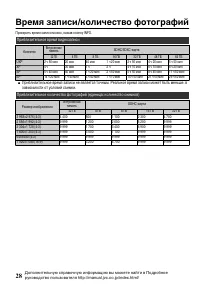
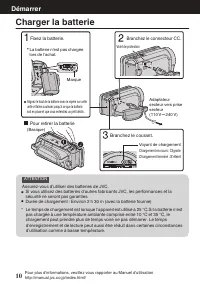
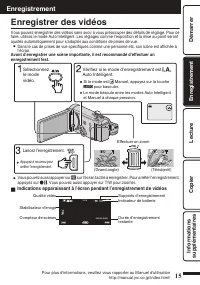
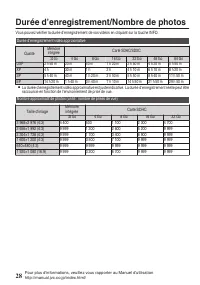
The estimated recording time of the supplied battery pack is approximately 40 minutes.
0
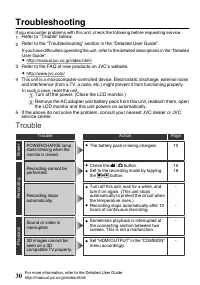
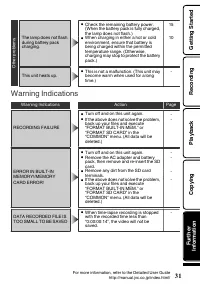
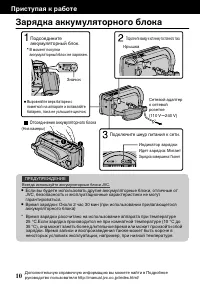
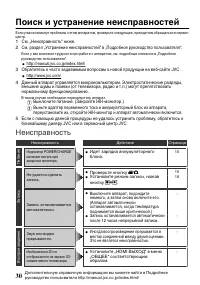
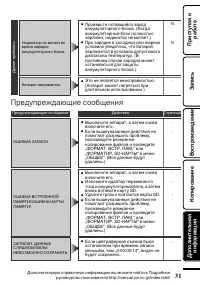
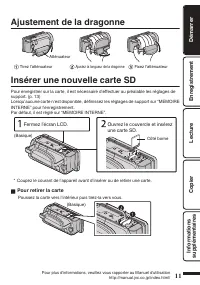
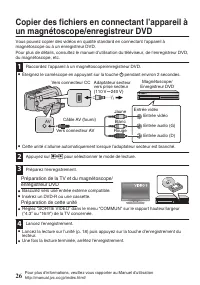
Do not remove the battery pack, AC adapter, or SD card when the access lamp is lighted.
The recorded data may become unreadable.
0
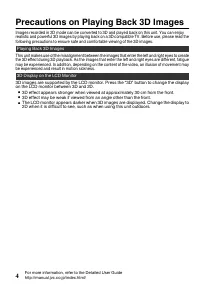
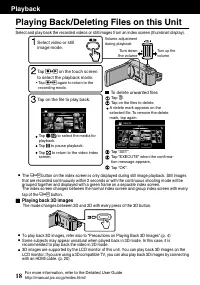
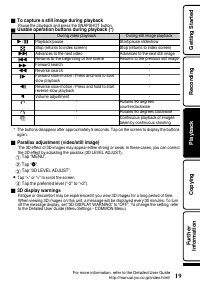
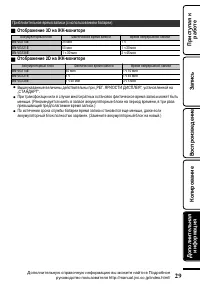
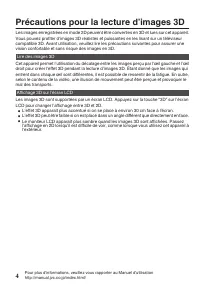
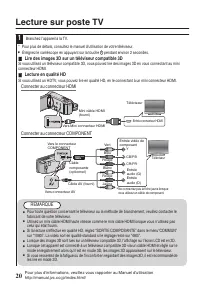
3D images are supported by the LCD monitor of this unit. To switch to 3D mode, refer to
“Precautions on Playing Back 3D Images”. (p. 18)
0
When recording in 3D mode, the image will be recorded in 2D even if the display on the
LCD monitor is set to 3D.
o
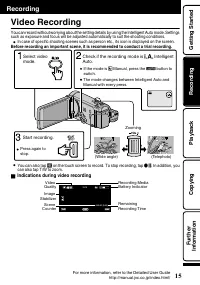
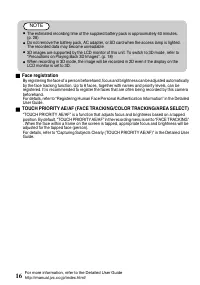
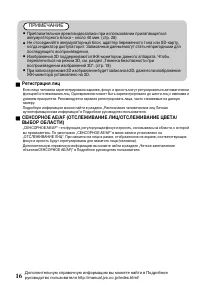
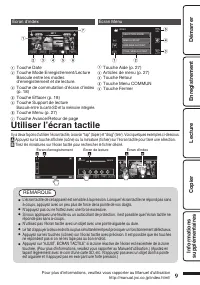
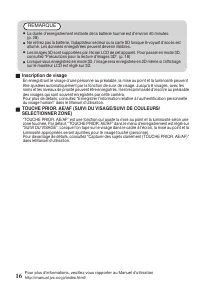
Face registration
By registering the face of a person beforehand, focus and brightness can be adjusted automatically
by the face tracking function. Up to 6 faces, together with names and priority levels, can be
registered. It is recommended to register the faces that are often being recorded by this camera
beforehand.
For details, refer to “Registering Human Face Personal Authentication Information” in the Detailed
User Guide.
o
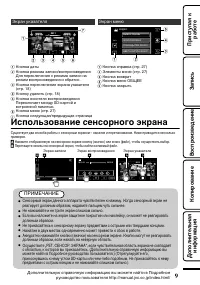
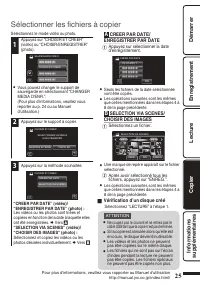
TOUCH PRIORITY AE/AF (FACE TRACKING/COLOR TRACKING/AREA SELECT)
“TOUCH PRIORITY AE/AF” is a function that adjusts focus and brightness based on a tapped
position. By default, “TOUCH PRIORITY AE/AF” in the recording menu is set to “FACE TRACKING”
. When the face within a frame on the screen is tapped, appropriate focus and brightness will be
adjusted for the tapped face (person).
For details, refer to “Capturing Subjects Clearly (TOUCH PRIORITY AE/AF)” in the Detailed User
Guide.
16
For more information, refer to the Detailed User Guide
http://manual.jvc.co.jp/index.html/
Содержание
- 46 ȜɉəɨɍɓɉɉɓɓɜɕɜɔɨɛɗəɖɗɌɗɊɔɗɓɉ; Отсоединение аккумуляторного блока; Подключите шнур питания к сети.; Подключите камеру к источнику постоянного тока.; ȤəɑɚɛɜɘɉɨɓəɉɊɗɛɎ
- 47 ȥɎɌɜɔɑəɗɋɓɉəɜɠɖɗɌɗəɎɕɖɨ; ȨɚɛɉɖɗɋɓɉƖɓɉəɛɤ; ȝɐɋɔɎɠɎɖɑɎɓɉəɛɤ; Ȥəɑɚɛɜɘɉɨɓ
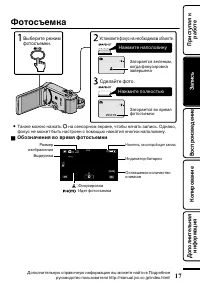
- 53 ȩɗɛɗɚɣɎɕɓɉ; Нажмите полностью; ȣɊɗɐɖɉɠɎɖɑɨɋɗɋəɎɕɨɝɗɛɗɚɣɎɕɓɑ
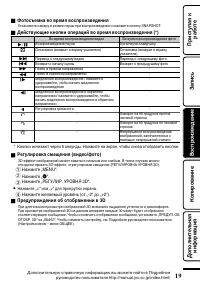
- 54 ȗɗɚɘəɗɑɐɋɎɍɎɖɑɎƭɜɍɉɔɎɖɑɎɝɉɒɔɗɋɖɉɉɘɘɉəɉɛɎ; ȗɗɚɘəɗɑɐɋɎɍɎɖɑɎ
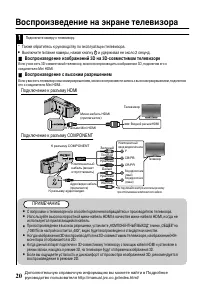
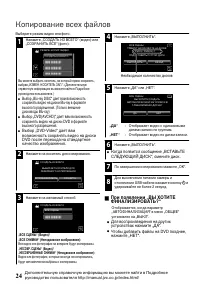
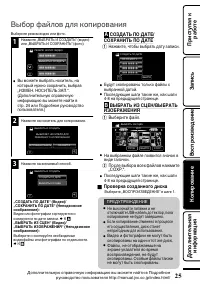
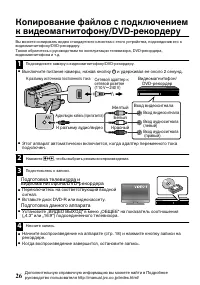
- 60 ȟɗɘɑəɗɋɉɖɑɎɋɚɎɞɝɉɒɔɗɋ; ȤəɑɘɗɨɋɔɎɖɑɑƤȗȰȪȣȧȝȧȚ
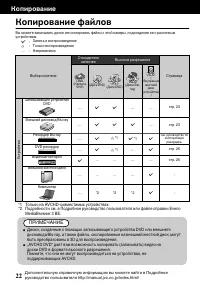
- 63 ȨɘəɉɋɔɎɖɑɎɕɎɖɧ; ȗɤɞɗɍɑɐɦɓəɉɖɉ; șɗɘɗɔɖɑɛɎɔɥɖɜɧɚɘəɉɋɗɠɖɜɧ; JVC; șɗɘɗɔɖɑɛɎɔɥɖɉɨɑɖɝɗəɕɉɟɑɨ
- 68 ȗɖɑɕɉɖɑɎ


