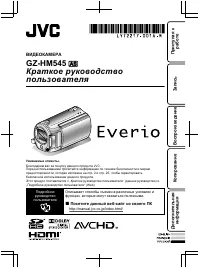
Видеокамеры JVC GZ-HM545 - инструкция пользователя по применению, эксплуатации и установке на русском языке. Мы надеемся, она поможет вам решить возникшие у вас вопросы при эксплуатации техники.
Если остались вопросы, задайте их в комментариях после инструкции.
"Загружаем инструкцию", означает, что нужно подождать пока файл загрузится и можно будет его читать онлайн. Некоторые инструкции очень большие и время их появления зависит от вашей скорости интернета.


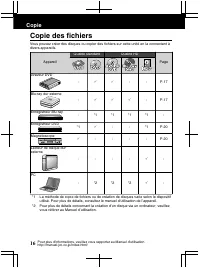

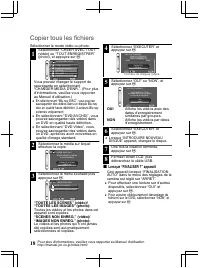


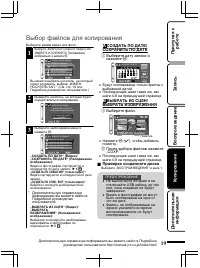
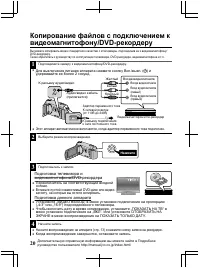

Selecting Files to Copy
Select video or still image mode.
1
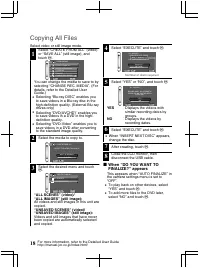
Select “SELECT AND CREATE”
(video) or “SELECT AND SAVE”
(still image), and touch
.
.
?
VIDEO BACKUP
CREATE FROM ALL
SELECT AND CREATE
PLAYBACK
FINALIZE
CHANGE REC
.
MEDIA
SET
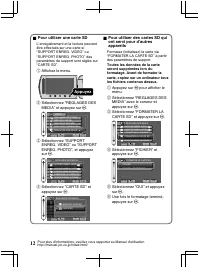
You can change the media to save to
by selecting “CHANGE REC. MEDIA”.
(Refer to P.18 or the Detailed User
Guide.)
2
Select the media to copy to.
.
SELECT THE MEDIA TO BACK UP
BUILT-IN MEMORY
SD CARD
SET
SELECT AND CREATE
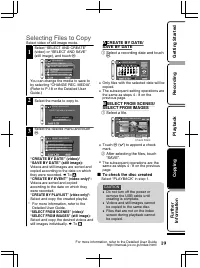
3
Select the desired menu and touch
.
.
?
SELECT AND CREATE
CREATE BY DATE
CREATE BY EVENT
CREATE BY PLAYLIST
SELECT FROM SCENES
SET
“CREATE BY DATE” (video)/
“SAVE BY DATE” (still image)
:
Videos and still images are sorted and
copied according to the date on which
they were recorded.
¨
To
A
“CREATE BY EVENT” (video only)*
:
Videos are sorted and copied
according to the date on which they
were recorded.
“CREATE BY PLAYLIST” (video only)*
:
Select and copy the created playlist.
* For more information, refer to the
Detailed User Guide.
“SELECT FROM SCENES” (video)/
“SELECT FROM IMAGES” (still image)
:
Select and copy the desired videos and
still images individually.
¨
To
B
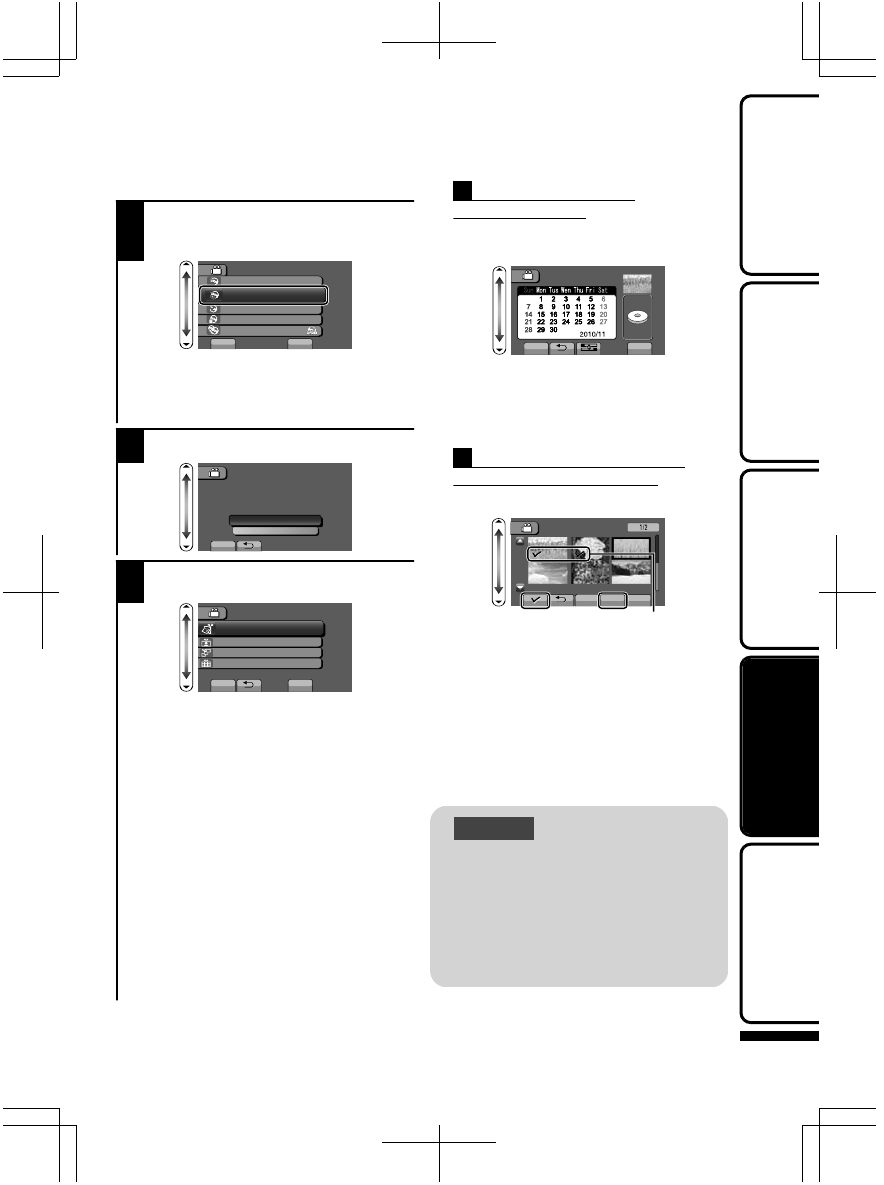
A
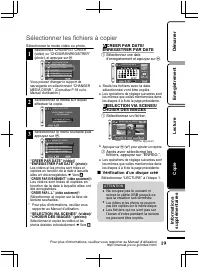
CREATE BY DATE/
SAVE BY DATE
①
Select a recording date and touch
.
.
CREATE BY DATE
TOTAL
00h10
m
DVD1
DVD(DL)1
SET
QUIT
●
Only files with the selected date will be
copied.
●
The subsequent setting operations are
the same as steps 4 - 8 on the
previous page.
B
SELECT FROM SCENES/
SELECT FROM IMAGES
①
Select a file.
.
Check Mark
SELECT FROM SCENES
CHECK SAVE
QUIT
●
Touch
(
(
) to append a check
mark.
②
After selecting the files, touch
“SAVE”.
●
The subsequent operations are the
same as steps 4 - 8 on the previous
page.
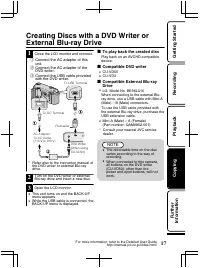
■
To check the disc created
Select “PLAYBACK” in step 1.
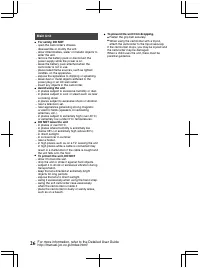
CAUTION
●
Do not turn off the power or
remove the USB cable until
creating is complete.
●
Videos and still images cannot
be copied to the same disc.
●
Files that are not on the index
screen during playback cannot
be copied.
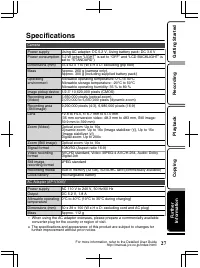
For more information, refer to the Detailed User Guide
http://manual.jvc.co.jp/index.html/
19
Getting Started
Recording
Playback
Copying
Further
Information
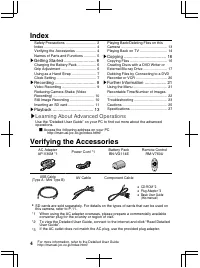
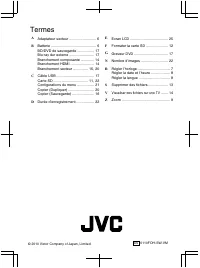
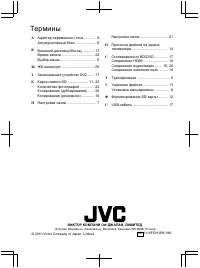
Содержание
- 60 Указатель; DVD; Получение; Проверка; „Read Detailed User Guide“.
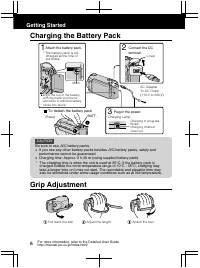
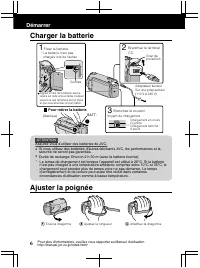
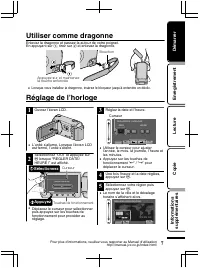
- 62 Отсоединение аккумуляторного блока; Приступая
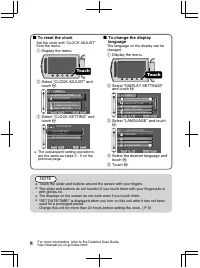
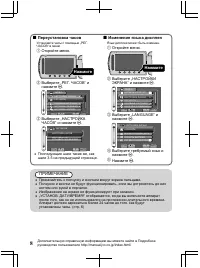
- 63 Выберите
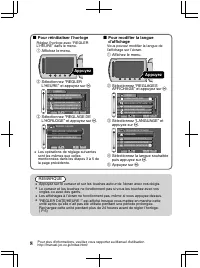
- 64 Изменение; „LANGUAGE“; ПРИМЕЧАНИЕ
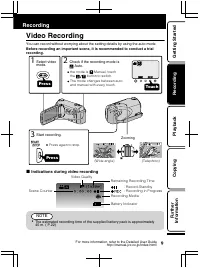
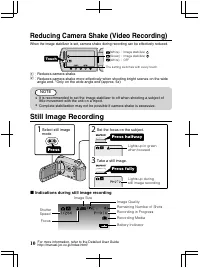
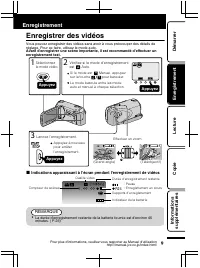
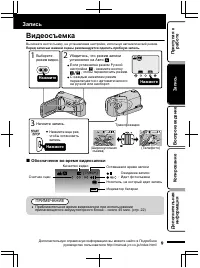
- 65 Видеосъемка; Нажмите; Обозначения; Запись
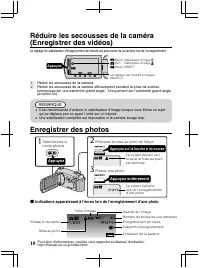
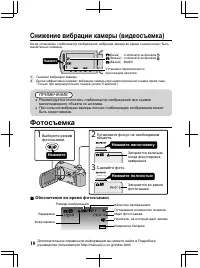
- 66 Фотосъемка; Установите фокус на необходимом
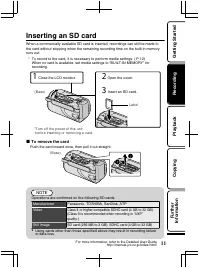
- 67 Извлечение
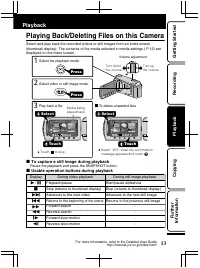
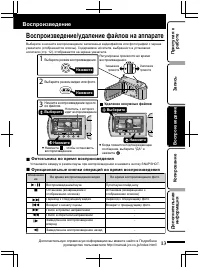
- 69 Удаление ненужных файлов; Воспроизведение
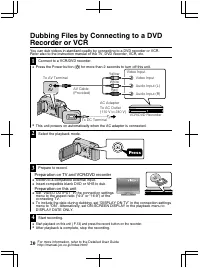
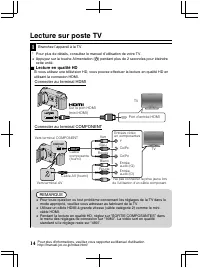
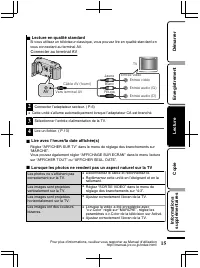
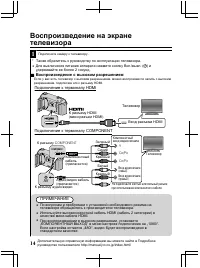
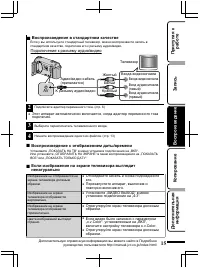
- 70 Подключение
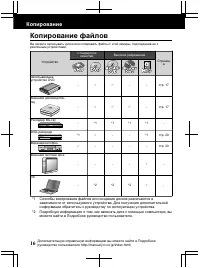
- 72 Копирование
- 74 При
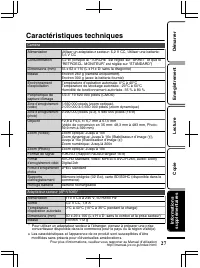
- 77 JVC; Дополнительная
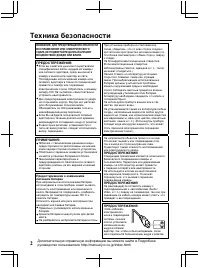
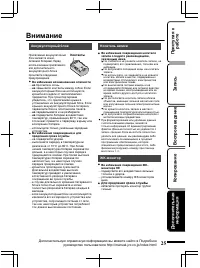
- 81 Внимание
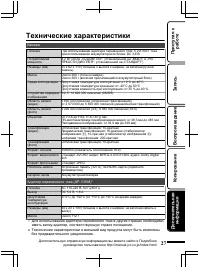
- 83 Камера; Адаптер
- 84 Термины; ВИКТОР КОМПАНИ ОФ ДЖАПАН, ЛИМИТЕД


