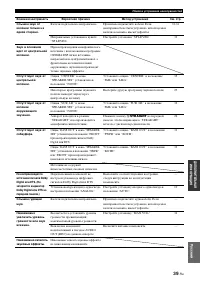
Усилители Yamaha RX-V365 - инструкция пользователя по применению, эксплуатации и установке на русском языке. Мы надеемся, она поможет вам решить возникшие у вас вопросы при эксплуатации техники.
Если остались вопросы, задайте их в комментариях после инструкции.
"Загружаем инструкцию", означает, что нужно подождать пока файл загрузится и можно будет его читать онлайн. Некоторые инструкции очень большие и время их появления зависит от вашей скорости интернета.


27
En
English
INTR
ODUCTION
AD
DITIONAL
INFORMA
T
ION
APPENDIX
PRE
P
ARA
T
ION
BA
S
IC
OPERA
T
ION
AD
V
ANCED
OPERA
T
ION
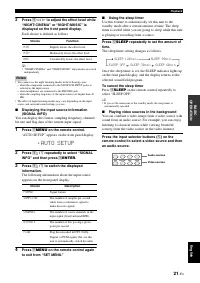
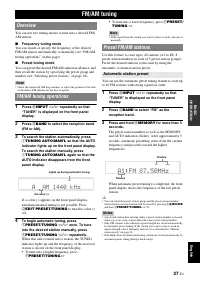
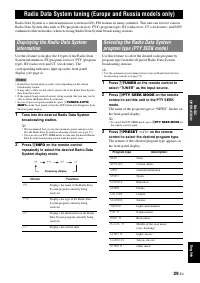
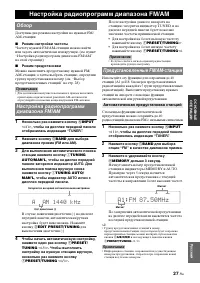
You can use two tuning modes to tune into a desired FM/
AM station:
■
Frequency tuning mode
You can search or specify the frequency of the desired
FM/AM station automatically or manually (see “FM/AM
tuning operations” on this page).
■
Preset tuning mode
You can preset the desired FM/AM station in advance, and
then recall the station by specifying the preset group and
number (see “Selecting preset stations” on page 28).
Note
•
Orient the connected AM loop antenna, or adjust the position of the end
of the indoor FM antenna for the best reception.
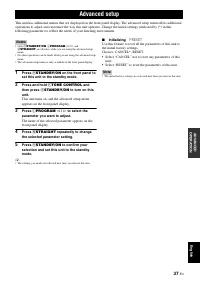
1
Press
N
INPUT
l
/
h
repeatedly so that
“TUNER” is displayed on the front panel
display.
2
Press
G
BAND
to select the reception band
(FM or AM).
3
To search the station automatically, press
I
TUNING AUTO/MAN’L
so that the AUTO
indicator lights up on the front panel display.
To search the station manually, press
I
TUNING AUTO/MAN’L
again so that the
AUTO indicator disappears from the front
panel display.
If a colon (:) appears on the front panel display,
automatic/manual tuning is not possible. Press
D
EDIT PRESET/TUNING
to turn the colon (:)
off.
4
To begin automatic tuning, press
F
PRESET/TUNING
l
/
h
once. To tune
into the desired station manually, press
F
PRESET/TUNING
l
/
h
repeatedly.
When this unit is tuned into a station, the TUNED
indicator lights up and the frequency of the received
station is shown on the front panel display.
•
To tune into a higher frequency, press
F
PRESET/TUNING
h
.
•
To tune into a lower frequency, press
F
PRESET/
TUNING
l
.
Note
•
If the signal from the station you want to select is weak, tune into it
manually.
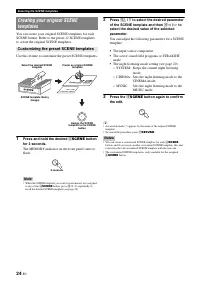
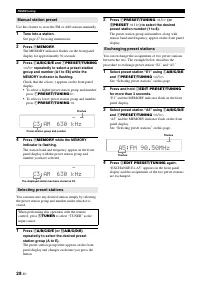
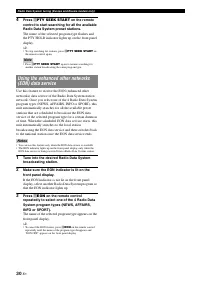
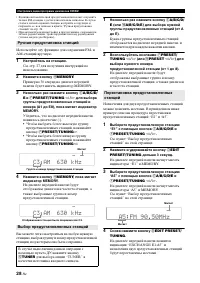
Use this feature to store up to 40 stations (A1 to E8: 8
preset station numbers in each of 5 preset station groups).
Preset the desired stations to this unit by using the
automatic or manual station preset.
You can use the automatic preset tuning feature to store up
to 40 FM stations with strong signals in order.
1
Press
N
INPUT
l
/
h
repeatedly so that
“TUNER” is displayed on the front panel
display.
2
Press
G
BAND
to select “FM” as the
reception band.
3
Press and hold
H
MEMORY
for more than 3
seconds.
The preset station number as well as the MEMORY
and AUTO indicators flashes. After approximately 5
seconds, automatic presetting status from the current
frequency and proceeds toward the higher
frequencies.
When automatic preset tuning is completed, the front
panel display shows the frequency of the last preset
station.
y
•
You can select the preset station group and the preset station number
where the first received station will be stored by pressing
E
A/B/C/D/E
and then
F
PRESET/TUNING
l
/
h
.
Notes
•
Any stored station data existing under a preset station number is cleared
when you store a new station under the same preset station number.
•
Only FM stations with sufficient signal strength are stored automatically
by automatic preset tuning. If the station you want to store is weak in
signal strength, tune it manually and store it as described in “Manual
station preset” on page 28.
•
Only Radio Data System broadcasting station are stored automatically by
automatic preset tuning (Europe model only).
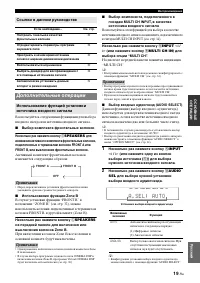
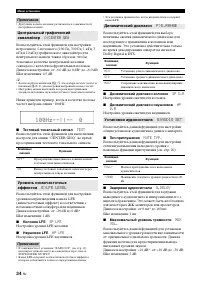
FM/AM tuning
Overview
FM/AM tuning operations
AUTO
A
AM 1440 kHz
Lights up during automatic tuning
No colon (:)
Preset FM/AM stations
Automatic station preset
AUTO
MEMORY
A1:FM 87.50MHz
Flashes
Flashes
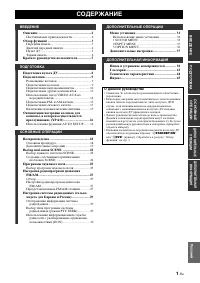
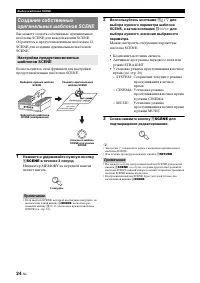
Содержание
- 53 НАЯ; Оптимизация настройки колонок для; СОДЕРЖАНИЕ; ВВЕДЕНИЕ
- 54 Описание
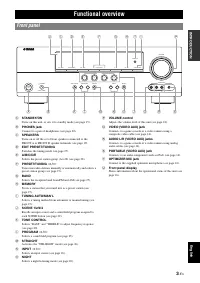
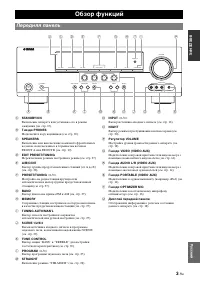
- 55 Обзор функций; Передняя панель
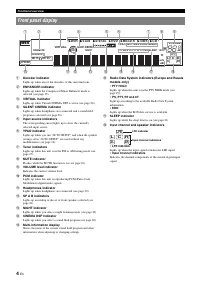
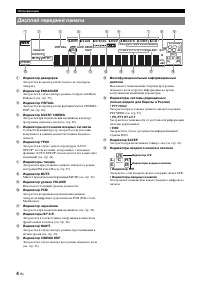
- 56 Дисплей передней панели
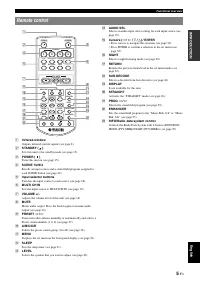
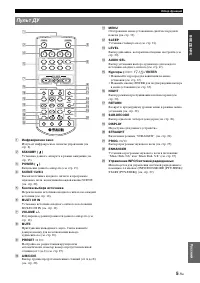
- 57 Пульт ДУ
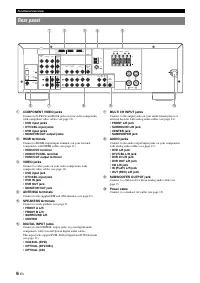
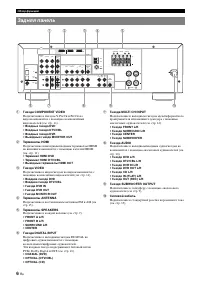
- 58 Задняя панель
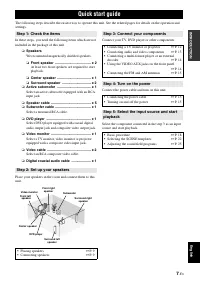
- 59 Краткое руководство пользователя; Шаг 1: Проверьте детали
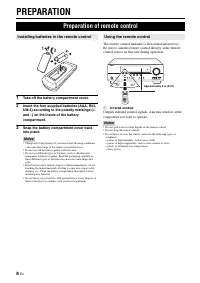
- 60 ПОДГОТОВКА; Примечания; Подготовка пульта ДУ; Установка батареек в пульт ДУ
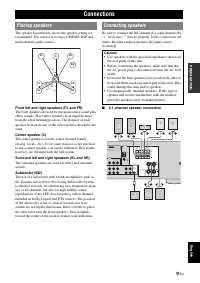
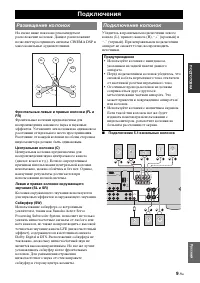
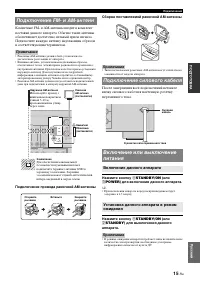
- 61 ПОДГ; Подключения; Размещение колонок; Подключение колонок; Предупреждение
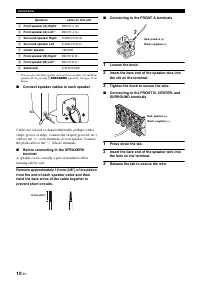
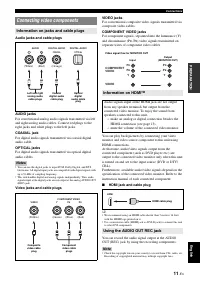
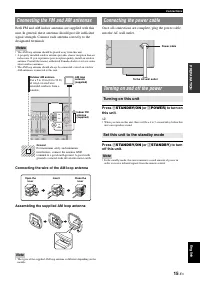
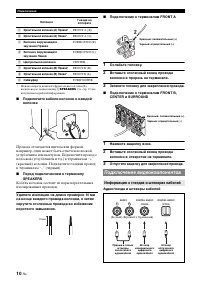
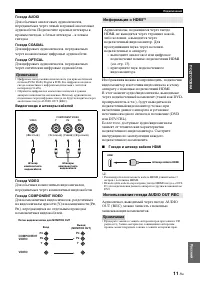
- 62 Подключение к терминалам FRONT A; Подключение видеокомпонентов; Информация о гнездах и штекерах кабелей
- 63 Примечание; Информация о HDMITM
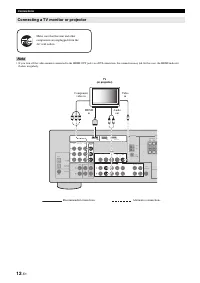
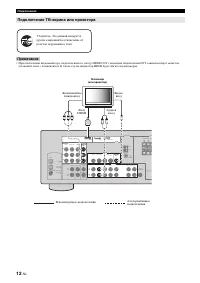
- 64 Подключение ТВ-экрана или проектора
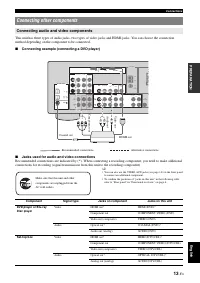
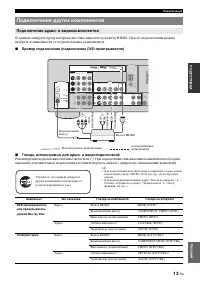
- 65 Подключение других компонентов; Подключение аудио- и видеокомпонентов
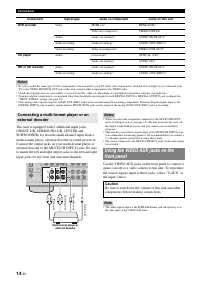
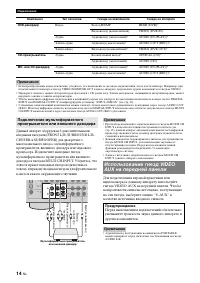
- 67 Подключение провода рамочной АМ-антенны; Нажмите кнопку; Подключение силового кабеля; Включение данного аппарата
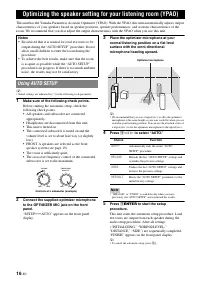
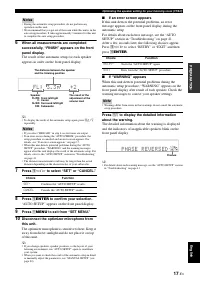
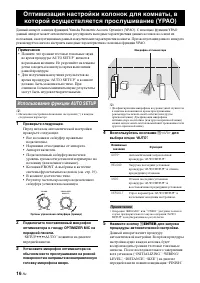
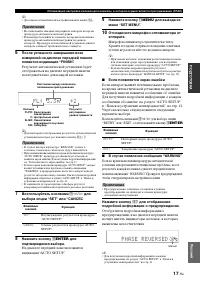
- 68 Наушники отсоединены от аппарата.; Оптимизация настройки колонок для комнаты, в; Использование функции AUTO SETUP
- 69 для выбора опции
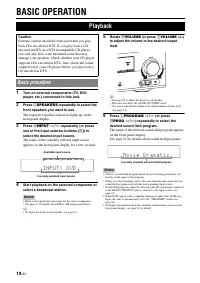
- 70 ОСНОВНЫЕ ОПЕРАЦИИ; Воспроизведение; Основная процедура
- 71 ОСНОВН; Ссылки в данном руководстве; Дополнительные операции
- 72 Использование аудиофункций
- 73 Варианты выбора определяются следующим образом.; Настройка таймера сна изменяется в следующем порядке.; на
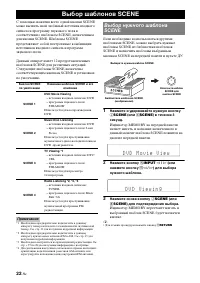
- 74 Нажмите и удерживайте нужную кнопку; Выбор шаблонов SCENE
- 75 Какой шаблон SCENE вам бы хотелось выбрать?
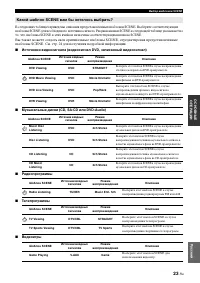
- 76 Компонент-источник сигнала
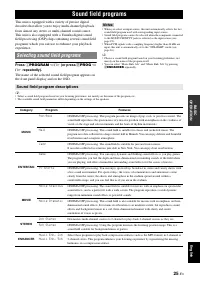
- 77 Программы звукового поля; Выбор программ звукового поля; Описание программ звукового поля
- 78 DECODE; “STRAIGHT” появится на дисплее передней панели.; ) чтобы индикация “STRAIGHT”
- 79 Настройка радиопрограмм диапазона FM/AM; Обзор; Автоматическая предустановка станций
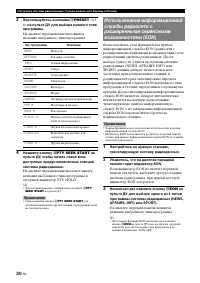
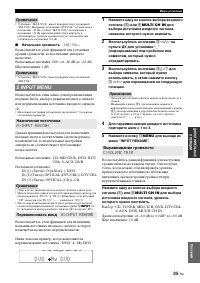
- 80 Ручная предустановка станций; для выбора опции “TUNER” в
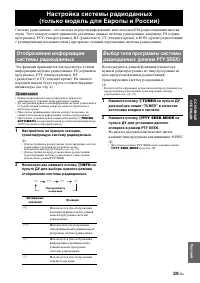
- 81 Настройка системы радиоданных
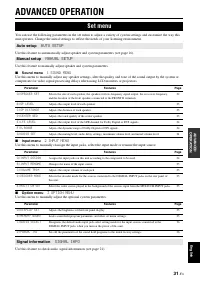
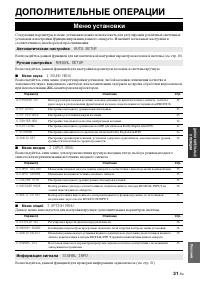
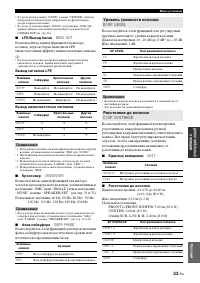
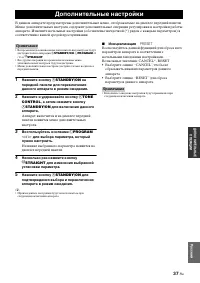
- 83 РАЦИ; ДОПОЛНИТЕЛЬНЫЕ ОПЕРАЦИИ; Меню звука; Меню входов; Меню опций; Меню установки; Автоматическая настройка; Ручная настройка; Информация сигнала
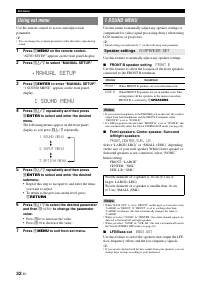
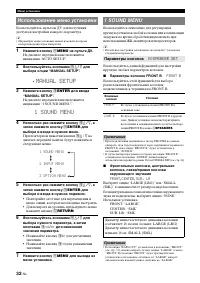
- 84 Использование меню установки; Параметры колонок
- 85 BASS OUT; Уровень громкости колонки
- 86 Динамический диапазон; Установки аудиосигнала
- 87 Назначение источника; Выравнивание громкости
- 88 Режим выбранного декодера; Яркость; DIMMER; Защита памяти; Режим декодера; Параметры дисплея; Выбор аудиосигнала
- 89 TONE; Дополнительные настройки
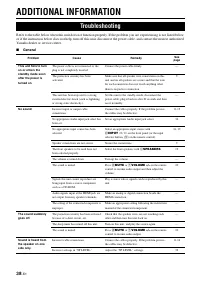
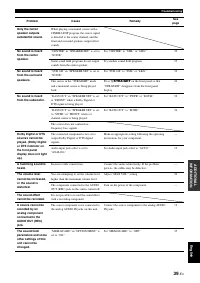
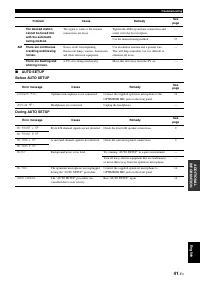
- 90 ДОПОЛНИТЕЛЬНАЯ ИНФОРМАЦИЯ; Неисправности общего характера; Поиск и устранение неисправностей
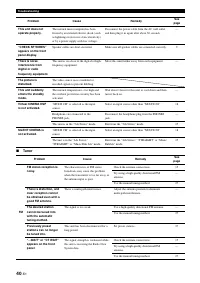
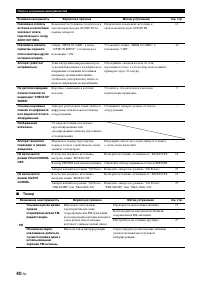
- 92 Тюнер
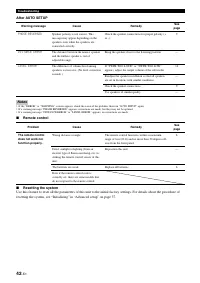
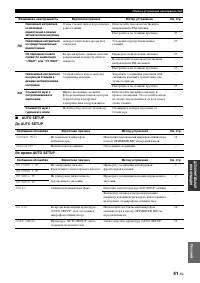
- 94 После AUTO SETUP
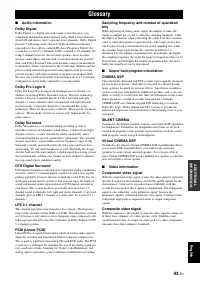
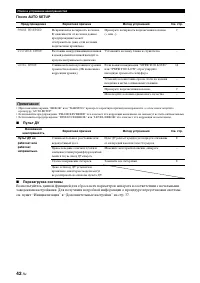
- 95 Глоссарий
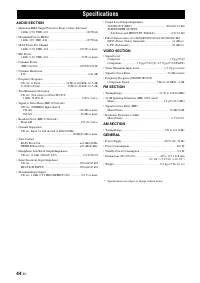
- 96 АУДИО; Технические характеристики


