Усилители Yamaha A-S700 - инструкция пользователя по применению, эксплуатации и установке на русском языке. Мы надеемся, она поможет вам решить возникшие у вас вопросы при эксплуатации техники.
Если остались вопросы, задайте их в комментариях после инструкции.
"Загружаем инструкцию", означает, что нужно подождать пока файл загрузится и можно будет его читать онлайн. Некоторые инструкции очень большие и время их появления зависит от вашей скорости интернета.


11
En
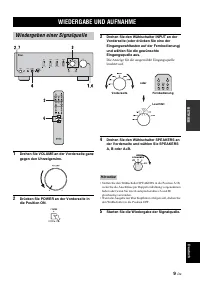
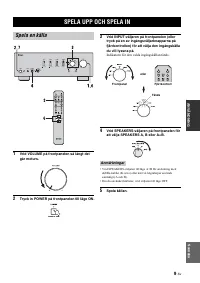
PLAYING AND RECORDING
OPERATION
Engli
sh
■
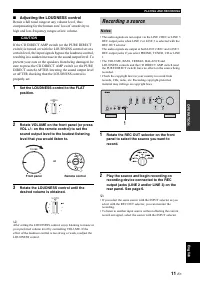
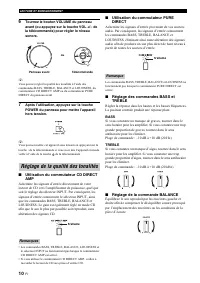
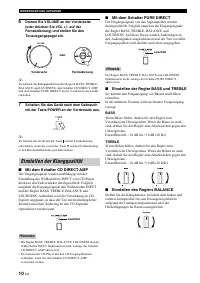
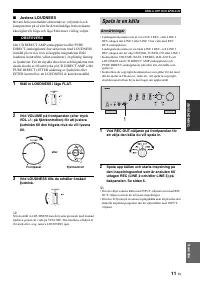
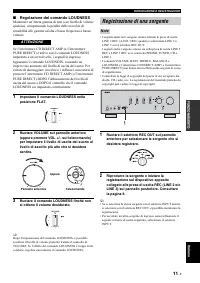
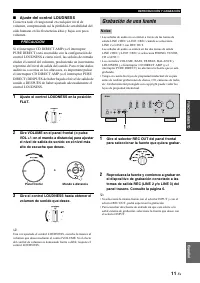
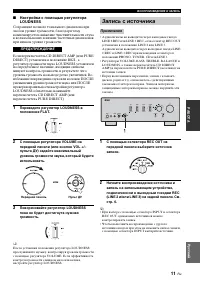
Adjusting the LOUDNESS control
Retain a full tonal range at any volume level, thus
compensating for the human ears’ loss of sensitivity to
high and low-frequency ranges at low volume.
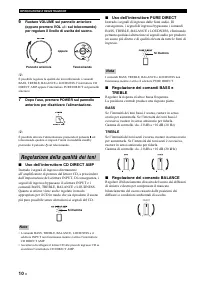
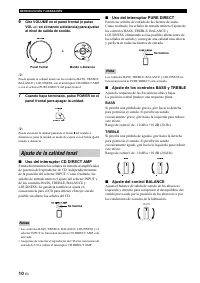
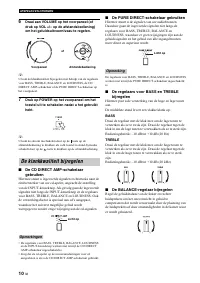
If the CD DIRECT AMP switch (or the PURE DIRECT
switch) is turned on with the LOUDNESS control set at a
certain level, the input signals bypass the loudness control,
resulting in a sudden increase in the sound output level. To
prevent your ears or the speakers from being damaged, be
sure to press the CD DIRECT AMP switch (or the PURE
DIRECT switch) AFTER lowering the sound output level
or AFTER checking that the LOUDNESS control is
properly set.
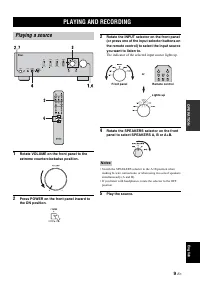
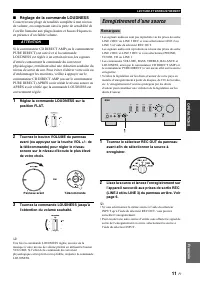
1
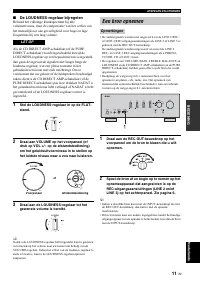
Set the LOUDNESS control to the FLAT
position.
2
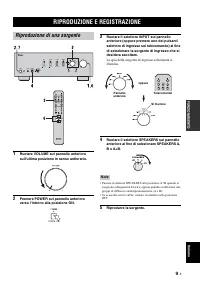
Rotate VOLUME on the front panel (or press
VOL +/– on the remote control) to set the
sound output level to the loudest listening
level that you would listen to.
3
Rotate the LOUDNESS control until the
desired volume is obtained.
y
After setting the LOUDNESS control, enjoy listening to music at
your preferred volume level by controlling VOLUME. If the
effect of the loudness control is too strong or weak, readjust the
LOUDNESS control.
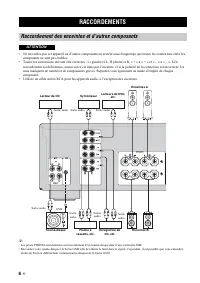
• The audio signals are not output via the LINE 2 REC or LINE 3
REC output jacks when LINE 2 or LINE 3 is selected with the
REC OUT selector.
The audio signals are output at both LINE 2 REC and LINE 3
REC output jacks if you select PHONO, TUNER, CD or LINE
1.
• The VOLUME, BASS, TREBLE, BALANCE and
LOUDNESS controls and the CD DIRECT AMP switch (and
the PURE DIRECT switch) have no effect on the source being
recorded.
• Check the copyright laws in your country to record from
records, CDs, radio, etc. Recording copyright-protected
material may infringe on copyright laws.
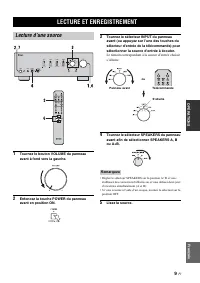
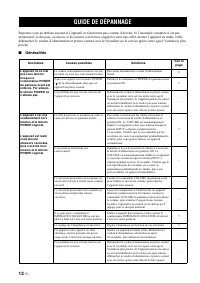
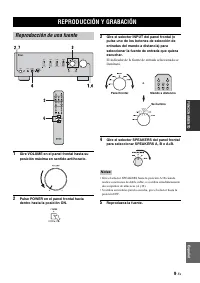
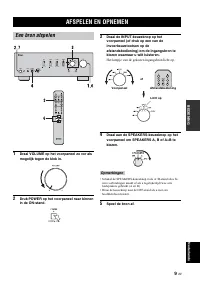
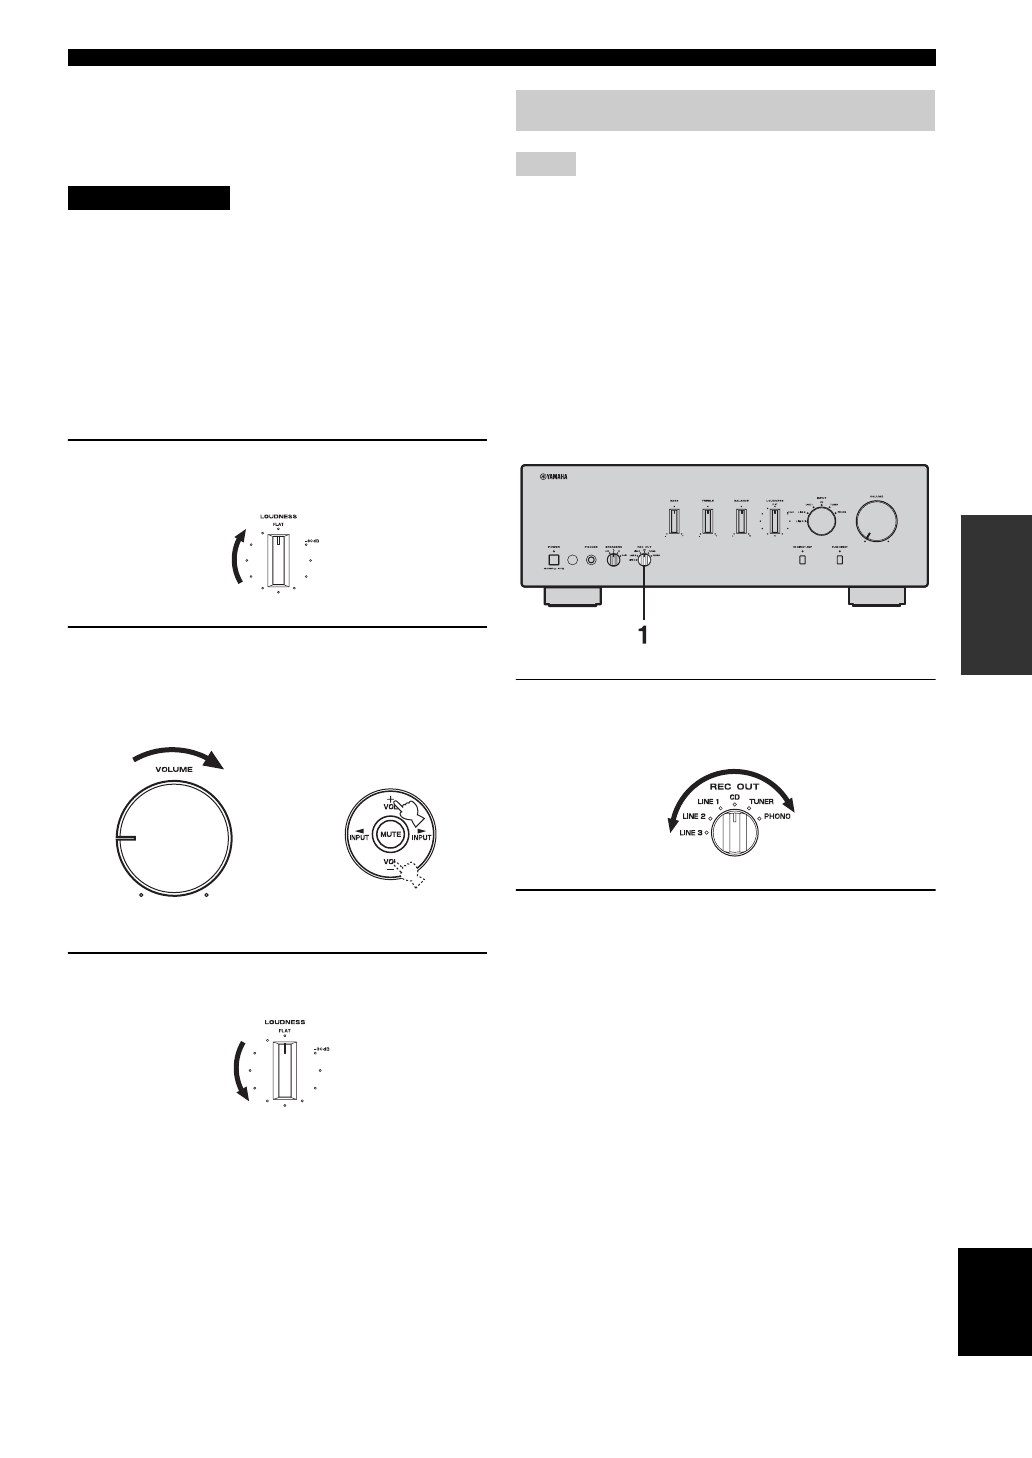
1
Rotate the REC OUT selector on the front
panel to select the source you want to
record.
2
Play the source and begin recording on
recording device connected to the REC
output jacks (LINE 2 and/or LINE 3) on the
rear panel. See page 6.
y
• If you select the same source with the INPUT selector as you
select with the REC OUT selector, you can monitor the
recording.
• To listen to another input source without affecting the current
record out signal, select the source with the INPUT selector.
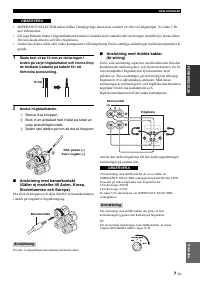
CAUTION
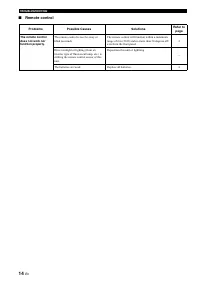
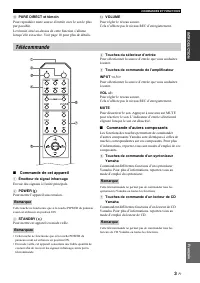
Remote control
Front panel
or
Recording a source
Notes
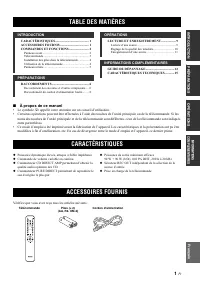
Содержание
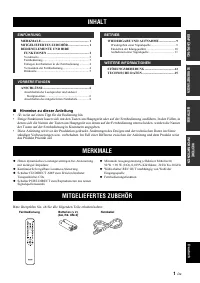
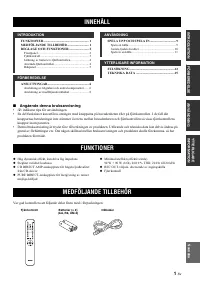
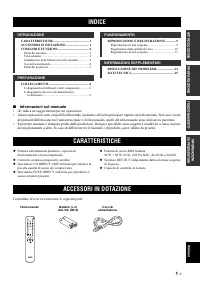
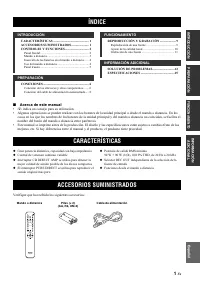
- 129 Об этом руководстве; Символ; Убедитесь в наличии перечисленных ниже компонентов:; СОДЕРЖАНИЕ; ВВЕДЕНИЕ; ФУНКЦИОНАЛЬНЫЕ ВОЗМОЖНОСТИ
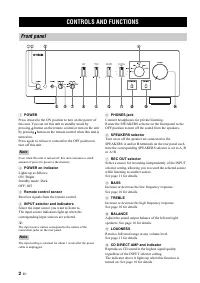
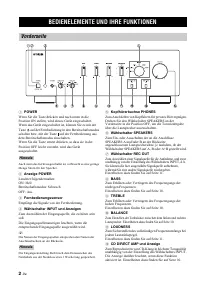
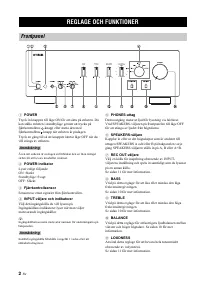
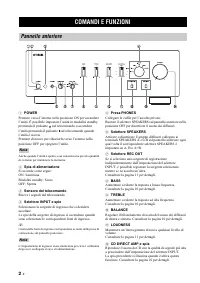
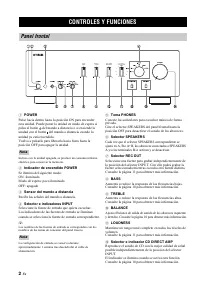
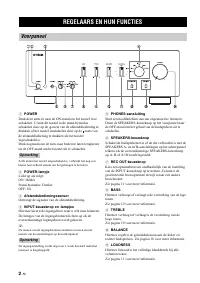
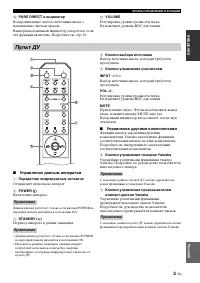
- 130 ОРГАНЫ УПРАВЛЕНИЯ И ФУНКЦИИ; Передняя панель; Примечание
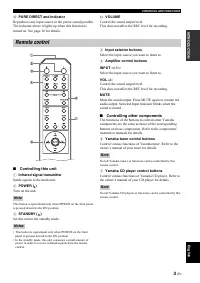
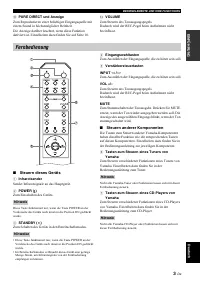
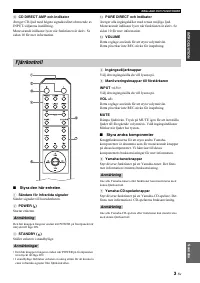
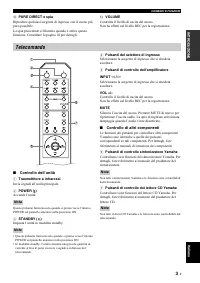
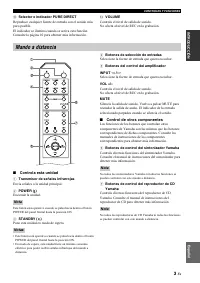
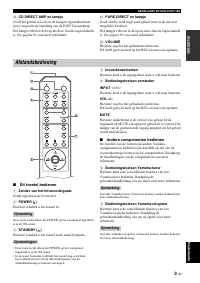
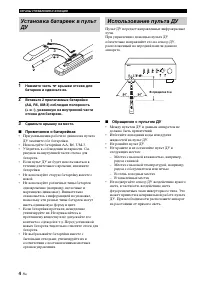
- 131 Управление данным аппаратом
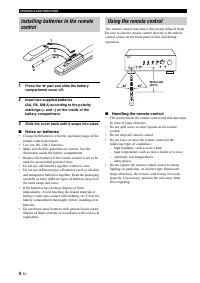
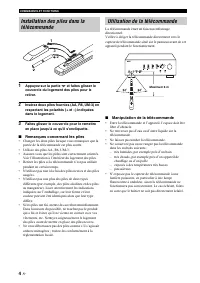
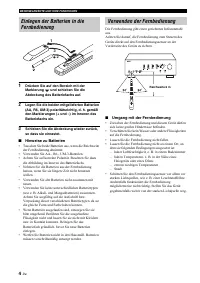
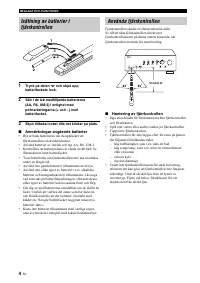
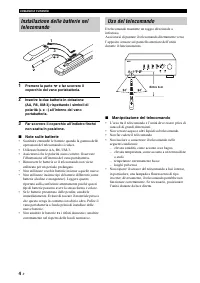
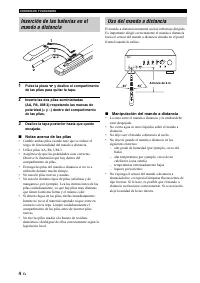
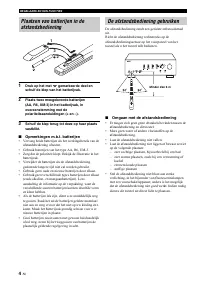
- 132 Нажмите часть; Примечания о батарейках; рядом с ванной; Использование пульта ДУ
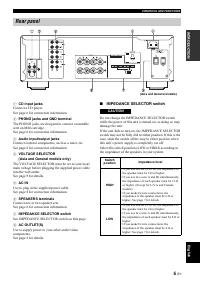
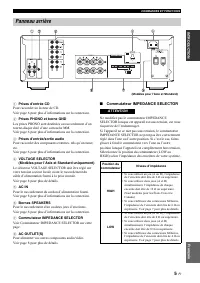
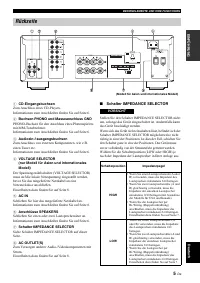
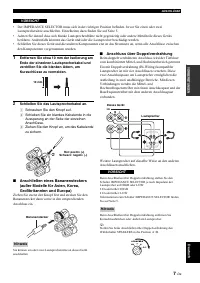
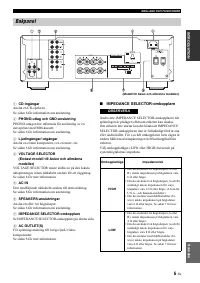
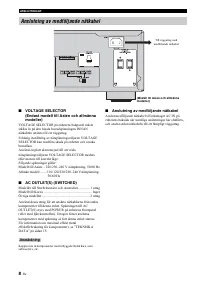
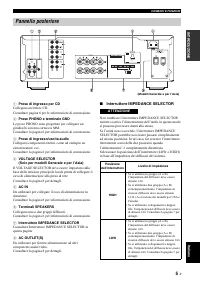
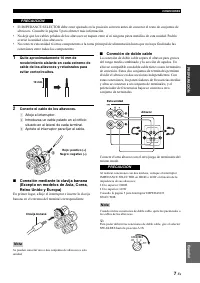
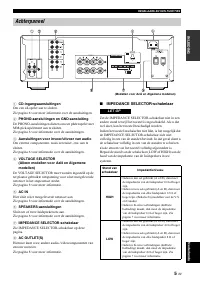
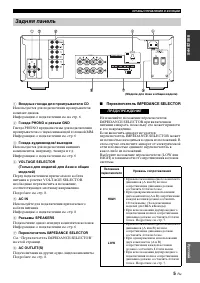
- 133 Переключатель IMPEDANCE SELECTOR; Задняя панель
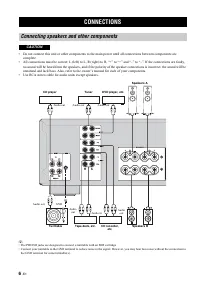
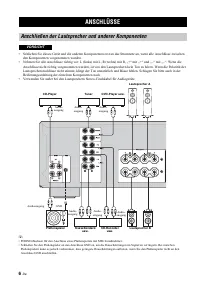
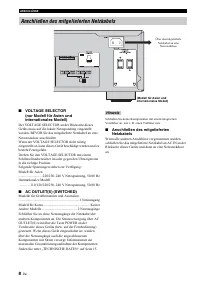
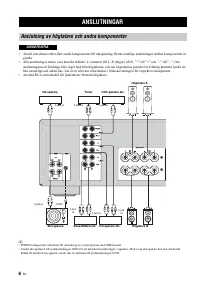
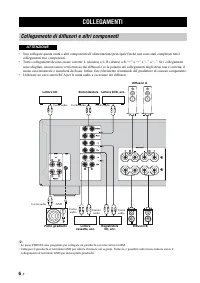
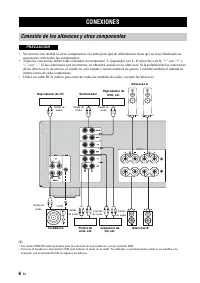
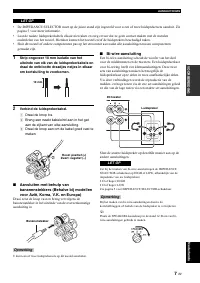
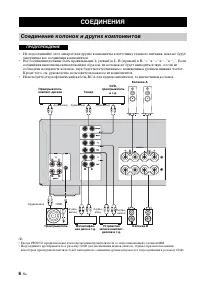
- 134 завершены все соединения компонентов.; СОЕДИНЕНИЯ; Соединение колонок и других компонентов
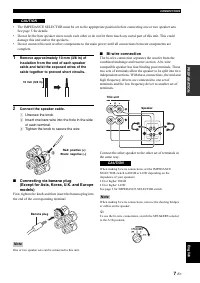
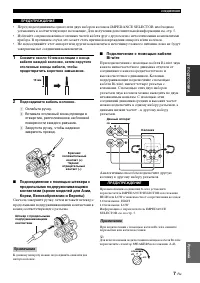
- 135 ПОДГО
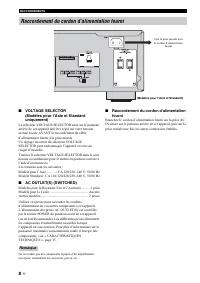
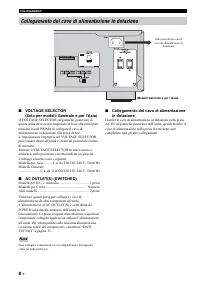
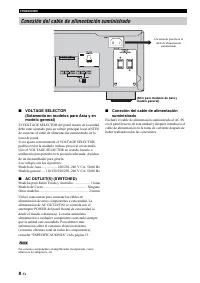
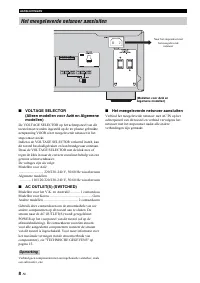
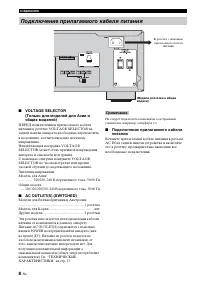
- 136 Общие модели; Подключение прилагаемого кабеля питания
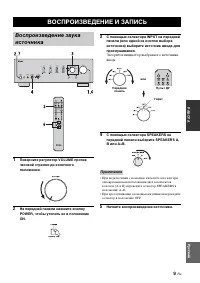
- 137 РАБО; Начните воспроизведение источника.; ВОСПРОИЗВЕДЕНИЕ И ЗАПИСЬ; Примечания
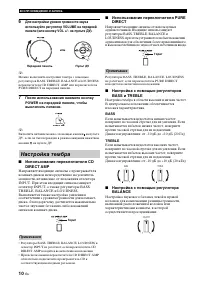
- 138 Настройка тембра
- 139 Запись с источника
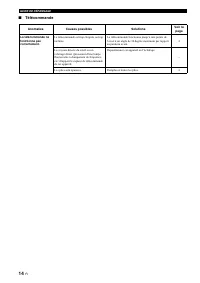
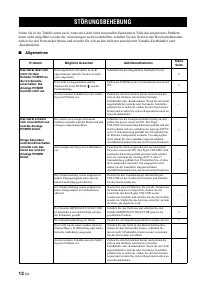
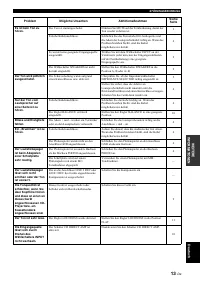
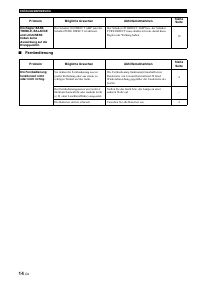
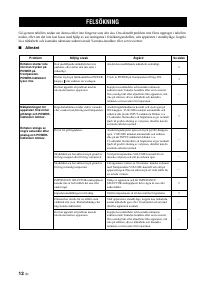
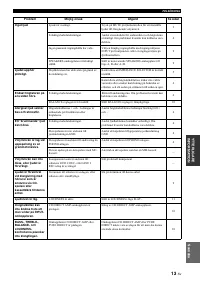
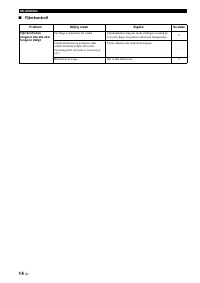
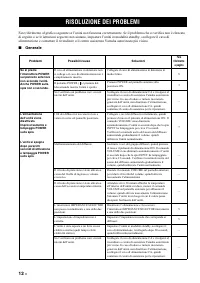
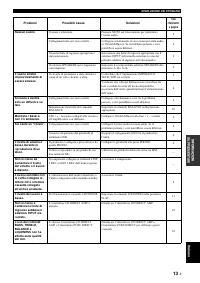
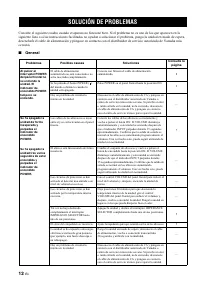
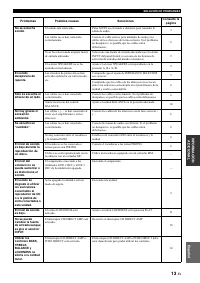
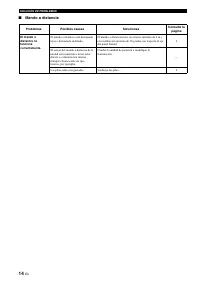
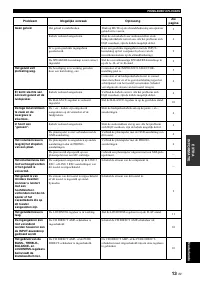
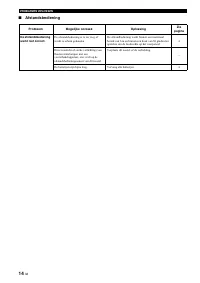
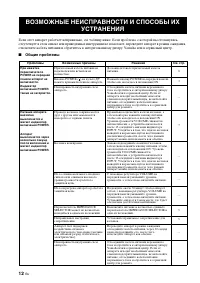
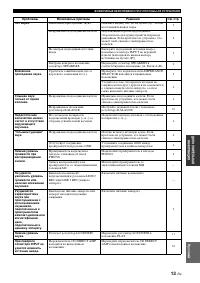
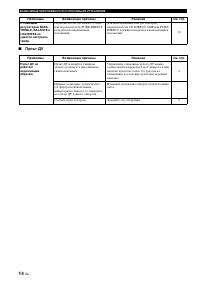
- 140 Общие проблемы; ВОЗМОЖНЫЕ НЕИСПРАВНОСТИ И СПОСОБЫ ИХ
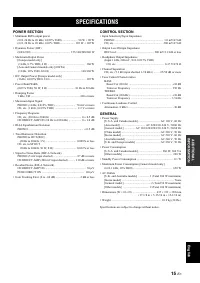
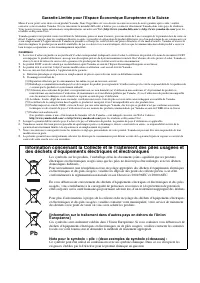
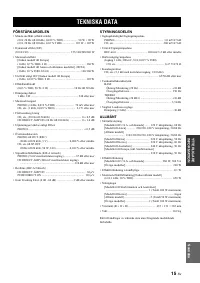
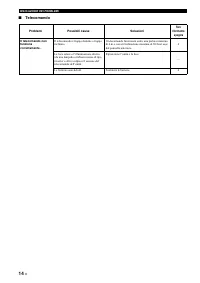
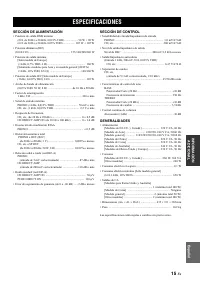
- 141 ТЕ
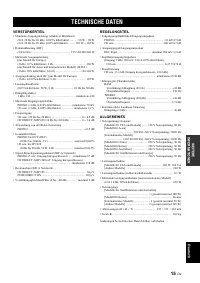
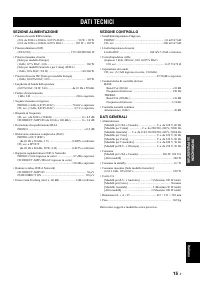
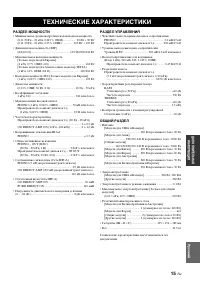
- 143 ТЕХНИЧЕСКИЕ ХАРАКТЕРИСТИКИ


