Усилители Yamaha A-S700 - инструкция пользователя по применению, эксплуатации и установке на русском языке. Мы надеемся, она поможет вам решить возникшие у вас вопросы при эксплуатации техники.
Если остались вопросы, задайте их в комментариях после инструкции.
"Загружаем инструкцию", означает, что нужно подождать пока файл загрузится и можно будет его читать онлайн. Некоторые инструкции очень большие и время их появления зависит от вашей скорости интернета.


8
En
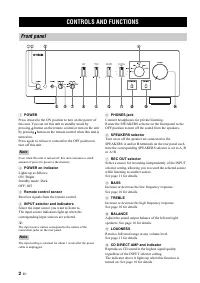
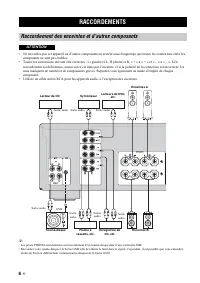
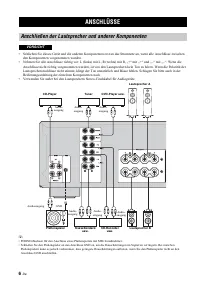
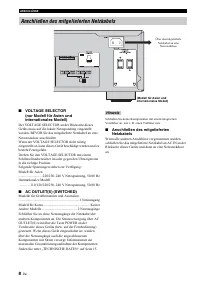
CONNECTIONS
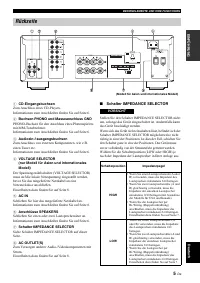
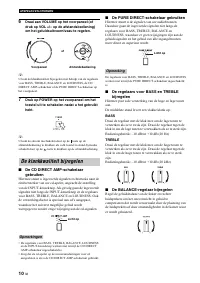
■
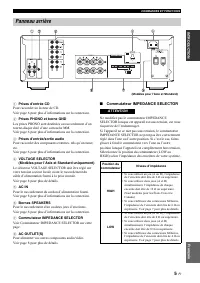
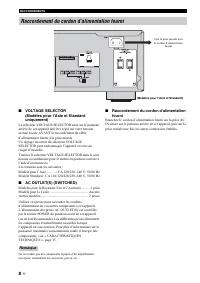
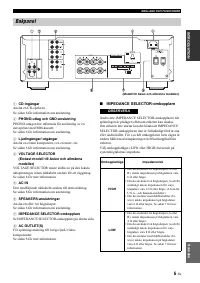
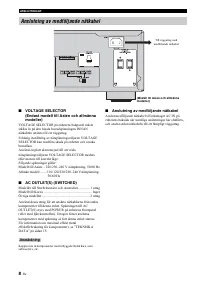
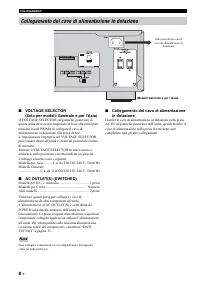
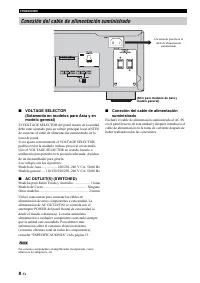
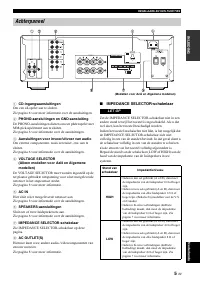
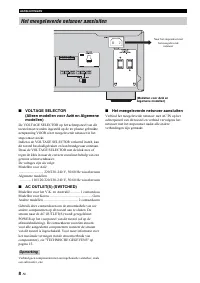
VOLTAGE SELECTOR
(Asia and General models only)
The VOLTAGE SELECTOR on the rear panel of this unit
must be set for your local main voltage BEFORE plugging
the supplied power cable into the wall outlet.
Improper setting of the VOLTAGE SELECTOR may
cause damage to this unit and create a potential fire
hazard.
Rotate the VOLTAGE SELECTOR clockwise or
counterclockwise to the correct position using a straight
slot screwdriver.
Voltages are as follows:
Asia model .......................... AC 220/230–240 V, 50/60 Hz
General model ...... AC 110/120/220/230–240 V, 50/60 Hz
■
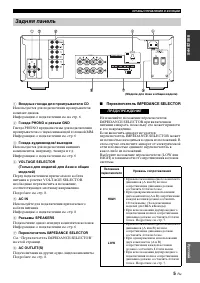
AC OUTLET(S) (SWITCHED)
U.K. and Australia models ..................................... 1 outlet
Korea model .............................................................. None
Other models ........................................................ 2 outlets
Use these outlets to connect the power cables from your
other components to this unit. The power to the AC
OUTLET(S) is controlled by POWER on the front panel
of this unit (or on the remote control). The outlet(s) supply
power to any connected component whenever the power
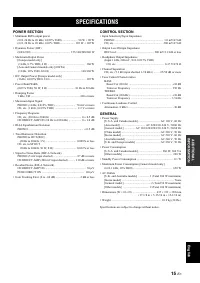
of this unit is turned on. For information on the maximum
power (total power consumption of components), see
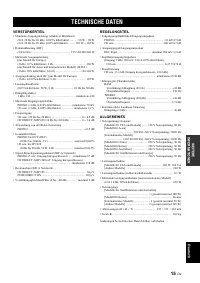
“SPECIFICATIONS” on page 15.
Do not connect components with a built-in amplifier, such as a
subwoofer, etc.
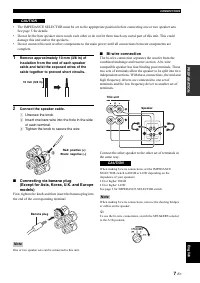
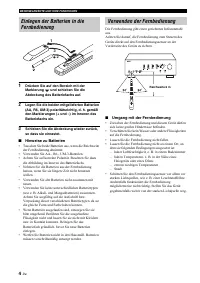
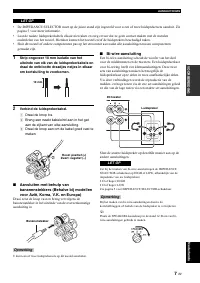
■
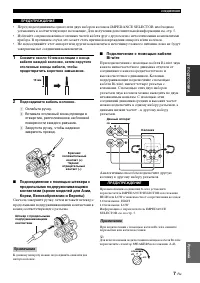
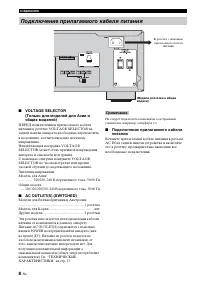
Connecting the supplied power cable
Plug the supplied power cable into the AC IN on the rear
panel of this unit and then, plug the power cable into the
wall outlet after all other connections are complete.
Connecting the supplied power cable
(Asia and General models)
To the wall outlet with the
supplied power cable
Note
Содержание
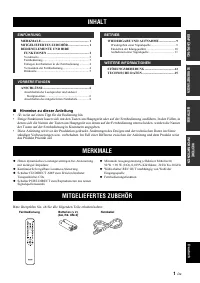
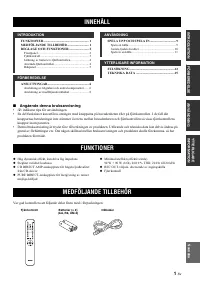
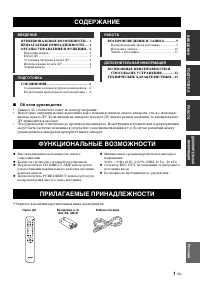
- 129 Об этом руководстве; Символ; Убедитесь в наличии перечисленных ниже компонентов:; СОДЕРЖАНИЕ; ВВЕДЕНИЕ; ФУНКЦИОНАЛЬНЫЕ ВОЗМОЖНОСТИ
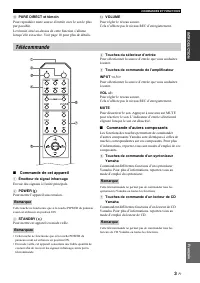
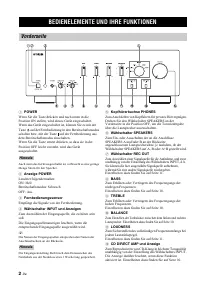
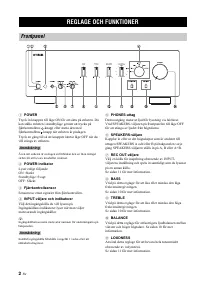
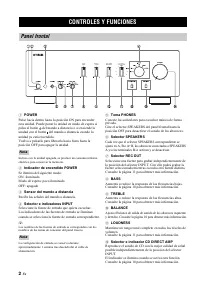
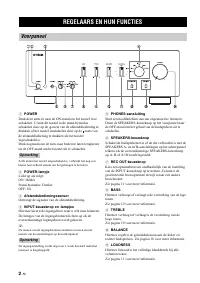
- 130 ОРГАНЫ УПРАВЛЕНИЯ И ФУНКЦИИ; Передняя панель; Примечание
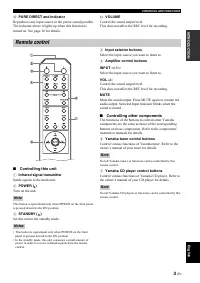
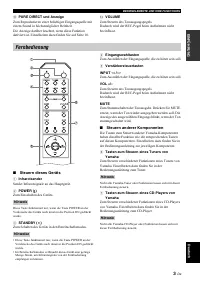
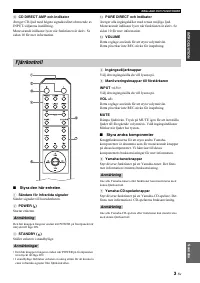
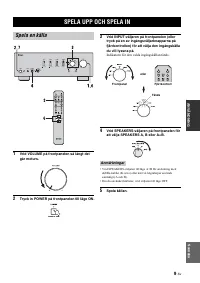
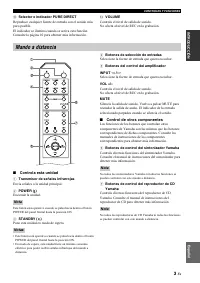
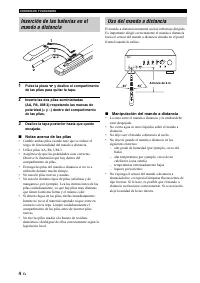
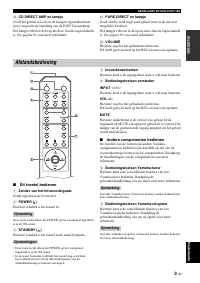
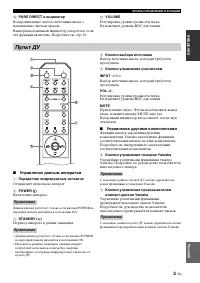
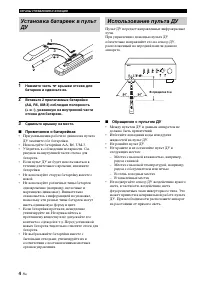
- 131 Управление данным аппаратом
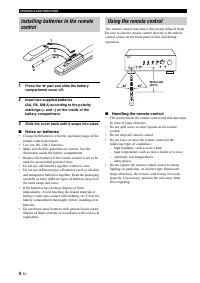
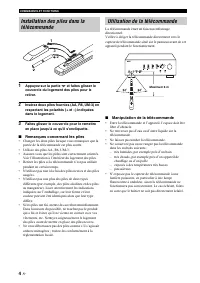
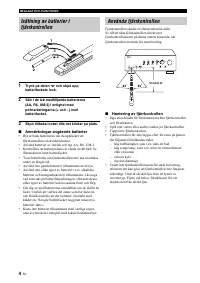
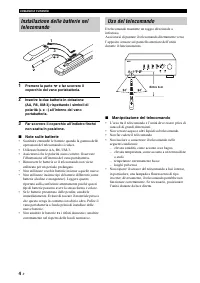
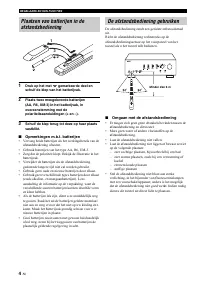
- 132 Нажмите часть; Примечания о батарейках; рядом с ванной; Использование пульта ДУ
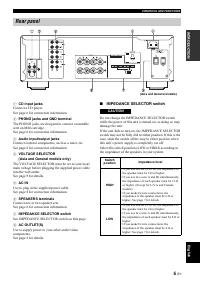
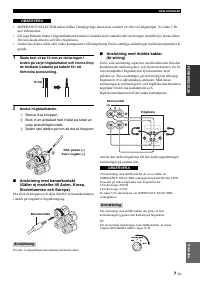
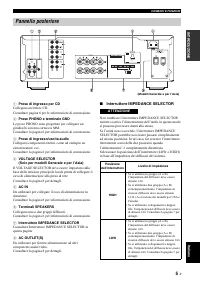
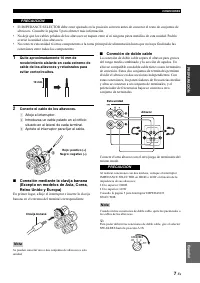
- 133 Переключатель IMPEDANCE SELECTOR; Задняя панель
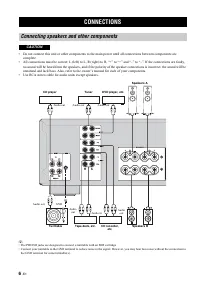
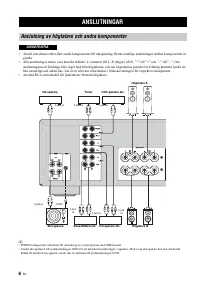
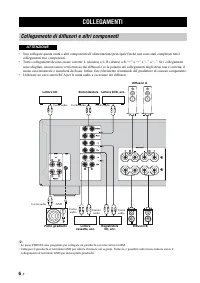
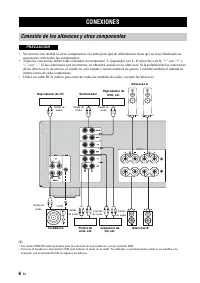
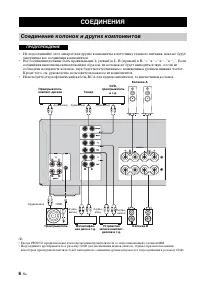
- 134 завершены все соединения компонентов.; СОЕДИНЕНИЯ; Соединение колонок и других компонентов
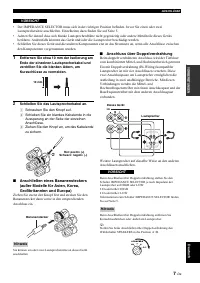
- 135 ПОДГО
- 136 Общие модели; Подключение прилагаемого кабеля питания
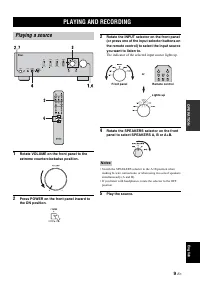
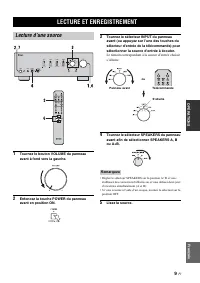
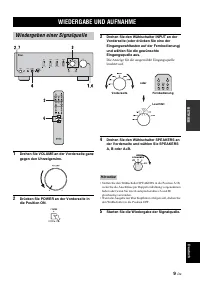
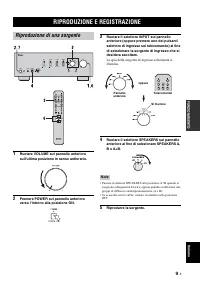
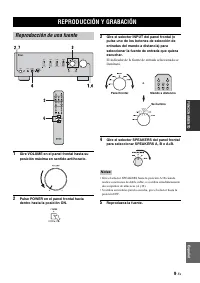
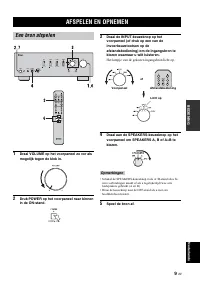
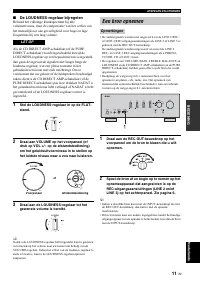
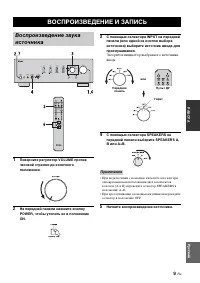
- 137 РАБО; Начните воспроизведение источника.; ВОСПРОИЗВЕДЕНИЕ И ЗАПИСЬ; Примечания
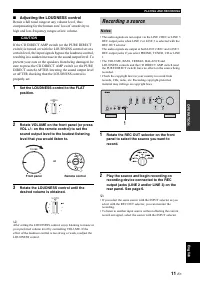
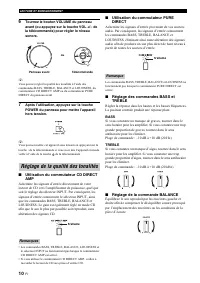
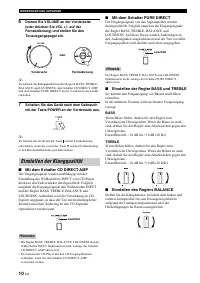
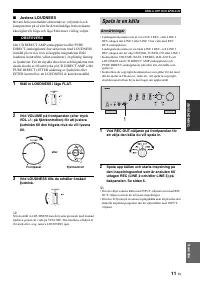
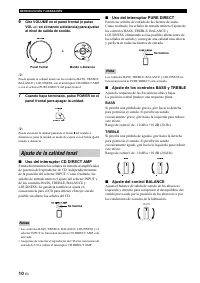
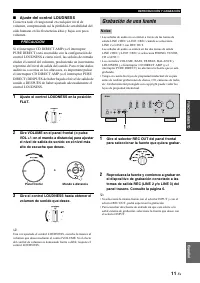
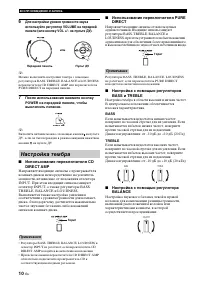
- 138 Настройка тембра
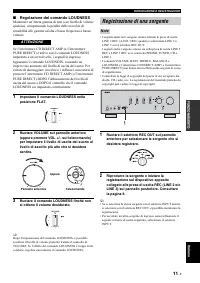
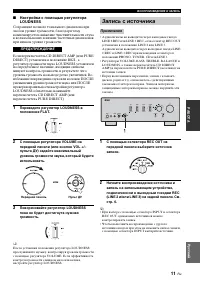
- 139 Запись с источника
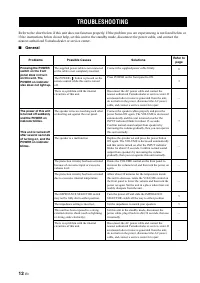
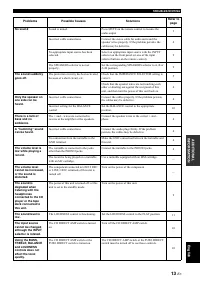
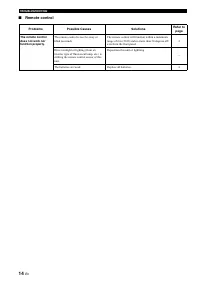
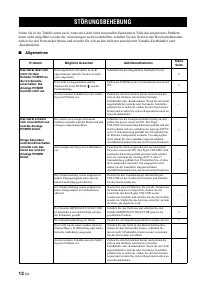
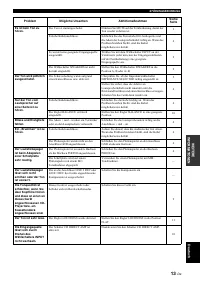
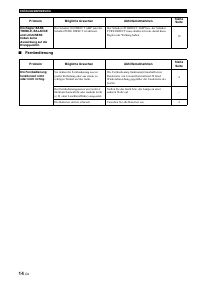
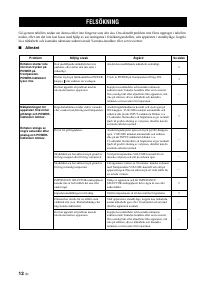
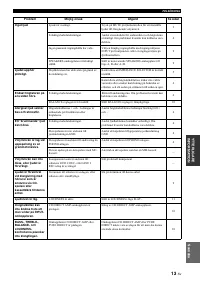
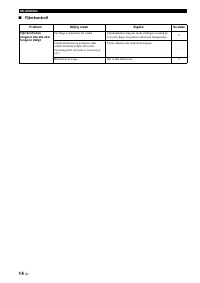
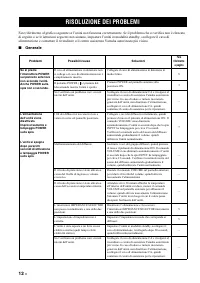
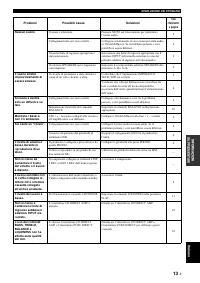
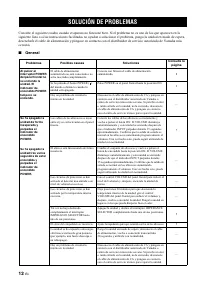
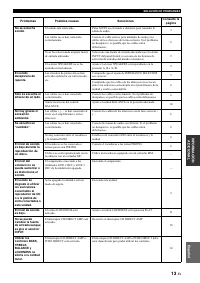
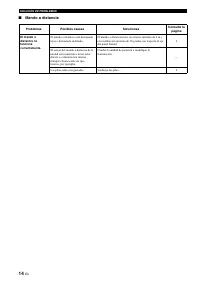
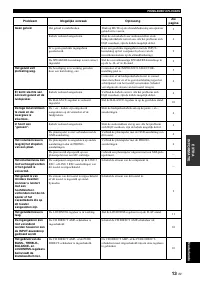
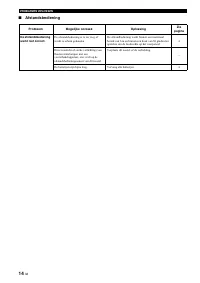
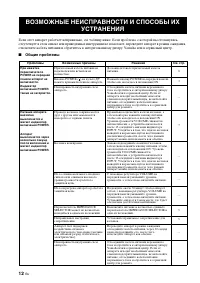
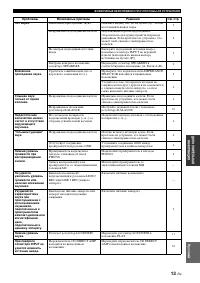
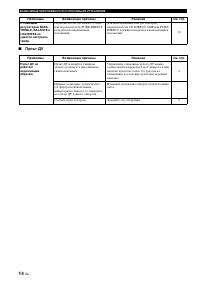
- 140 Общие проблемы; ВОЗМОЖНЫЕ НЕИСПРАВНОСТИ И СПОСОБЫ ИХ
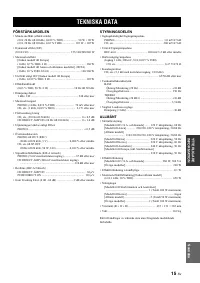
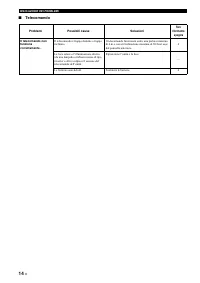
- 141 ТЕ
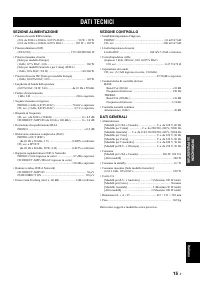
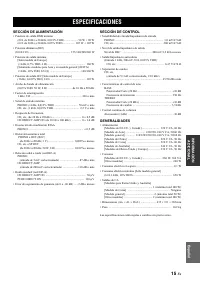
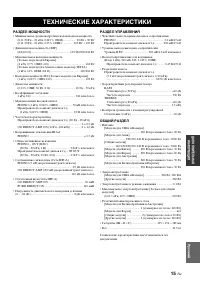
- 143 ТЕХНИЧЕСКИЕ ХАРАКТЕРИСТИКИ


