Швейная машина Brother STAR 45 - инструкция пользователя по применению, эксплуатации и установке на русском языке. Мы надеемся, она поможет вам решить возникшие у вас вопросы при эксплуатации техники.
Если остались вопросы, задайте их в комментариях после инструкции.
"Загружаем инструкцию", означает, что нужно подождать пока файл загрузится и можно будет его читать онлайн. Некоторые инструкции очень большие и время их появления зависит от вашей скорости интернета.


63
BUTTONHOLE AND BUTTON SEWING
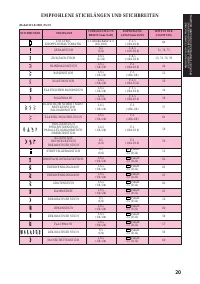
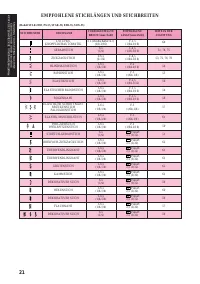
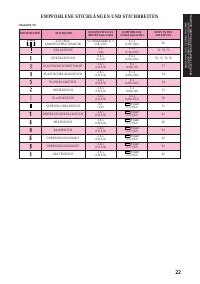
KNOPFLÖCHER UND KNÖPFE NÄHEN
ОБМЕТЫВАНИЕ ПЕТЕЛЬ И ПРИШИВАНИЕ ПУГОВИЦ
(Model STAR 240E, STAR 230E, PS-57, PS-55, STAR-50,
RSR-55, XRX-55)
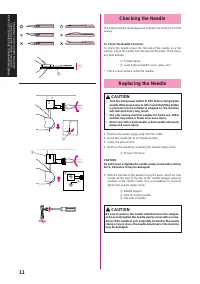
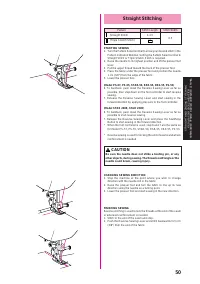
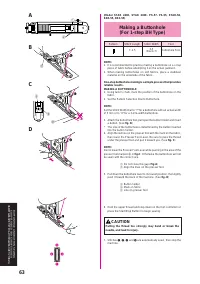
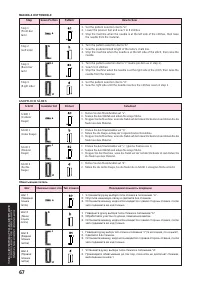
Making a Buttonhole
(For 1-step BH Type)
Pattern
Stitch Length
Stitch Width
Foot
F-1.5
3-5
Buttonhole Foot
(Dial 4-7)
NOTE:
1. It is recommended to practice making a buttonhole on a scrap
piece of fabric before attempting it on the actual garment.
2. When making buttonholes on soft fabrics, place a stabilizer
material on the underside of the fabric.
One-step buttonhole-making is a simple process that provides
reliable results.
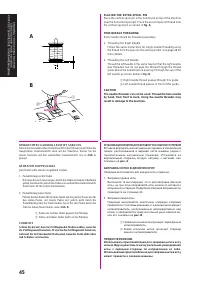
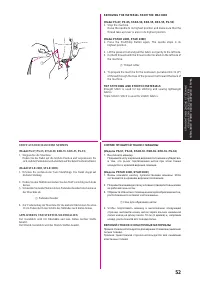
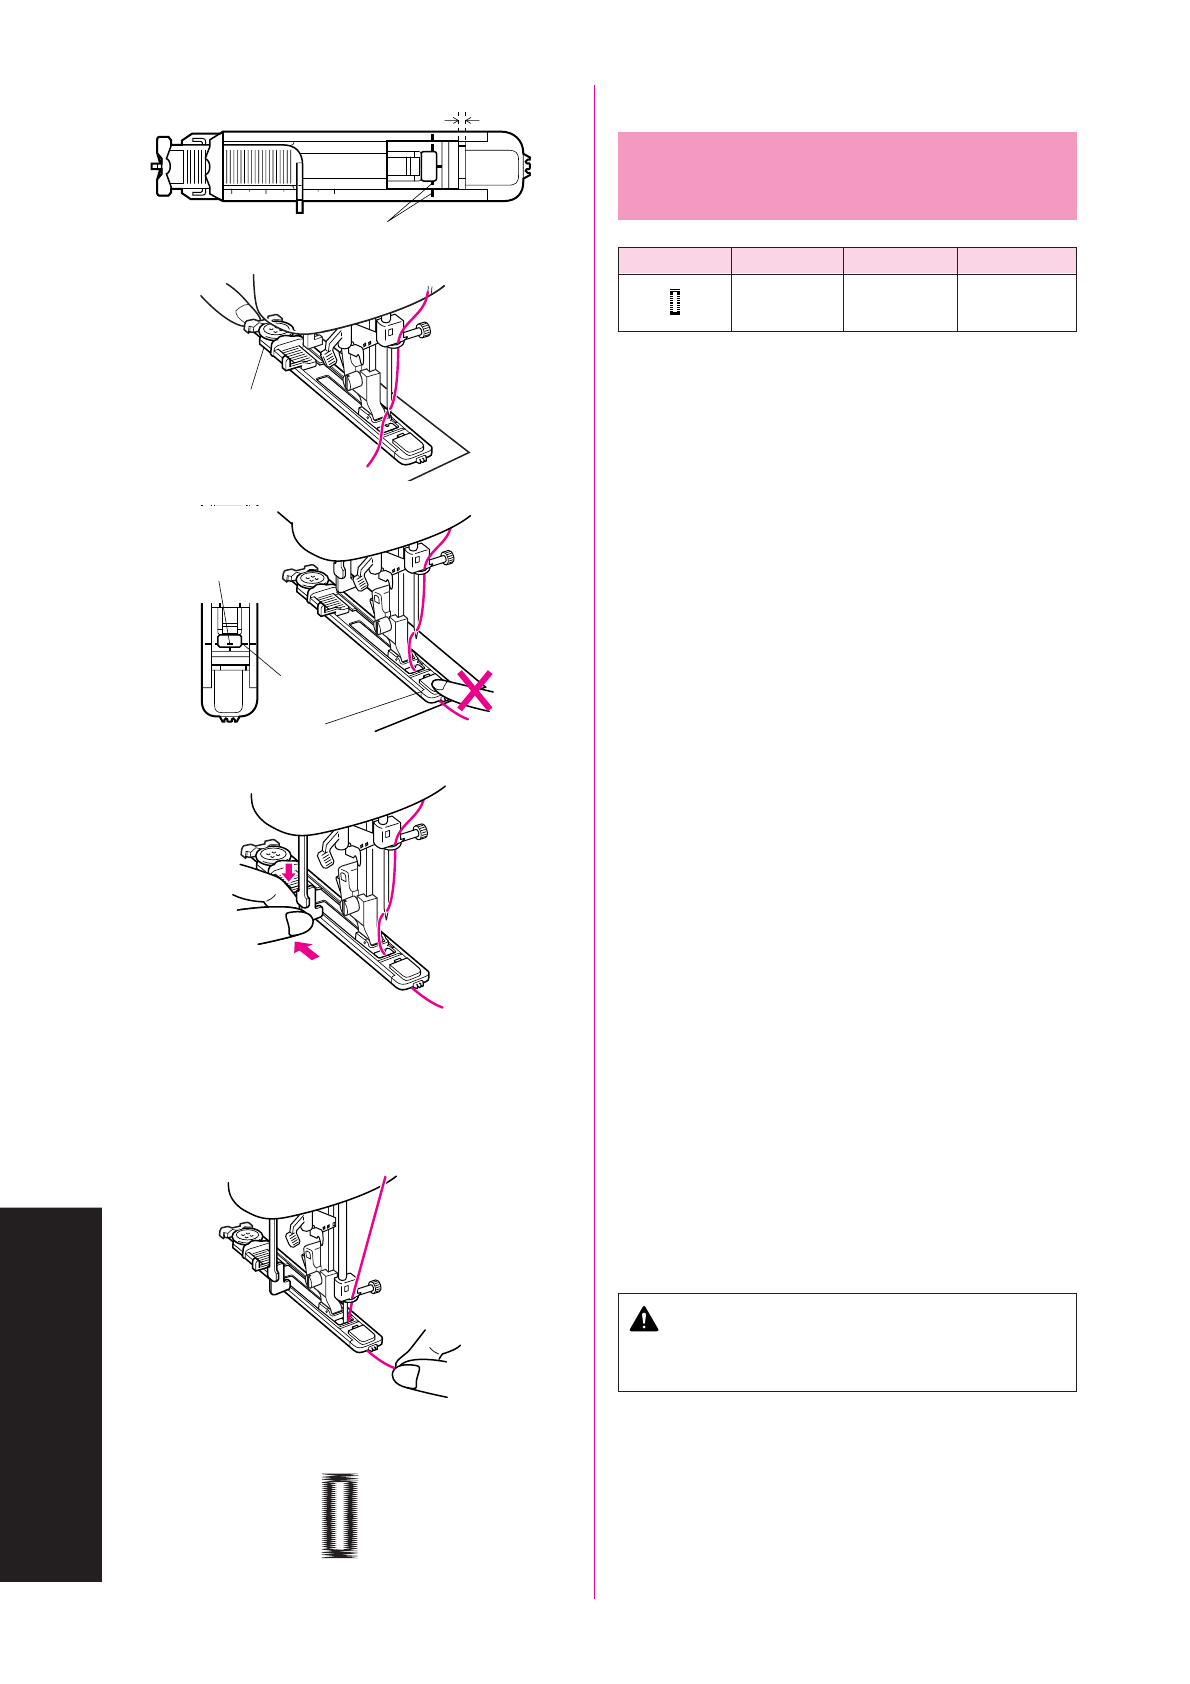
MAKING A BUTTONHOLE
1. Using tailor’s chalk, mark the position of the buttonhole on the
fabric.
2. Set the Pattern Selection Dial to Buttonhole.
NOTE:
Set the Stitch Width Dial to “7” for a buttonhole with an actual width
of 5 mm or to “4” for a 3-mm-width buttonhole.
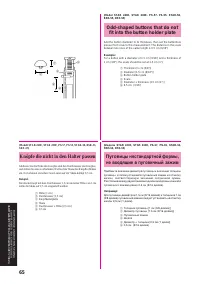
3. Attach the buttonhole foot, pull open the button holder and insert
a button. (See fig. B)
*
The size of the buttonhole is determined by the button inserted
into the button holder.
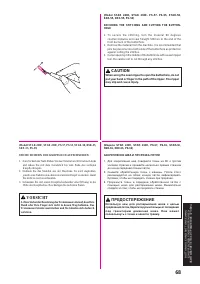
4. Align the red line on the presser foot with the mark on the fabric,
then lower the Presser Foot Lever. Be sure to pass the thread
under the presser foot and pull it toward you. (See fig. C)
NOTE:
Do not lower the Presser Foot Lever while pushing in the area of the
presser foot marked
a
in fig.C. Otherwise the buttonhole will not
be sewn with the correct size.
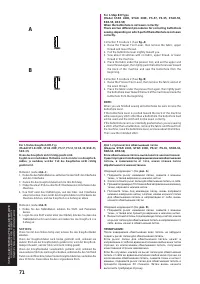
1
Do not close this gap.(Fig.A)
2
Align the lines on the presser foot.
5. Pull down the buttonhole lever to its lowest position, then lightly
push it toward the back of the machine. (See fig. D)
3
Button holder
4
Mark on fabric
5
Line on presser foot
6. Hold the upper thread and step down on the foot controller (or
press the Start/Stop Button) to begin sewing.
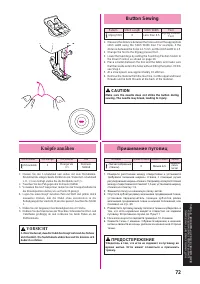
CAUTION
Pulling the thread too strongly may bend or break the
needle, and lead to injury.
7. Stitches
1
,
2
,
3
and
4
are automatically sewn, then stop the
machine.
A
D
5
4
a
B
3
1
A
2
3
2
4
1
C
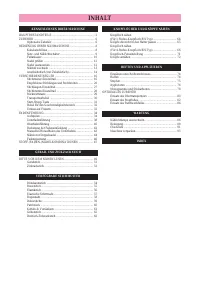
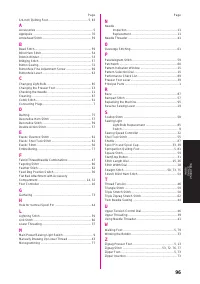
Содержание
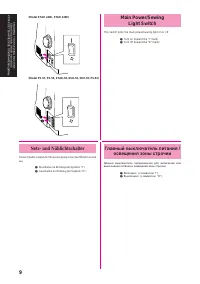
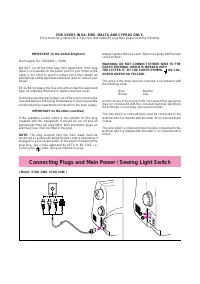
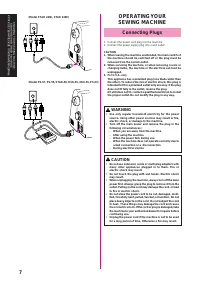
- 3 Light Switch; Главный выключатель питания /
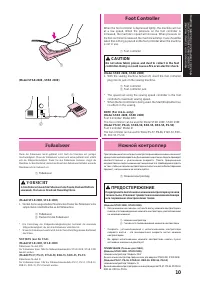
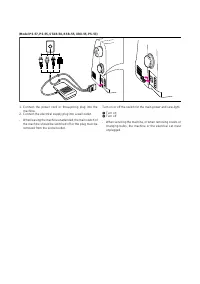
- 4 VORSICHT; Foot Controller; CAUTION; Ножной контроллер; ПРЕДОСТЕРЕЖЕНИЕ
- 6 Проверка иглы; Замена иглы; Nadel prüfen
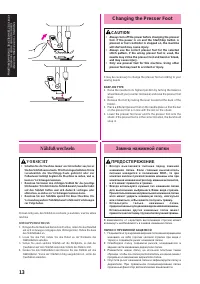
- 7 Changing the Presser Foot; Nähfuß wechseln; Замена нажимной лапки
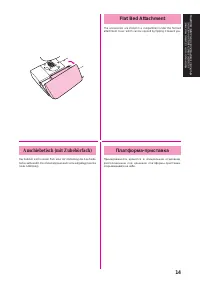
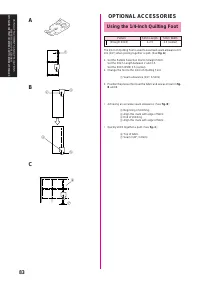
- 8 Flat Bed Attachment
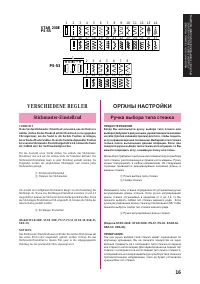
- 10 VERSCHIEDENE REGLER; ОРГАНЫ НАСТРОЙКИ; Ручка выбора типа стежка
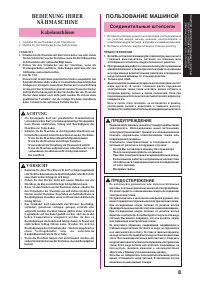
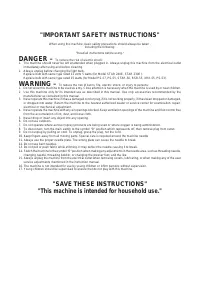
- 15 «УКАЗАНИЯ ПО ТЕХНИКЕ БЕЗОПАСНОСТИ»; ВНИМАНИЕ –; “СОХРАНИТЕ НАСТОЯЩЕЕ РУКОВОДСТВО”
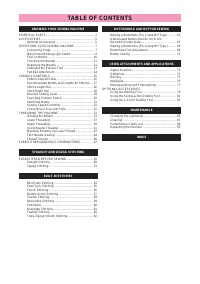
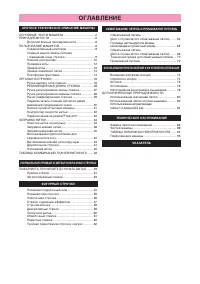
- 23 ОГЛАВЛЕНИЕ
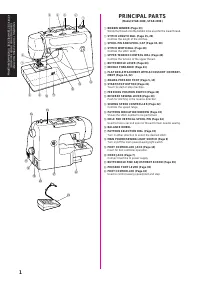
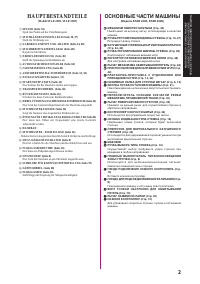
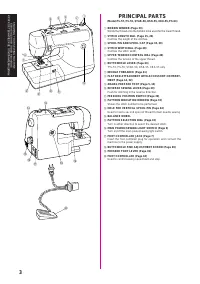
- 25 ОСНОВНЫЕ ЧАСТИ МАШИНЫ
- 29 ПРИНАДЛЕЖНОСТИ; Optionales Zubehör; Дополнительные принадлежности
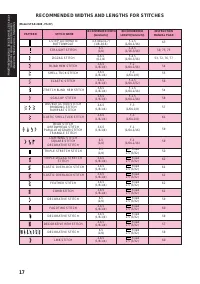
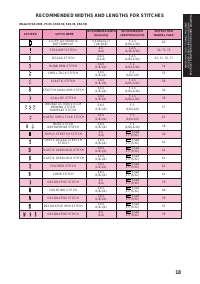
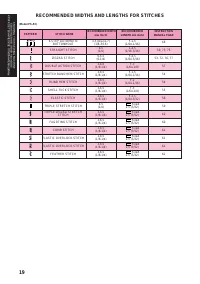
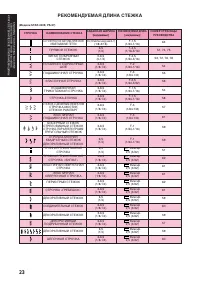
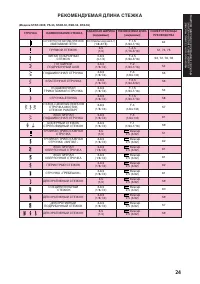
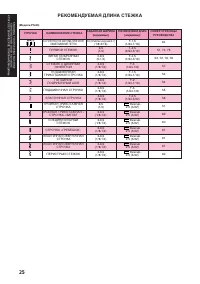
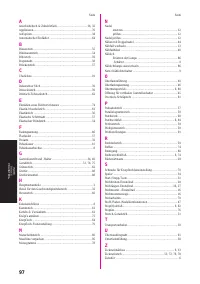
- 35 РЕКОМЕНДУЕМАЯ ДЛИНА СТЕЖКА
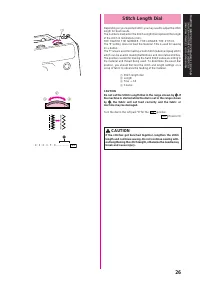
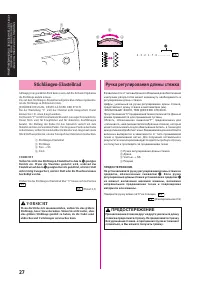
- 39 Ручка регулирования длины стежка
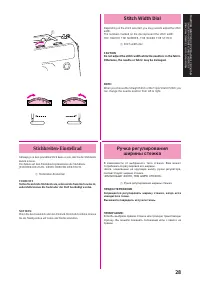
- 40 Stitch Width Dial; Ручка регулирования
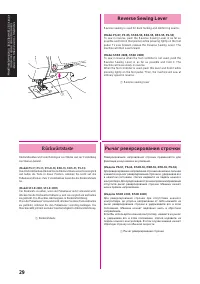
- 41 Reverse Sewing Lever; Рычаг реверсирования строчки
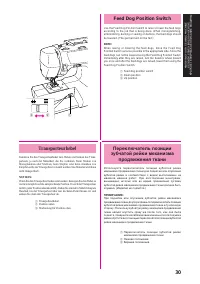
- 42 Feed Dog Position Switch; Переключатель позиции
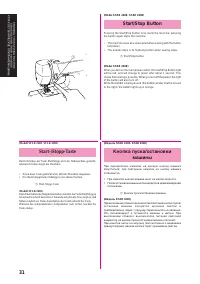
- 43 Кнопка пуска/остановки
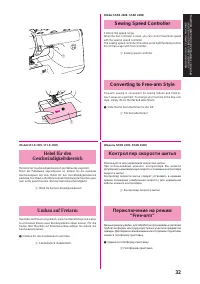
- 44 Sewing Speed Controller; Converting to Free-arm Style; Hebel für den; Umbau auf Freiarm; Переключение на режим
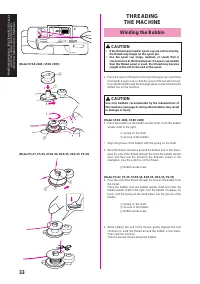
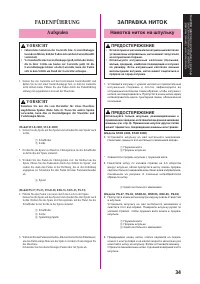
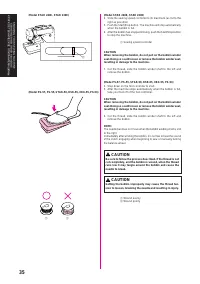
- 46 ЗАПРАВКА НИТОК; Намотка ниток на шпульку; FADENFÜHRUNG; Aufspulen
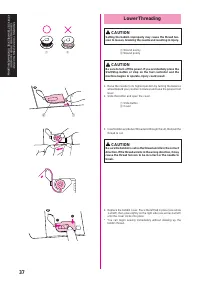
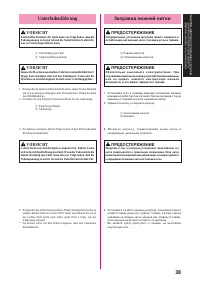
- 50 Заправка нижней нитки; Unterfadenführung
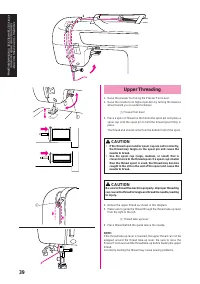
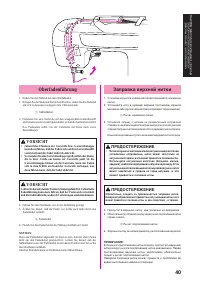
- 52 Заправка верхней нитки; Oberfadenführung
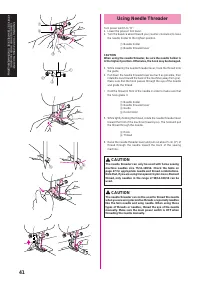
- 54 Использование приспособления; Bedienung der Fadeneinfädelung
- 55 Manually Drawing Up
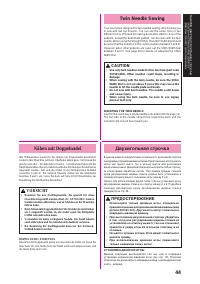
- 56 Twin Needle Sewing; Двухигольная строчка; Nähen mit Doppelnadel
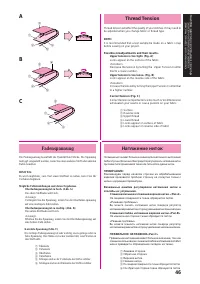
- 58 Thread Tension; Fadenspannung; Натяжение ниток
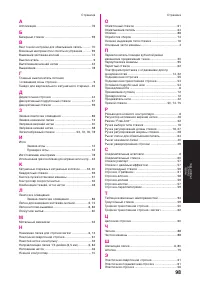
- 61 PLEASE READ BEFORE SEWING; ПОЖАЛУЙСТА, ПРОЧИТАЙТЕ ДО НАЧАЛА ШИТЬЯ; BITTE VOR DEM NÄHEN LESEN
- 63 Geradstich; Прямой стежок
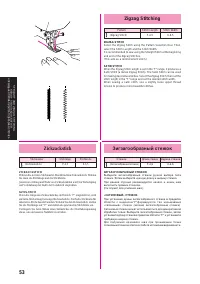
- 65 Zigzag Stitching; Зигзагообразный стежок; Zickzackstich
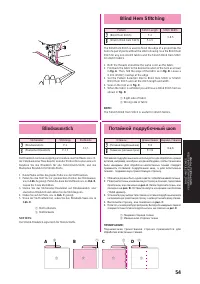
- 66 Blind Hem Stitching
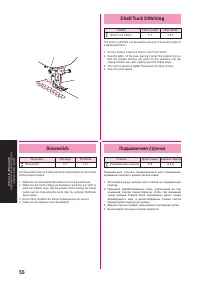
- 67 Shell Tuck Stitching; Подшивочная строчка; Biesenstich
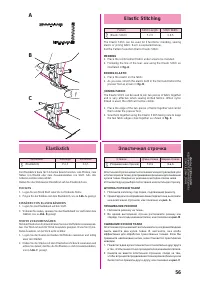
- 68 Elastic Stitching; Elastikstich
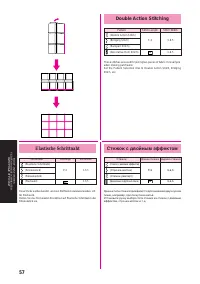
- 69 Double Action Stitching; Стежок с двойным эффектом; Elastische Schrittnaht
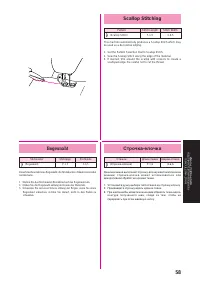
- 70 Scallop Stitching; Bogennaht
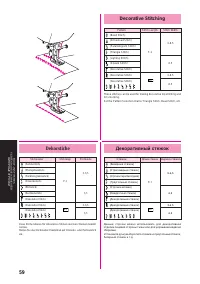
- 71 Decorative Stitching; Декоративный стежок; Dekorstiche
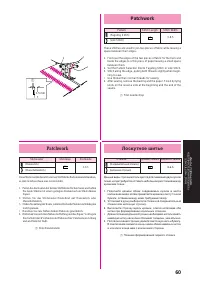
- 72 Лоскутное шитье; Patchwork
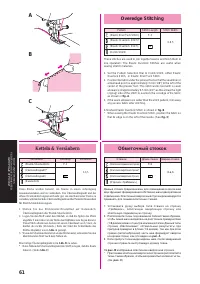
- 73 Overedge Stitching; Обметочный стежок
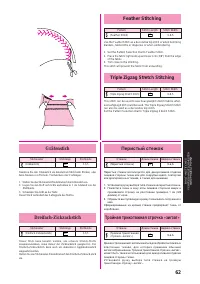
- 74 Feather Stitching
- 76 Обметывание петель; Knopfloch nähen
- 77 Knöpfe die nicht in den Halter passen; Odd-shaped buttons that do not; Пуговицы нестандартной формы,
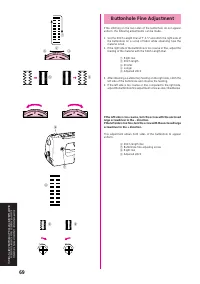
- 82 Тонкая настройка для
- 84 Button Sewing; Пришивание пуговиц; Knöpfe annähen
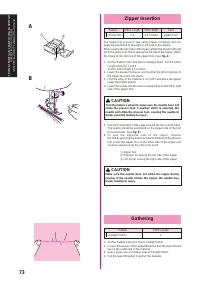
- 86 Вшивание застежек-молний; Обработка сборок; Raffen
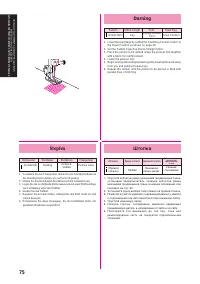
- 87 Darning
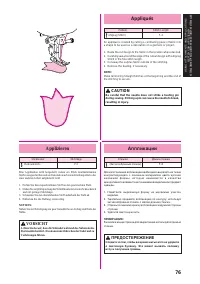
- 88 Appliqués; Аппликации; Applizieren
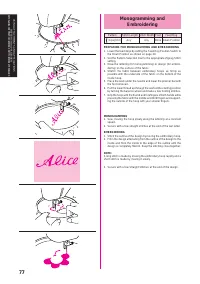
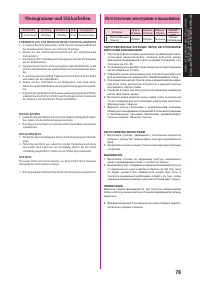
- 90 Monogramme und Stickarbeiten
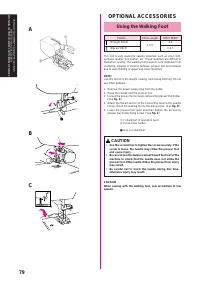
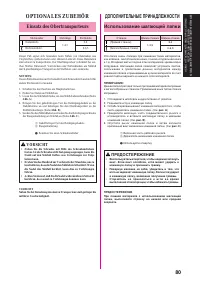
- 92 Использование шагающей лапки; Einsatz des Obertransporteurs
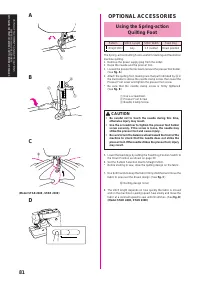
- 94 Использование лапки штопки-; Einsatz des Stopffußes
- 96 Использование направляющей; Einsatz des Patchworkfuß
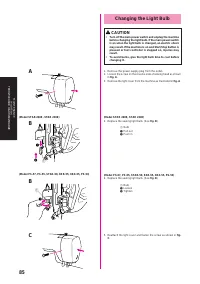
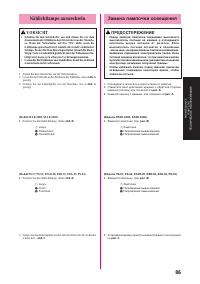
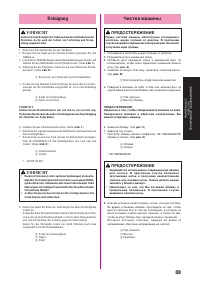
- 98 Замена лампочки освещения; Nählichtlampe auswechseln
- 100 Чистка машины; Reinigung
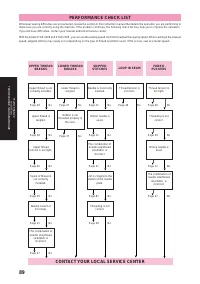
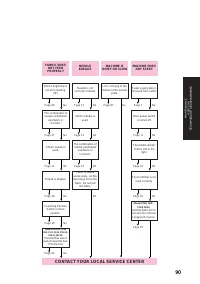
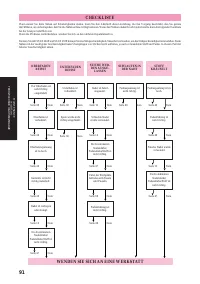
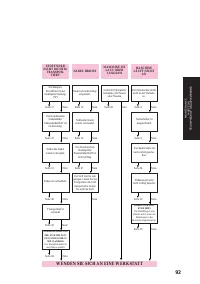
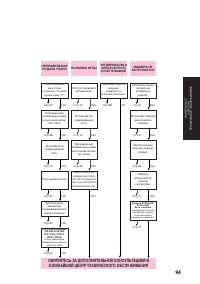
- 105 ТАБЛИЦА ВОЗМОЖНЫХ НЕИСПРАВНОСТЕЙ
- 106 ОБРАТИТЕСЬ ЗА ДОПОЛНИТЕЛЬНОЙ КОНСУЛЬТАЦИЕЙ В
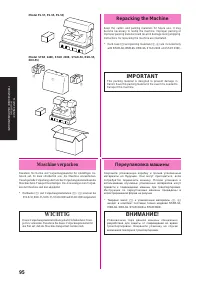
- 107 Repacking the Machine; IMPORTANT; Maschine verpacken; WICHTIG; Переупаковка машины


