Материнские платы MSI MAG B650M - инструкция пользователя по применению, эксплуатации и установке на русском языке. Мы надеемся, она поможет вам решить возникшие у вас вопросы при эксплуатации техники.
Если остались вопросы, задайте их в комментариях после инструкции.
"Загружаем инструкцию", означает, что нужно подождать пока файл загрузится и можно будет его читать онлайн. Некоторые инструкции очень большие и время их появления зависит от вашей скорости интернета.


27
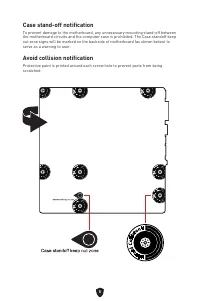
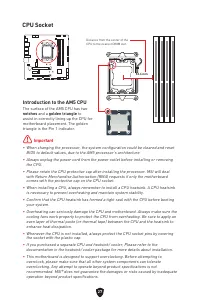
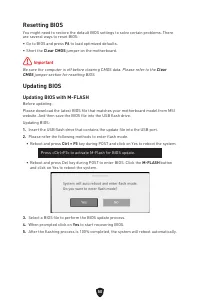
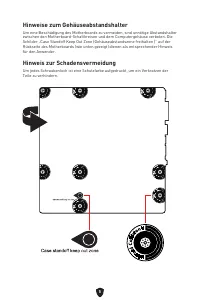
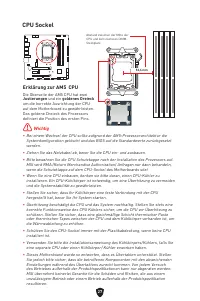
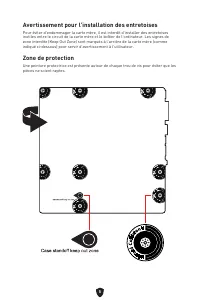
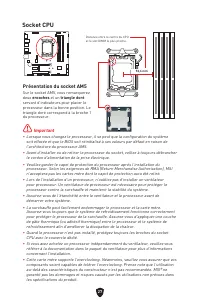
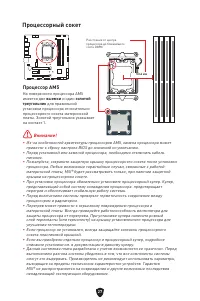
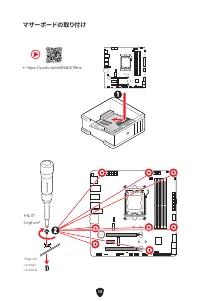
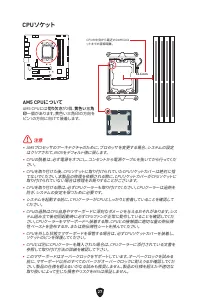
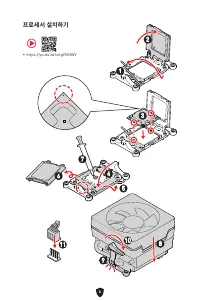
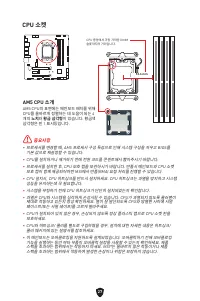
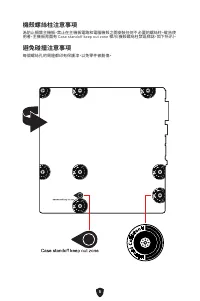
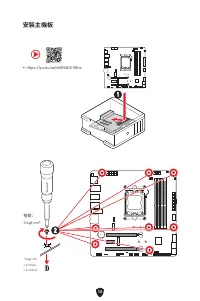
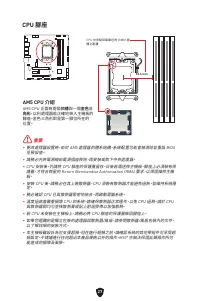
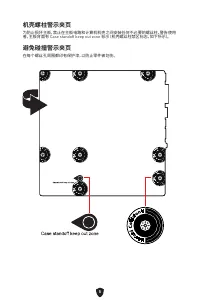
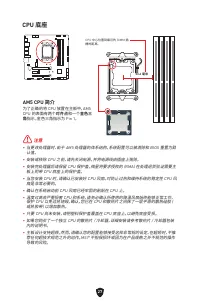
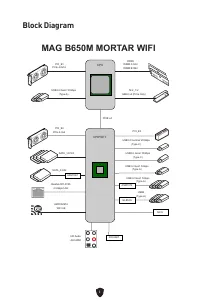
CPU Socket
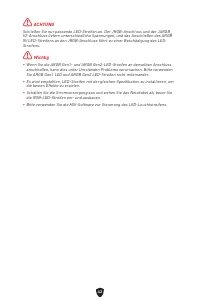
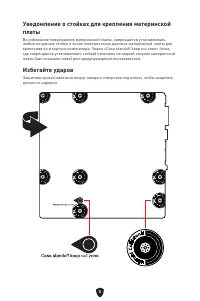
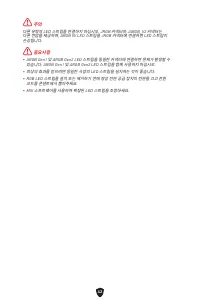
⚠
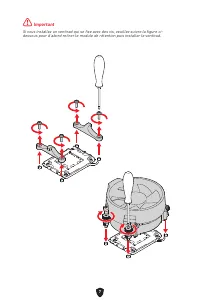
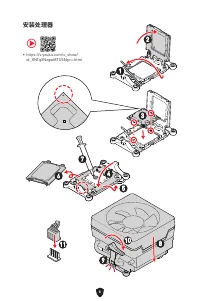
Important
∙
When changing the processor, the system configuration could be cleared and reset
BIOS to default values, due to the AM5 processor’s architecture.
∙
Always unplug the power cord from the power outlet before installing or removing
the CPU.
∙
Please retain the CPU protective cap after installing the processor. MSI will deal
with Return Merchandise Authorization (RMA) requests if only the motherboard
comes with the protective cap on the CPU socket.
∙
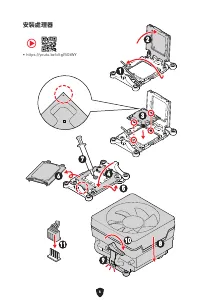
When installing a CPU, always remember to install a CPU heatsink. A CPU heatsink
is necessary to prevent overheating and maintain system stability.
∙
Confirm that the CPU heatsink has formed a tight seal with the CPU before booting
your system.
∙
Overheating can seriously damage the CPU and motherboard. Always make sure the
cooling fans work properly to protect the CPU from overheating. Be sure to apply an
even layer of thermal paste (or thermal tape) between the CPU and the heatsink to
enhance heat dissipation.
∙
Whenever the CPU is not installed, always protect the CPU socket pins by covering
the socket with the plastic cap.
∙
If you purchased a separate CPU and heatsink/ cooler, Please refer to the
documentation in the heatsink/ cooler package for more details about installation.
∙
This motherboard is designed to support overclocking. Before attempting to
overclock, please make sure that all other system components can tolerate
overclocking. Any attempt to operate beyond product specifications is not
recommended. MSI® does not guarantee the damages or risks caused by inadequate
operation beyond product specifications.
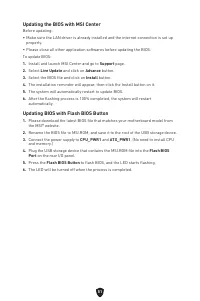
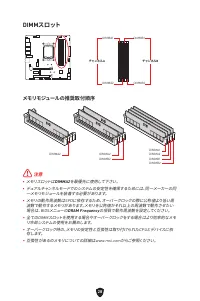
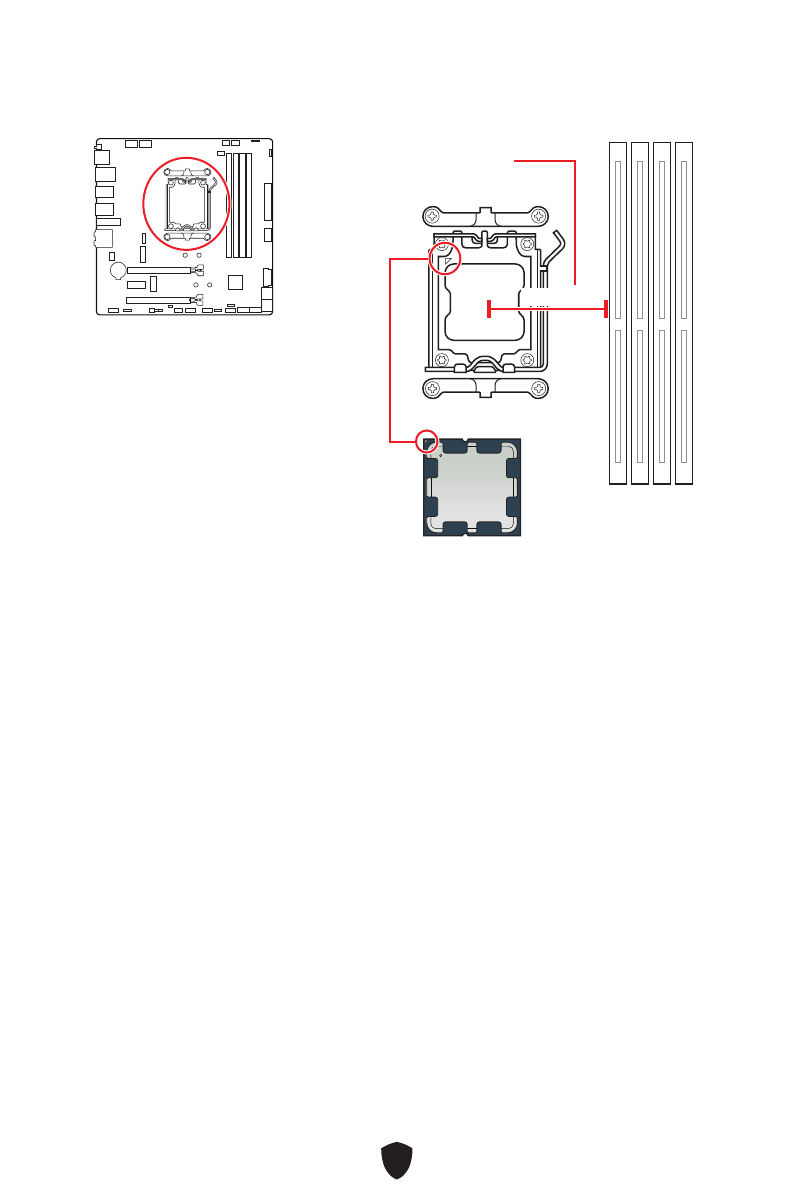
Distance from the center of the
CPU to the nearest DIMM slot.
53.6 mm
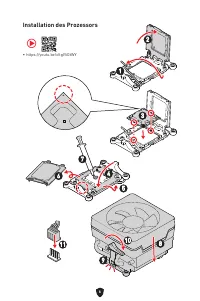
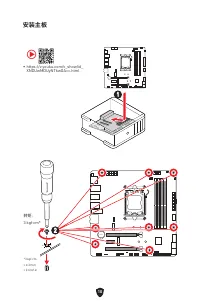
Introduction to the AM5 CPU
The surface of the AM5 CPU has two
notches
and a
golden triangle
to
assist in correctly lining up the CPU for
motherboard placement. The golden
triangle is the Pin 1 indicator.
Содержание
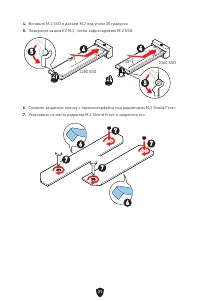
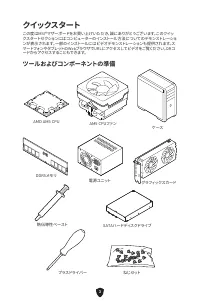
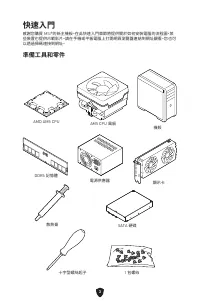
- 158 Краткое руководство по установке; Подготовка инструментов и компонентов
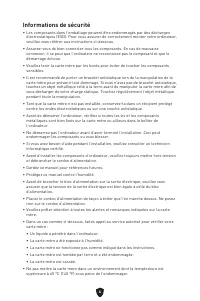
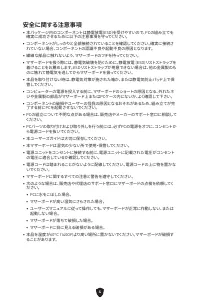
- 159 Безопасное использование продукции
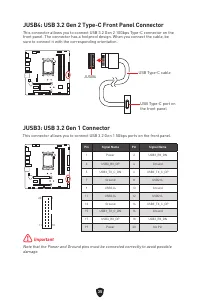
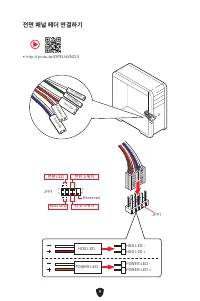
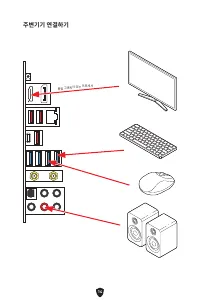
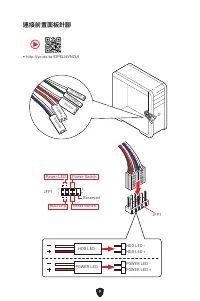
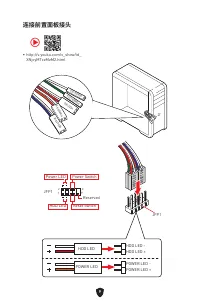
- 164 Подключение разъема на передней панели
- 171 Технические характеристики
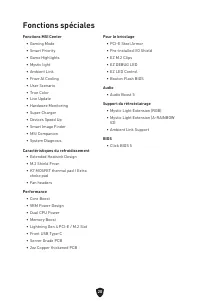
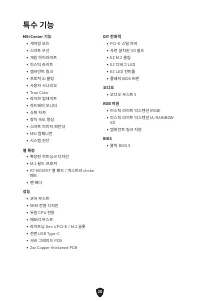
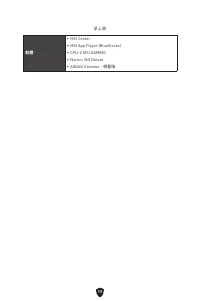
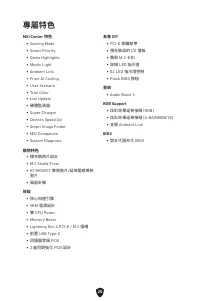
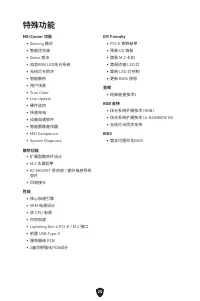
- 175 Эксклюзивные функции
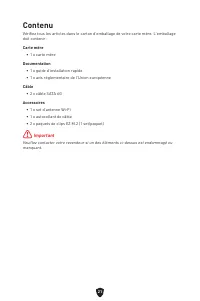
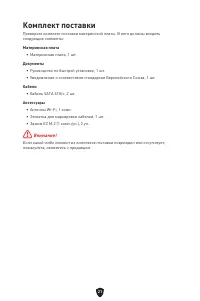
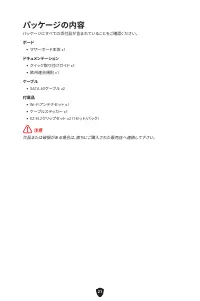
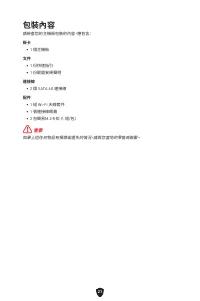
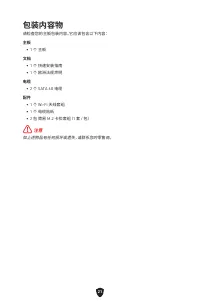
- 176 Комплект поставки
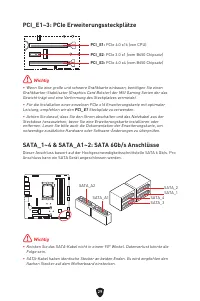
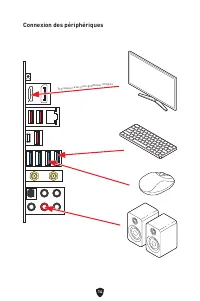
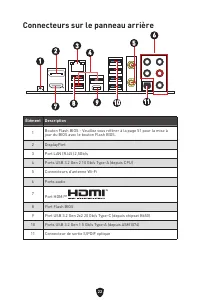
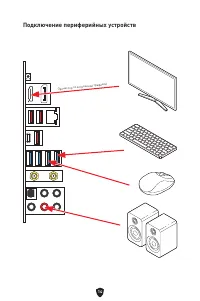
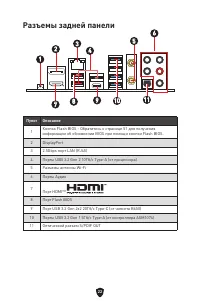
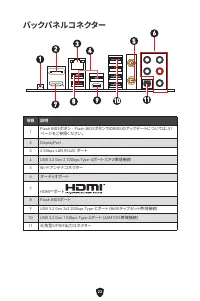
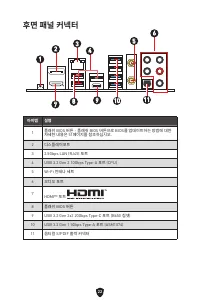
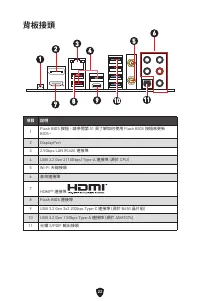
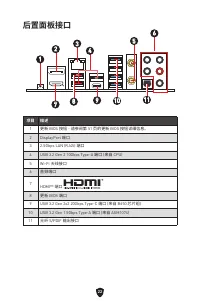
- 177 Разъемы задней панели
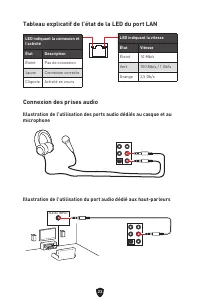
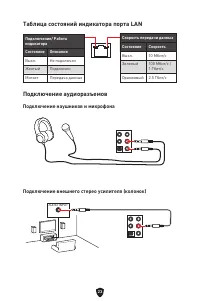
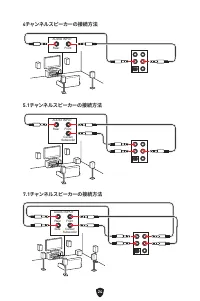
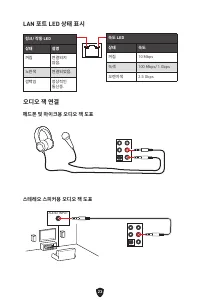
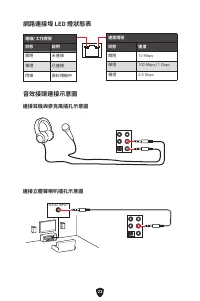
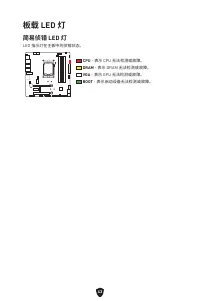
- 178 Таблица состояний индикатора порта LAN; Подключение аудиоразъемов; Подключение наушников и микрофона
- 182 Процессор AM5
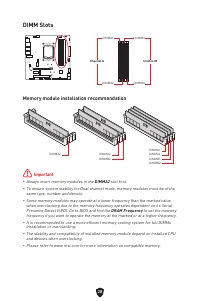
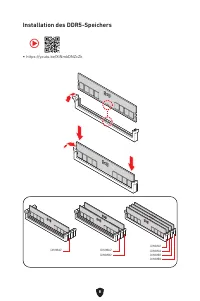
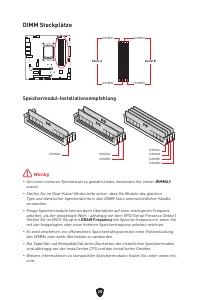
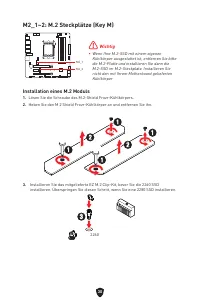
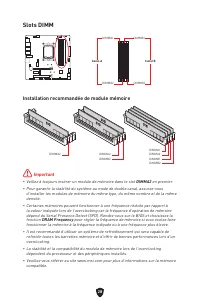
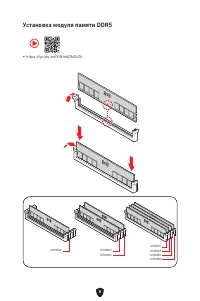
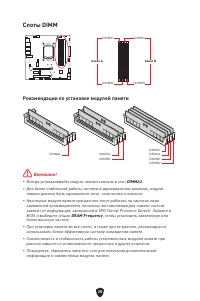
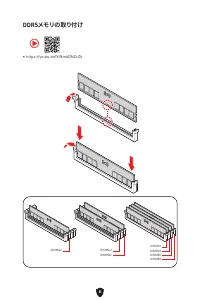
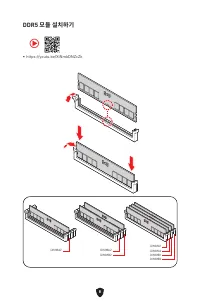
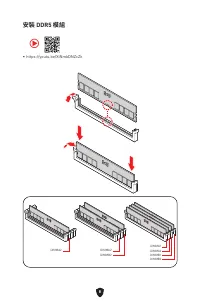
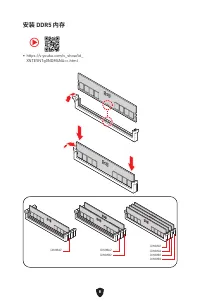
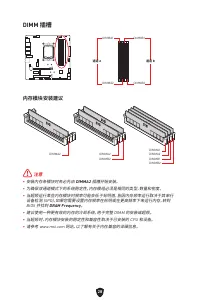
- 183 Слоты DIMM; Рекомендации по установке модулей памяти
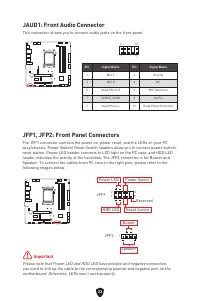
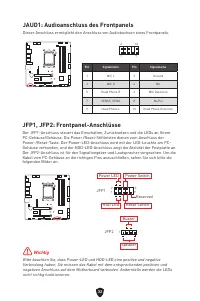
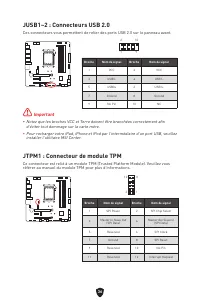
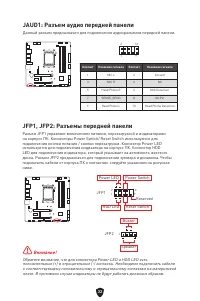
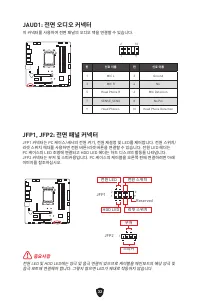
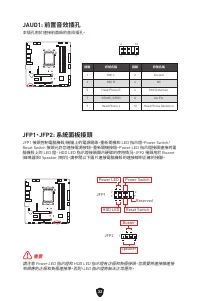
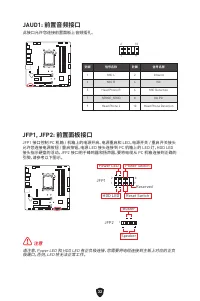
- 187 JAUD1: Разъем аудио передней панели
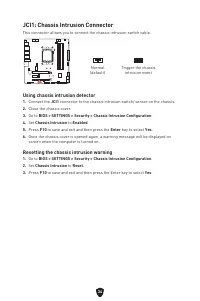
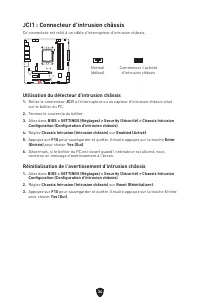
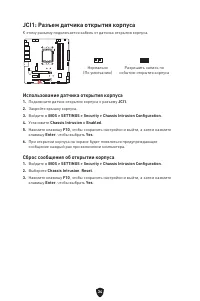
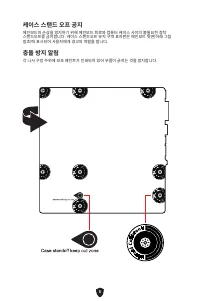
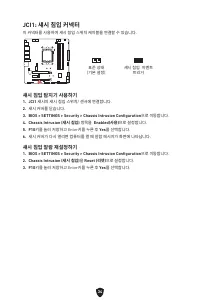
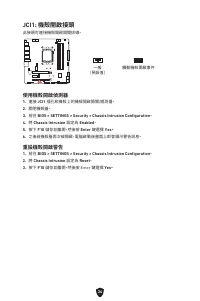
- 189 JCI1: Разъем датчика открытия корпуса; Использование датчика открытия корпуса
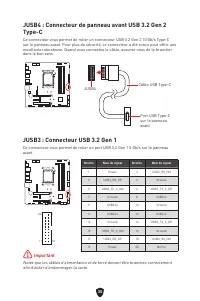
- 190 панели
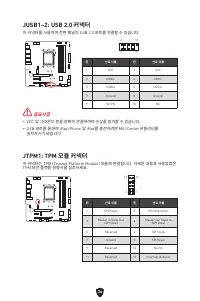
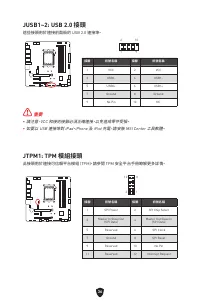
- 191 JTPM1: Разъем модуля ТРМ
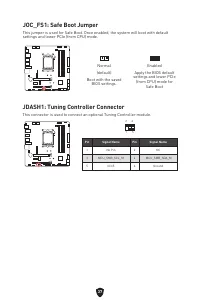
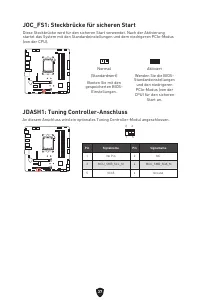
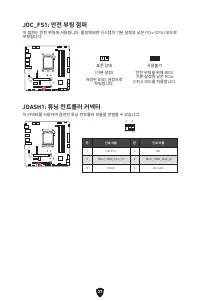
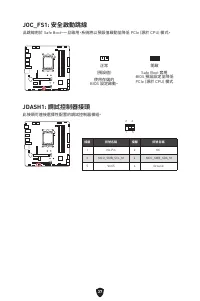
- 192 JDASH1: Разъем контроллера настройки
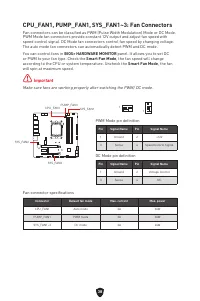
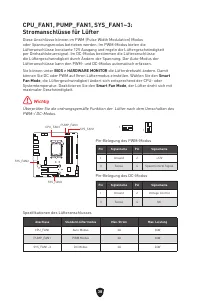
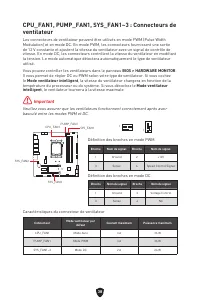
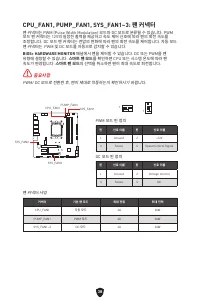
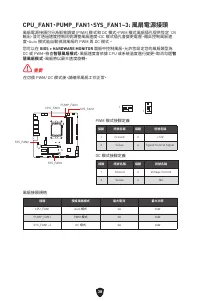
- 193 вентиляторов
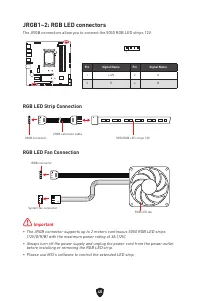
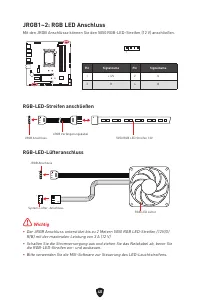
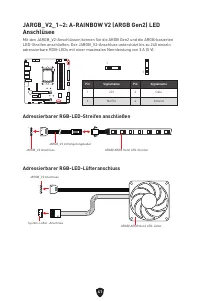
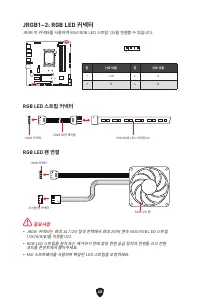
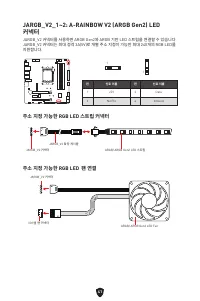
- 195 Подключение RGB светодиодных лент
- 196 LED; Подключение адресных RGB светодиодных лент
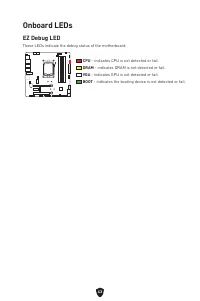
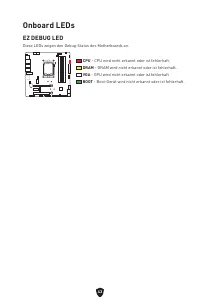
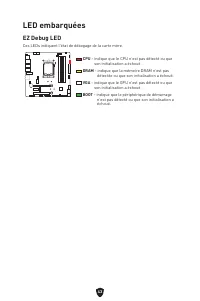
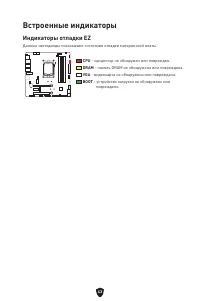
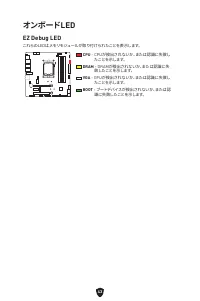
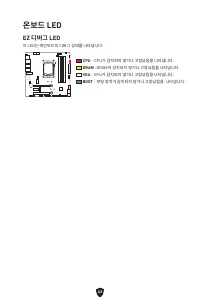
- 198 Индикаторы отладки EZ; Встроенные индикаторы
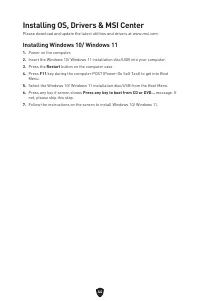
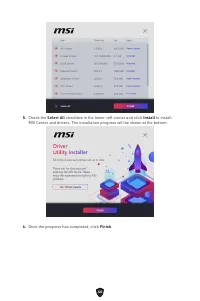
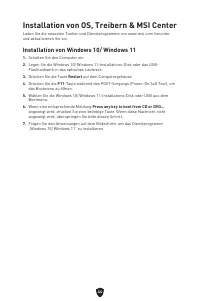
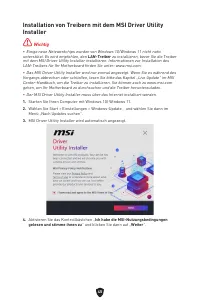
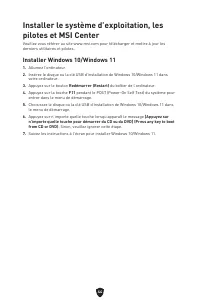
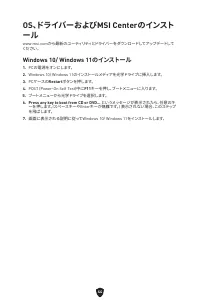
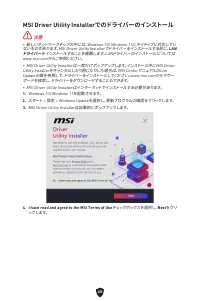
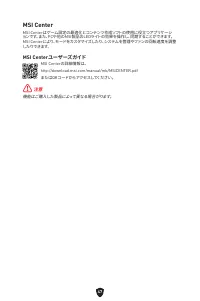
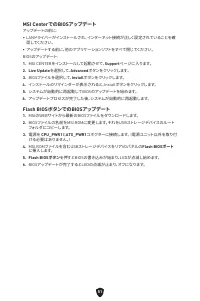
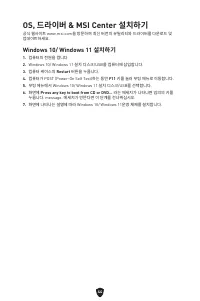
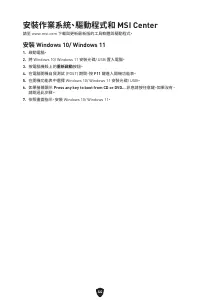
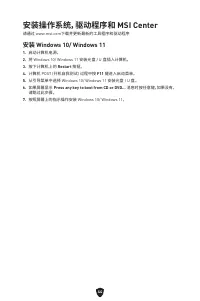
- 199 Установка ОС, драйверов и MSI Center; Установка Windows 10/ Windows 11
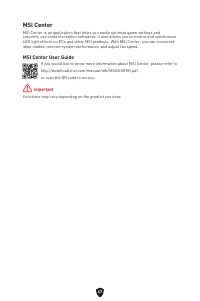
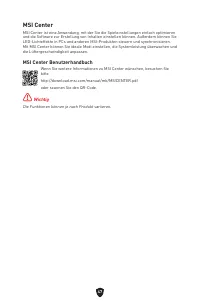
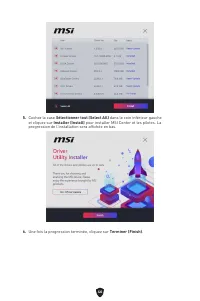
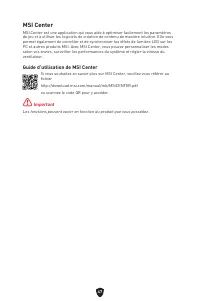
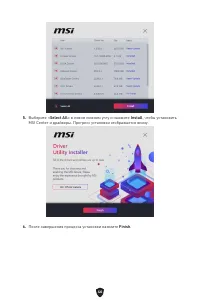
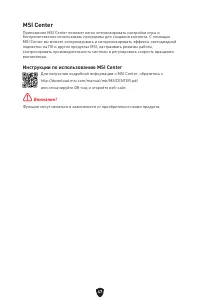
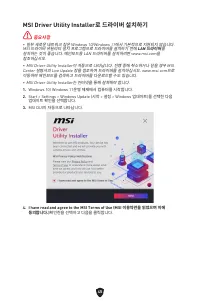
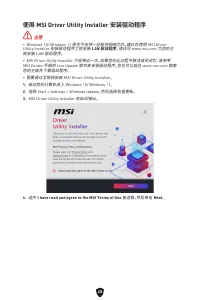
- 202 Инструкции по использованию MSI Center
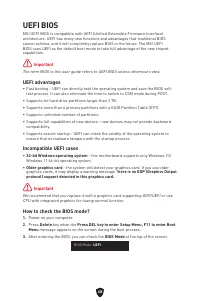
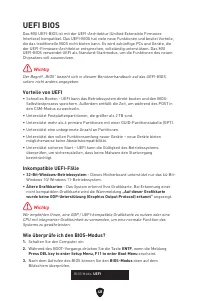
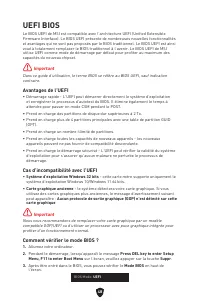
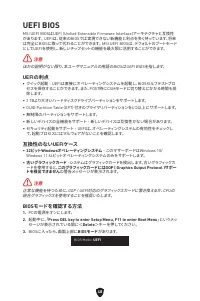
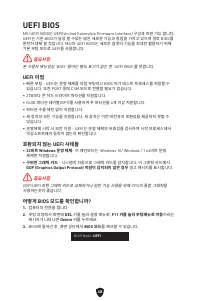
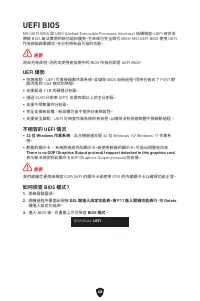
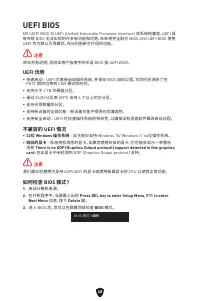
- 203 Преимущества UEFI
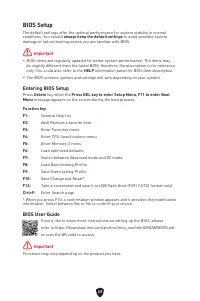
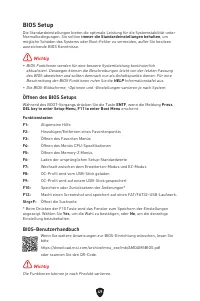
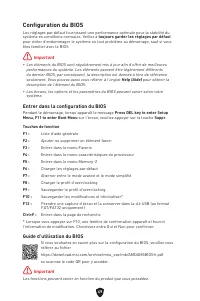
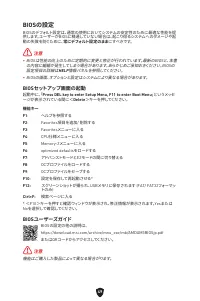
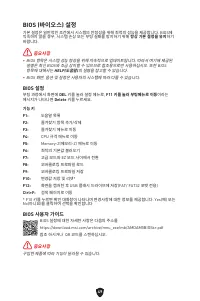
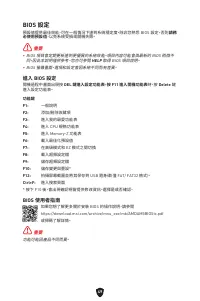
- 204 Настройка BIOS; Вход в настройки BIOS; Инструкции по настройке BIOS
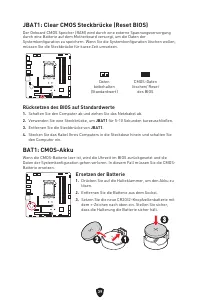
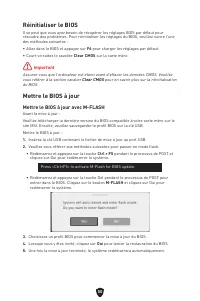
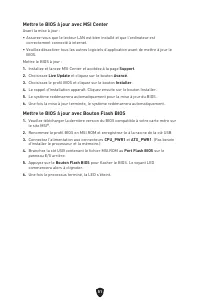
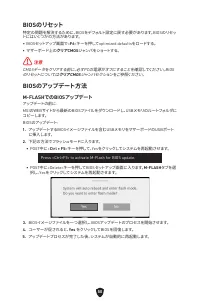
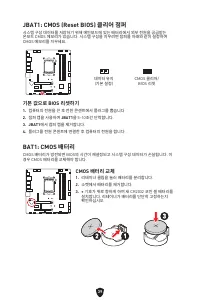
- 205 Сброс BIOS; Обновление BIOS; Обновление BIOS при помощи M-FLASH
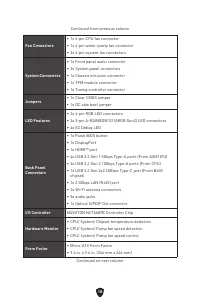
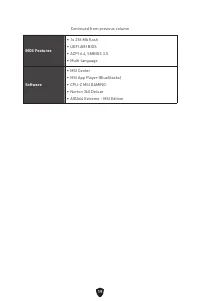
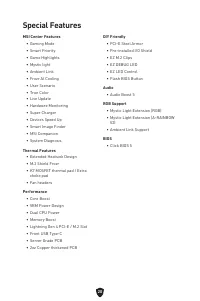
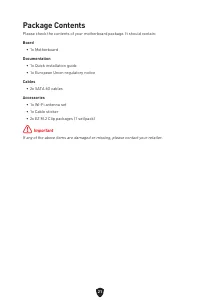
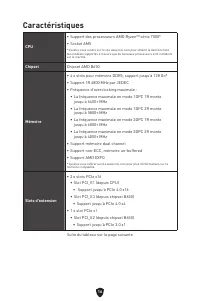
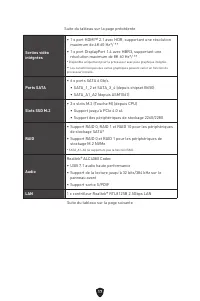
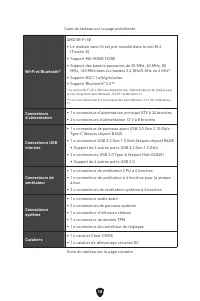
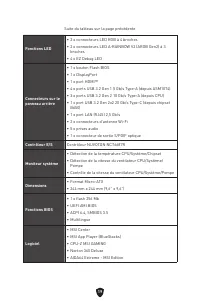
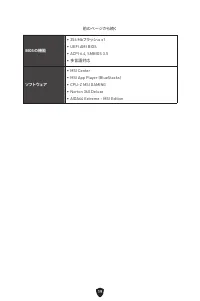
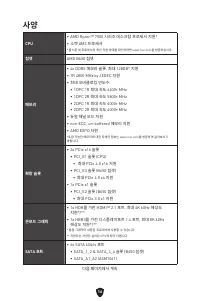
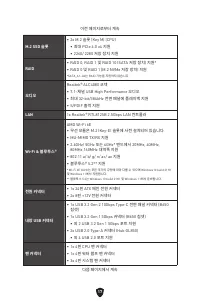
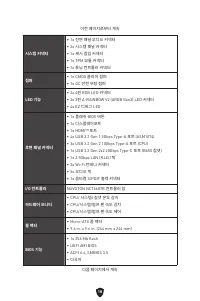
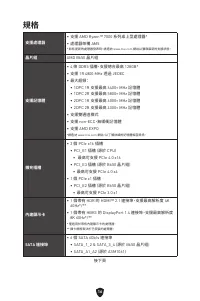
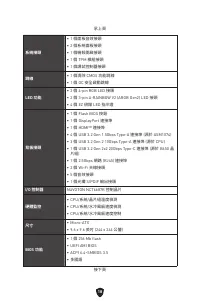
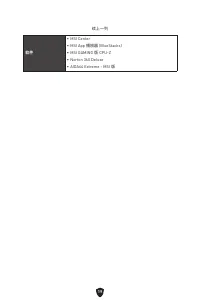
Характеристики

Остались вопросы?Не нашли свой ответ в руководстве или возникли другие проблемы? Задайте свой вопрос в форме ниже с подробным описанием вашей ситуации, чтобы другие люди и специалисты смогли дать на него ответ. Если вы знаете как решить проблему другого человека, пожалуйста, подскажите ему :)


