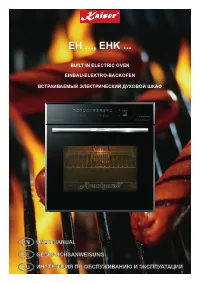
Духовые шкафы Kaiser EH 6981 - инструкция пользователя по применению, эксплуатации и установке на русском языке. Мы надеемся, она поможет вам решить возникшие у вас вопросы при эксплуатации техники.
Если остались вопросы, задайте их в комментариях после инструкции.
"Загружаем инструкцию", означает, что нужно подождать пока файл загрузится и можно будет его читать онлайн. Некоторые инструкции очень большие и время их появления зависит от вашей скорости интернета.


140
EN
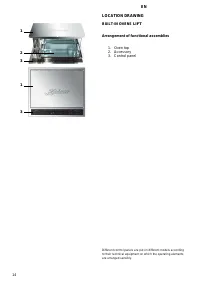
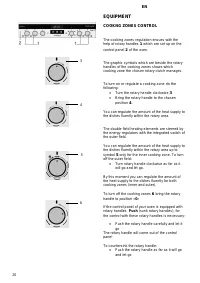
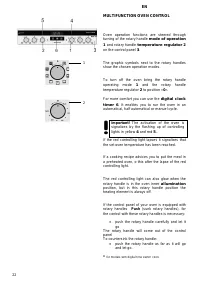
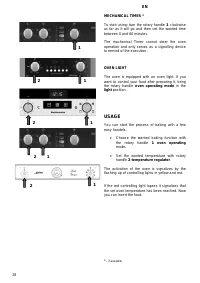
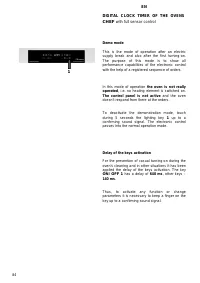
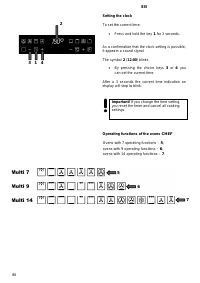
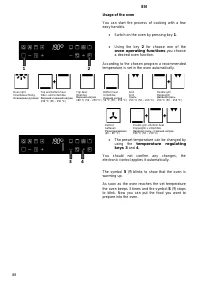
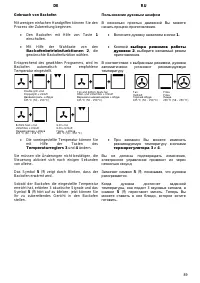
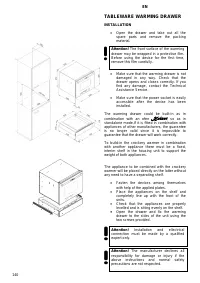
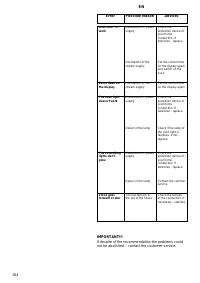
TABLEWARE WARMING DRAWER
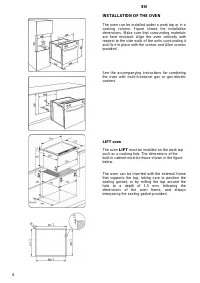
INSTALLATION
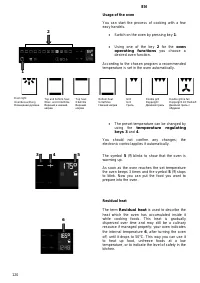
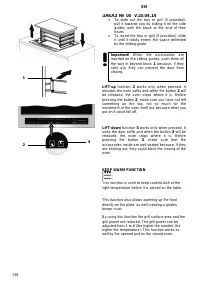
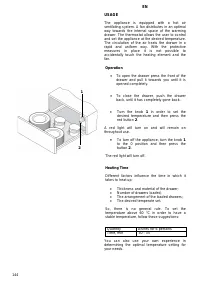
•
Open the drawer and take out all the
spare parts and remove the packing
material.
•
Make sure that the warming drawer is not
damaged in any way. Check that the
drawer opens and closes correctly. If you
find any damage, contact the Technical
Assistance Service.
•
Make sure that the power socket is easily
accessible after the devise has been
installed.
The warming drawer could be built-in as in
combination with an ofen
Kaiser
, so as in
standalone mode.If it is fitted in combination with
appliances of other manufacturers, the guarantee
is no longer valid since it is impossible to
guarantee that the drawer will work correctly.
To build-in the crockery warmer in combination
with another appliance there must be a fixed,
interim shelf in the housing unit to support the
weight of both appliances.
The appliance to be combined with the crockery
warmer will be placed directly on the latter without
any need to have a separating shelf.
•
Fasten the devices among themselves
with help of the applied plates.
•
Place the appliances on the shelf and
completely line up with the front of the
units.
•
Check that the appliances are properly
levelled and is sitting evenly on the shelf.
•
Open the drawer and fix the warming
drawer to the sides of the unit using the
two screws provided.
Attention!
The front surface of the warming
drawer may be wrapped in a protective film.
Before using the devise for the first time,
remove this film carefully.
Attention!
Installation and ellectrical
connection must be made by a qualified
expert only.
Attention!
The manufacturer declines all
responsibility for damage or injury if the
above instructions and normal safety
precautions are not respected.
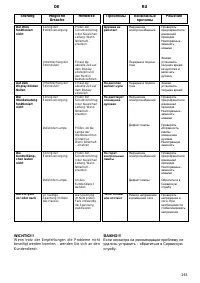
Содержание
- 5 INHALTSVERZEICHNIS; ОГЛАВЛЕНИЕ
- 7 FÜR DEN INSTALLATEUR; STROMANSCHLUSS; ИНСТРУКЦИЯ ПО МОНТАЖУ; ПОДКЛЮЧЕНИЕ К ЭЛЕКТРОСЕТИ
- 9 УСТАНОВКА; Духовой шкаф
- 11 Электронное
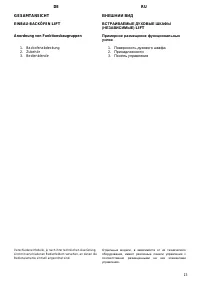
- 13 KURZBESCHREIBUNG; GESAMTANSICHT; КРАТКОЕ ОПИСАНИЕ; ВНЕШНИЙ ВИД; ВСТРАИВАЕМЫЕ ДУХОВЫЕ ШКАФЫ
- 15 Поверхность духового шкафа
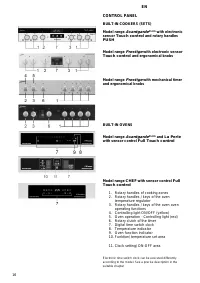
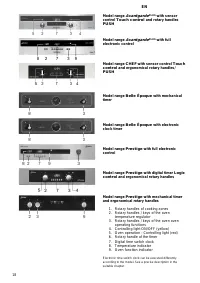
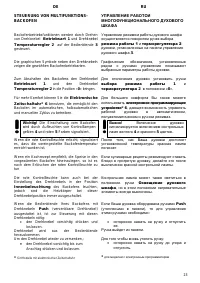
- 17 ПАНЕЛЬ УПРАВЛЕНИЯ
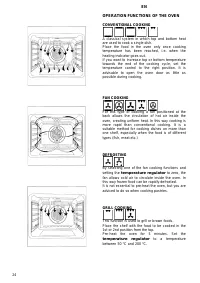
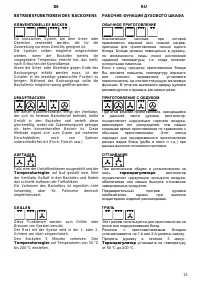
- 21 AUSSTATUNG; ОБОРУДОВАНИЕ; УПРАВЛЕНИЕ РАБОТОЙ
- 25 Temperaturregler; РАБОЧИЕ ФУНКЦИИ ДУХОВОГО ШКАФА; терморегуляторе
- 27 II
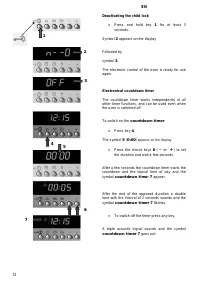
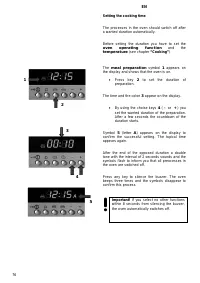
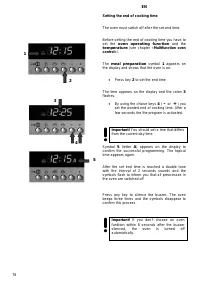
- 29 BENUTZUNG; ИСПОЛЬЗОВАНИЕ
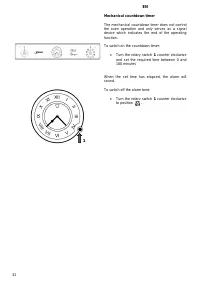
- 33 Mechanischer Kurzzeitwecker
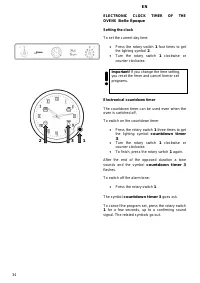
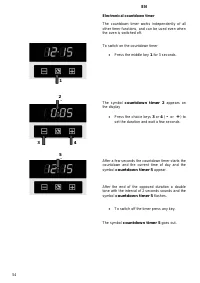
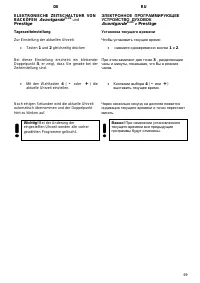
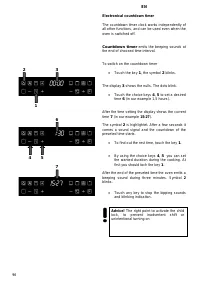
- 35 ELEKTRONISCHE ZEITSCHALTUHR VON; BACKÖFEN; ЭЛЕКТРОННОЕ
- 43 Elektronischer Kurzzeitwecker
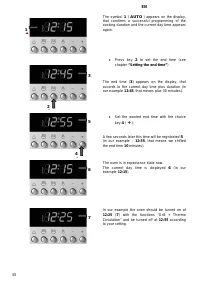
- 45 das Symbol
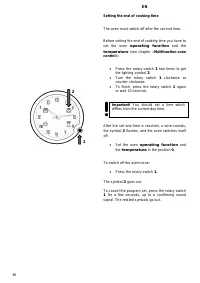
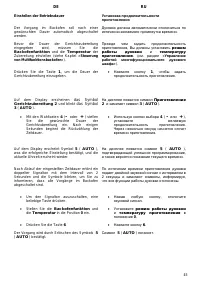
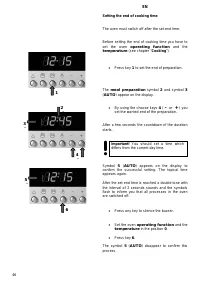
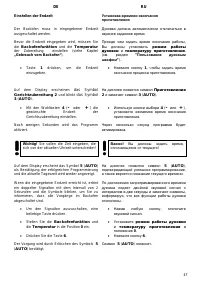
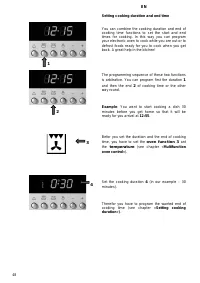
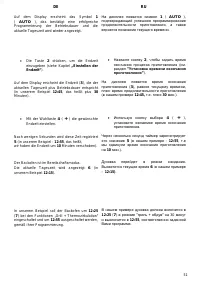
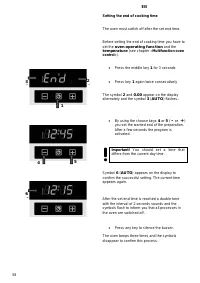
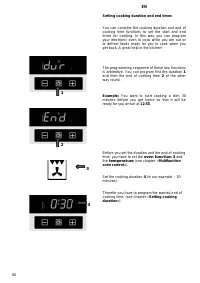
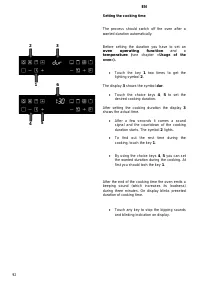
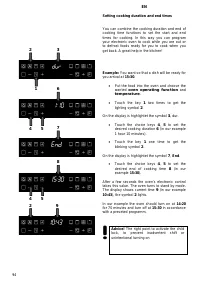
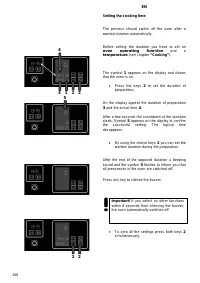
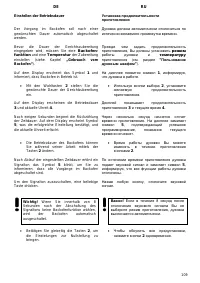
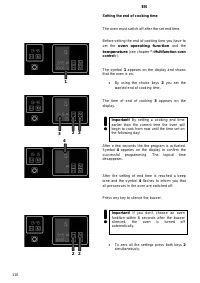
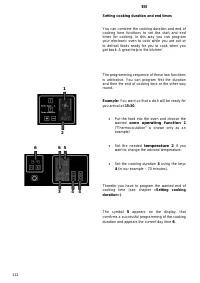
- 47 „Gebrauch vom Backofen“; Установка времени окончания
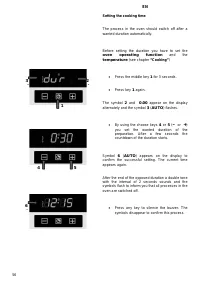
- 49 Backofenfunktion 3
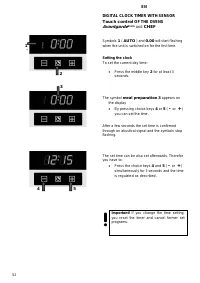
- 53 und; Uhrzeit; Touch control
- 57 „Gebrauch
- 61 Backofenfunktion
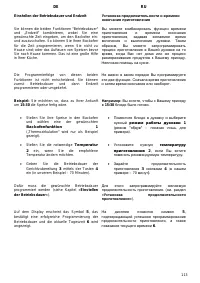
- 65 Установка громкости предупредительного
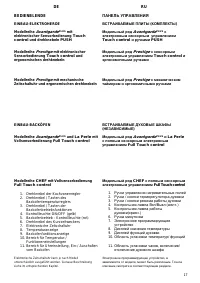
- 67 DE; RU
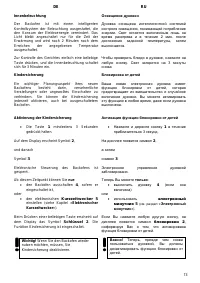
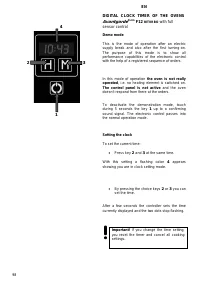
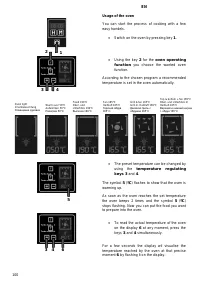
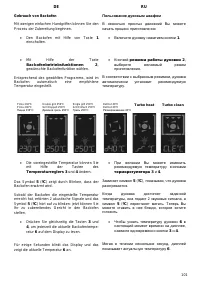
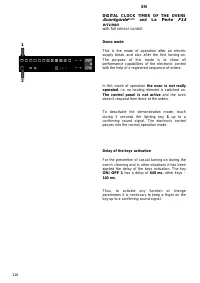
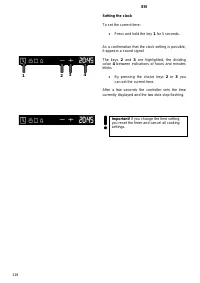
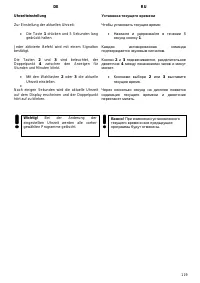
- 69 Tageszeiteinstellung; ЭЛЕКТРОННОЕ ПРОГРАММИРУЮЩЕЕ; Установка текущего времени
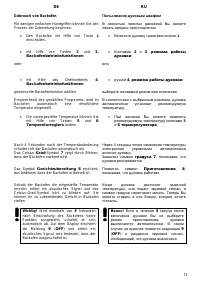
- 71 Gebrauch von Backofen
- 73 Kurzzeitwecker
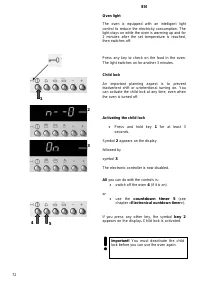
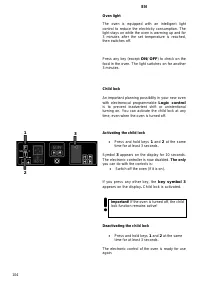
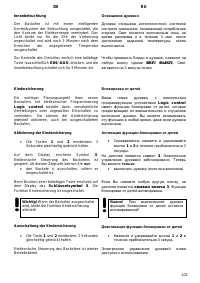
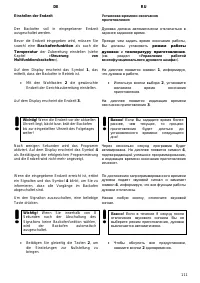
- 75 Ausschaltung der Kindersicherung
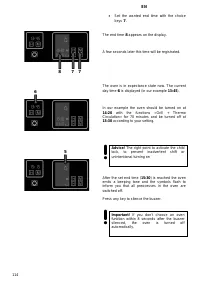
- 83 »Einstellen der
- 85 mit Vollsensorbedienung; полным
- 87 Uhrzeiteinstellung
- 91 Logic control
- 93 Funktion
- 97 Mit der; Электроный минутник
- 99 ЭЛЕКТРОННОЕ ПРОГРАММИРУЮЩЕЕ; полным сенсорным управлением
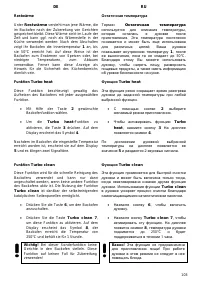
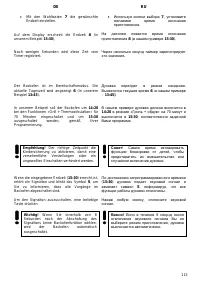
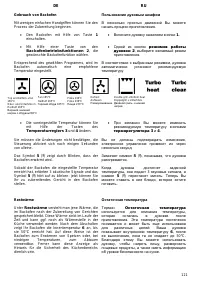
- 101 Turbo heat
- 107 Elektronischer Kurzzeitwecker und Wecker; Elektronischer Wecker
- 109 funktion
- 115 Совет
- 117 La Perle
- 125 Backofenbeleuchtung
- 133 nur
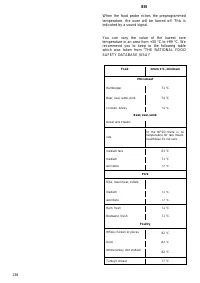
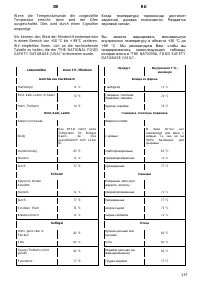
- 135 Temperatursonde
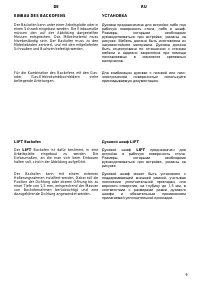
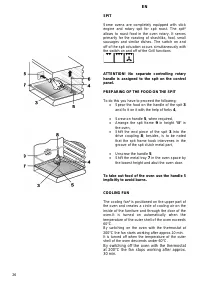
- 141 GESCHIRRWÄRME-SCHUBLADE; EINBAU; Achtung
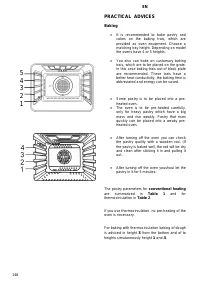
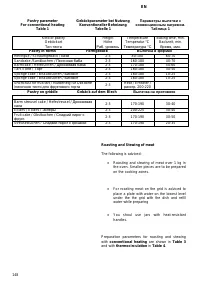
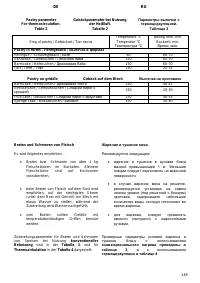
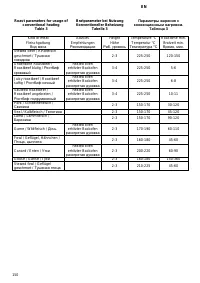
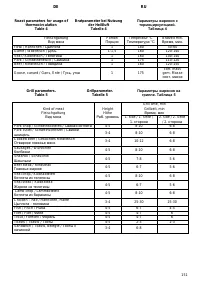
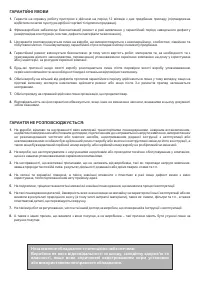
- 145 Gebrauch; Время нагрева
- 147 PRAKTISCHE EMPFEHLUNGEN; Выпечка кондитерских изделий
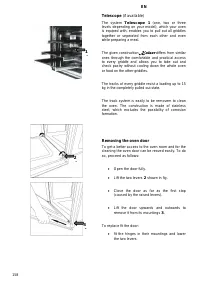
- 159 Teleskop 1; Телескоп 1
- 165 Если несмотря на рекомендации проблему не
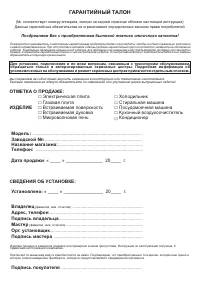
- 169 ГАРАНТИЙНЫЙ ТАЛОН
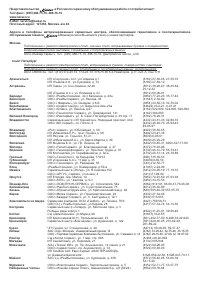
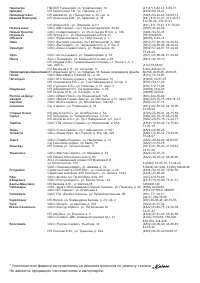
- 171 Уполномочено фирмой
- 174 Не є продавцем, виробником та імпортером.


