Швейная машина Janome Jem Gold 2 - инструкция пользователя по применению, эксплуатации и установке на русском языке. Мы надеемся, она поможет вам решить возникшие у вас вопросы при эксплуатации техники.
Если остались вопросы, задайте их в комментариях после инструкции.
"Загружаем инструкцию", означает, что нужно подождать пока файл загрузится и можно будет его читать онлайн. Некоторые инструкции очень большие и время их появления зависит от вашей скорости интернета.


7
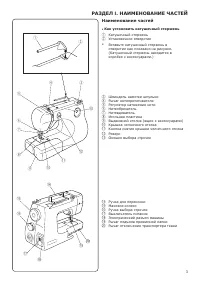
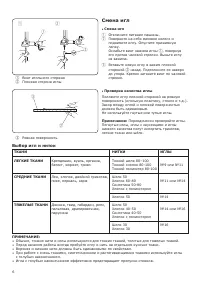
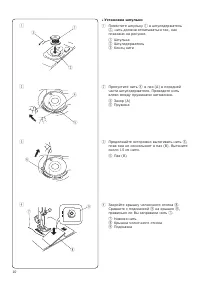
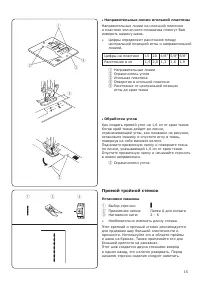
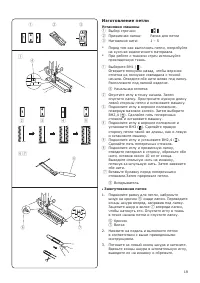
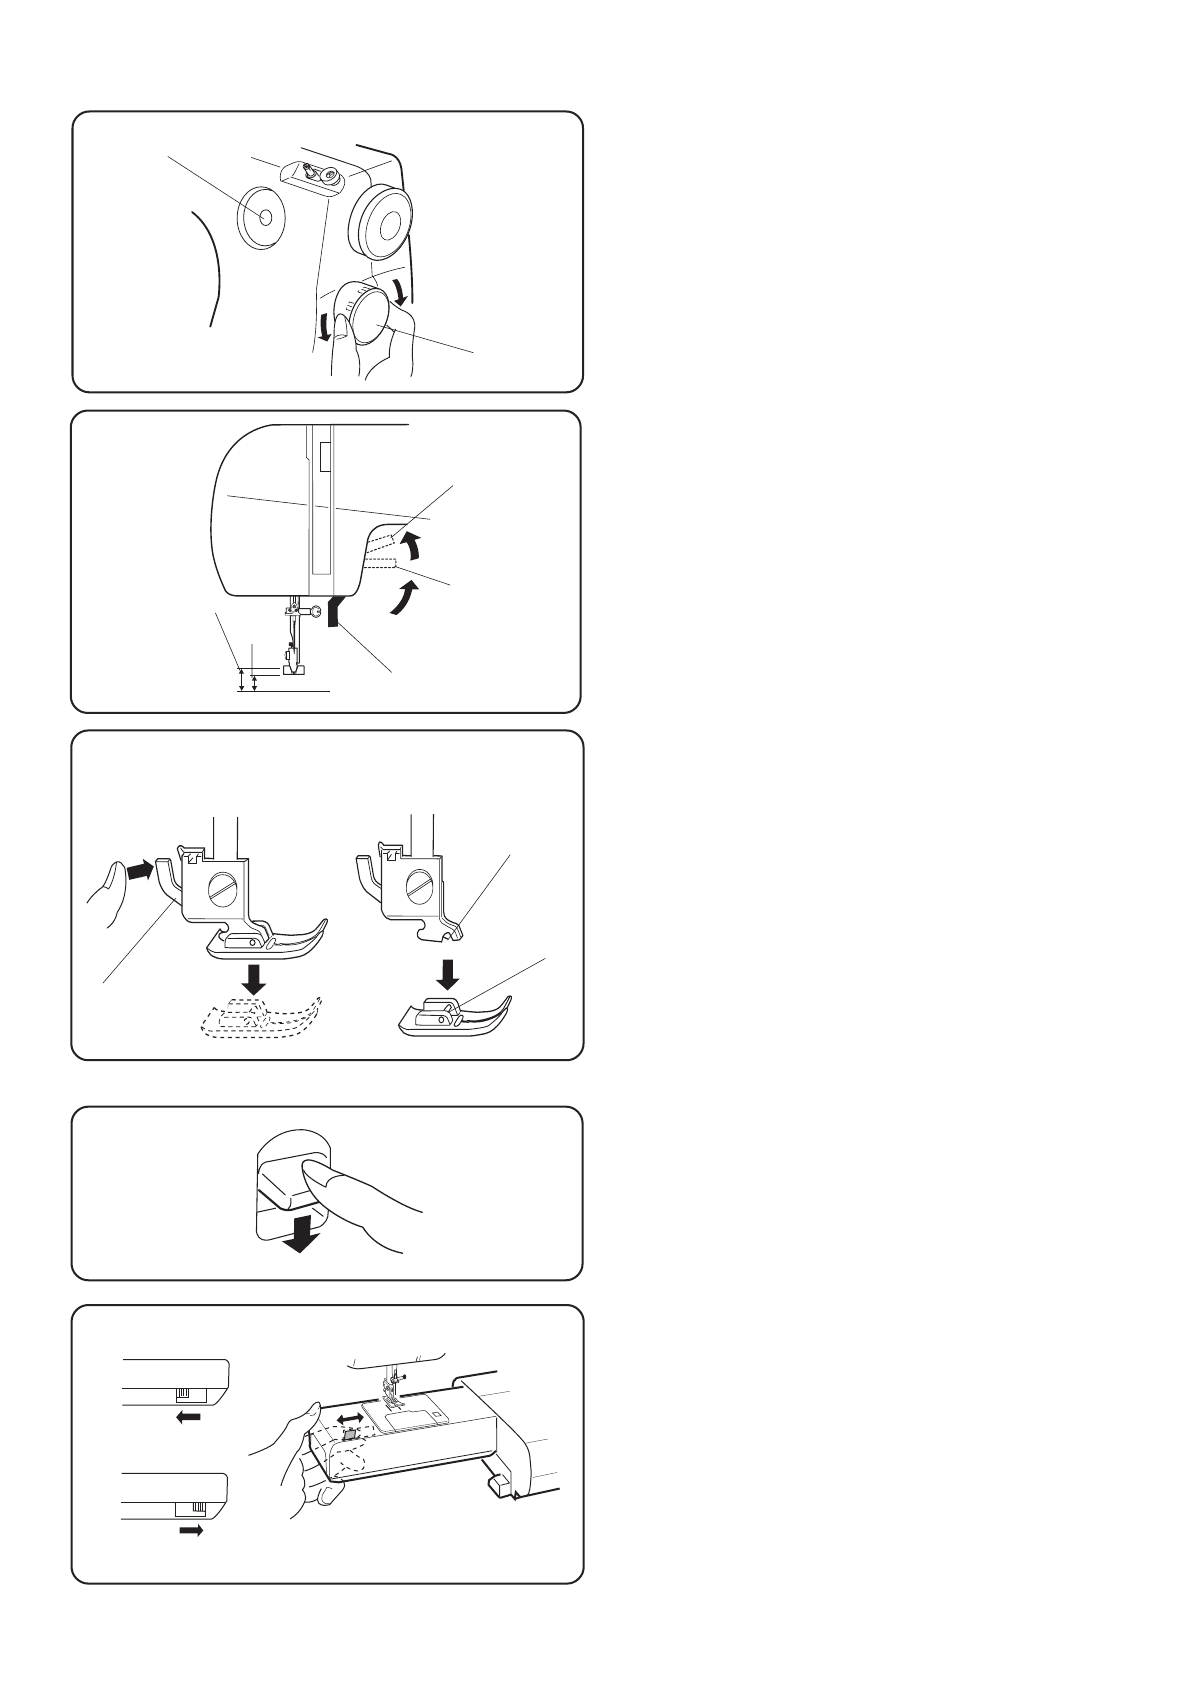
Выбор строчек
Поднимите иглу, установите нужную строчку
вращая ручку выбора строчек.
Примечание:
Не поворачивайте ручку выбора
строчек, если игла находится в ткани. Иначе
игла может погнуться или сломаться.
1
Окошко выбора строчки
2
Регулятор выбора строчек
Рычаг подъема прижимной лапки
Рычаг подъема поднимает и опускает
прижимную лапку.
Рычаг дает возможность поднять лапку выше
обычного положения на 0.6 см, чтобы заменить
лапку или подложить тяжелую ткань.
1
Обычное поднятое положение
2
Верхнее положение
3
Рычаг подъема лапки
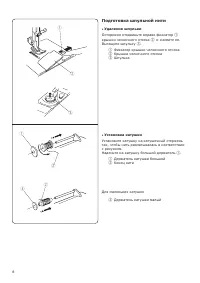
Прижимная лапка
Как установить и снять прижимную лапку
1
Поднимите прижимную лапку. Нажмите на
рычаг позади держателя лапки.
Прижимная лапка отскочит.
1
Рычаг
2
Расположите лапку, чтобы перекладина
лапки находилась под выемкой держателя.
Опустите лапку и пристегните ее.
2
Выемка
3
Перекладина
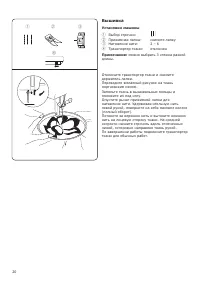
Реверс
При удержании кнопки реверса машина шьет
в обратную сторону.
Отключение транспортера ткани
Рычаг транспортера ткани находится под
свободным рукавом позади машины.
Передвиньте рычаг отключения транспортера
ткани вправо
1
и отключите его.
Чтобы поднять зубчатую рейку, передвиньте
рычаг влево
2
и поверните на себя маховое
колесо. При обычном шитье транспортер ткани
должен быть поднят.
7
q
w
w
q
w
q
e
q
e
w
z
x
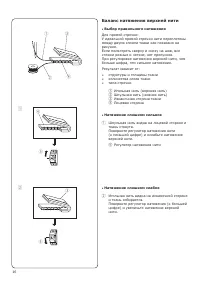
Pattern Selection
Raise the needle, turn the pattern selector dial to select
the desired pattern.
Note:
Do not turn the pattern selector dial while the
needle is in the fabric, otherwise the needle may
bend or break.
q
Pattern indication window
w
Pattern selector dial
Presser Foot Lifter
The presser foot lifter raises and lowers the presser foot.
You can raise it about 0.6 cm (1/4˝) higher than the
normal up position for easy removal of the presser foot or
to help you place heavy fabric under the foot.
q
Normal up position
w
High position
e
Presser foot lifter
To Attach and Remove the Presser Foot
z
Raise the presser foot. Press the lever on the back of
the foot holder.
The presser foot will drop off.
q
Lever
x
Place the selected presser foot so the pin on the
foot lies just under the groove of the foot holder.
Lower the presser bar to lock the foot in place.
w
Groove
e
Pin
Reverse Stitch Lever
The machine will sew in reverse while the reverse stitch
lever is depressed.
How to Drop the Feed Dog
The drop feed dog lever is located underneath the free
arm bed on the back side of the machine.
To drop the feed dog, slide the drop feed dog lever to the
right
q
.
To raise the feed dog, slide the drop feed dog lever to the
left
w
, and turn the handwheel toward you.
The feed dog must be up for normal sewing.
q
w
q
w
7
q
w
w
q
w
q
e
q
e
w
z
x
Pattern Selection
Raise the needle, turn the pattern selector dial to select
the desired pattern.
Note:
Do not turn the pattern selector dial while the
needle is in the fabric, otherwise the needle may
bend or break.
q
Pattern indication window
w
Pattern selector dial
Presser Foot Lifter
The presser foot lifter raises and lowers the presser foot.
You can raise it about 0.6 cm (1/4˝) higher than the
normal up position for easy removal of the presser foot or
to help you place heavy fabric under the foot.
q
Normal up position
w
High position
e
Presser foot lifter
To Attach and Remove the Presser Foot
z
Raise the presser foot. Press the lever on the back of
the foot holder.
The presser foot will drop off.
q
Lever
x
Place the selected presser foot so the pin on the
foot lies just under the groove of the foot holder.
Lower the presser bar to lock the foot in place.
w
Groove
e
Pin
Reverse Stitch Lever
The machine will sew in reverse while the reverse stitch
lever is depressed.
How to Drop the Feed Dog
The drop feed dog lever is located underneath the free
arm bed on the back side of the machine.
To drop the feed dog, slide the drop feed dog lever to the
right
q
.
To raise the feed dog, slide the drop feed dog lever to the
left
w
, and turn the handwheel toward you.
The feed dog must be up for normal sewing.
q
w
q
w
Содержание
- 3 СОДЕРЖАНИЕ; ll; НЕИСПРАВНОСТИ МАШИНЫ; Names of Parts; How to attach the spool pin; SECTION I NAME OF PARTS
- 4 Наименование частей; Как установить катушечный стержень; РАЗДЕЛ
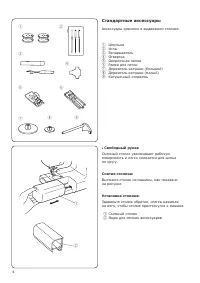
- 5 Стандартные аксессуары; Свободный рукав; Standard Accessories and Storage Place; • Free arm; Connecting Machine to Power Supply; • Foot control; SECTION II GETTING READY TO SEW; Operating Instructions:
- 6 Педаль
- 7 Смена игл; Выбор игл и ниток
- 8 The feed dog must be up for normal sewing.
- 9 Подготовка шпульной нити; Удаление шпульки; Preparation of the Bobbin Thread; • Removing the bobbin; c v; • Winding the bobbin
- 10 Намотка шпульки; Thread guide
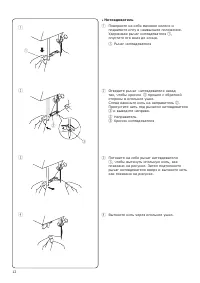
- 11 Установка шпульки; • Inserting the bobbin; Threading the Machine; • To set the needle thread; Raise the presser foot with the presser foot lifter; Then, down around the thread guide plate; and down into the take-up lever; Use the needle threader to thread the needle.
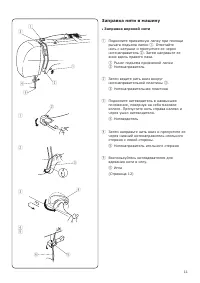
- 12 Заправка нити в машину; Заправка верхней нити
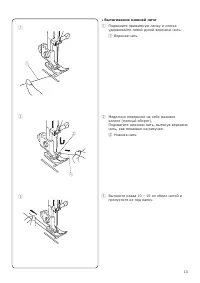
- 13 Нитевдеватель; • Using the needle threader; Needle threader knob; • Drawing up the bobbin thread; Needle thread
- 14 Вытягивание нижней нити
- 15 Прямая строчка; Установки машины; Начало строчки; SECTION III BASIC SEWING; • Using the seam guides on the needle plate; Triple Straight Stitch; lll; . ОСНОВНЫЕ ШВЕЙНЫЕ ТЕХНИКИ
- 16 Прямой тройной стежок
- 17 Баланс натяжения верхней нити; Выбор правильного натяжения; Balancing Needle Thread Tension; • Choose the correct tension; Wrong side of fabric; • Tension is too tight; Thread tension dial; • Tension is too loose; Zigzag Stitching; Overcasting; Overedge foot C; Tricot Stitch; Zigzag foot A; SECTION IV UTILITY STITCHES; or
- 18 Зигзаг; Обработка края; Трикотажный стежок
- 19 How to fold the fabric; Потайная строчка; How to fold the fabric; SECTION V DECORATIVE STITCHING; Как сложить ткань; Shell Tuck; How to fold the fabric; SECTION V DECORATIVE STITCHING; n m; Buttonhole; • Corded buttonhole; РАЗДЕЛ V. ДЕКОРАТИВНЫЕ СТРОЧКИ
- 20 Изготовление петли
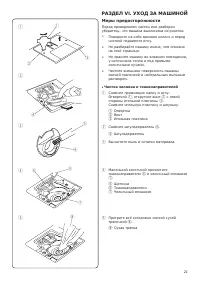
- 21 Вышивка; Machine setting; Machine setting; Caution; • Cleaning the hook race and feed dogs; SECTION VI CARE OF YOUR MACHINE
- 22 Меры предосторожности; Чистка челнока и тканенаправителей; РАЗДЕЛ V
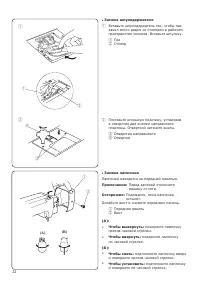
- 23 Replacing the Light Bulb; The sewing light is located behind the face plate.; • Replacing the bobbin holder
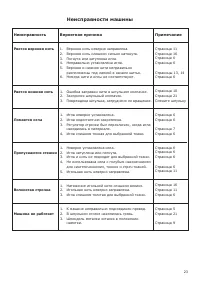
- 24 расположены под лапкой в начале шитья.; Примечание; Страница 9; Неисправности машины


