Швейная машина Janome Jem Gold 2 - инструкция пользователя по применению, эксплуатации и установке на русском языке. Мы надеемся, она поможет вам решить возникшие у вас вопросы при эксплуатации техники.
Если остались вопросы, задайте их в комментариях после инструкции.
"Загружаем инструкцию", означает, что нужно подождать пока файл загрузится и можно будет его читать онлайн. Некоторые инструкции очень большие и время их появления зависит от вашей скорости интернета.


5
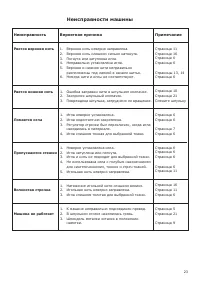
Подключение питания к машине
Перед подключением шнура, убедитесь,
что напряжение и частота Вашей сети
соответствуют напряжению и частоте,
указанным на машине.
1
Вилка педали
2
Гнездо машины
3
Электрическая вилка
4
Электрическая розетка
5
Выключатель питания
1
Выключите питание
5
.
2
Вставьте вилку педали
1
в гнездо
2
.
3
Вставьте электрическую вилку
3
в электрическую розетку
4
.
4
Нажмите на выключатель
5
: включите
питание и свет.
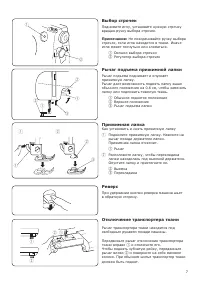
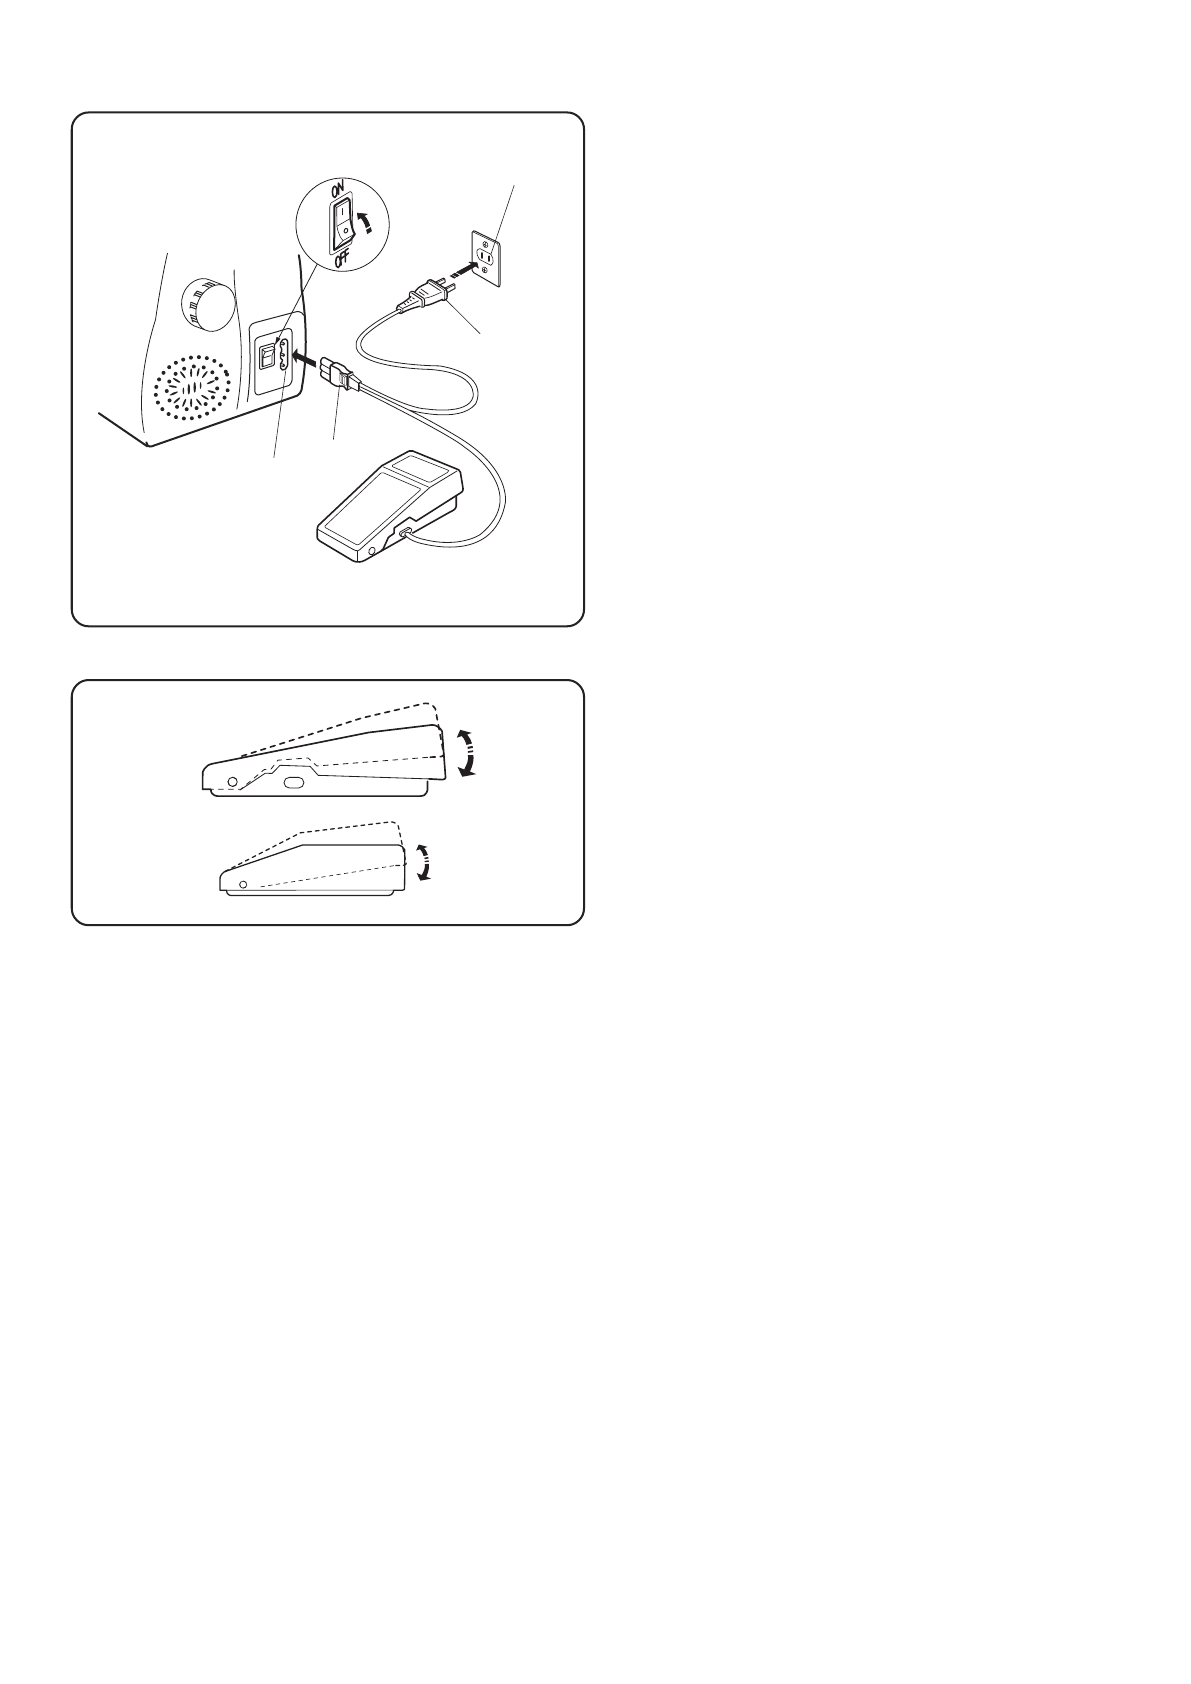
Контроль скорости шитья
•
Педаль
Скорость шитья можно регулировать педалью.
Чем сильнее нажимать на педаль, тем быстрее
шьет машина.
1
Педаль 120 В
2
Педаль 220-240 В
5
Connecting Machine to Power Supply
Before connecting the power cord, make sure the voltage
and frequency shown on the machine conform to your
electrical power.
q
Machine plug
w
Machine socket
e
Power supply plug
r
Electrical outlet
t
Power switch
z
Turn off the power switch
t
.
x
Insert the machine plug
q
into the machine
socket
w
.
c
Insert the power supply plug
e
into the
electrical outlet
r
.
v
Turn the power switch
t
to turn on the power and
sewing light.
Controlling Sewing Speed
• Foot control
Sewing speed can be varied by the foot control.
The harder you press on the control, the faster the
machine runs.
q
Foot control for 120V
w
Foot control for 240V
x
c
v
t
r
e
q
w
q
w
SECTION II GETTING READY TO SEW
z
Operating Instructions:
Foot Controller Model YC-482J or TJC-150 is used
with Sewing Machine Model 661.
This appliance has a polarized plug (one blade wider
than the other). To reduce the risk of electric shock, this
plug is intended to fit in a polarized outlet only one
way. If the plug does not fit in the outlet, reverse the
plug. If it still does not fit, contact a qualified electrician
to install the proper outlet. Do not modify the plug in
any way.
РАЗДЕЛ
ll
. ПОДГОТОВКА К ШИТЬЮ
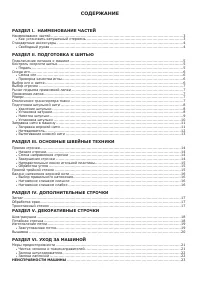
Содержание
- 3 СОДЕРЖАНИЕ; ll; НЕИСПРАВНОСТИ МАШИНЫ; Names of Parts; How to attach the spool pin; SECTION I NAME OF PARTS
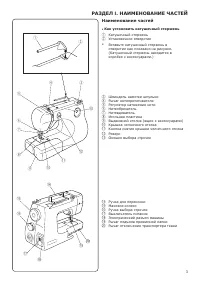
- 4 Наименование частей; Как установить катушечный стержень; РАЗДЕЛ
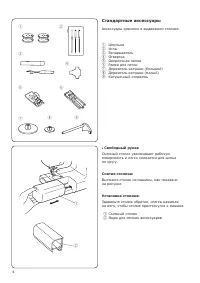
- 5 Стандартные аксессуары; Свободный рукав; Standard Accessories and Storage Place; • Free arm; Connecting Machine to Power Supply; • Foot control; SECTION II GETTING READY TO SEW; Operating Instructions:
- 6 Педаль
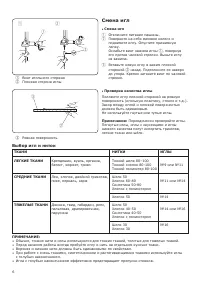
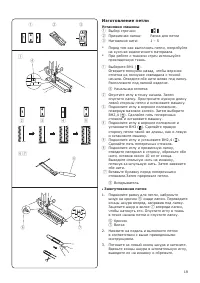
- 7 Смена игл; Выбор игл и ниток
- 8 The feed dog must be up for normal sewing.
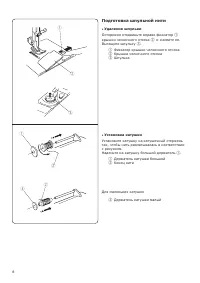
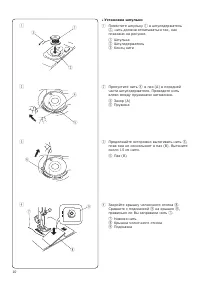
- 9 Подготовка шпульной нити; Удаление шпульки; Preparation of the Bobbin Thread; • Removing the bobbin; c v; • Winding the bobbin
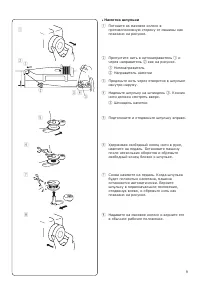
- 10 Намотка шпульки; Thread guide
- 11 Установка шпульки; • Inserting the bobbin; Threading the Machine; • To set the needle thread; Raise the presser foot with the presser foot lifter; Then, down around the thread guide plate; and down into the take-up lever; Use the needle threader to thread the needle.
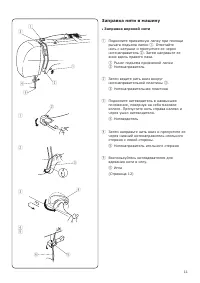
- 12 Заправка нити в машину; Заправка верхней нити
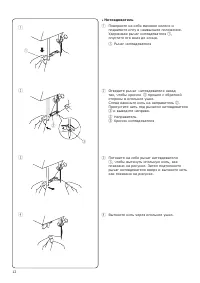
- 13 Нитевдеватель; • Using the needle threader; Needle threader knob; • Drawing up the bobbin thread; Needle thread
- 14 Вытягивание нижней нити
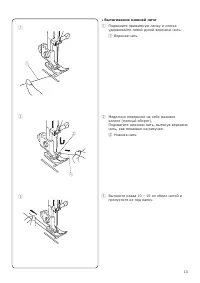
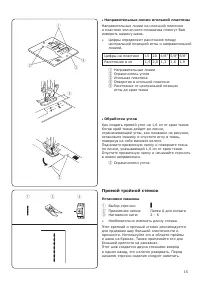
- 15 Прямая строчка; Установки машины; Начало строчки; SECTION III BASIC SEWING; • Using the seam guides on the needle plate; Triple Straight Stitch; lll; . ОСНОВНЫЕ ШВЕЙНЫЕ ТЕХНИКИ
- 16 Прямой тройной стежок
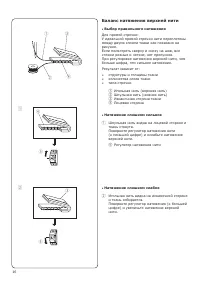
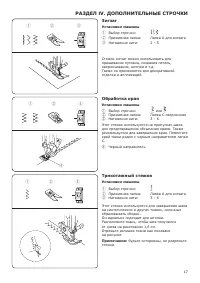
- 17 Баланс натяжения верхней нити; Выбор правильного натяжения; Balancing Needle Thread Tension; • Choose the correct tension; Wrong side of fabric; • Tension is too tight; Thread tension dial; • Tension is too loose; Zigzag Stitching; Overcasting; Overedge foot C; Tricot Stitch; Zigzag foot A; SECTION IV UTILITY STITCHES; or
- 18 Зигзаг; Обработка края; Трикотажный стежок
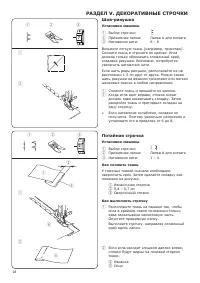
- 19 How to fold the fabric; Потайная строчка; How to fold the fabric; SECTION V DECORATIVE STITCHING; Как сложить ткань; Shell Tuck; How to fold the fabric; SECTION V DECORATIVE STITCHING; n m; Buttonhole; • Corded buttonhole; РАЗДЕЛ V. ДЕКОРАТИВНЫЕ СТРОЧКИ
- 20 Изготовление петли
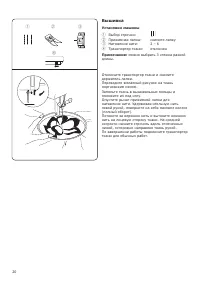
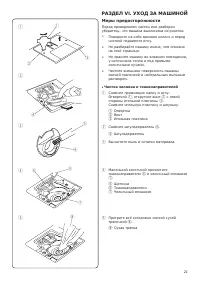
- 21 Вышивка; Machine setting; Machine setting; Caution; • Cleaning the hook race and feed dogs; SECTION VI CARE OF YOUR MACHINE
- 22 Меры предосторожности; Чистка челнока и тканенаправителей; РАЗДЕЛ V
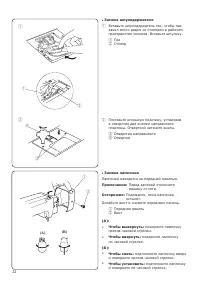
- 23 Replacing the Light Bulb; The sewing light is located behind the face plate.; • Replacing the bobbin holder
- 24 расположены под лапкой в начале шитья.; Примечание; Страница 9; Неисправности машины


