Швейная машина Janome Jem Gold 2 - инструкция пользователя по применению, эксплуатации и установке на русском языке. Мы надеемся, она поможет вам решить возникшие у вас вопросы при эксплуатации техники.
Если остались вопросы, задайте их в комментариях после инструкции.
"Загружаем инструкцию", означает, что нужно подождать пока файл загрузится и можно будет его читать онлайн. Некоторые инструкции очень большие и время их появления зависит от вашей скорости интернета.


12
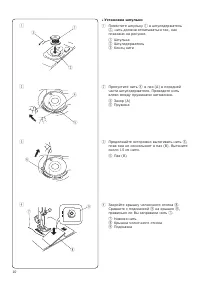
•
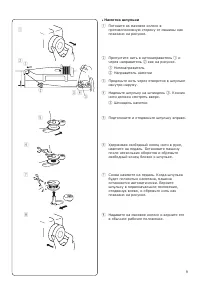
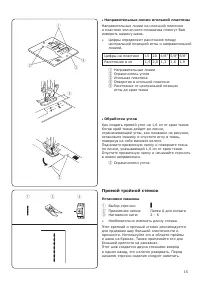
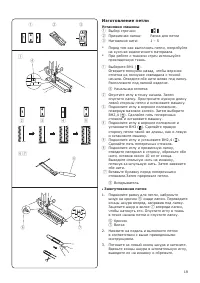
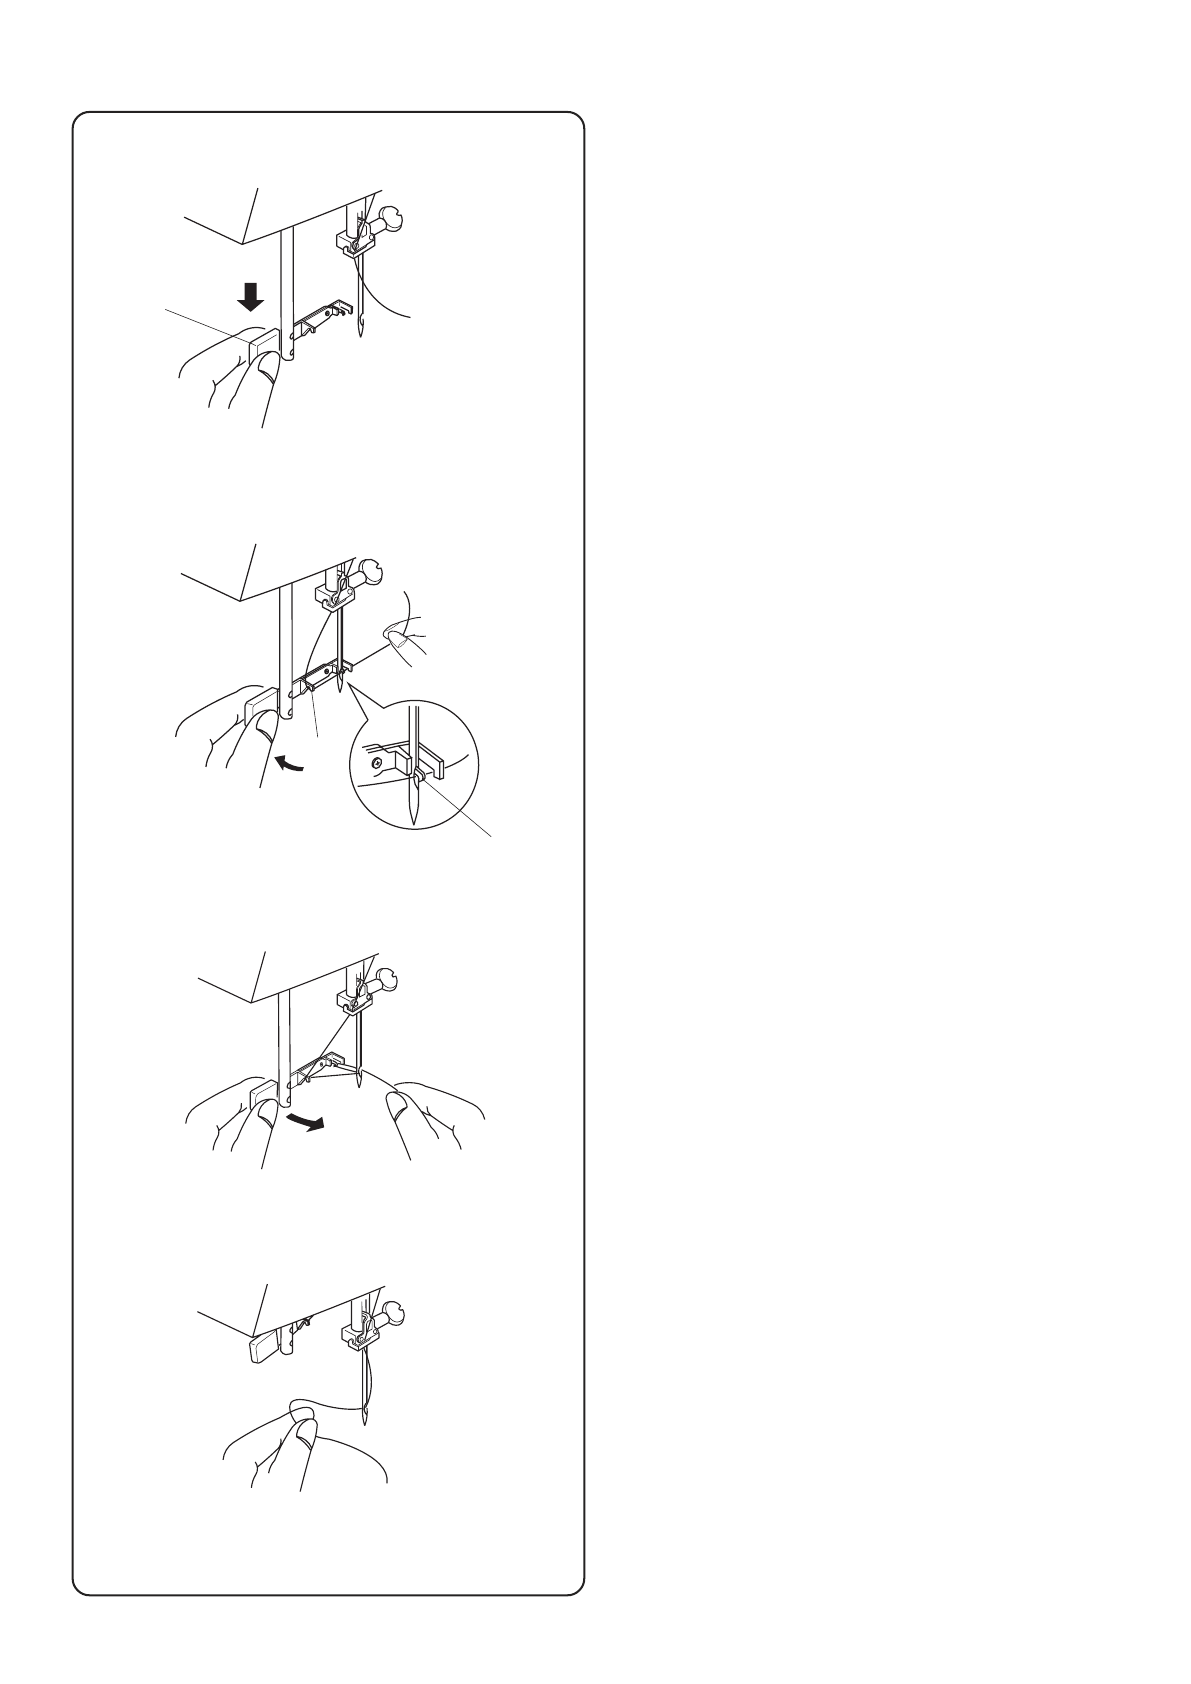
Нитевдеватель
1
Поверните на себя маховое колесо и
поднимите иглу в наивысшее положение.
Удерживая рычаг нитевдевателя
1
,
опустите его вниз до конца.
1
Рычаг нитевдевателя
2
Отведите рычаг нитевдевателя назад
так, чтобы крючок
3
прошел с обратной
стороны в игольное ушко.
Слева накиньте нить на направитель
2
.
Пропустите нить под рычагом нитевдевателя
3
и выведите направо.
2
Направитель
3
Крючок нитевдевателя
3
Потяните на себя рычаг нитевдевателя
1
, чтобы вытянуть игольную нить, как
показано на рисунке. Затем подтолкните
рычаг нитевдевателя вверх и вытяните нить
как показано на рисунке.
4
Вытяните нить через игольное ушко.
12
z
x
c
v
q
w
e
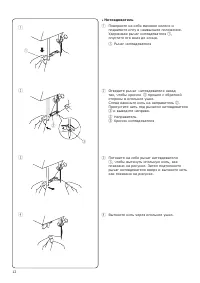
• Using the needle threader
z
Turn the handwheel toward you to raise the
needle to its highest position. Hold the needle
threader knob
q
and pull it down to its lowest
position.
q
Needle threader knob
x
Push the needle threader knob
q
to the back so
that the hook
e
is coming out from the backside of
the needle eye.
Hook the thread around the guide
w
from the left.
Pass the thread under the threader hook
e
and draw
the thread to the right.
w
Guide
e
Needle threader hook
c
Push the needle threader knob
q
towards you to
pull out the needle thread as illustrated. Then push the
knob
q
up to pull the needle thread as illustrated.
v
Pull the needle thread through the needle eye.
13
z
x
c
q
w
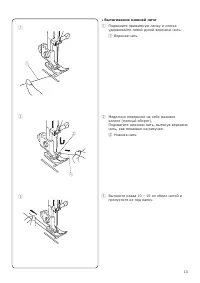
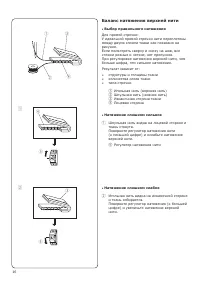
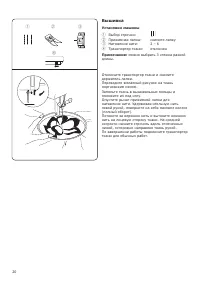
• Drawing up the bobbin thread
z
Raise the presser foot and hold the needle thread
lightly with your left hand.
q
Needle thread
x
Turn the handwheel slowly towards you one
complete turn.
Bring the bobbin thread up by pulling the needle
thread as illustrated.
w
Bobbin thread
c
Pull 10 to 15 cm (4˝ to 6˝) of both threads back
and under the presser foot.
q
Содержание
- 3 СОДЕРЖАНИЕ; ll; НЕИСПРАВНОСТИ МАШИНЫ; Names of Parts; How to attach the spool pin; SECTION I NAME OF PARTS
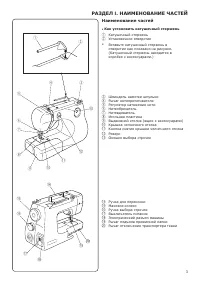
- 4 Наименование частей; Как установить катушечный стержень; РАЗДЕЛ
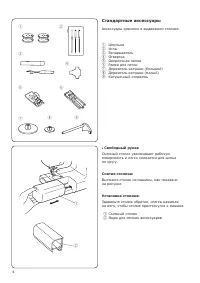
- 5 Стандартные аксессуары; Свободный рукав; Standard Accessories and Storage Place; • Free arm; Connecting Machine to Power Supply; • Foot control; SECTION II GETTING READY TO SEW; Operating Instructions:
- 6 Педаль
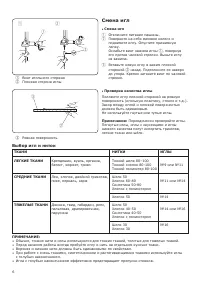
- 7 Смена игл; Выбор игл и ниток
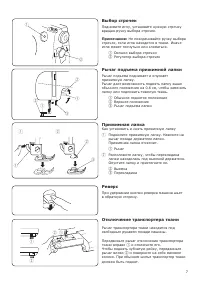
- 8 The feed dog must be up for normal sewing.
- 9 Подготовка шпульной нити; Удаление шпульки; Preparation of the Bobbin Thread; • Removing the bobbin; c v; • Winding the bobbin
- 10 Намотка шпульки; Thread guide
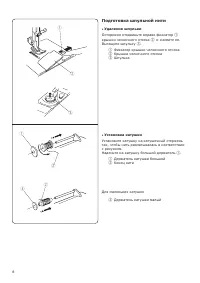
- 11 Установка шпульки; • Inserting the bobbin; Threading the Machine; • To set the needle thread; Raise the presser foot with the presser foot lifter; Then, down around the thread guide plate; and down into the take-up lever; Use the needle threader to thread the needle.
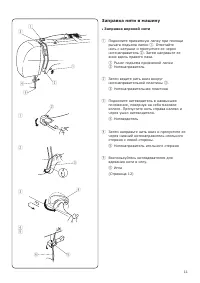
- 12 Заправка нити в машину; Заправка верхней нити
- 13 Нитевдеватель; • Using the needle threader; Needle threader knob; • Drawing up the bobbin thread; Needle thread
- 14 Вытягивание нижней нити
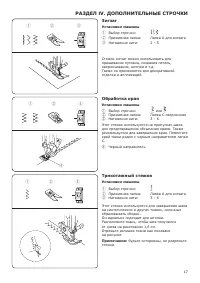
- 15 Прямая строчка; Установки машины; Начало строчки; SECTION III BASIC SEWING; • Using the seam guides on the needle plate; Triple Straight Stitch; lll; . ОСНОВНЫЕ ШВЕЙНЫЕ ТЕХНИКИ
- 16 Прямой тройной стежок
- 17 Баланс натяжения верхней нити; Выбор правильного натяжения; Balancing Needle Thread Tension; • Choose the correct tension; Wrong side of fabric; • Tension is too tight; Thread tension dial; • Tension is too loose; Zigzag Stitching; Overcasting; Overedge foot C; Tricot Stitch; Zigzag foot A; SECTION IV UTILITY STITCHES; or
- 18 Зигзаг; Обработка края; Трикотажный стежок
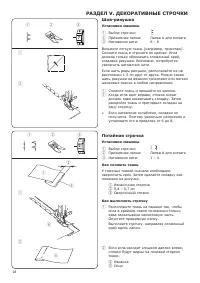
- 19 How to fold the fabric; Потайная строчка; How to fold the fabric; SECTION V DECORATIVE STITCHING; Как сложить ткань; Shell Tuck; How to fold the fabric; SECTION V DECORATIVE STITCHING; n m; Buttonhole; • Corded buttonhole; РАЗДЕЛ V. ДЕКОРАТИВНЫЕ СТРОЧКИ
- 20 Изготовление петли
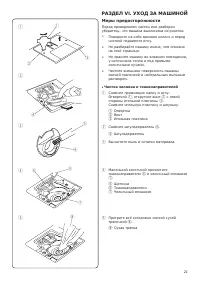
- 21 Вышивка; Machine setting; Machine setting; Caution; • Cleaning the hook race and feed dogs; SECTION VI CARE OF YOUR MACHINE
- 22 Меры предосторожности; Чистка челнока и тканенаправителей; РАЗДЕЛ V
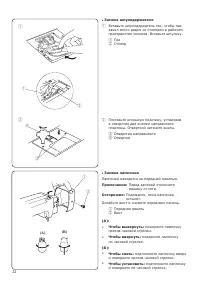
- 23 Replacing the Light Bulb; The sewing light is located behind the face plate.; • Replacing the bobbin holder
- 24 расположены под лапкой в начале шитья.; Примечание; Страница 9; Неисправности машины


