
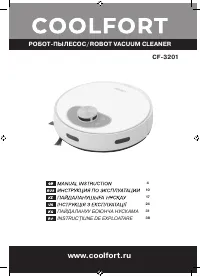
Роботы-пылесосы COOLFORT CF-3201 - инструкция пользователя по применению, эксплуатации и установке на русском языке. Мы надеемся, она поможет вам решить возникшие у вас вопросы при эксплуатации техники.
Если остались вопросы, задайте их в комментариях после инструкции.
"Загружаем инструкцию", означает, что нужно подождать пока файл загрузится и можно будет его читать онлайн. Некоторые инструкции очень большие и время их появления зависит от вашей скорости интернета.


6
ENGLISH
•
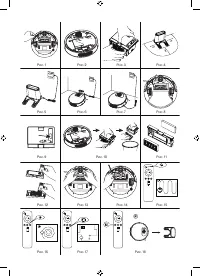
There should be at least 2 meters of free space in
front of the charging station and at least 1 meter at the
sides (pic. 4).
•
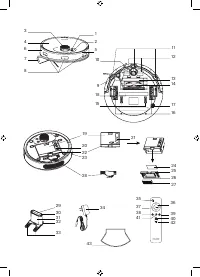
Connect the power adapter (34) connecting cord
jack to the socket (32) on the charging station (29).
Carefully wind the connection cord of the power adapt-
er, do not let it hang (pic. 5).
Notes:
Do not place the charging station next to objects
with high reflective power, such as mirrors, otherwise the
vacuum cleaner’s return to the charging station will be
hindered.
BEFORE USING THE VACUUM CLEANER
•
Remove all kinds of power cords, power extension
cords and other similar items from the floor that
may interfere with the movement of the vacuum
cleaner.
•
The vacuum cleaner is intended for operation on a
smooth floor or on a carpet with low pile (no more than
1,5 cm). Do not use the vacuum cleaner for cleaning
the floors and carpets with high pile.
•
Make sure that there are no tablecloths, curtains or
other furnishings hanging to the floor along the path of
motion of the vacuum cleaner.
•
The free space under the furniture should be at least
11 centimeters, otherwise the vacuum cleaner will get
stuck under the furniture.
•
If the distance from the floor to the furniture is less than
11 centimeters, it is necessary to lift the furniture or to
provide a barrier against the vacuum cleaner getting
in such places.
•
Arrange furniture for free movement of the vacuum
cleaner, remove foreign objects from the floor.
•
Do not use the vacuum cleaner in the rooms with
unsteady furniture, especially if there are fragile inte-
rior objects or burning candles placed on it.
•
Do not place or install foreign objects on the vacuum
cleaner body, make sure that there are no pets on the
vacuum cleaner body.
•
Before using the vacuum cleaner make sure that there
are no narrow places in the path of motion of the vac-
uum cleaner.
USING THE VACUUM CLEANER
Charging the vacuum cleaner battery
•
Install the charging station (29). The installation rec-
ommendations are given above.
•
Plug the power adapter (34) into the mains socket,
the charging station operation indicator (30) will light
up red.
•
Place the vacuum cleaner right in the center of the
charging station (29), the contact points (12) on the
vacuum cleaner should match the contact points (33)
on the charging station (pic. 6). The vacuum clean-
er will start charging. After some time you will hear
a sound signal, and the control buttons (on/off (2)
«
» and returning to the charging station (1) «
»)
will start flashing white.
•
For the first time charge the battery for 4-5 hours.
Note:
1. If the charging station is not available, you can charge
the vacuum cleaner directly from the power adapter
as shown on the pic. 7. In this case connect the power
adapter (34) connecting cord jack to the socket (23) on
the vacuum cleaner body.
2. When placing the vacuum cleaner on the charging
station (29) pay attention to the position of the side
brush (9). The brush bristles should not interrupt the
contact points (12) of the vacuum cleaner and the
contact points for charging (33). If the bristles are
above the contact point (12), turn the brush (9) by
the cord.
Notes:
When you place the vacuum cleaner on the
charging station (29) or if it is charging through the power
adapter, the unit will be automatically switched on, even if
it was preliminary switched off.
•
Wait until the control buttons (1) «
» and (2) «
» illu-
mination will stop flashing and start glowing constantly.
The battery charging is finished and the vacuum clean-
er is ready for operation.
Switching the vacuum cleaner on/off
•
To switch the vacuum cleaner on press and hold the
button (2) «
» for more than 3 seconds until the con-
trol buttons (1) and (2) starts flashing white. After a
while you will hear a sound signal, and the control but-
tons illumination will glow constantly. Vacuum cleaner
is ready for operation.
Notes:
The vacuum cleaner switches off automatically if
there are no commands and if the waiting time exceeds
30 minutes.
•
To switch the vacuum cleaner off press and hold the
button (2) «
» for more that 3 seconds until you hear
a voice message. The vacuum cleaner will be switched
off and the control buttons illumination will go out.
Cleaning mode selection
•
You can select the required cleaning mode with the
remote control.
Notes:
- after you switch the vacuum cleaner off, it will
start cleaning in the automatic mode when switched on
again.
Automatic room cleaning mode
•
To switch the automatic room cleaning mode on, press
the on/off button (2) «
» or the button (35) «
АВТО
» on
the remote control (RC), you will hear a corresponding
sound message.
•
During cleaning the vacuum cleaner makes a short
stop to calculate (review and analyze) the area of the
surface to clean.
•
Do not interfere with the vacuum cleaner during the
stop. In different rooms the time of the stop will be
different.
•
After finishing the cleaning the vacuum cleaner will
stop and automatically return to the charging station.
Notes:
if you need to clean only one room, close the door
and the vacuum cleaner will clean the room. If there is no
charging station in the room, it will return to the starting
point after cleaning is finished.
Temporary stop of the vacuum cleaner
during cleaning
•
If you need to pause during the operation of the vac-
uum cleaner, press the on/off button (2) «
» or the
“start/pause” button (37) «
» on the remote control
once.
•
To resume cleaning, press the on/off button (2) «
»
or the “start/pause” button (37) «
» on the remote
control (pic. 15) again.
Содержание
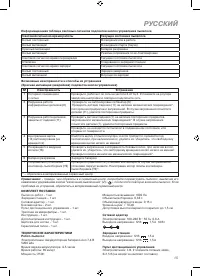
- 11 Не разрешайте детям играть с полиэ-; ПЕРЕД ПЕРВЫМ ИСПОЛЬЗОВАНИЕМ; Сохраните заводскую упаковку.
- 12 Не устанавливайте зарядную станцию; ПЕРЕД ИСПОЛЬЗОВАНИЕМ ПЫЛЕСОСА; При установке пылесоса на зарядную
- 13 Пылесос отключается автоматически; если вам нужно убрать только одну
- 14 Отсрочка старта 24 часа; - в режиме “отсрочка старта 24 часа”; ЧИСТКА И УХОД; в специальном углублении.; ХРАНЕНИЕ
- 15 Световой сигнал во время работы
- 16 УТИЛИЗАЦИЯ; Срок службы устройства – 3 года
- 44 înseamnă că produsul dat a fost fabricat în iunie (luna a asea) 2006.
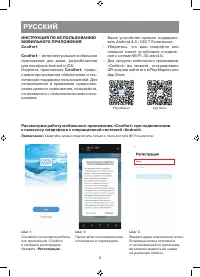
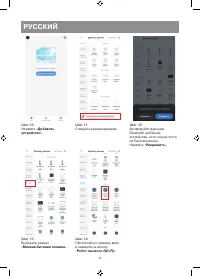
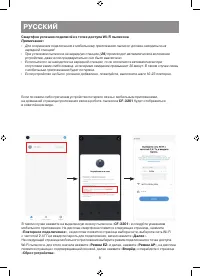
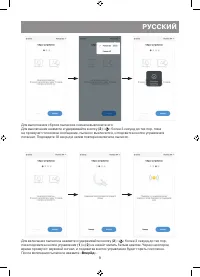
- 46 – Ваше устройство должно поддержи-; Play Маркет
- 48 Следуйте рекомендациям.
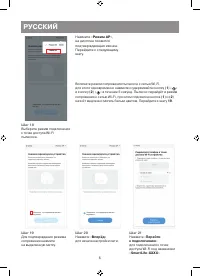
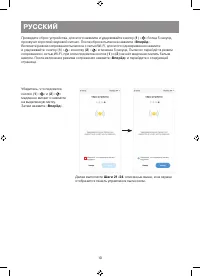
- 50 » в течение 5 секунд. Пылесос перейдёт в режим
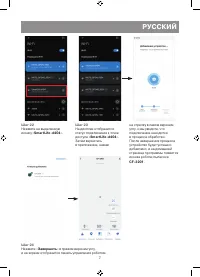
- 53 » более 3 секунд до тех пор, пока; Для включения пылесоса нажмите и удерживайте кнопку (2) «; » более 3 секунд до тех пор,


