Пилы торцовочные Makita MLS100 - инструкция пользователя по применению, эксплуатации и установке на русском языке. Мы надеемся, она поможет вам решить возникшие у вас вопросы при эксплуатации техники.
Если остались вопросы, задайте их в комментариях после инструкции.
"Загружаем инструкцию", означает, что нужно подождать пока файл загрузится и можно будет его читать онлайн. Некоторые инструкции очень большие и время их появления зависит от вашей скорости интернета.


9
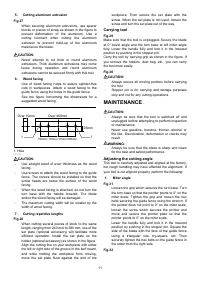
CAUTION:
•
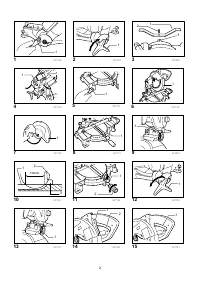
When tilting the saw blade, be sure to raise the
handle fully.
•
After changing the bevel angle, always secure the
arm by tightening the knob clockwise.
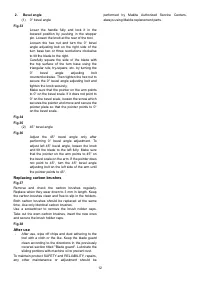
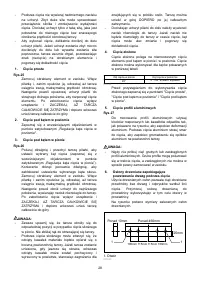
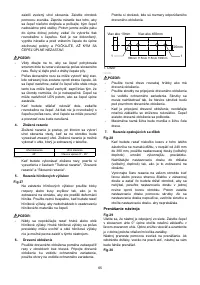
Switch action
CAUTION:
•
Before plugging in the tool, always check to see
that the switch trigger actuates properly and
returns to the "OFF" position when released.
For European countries
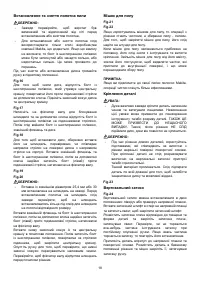
Fig.14
To start the tool, push the lever to the right and then pull
the switch trigger. Release the switch trigger to stop.
For all countries other than European countries
Fig.15
To start the tool, simply pull the switch trigger. Release
the switch trigger to stop.
WARNING:
•
NEVER use tool without a fully operative switch
trigger. Any tool with an inoperative switch is
HIGHLY DANGEROUS and must be repaired
before further usage.
ASSEMBLY
CAUTION:
•
Always be sure that the tool is switched off and
unplugged before carrying out any work on the
tool.
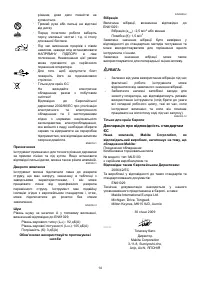
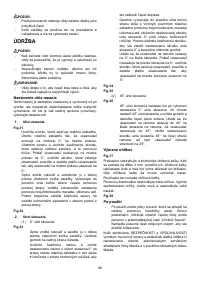
Installing or removing saw blade
CAUTION:
•
Always be sure that the tool is switched off and
unplugged before installing or removing the blade.
•
Use only the Makita wrench provided to install or
remove the blade. Failure to do so may result in
overtightening or insufficient tightening of the hex
bolt. This could cause an injury.
When removing or installing the blade, keep the handle
in the raised position.
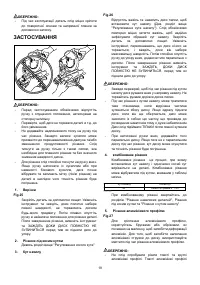
Fig.16
To remove the blade, use the wrench to loosen the hex
bolt holding the center cover by turning it
counterclockwise. Raise the blade guard and center
cover.
Fig.17
Press the shaft lock to lock the spindle and use the
wrench to loosen the hex bolt clockwise. Then remove
the hex bolt, outer flange and blade.
Fig.18
To install the blade, mount it carefully onto the spindle,
making sure that the direction of the arrow on the
surface of the blade matches the direction of the arrow
on the blade case. Install the outer flange and hex bolt,
and then use the wrench to tighten the hex bolt
(left-handed) securely counterclockwise while pressing
the shaft lock.
Fig.19
Fig.20
CAUTION:
•
The ring 25.4 mm or 30 mm in outer diameter is
factory-installed onto the spindle. Before mounting
the blade onto the spindle, always be sure that the
correct ring for the arbor hole of the blade you
intend to use is installed onto the spindle.
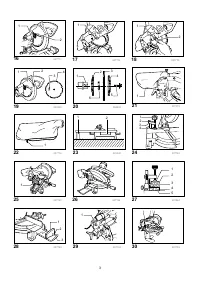
Install the outer flange and hex bolt, and then use the
wrench to tighten the hex bolt (left-handed) securely
counterclockwise while pressing the shaft lock.
Return the blade guard and center cover to its original
position. Then tighten the hex bolt clockwise to secure
the center cover. Lower the handle to make sure that the
blade guard moves properly. Make sure shaft lock has
released spindle before making cut.
Dust bag
Fig.21
Fig.22
The use of the dust bag makes cutting operations clean
and dust collection easy. To attach the dust bag, fit it
onto the dust nozzle.
When the dust bag is about half full, remove the dust
bag from the tool and pull the fastener out. Empty the
dust bag of its contents, tapping it lightly so as to remove
particles adhering to the insides which might hamper
further collection.
NOTE:
If you connect a Makita vacuum cleaner to your saw,
more efficient and cleaner operations can be performed.
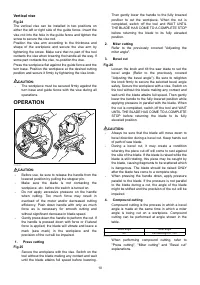
Securing workpiece
WARNING:
•
It is extremely important to always secure the
workpiece properly and tightly with the vise. Failure
to do so can cause the tool to be damaged and/or
the workpiece to be destroyed. PERSONAL
INJURY MAY ALSO RESULT. Also, after a cutting
operation, DO NOT raise the blade until the blade
has come to a complete stop.
CAUTION:
•
When cutting long workpieces, use supports that
are as high as the top surface level of the turn base.
Do not rely solely on the vertical vise and/or
horizontal vise to secure the workpiece.
Thin material tends to sag. Support workpiece over
its entire length to avoid blade pinch and possible
KICKBACK.
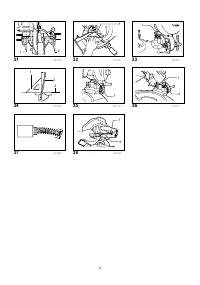
Fig.23
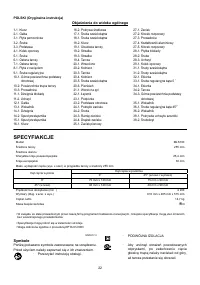
Характеристики

Остались вопросы?Не нашли свой ответ в руководстве или возникли другие проблемы? Задайте свой вопрос в форме ниже с подробным описанием вашей ситуации, чтобы другие люди и специалисты смогли дать на него ответ. Если вы знаете как решить проблему другого человека, пожалуйста, подскажите ему :)


