Телефоны Sanyo scp 8100 - инструкция пользователя по применению, эксплуатации и установке на русском языке. Мы надеемся, она поможет вам решить возникшие у вас вопросы при эксплуатации техники.
Если остались вопросы, задайте их в комментариях после инструкции.
"Загружаем инструкцию", означает, что нужно подождать пока файл загрузится и можно будет его читать онлайн. Некоторые инструкции очень большие и время их появления зависит от вашей скорости интернета.


8.
Wait for the download to complete.
9.
Press
to end, or press the left or right softkey for further
operation.
䊳
runs the downloaded data. (See “Confirming the
Downloaded Data” on pages 114-117.)
䊳
returns to the download homepage and you can
continue to download.
To download a file from Phone Book Entry:
1.
Press
to access the main menu.
2.
Highlight
Phone Book
and press
.
3.
Highlight
Find Name
and press
.
4.
Highlight the entry you want to assign the downloaded ringer
or image to and press
.
5.
Highlight a phone number and press
(right softkey).
Then highlight
Edit
and press
.
– or –
Highlight an Email address or Web address, then press
(right softkey).
6.
Select the menu under
Ringer
or
Image
and press
.
7.
Highlight
Get New
and press
.
8.
Start up a Browser and connect to the download page.
9.
Select your desired image or ringer file, and follow the system
prompts.
10.
Press the left softkey to start downloading.
11.
Wait for the download to complete.
12.
Press
to end, or press the left or right softkey for further
operation.
䊳
runs the downloaded data. (See “To confirm the
downloaded ringers folder” on pages 114-115 or “To confirm
the downloaded images (screen savers) folder” on page 115.)
䊳
returns to the download homepage and you can
continue to download.
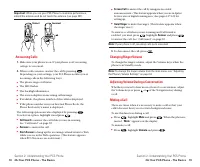
Right softkey
Left softkey
Edit
Options
Right softkey
Left softkey
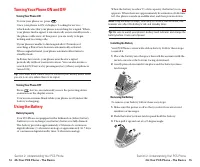
Section 2: Understanding Your PCS Phone
2H: Personal Organizer 111
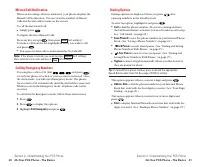
Erasing All Downloaded Data
If the selected data has already been assigned to any menu
(Phone Book, Screen Saver, Ringer Type, etc.), the setting
returns to default.
1.
Press
to access the main menu.
2.
Highlight
Tools/Extras
and press
.
3.
Highlight
PC Sync
and press
.
4.
Highlight
Erase Data
and press
.
5.
Highlight
Ringers
,
Images
, or
All
and press
.
6.
Highlight
Yes
and press
.
䊳
To erase all downloaded data in another way, see page 109.
䊳
To erase individual downloaded data, see page 108.
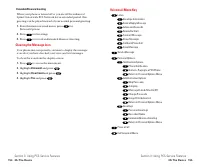
Downloading through Wireless Web
Your PCS Phone allows you to download images (screen savers),
ringers, games, etc., from a Web site. It is also possible to
download from certain menus (Phone Book, Ringer Setting, or
Display Setting).
To download a file from the Web:
1.
Press
to access the main menu.
2.
Highlight
Downloads
and press
.
3.
Highlight your desired data folder and press
.
4.
Highlight
Get New
and press
.
5.
Start up a Browser and connect to the download page.
6.
Select your desired image or ringer file, and follow the system
prompts.
7.
Press the left softkey to start downloading.
Section 2: Understanding Your PCS Phone
110 2H: Personal Organizer

