
Пылесос Dyson Cyclone V10 Parquet (SV12) - инструкция пользователя по применению, эксплуатации и установке на русском языке. Мы надеемся, она поможет вам решить возникшие у вас вопросы при эксплуатации техники.
Если остались вопросы, задайте их в комментариях после инструкции.
"Загружаем инструкцию", означает, что нужно подождать пока файл загрузится и можно будет его читать онлайн. Некоторые инструкции очень большие и время их появления зависит от вашей скорости интернета.


38
39
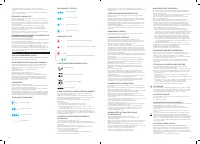
•
The end cap should be in the open position as shown. Once in place, rotate the end
cap back into the closed position.
•
Close the fastener by turning a quarter clockwise. Ensure that the fastener is fully
turned and the base plate and the brush bars are secure.
WASHING THE FILTER UNIT
Check and wash the filter unit, according to the instructions, to
maintain performance.
•
Remove the filter unit by twisting anticlockwise to the open position. Gently pull
away from the appliance.
•
Wash the inside of the filter unit first; hold it upright under the cold water tap and
agitate using a rotating motion.
•
Wash the outside of the filter unit; fill the unit with cold water, place your hand over
the open end and shake gently.
•
Repeat washing the inside and outside of the filter unit until the water runs clear.
•
Gently tap the filter unit to remove any excess water and leave to dry with the filter
end down.
•
Leave the filter unit to dry completely for a minimum of 24 hours.
•
Check that the filter unit is completely dry.
•
To refit, return the filter unit to the open position and twist clockwise until it clicks
into place.
The filter unit may require more frequent washing if vacuuming fine dust or using
mainly maximum suction.
Do not put the filter unit in a dishwasher, washing machine, tumble dryer, oven,
microwave or near a naked flame.
BLOCK AGES – AUTOMATIC CUT-OUT
•
This appliance is fitted with an automatic cut-out.
•
If any part becomes blocked the appliance may automatically cut out.
•
This will happen after the motor pulses a number of times (i.e switches on and off in
quick succession) and the blockage indicator LED will illuminate.
•
Leave to cool down before looking for blockages.
•
Ensure that the appliance is disconnected from the charger before looking for
blockages. Failure to do so could result in personal injury.
•
Clear any blockage before restarting.
•
Refit all parts securely before using.
•
Clearing blockages is not covered by your guarantee.
LOOKING FOR BLOCK AGES
The motor will pulse and the blockage indicator LED will illuminate when there is a
blockage. Please follow the instructions below to locate the blockage:
•
Ensure that the appliance is disconnected from the charger before looking for
blockages. Be careful not to pull the ‘ON’ trigger.
•
Do not operate while checking for blockages. Doing so could result in
personal injury.
•
Leave to cool down before looking for blockages.
•
Beware of sharp objects when checking for blockages.
•
To check for blockages in the main body of the appliance, remove the clear
bin following the instructions in the 'Cleaning the clear bin' section and remove
the blockage.
•
If you cannot clear an obstruction you may need to remove the brush bars, please
follow the instructions below:
– To remove the soft roller cleaner head brush bar, please refer to the ' Washing
the soft roller cleaner head brush bars' section. Remove the obstruction and
replace the brush bar as shown in the ‘Washing the soft roller cleaner head
brush bars’ section. Ensure that the fastener is fully turned and the base plate
and brush bar is secure before operating the appliance.
– To remove the brush bar from the mini motorised tool, use a coin to unlock
the fastener and slide the brush bars out of the cleaner head. Remove the
obstruction. Replace the brush bar and secure it by tightening the fastener.
Ensure it is fixed firmly before operating the appliance.
•
This product has carbon fibre brushes. Take care if coming into contact with
them, as they may cause minor skin irritation. Wash your hands after handling
the brushes.
•
Refit all parts securely before using.
•
Clearing blockages is not covered by your guarantee.
CHARGING AND STORING
•
This appliance will switch ‘OFF’ if the battery temperature is below 3°C
(37.4°F). This is designed to protect the motor and battery. Do not charge the
appliance and then move it to an area with a temperature below 3°C (37.4°F) for
storage purposes.
•
To help prolong battery life, avoid recharging immediately after a full discharge.
Allow to cool for a few minutes.
•
Avoid using the appliance with the battery flush to a surface. This will help it run
cooler and prolong battery run time and life.
BATTERY SAFETY INSTRUCTIONS
•
If the battery needs replacing please contact the Dyson Helpline.
•
Use only Dyson chargers for charging this Dyson appliance.
•
The battery is a sealed unit and under normal circumstances poses no safety
concerns. In the unlikely event that liquid leaks from the battery, do not touch the
liquid and observe the following precautions:
– Skin contact – can cause irritation. Wash with soap and water.
– Inhalation – can cause respiratory irritation. Expose to fresh air and seek
medical advice.
– Eye contact – can cause irritation. Immediately flush eyes thoroughly with water
for at least 15 minutes. Seek medical attention.
– Disposal – wear gloves to handle the battery and dispose of immediately,
following local ordinances or regulations.
CAUTION
The battery used in this device may present a risk of fire or chemical burn if
mistreated. Do not disassemble, short contacts, heat above 60°C (140°F), or
incinerate. Keep away from children. Do not disassemble or dispose of in fire.
ONLINE SUPPORT
•
For online help, general tips, videos and useful information about Dyson.
www.dyson.com/support
DISPOSAL INFORMATION
•
Dyson products are made from high grade recyclable materials. Recycle
where possible.
•
The battery should be removed from the product before disposal.
•
Dispose of or recycle the battery in accordance with local ordinances
or regulations.
•
Dispose of the exhausted filter unit in accordance with local ordinances
or regulations.
•
This marking indicates that this product should not be disposed with other
household wastes throughout the EU. To prevent possible harm to the environment
or human health from uncontrolled waste disposal, recycle it responsibly to
promote the sustainable reuse of material resources. To return your used
device, please use the return and collection systems or contact the retailer where
the product was purchased. They can take this product for environmentally
safe recycling.
DYSON CUSTOMER CARE
THANK YOU FOR CHOOSING TO BUY A DYSON APPLIANCE.
After registering your 2 year guarantee, your Dyson appliance will be covered for
parts and labour for 2 years from the date of purchase, subject to the terms of the
guarantee. If you have any queries regarding your Dyson appliance, visit www.
dyson.com for online help, general tips and useful information about Dyson.
Alternatively, you can call the Dyson Helpline with your serial number and details of
where/when you bought the appliance.
If your Dyson appliance needs a repair, call the Dyson Helpline so we can discuss
the available options. If your Dyson appliance is under guarantee, and the repair is
covered, it will be repaired at no cost.
PLEASE REGISTER AS A DYSON APPLIANCE OWNER
The guarantee for this product is 2 years from the the date of purchase. Please
register your guarantee within 30 days of your purchase date. To help us ensure
that you receive prompt and efficient service, please register immediately after
purchase. Please keep the receipt showing the date of purchase.
There are three ways to do this:
•
Online at www.dyson.com/register
•
Telephone the Dyson Helpline on 0800 298 0298 (UK) or 01 475 7109 (ROI).
•
Complete the enclosed form and post it to us.
By registering online or by phone you will:
•
Protect your investment with a two year parts and labour guarantee
•
Receive helpful tips on using your machine
•
Get expert advice from the Dyson helpline
•
Be the first to hear about our latest inventions
•
Registering only takes a few minutes and all you need is your serial number.
LIMITED 2 YEAR GUAR ANTEE
TER MS AND CONDITIONS OF THE DYSON 2 YEAR LIMITED GUAR ANTEE
WHAT IS COVERED
•
The repair or replacement of your Dyson appliance (at Dyson’s discretion) if
it is found to be defective due to faulty materials, workmanship or function
within 2 years of purchase or delivery (if any part is no longer available or out of
manufacture Dyson will replace it with a functional replacement part).
•
Where this appliance is sold outside of the EU, this guarantee will only be valid if the
appliance is used in the country in which it was sold.
•
Where this appliance is sold within the EU, this guarantee will only be valid (i) if the
appliance is used in the country in which it was sold or (ii) if the appliance is used in
Austria, Belgium, France, Germany, Ireland, Italy, Netherlands, Spain or the United
Kingdom and the same model as this appliance is sold at the same voltage rating in
the relevant country.
WHAT IS NOT COVERED
Dyson does not guarantee the repair or replacement of a product where a defect is
the result of:
•
Accidental damage, faults caused by negligent use or care, misuse, neglect,
carelessness or operation or handling of the appliance which is not in accordance
with the Dyson Operating Manual.
•
Use of the appliance for anything other than normal domestic household purposes.
•
Use of parts not assembled or installed in accordance with the instructions
of Dyson.
•
Use of parts and accessories which are not genuine Dyson components.
•
Faulty installation (except where installed by Dyson).
•
Repairs or alterations carried out by parties other than Dyson or its
authorised agents.
•
Blockages – please refer to the Dyson Operating Manual for details of how to look
for and clear blockages.
•
Normal wear and tear (e.g. fuse, brush bar etc.).
•
Use of this appliance on rubble, ash, plaster.
•
Reduction in battery discharge time due to battery age or use (where applicable).
If you are in any doubt as to what is covered by your guarantee, please contact the
Dyson helpline.
SUMMARY OF COVER
•
The guarantee becomes effective from the date of purchase (or the date of delivery
if this is later).
•
You must provide proof of (both the original and any subsequent) delivery/purchase
before any work can be carried out on your Dyson appliance. Without this proof,
any work carried out will be chargeable. Keep your receipt or delivery note.
•
All work will be carried out by Dyson or its authorised agents.
•
Any parts which are replaced by Dyson will become the property of Dyson.
•
The repair or replacement of your Dyson appliance under guarantee will not extend
the period of guarantee.
•
The guarantee provides benefits which are additional to and do not affect your
statutory rights as a consumer.
IMPORTANT DATA PROTECTION INFORMATION
When registering your Dyson appliance:
•
You will need to provide us with basic contact information to register your appliance
and enable us to support your guarantee.
•
When you register, you will have the opportunity to choose whether you would like
to receive communications from us. If you opt-in to communications from Dyson,
we will send you details of special offers and news of our latest innovations. We
never sell your information to third parties and only use information that you share
with us as defined by our privacy policies which are available on our website:
privacy.dyson.com.
DE/AT/CH
BENUTZUNG IHRES DYSON GER ÄTS
BITTE LESEN SIE DEN ABSCHNITT „WICHTIGE SICHERHEITSHINWEISE“ IN
DIESER DYSON BEDIENUNGSANLEITUNG, BEVOR SIE DAS GER ÄT BENUTZEN.
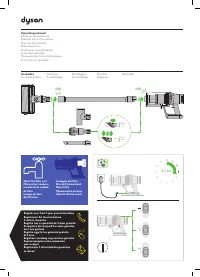
MONTAGE DER WANDHALTERUNG
•
Ladehalterung, Stecker und Montageanleitung aus der Verpackung entnehmen.
•
Wählen Sie für die Ladehalterung einen Standort aus und stellen Sie sicher, dass
direkt hinter dem Montageort keine Leitungen (Gas, Wasser oder Luft), Stromkabel,
Drähte oder Rohre verlaufen.
•
Befolgen Sie die Anweisungen in der Montageanleitung.
•
Befestigungen einrasten lassen.
•
Gerät in der Ladehalterung platzieren.
•
Ladehalterung an eine Steckdose anschließen und einschalten, um Ladevorgang
zu starten.
•
Das Gerät muss vor dem ersten Gebrauch vollständig geladen werden.
Die Ladehalterung muss entsprechend den gesetzlichen Bestimmungen und den
entsprechenden Vorschriften und Normen (Bundes- und Landesgesetze beachten!)
montiert werden.
Dyson empfiehlt den Einsatz von Schutzkleidung, Augenschutz und Schutzmaterial
für die Montage der Ladehalterung.
STAUBSAUGEN
•
Gerät aus der Ladehalterung entnehmen.
•
Überprüfen Sie, dass die Unterseite des Reinigungskopfs oder der Bürste sauber
und frei von Fremdkörpern ist, die Schäden verursachen könnten.
Vor dem Saugen Ihrer Fußböden und Fußbodenbeläge sollten Sie die
Pflegehinweise des jeweiligen Herstellers lesen.
Die Bürstwalze des Geräts kann bei bestimmten Teppichen und Hartböden
Schäden verursachen. Einige Teppichböden fusseln, wenn sie mit einer rotierenden
Bürstwalze gereinigt werden. Sollte das der Fall sein, empfehlen wir, beim Saugen
auf die Elektrobürste zu verzichten und den Bodenbelaghersteller zu kontaktieren.
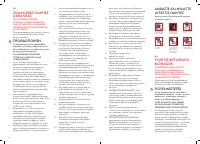
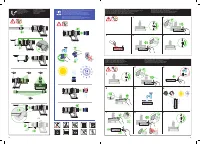
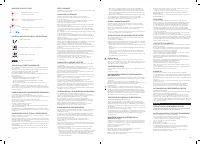
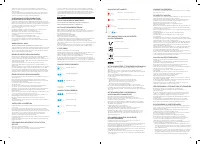
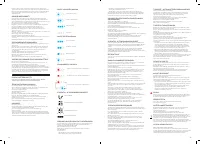
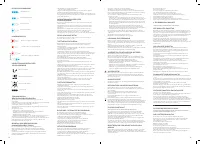
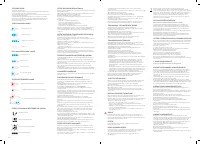
LEUCHTANZEIGE BEIM LADEN
LEUCHTANZEIGE BEI GEBR AUCH
DIAGNOSELEUCHTEN
FILTER- UND BLOCKIERUNGSANZEIGE-LEDS
BEHÄLTERENTLEERUNG
•
Leeren Sie den durchsichtigen Behälter, sobald der Schmutz an einer Stelle die
M A X-Markierung erreicht hat. Er darf nicht überfüllt werden.
•
Vergewissern Sie sich, dass das Gerät vom Ladegerät getrennt ist, bevor Sie den
durchsichtigen Behälter leeren. Achten Sie darauf, dass Sie nicht den EIN-/AUS-
Schalter drücken.
•
Beim Leeren nicht den Einschalthebel ziehen.
•
Das Rohr durch Drücken der Verriegelung entfernen und vom
Auffangbehälter abziehen.
•
Schmutz entsorgen:
– Das Gerät so halten, dass der Auffangbehälter nach unten zeigt.
– Fest auf die rote Auffangbehälterverriegelung drücken.
– Der Auffangbehälter lässt sich nach unten schieben, wodurch das Sieb
freigelegt wird.
– Daraufhin öffnet sich die Bodenplatte des Auffangbehälters.
– Die Bodenplatte lässt sich nicht öffnen, wenn der rote Knopf nicht ganz
durchgedrückt wird.
Um Kontakt mit Staub und anderen Allergenen bei der Entleerung zu vermeiden,
sollten Sie den Behälter in eine Plastiktüte entleeren. Ziehen Sie den durchsichtigen
Behälter anschließend vorsichtig aus der Plastiktüte. Schließen Sie die Plastiktüte
und entsorgen Sie sie auf dem normalen Weg.
REINIGEN DES AUFFANGBEHÄLTERS (OPTIONAL)
Falls der durchsichtige Auffangbehälter gereinigt werden muss:
•
Anweisungen im Abschnitt „ Auffangbehälter leeren“ befolgen.
•
Den roten Knopf an der Gleitschiene des Behälters drücken, um den
Auffangbehälter von der Gleitschiene zu schieben.
•
Reinigen Sie den durchsichtigen Behälter nur mit einem feuchten Lappen.
•
Der Auffangbehälter und die Dichtungen müssen trocken sein, bevor sie wieder
eingesetzt werden.
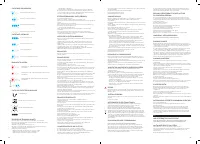
Hoher Ladestand
Ladevorgang, geringe Ladung
Akkufehler – Kundendienst von Dyson kontaktieren
Mittlerer Ladestand
Ladevorgang, mittlere Ladung
Fehler am Hauptgerät – Kundendienst von Dyson kontaktieren
Niedriger Ladestand
Ladevorgang, fast aufgeladen
Fehler am Ladegerät – Kundendienst von Dyson kontaktieren
Leer, muss geladen werden
Vollständig geladen
Blockierungsanzeige
Filter nicht richtig eingesetzt
Siehe Abschnitt zum Akku
Filter muss gereinigt werden


