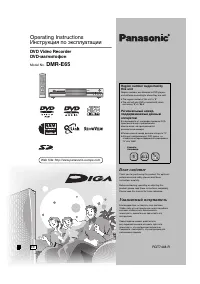
Проигрыватели Panasonic DMR-E65EE-S - инструкция пользователя по применению, эксплуатации и установке на русском языке. Мы надеемся, она поможет вам решить возникшие у вас вопросы при эксплуатации техники.
Если остались вопросы, задайте их в комментариях после инструкции.
"Загружаем инструкцию", означает, что нужно подождать пока файл загрузится и можно будет его читать онлайн. Некоторые инструкции очень большие и время их появления зависит от вашей скорости интернета.


35
RQT7448
T
ra
n
s
fe
r (
D
ubbing)
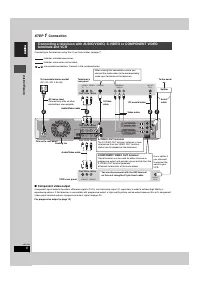
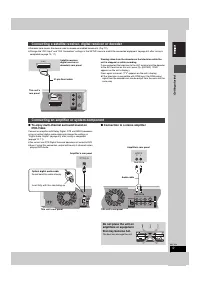
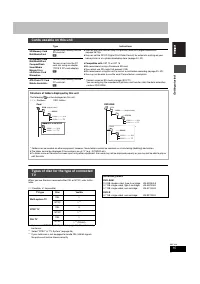
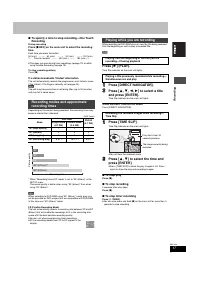
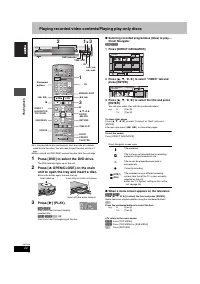
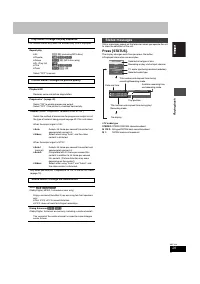
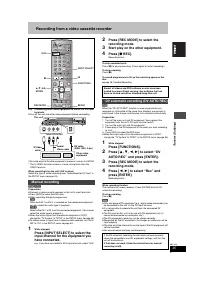
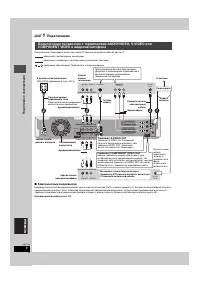
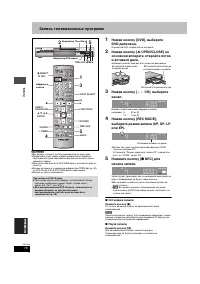
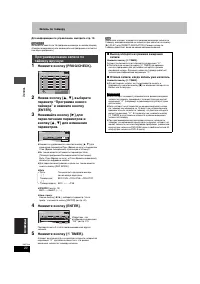
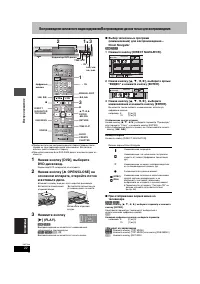
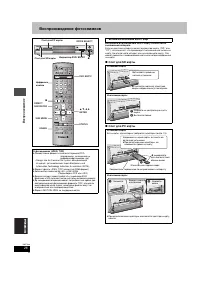
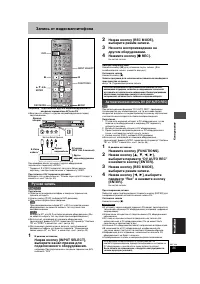
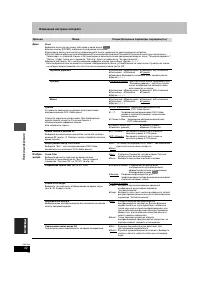
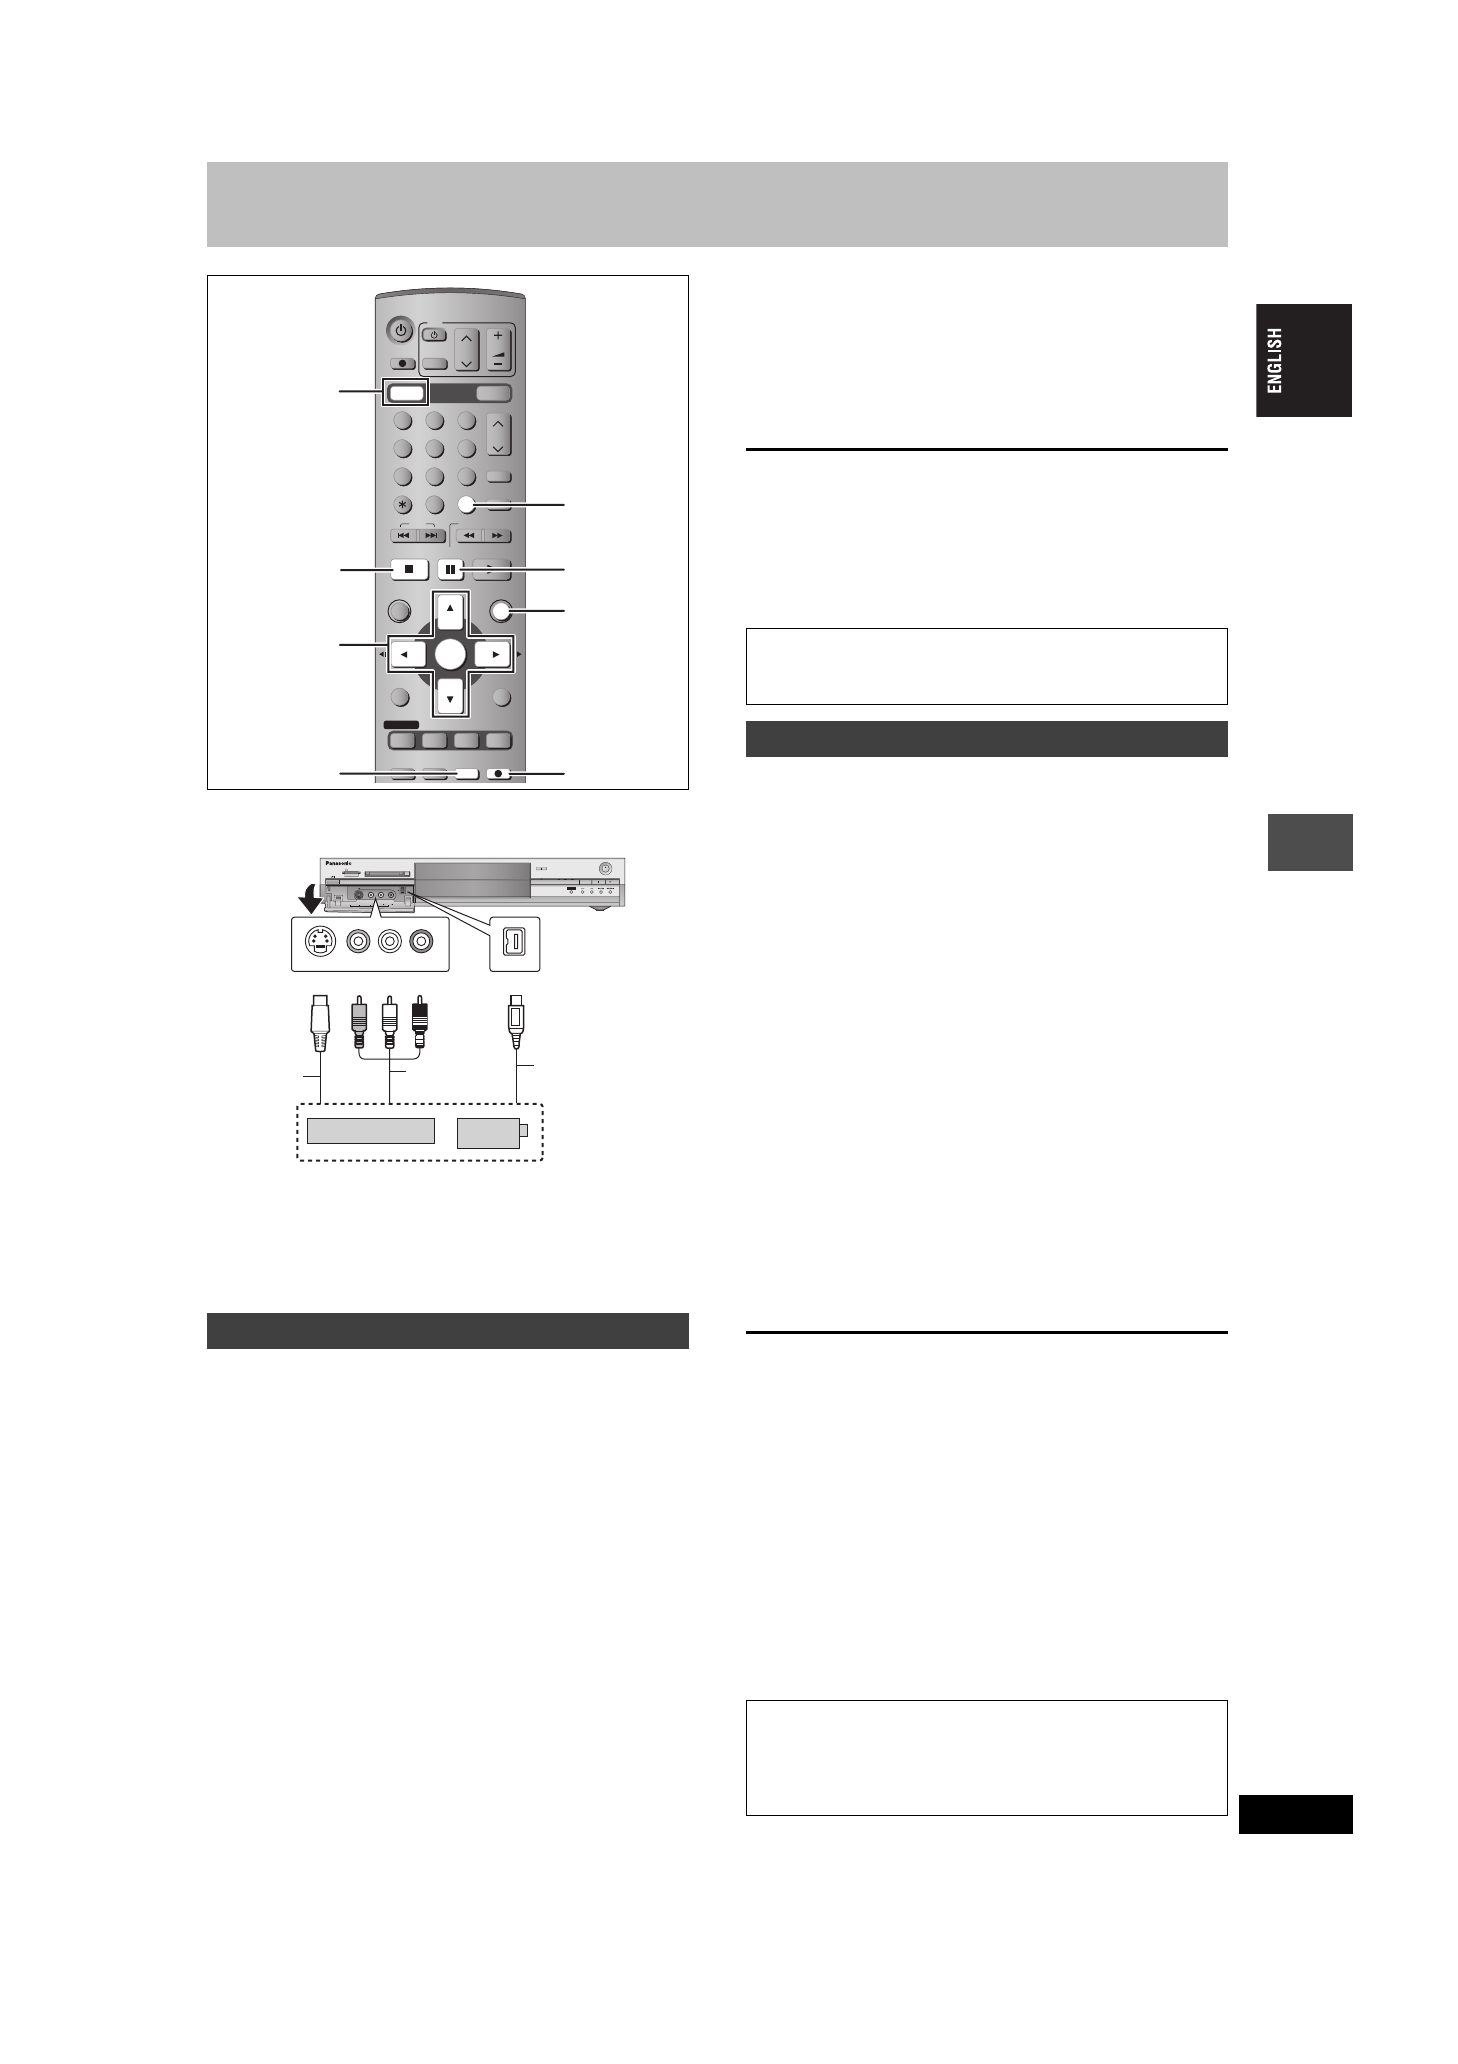
Recording from a video cassette recorder
e.g., Connecting other video equipment to the AV3 or DV input
terminals
≥
Turn off the unit and other video equipment before connecting.
If the audio output of the other equipment is monaural, connect to L/MONO.
§
The S-VIDEO terminal achieves a more vivid picture than the
VIDEO terminal.
When recording from the unit’s DV terminal
Select the type of audio recording from “Audio Mode for DV Input” in
the SETUP menu (
➡
page 43).
[RAM]
[DVD-R]
Preparation
≥
Connect a video cassette recorder to this unit’s input terminals.
≥
Press [DVD] to select the DVD drive.
≥
When recording bilingual programmes
[RAM]
When both M 1 and M 2 is selected on the connected equipment,
you can select the audio type in playback.
[DVD-R]
Select either M 1 or M 2 on the connected equipment. (You cannot
select the audio type in playback.)
≥
When the output signal from the external equipment is NTSC,
change the “TV System” to “NTSC” in the SETUP menu (
➡
page 46).
≥
To reduce noise in input from a video cassette recorder, set “AV-in
NR” to “On” in the SETUP menu (
➡
page 42).
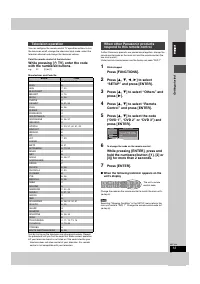
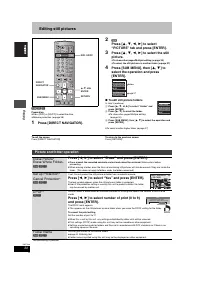
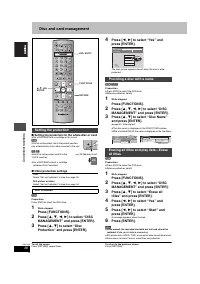
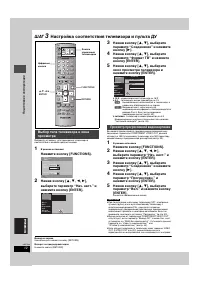
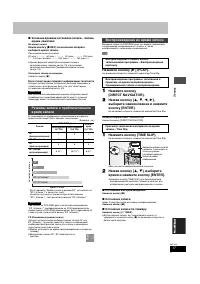
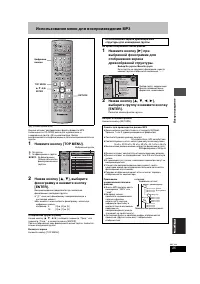
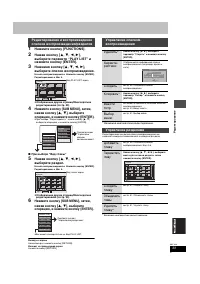
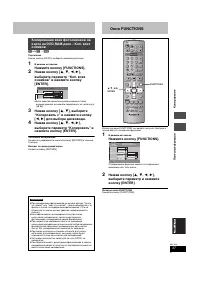
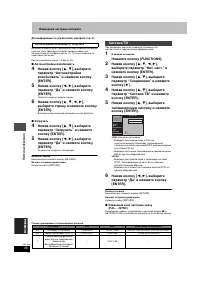
1
While stopped
Press [INPUT SELECT] to select the
input channel for the equipment you
have connected.
e.g., If you have connected to AV3 input terminals, select “AV3”.
2
Press [REC MODE] to select the
recording mode.
3
Start play on the other equipment.
4
Press [
¥
REC].
Recording starts.
To skip unwanted parts
Press [
;
] to pause recording. (Press again to restart recording.)
To stop recording
Press [
∫
].
To record programmes to fill up the remaining space on the
disc
➡
page 18, Flexible Recording
[RAM]
When the “DV AUTO REC” function is used, programmes are
recorded as a title while at the same time chapters are created at
each break in the images and the play list is created automatically.
Preparation
1 Turn off the main unit and DV equipment, then connect the
equipment with the unit’s DV input terminal (
➡
left).
2 Turn on the main unit and DV equipment.
3 Pause play of the DV equipment at the point you want recording
to start.
4 Press [DVD] to select the DVD drive.
≥
When the output signal from the external equipment is NTSC,
change the “TV System” to “NTSC” in the SETUP menu (
➡
page 46).
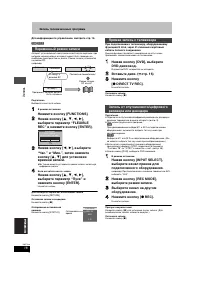
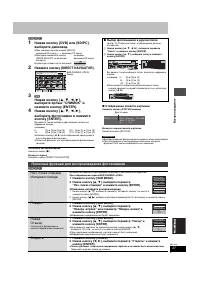
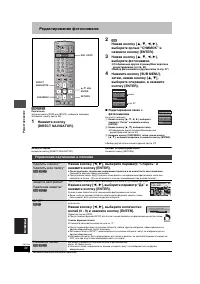
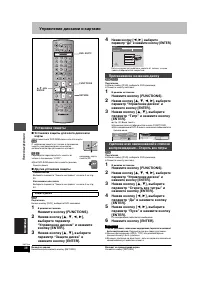
1
While stopped
Press [FUNCTIONS].
2
Press [
3
,
4
,
2
,
1
] to select “DV
AUTO REC” and press [ENTER].
3
Press [REC MODE] to select the
recording mode.
4
Press [
2
,
1
] to select “Rec” and
press [ENTER].
Recording starts.
When recording finishes
The confirmation screen appears. Press [ENTER] to finish DV
automatic recording.
To stop recording
Press [
∫
].
[Note]
≥
Only one piece of DV equipment (e.g., digital video camcorder) can
be connected to the unit via the DV input terminal.
≥
It is not possible to operate the unit from the connected DV
equipment.
≥
The DV input on this unit is for use with DV equipment only. (It
cannot be connected to a computer, etc.)
≥
The DV equipment name may not be shown correctly.
≥
Depending on the DV equipment, the images or audio may not be
input properly.
≥
The date and time information on the tape of the DV equipment will
not be recorded.
≥
You cannot record and play simultaneously.
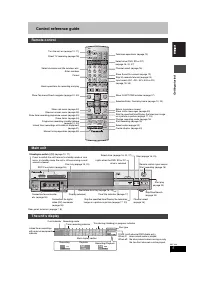
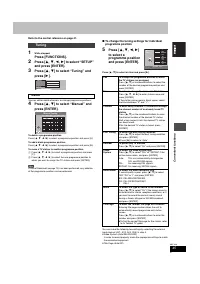
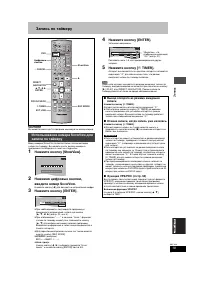
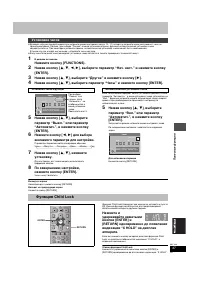
Manual recording
VOLUME
CH
DIRECT TV REC
DVD
TV
AV
1
2
3
4
5
6
7
8
0
9
MANUAL SKIP
ShowView
CH
CANCEL
INPUT SELECT
SKIP
STOP
PAUSE
PLAY/x1.3
SLOW/SEARCH
FUNCTIONS
ENTER
DIRECT NAVIGATOR
TOP MENU
RETURN
SUB MENU
CREATE
TIMER
PROG/CHECK
REC MODE
ERASE
REC
TIME SLIP
STATUS
DISPLAY
F
DVD
SD/PC
DRIVE SELECT
3
,
4
,
2
,
1
ENTER
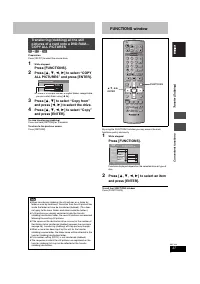
FUNCTIONS
REC MODE
DVD
¥
REC
INPUT SELECT
∫
;
OPEN/CLOSE
REC
/x1.3
TIME SLIP
CH
TIME SLIP
DRIVE SELECT
SD
PC
DVD
SD CARD
PC CARD
EJECT
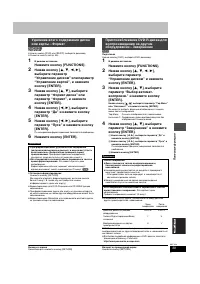
AV3
S-VIDEO IN
VIDEO IN
AUDIO IN
DV IN
R
L/MONO
L/MONO - AUDIO IN - R
VIDEO IN
DV IN
S-VIDEO IN
Audio/
Video cable
S-Video
cable
§
Other video
equipment
Yellow White Red
This unit
DV cable
(IEEE 1394, 4-pin)
Almost all videos and DVD software on sale have been
treated to prevent illegal copying. Any software that has
been so treated cannot be recorded using this unit.
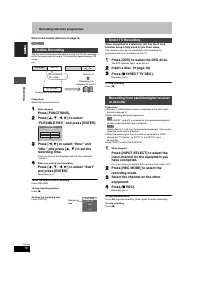
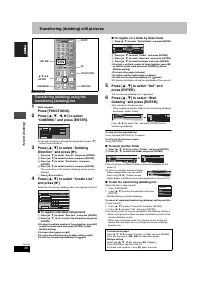
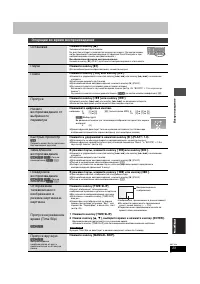
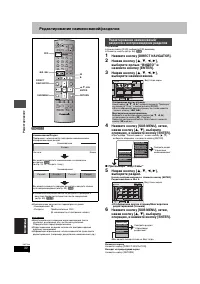
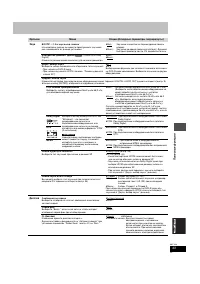
DV automatic recording (DV AUTO REC)
If the DV automatic recording function does not work properly,
check the connections and DV equipment settings, and turn the
unit off and back on.
If that does not work, follow the instructions for manual
recording (
➡
left).
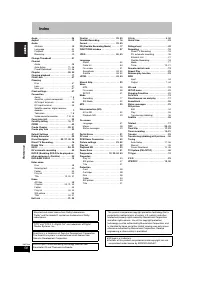
35
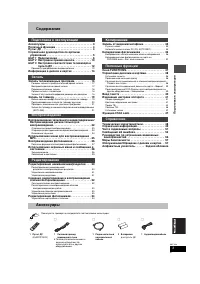
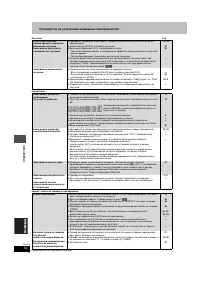
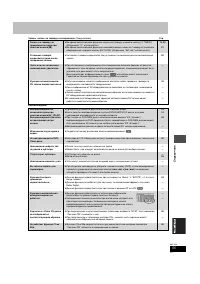
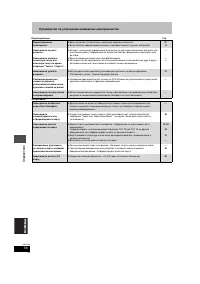
Содержание
- 60 Clejaho b Rgohnn; Внутри аппарата; Panasonic; 5EE Panasonic
- 61 Содержание; ШАГ; Настройка соответствия телевизора и; Использование номера S; Воспроизведение записанного видеосодержания/; Редактирование наименований/; Создание, редактирование и воспроизведение; Аксессуары; Пожалуйста, проверьте и определите поставляемые аксессуары.; Пульт ДУ; для пульта ДУ
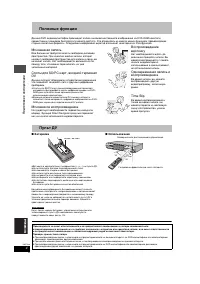
- 62 Полезные функции; Мгновенная запись; Батарейки; He ncgojvÎyØte °atapen gepeÎaprÒaemofo tnga.; Использование; Time Slip; Пульт ДУ
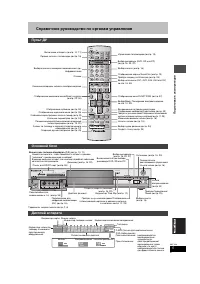
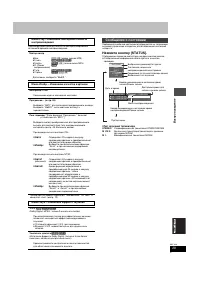
- 63 Справочное руководство по органам управления; Основной блок; Дисплей аппарата
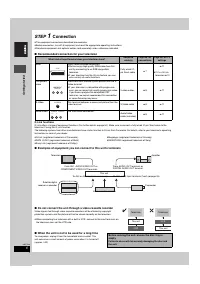
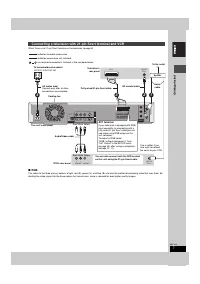
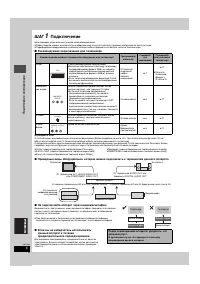
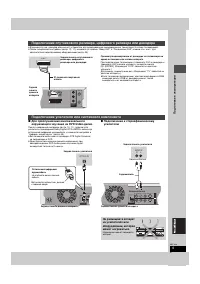
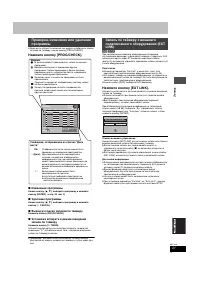
- 64 Подключение; Рекомендуемое подключение для телевизора; Функции Q Link; Не подключайте аппарат через видеомагнитофон; Видеомагнитофон
- 65 Терминал AV1
- 66 Компонентный видеовыход; Терминал COMPONENT VIDEO OUT
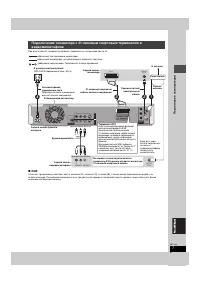
- 67 После завершения настройки (; Подключение усилителя или системного компонента; Красный Белый; Задняя панель данного аппарата
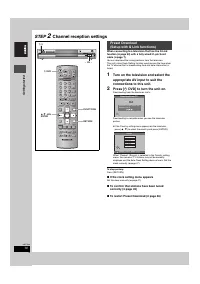
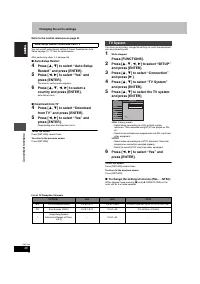
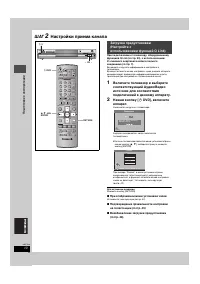
- 68 Настройки приема канала; Начинается загрузка с телевизора.; Для остановки операции; При отображении меню установки часов; Установите часы вручную (; Загрузить
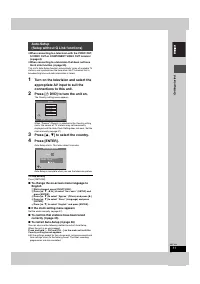
- 69 Появится меню установки страны.; Нажмите и удерживайте нажатыми кнопки [
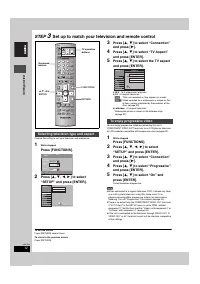
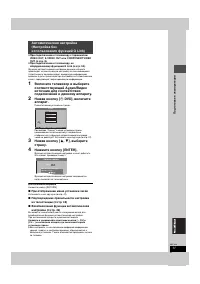
- 70 Настройка соответствия телевизора и пульта ДУ; В режиме остановки; телевизор с окном просмотра на 4:3; Начнется прогрессивный вывод.; Выход из экрана; Просмотр прогрессивной видеокартинки
- 71 используя цифровые кнопки.
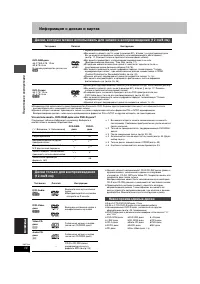
- 72 Информация о дисках и картах; Перезаписываемые диски; Невоспроизводимые диски
- 73 Карты, которые могут использоваться на данном аппарате; Дополнительные диски
- 74 Запись телевизионных программ; Остановка записи; Индикатор Time Slip
- 75 Остановка воспроизведения; Чaсов; честв; Воспроизведение во время записи
- 76 Переменный режим записи; Прямая запись с телевизора
- 77 Запись по таймеру; для; Отмена записи, когда запись уже началась; Включение функции VPS/PDC
- 78 Дата
- 79 Изменение программы; ” для обозначения того, что режим ожидания; Подготовка; ] на основном аппарате на; Для вашей информации; Иконки; отсутствия свободного пространства
- 80 Отображение других страниц; Возврат на экран меню
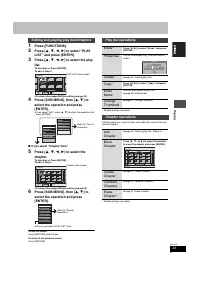
- 81 Операции во время воспроизведения; Возобновление функции воспроизведения; Нажимайте цифровые кнопки.
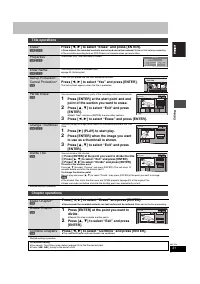
- 82 Переключение типа звучания невозможно в следующих случаях.; Операции редактирования во время воспроизведения; Стереть; ], выберите параметр “Стереть” и нажмите; Создать главу; Изменение звучания; например, выбран параметр “L R”
- 83 Использование меню для воспроизведения МР3
- 84 Воспроизведение фотоснимков; Слот для SD карты
- 85 Отображение свойств картинки; Выход из экрана свойств картинки; Выбор фотоснимков в другой папке; Полезные функции для воспроизведения фотоснимков; При отображенном экране ВИД СНИМКА (JPEG); Изменение интервала воспроизведения
- 86 Использование экранных меню и сообщений о состоянии; меню и нажмите кнопку [; Меню Диск—Настройка содержания диска
- 87 Усилитель диалога; Сообщения о состоянии
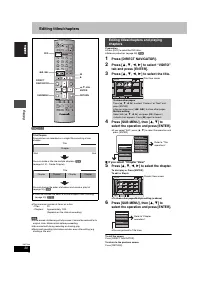
- 88 Редактирование наименований/разделов; выберите наименование.; При выборе “Вид главы”; Отображение других страниц/Многократное
- 89 Управление наименованиями; Подтверждение точки разделения; Управление разделами; Ускорение редактирования
- 90 Создание списков воспроизведения
- 91 выберите список воспроизведения.; Возможно многократное редактирование.; Удалить
- 92 Редактирование фотоснимков; Управление картинками и папками; Отмена функции печати
- 93 Запись от видеомагнитофона; Ручная запись
- 94 Копирование фотоснимков; Регистрация отдельных фотоснимков
- 95 или; Окно FUNCTIONS
- 96 Управление дисками и картами; Для кассетного DVD-RAM-диска или для карты; Другие установки защиты; Название диска отображается в окне FUNCTIONS.; Установка защиты; Присваивание названия диску
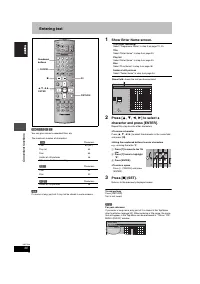
- 98 Ввод текста; Отображение экрана Ввести титр
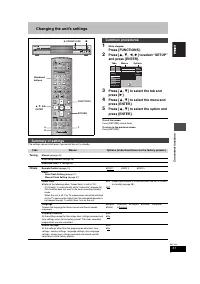
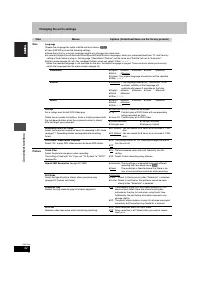
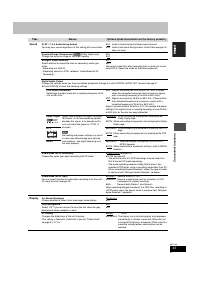
- 99 Изменение настроек аппарата; ярлык и нажмите кнопку [; Общие процедуры; Краткое содержание настроек; Ярлыки
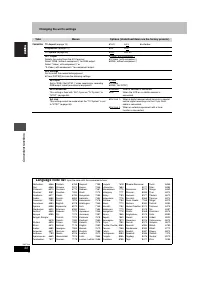
- 102 Список кодов различных языков
- 103 Настройка вручную
- 104 Автонастройки возобновить, Загрузить; Система TB
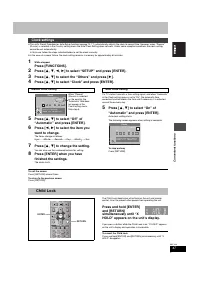
- 105 желаемого параметра для настройки.; Установка часов; Установка часов вручную; Автоматическая установка часов; Функция Child Lock
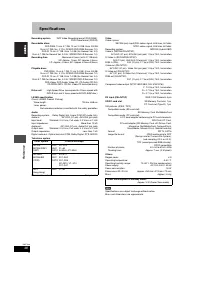
- 106 Технические характеристики
- 107 Справочная информация; поместить картинку на экран.
- 109 Часто задаваемые вопросы; Установка; PCM
- 110 Сообщения об ошибках; На телевизоре
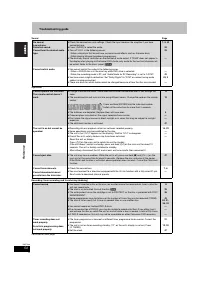
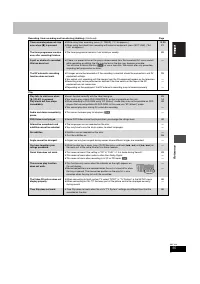
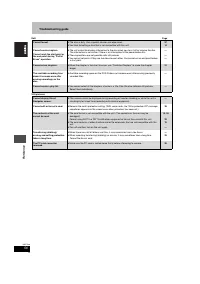
- 111 Руководство по устранению возможных неисправностей; Следующее не означает неисправную работу данного аппарата:
- 113 Запись, запись по таймеру и копирование
- 114 Редактирование; Данные операции недоступны для фотоснимков.
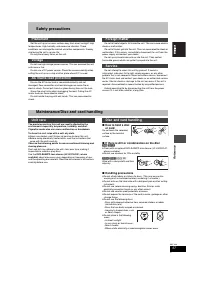
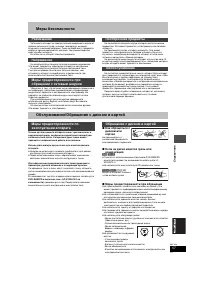
- 115 Меры безопасности; Меры предосторожности при обращении; Размещение; Обслуживание/Обращение с диском и картой; Обращение с диском и картой
- 116 Алфавитный указатель; Digital Out” торговые марки фирмы; ) является официально; ) изготовлена по лицензии; py


