
Обогреватели TESY CN 04 250 EIS W - инструкция пользователя по применению, эксплуатации и установке на русском языке. Мы надеемся, она поможет вам решить возникшие у вас вопросы при эксплуатации техники.
Если остались вопросы, задайте их в комментариях после инструкции.
"Загружаем инструкцию", означает, что нужно подождать пока файл загрузится и можно будет его читать онлайн. Некоторые инструкции очень большие и время их появления зависит от вашей скорости интернета.


EN
Operation and Storage Manual of Panel Heater
5
English
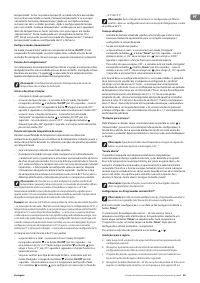
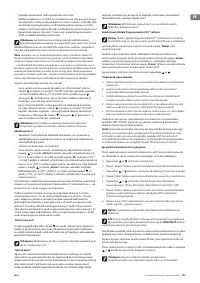
b. to go to time setting, shortly press the “
Timer
” button
c. use the and buttons to select the desired time (with a 0.5h interval) per point
d. to go to temperature setting, shortly press the “
Timer
” button
e. to select the desired temperature, use the and buttons. The possible
temperature range is from 10 to 30°С, and OFF status is possible as well.
f. To store the point, shortly press the “Timer” button; then you are automatically
transferred to the setting of the next point (the display again shows dAYX) and
you can proceed with paragraph а) for the next point.
g. When you have stored a point in the last hour of the day – 23.5h, you cannot
store any more points for this day in the current setting, and the display will
show “FUL_” and the number of the day.
Note:
Points of a particular day may be stored only in ascending order of
their times.
Note:
Before implementing paragraph
f)
the user can go back to paragraph
а)
to correct the three parameters of a point by shortly pressing the
ON/OFF
button, without storing the settings in the memory.
Adding more points in a particular day may be done at random, after you
have stored points for other days, however you need to observe the rule for
ascending order of their times in a day.
To exit the settings mode, press continuously the “Timer” button and wait for
30 seconds.
Upon leaving the settings you can review the stored points by using the
and buttons, provided that the appliance is in programming mode.
Note:
When you turn on the appliance, it will start operating in the (heating
or programming) mode which it has last operated.
Note:
You can switch between the modes of operation (heating or programming)
by shortly pressing the “
Timer
” button when the appliance is switched on.
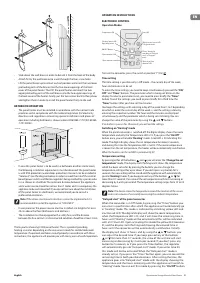
“Return to factory settings” function
When the convector is in “Off ” mode, press the and buttons
simultaneously for six seconds; then the display will show „_ _ __“ and rotating
symbols. When it is “reset”, the display will show the measured value of the
room temperature.
After using the reset function, you need to re-enter the settings of the
following functions:
• time setting
• enter a value of the temperature correction (if needed)
• disable the “Anti-frost” function (if needed)
• disable the “Adaptive start” (if needed)
• weekly programme - 24/7
If the electric convector is disconnected from the mains, this will not affect
the set temperature and the mode of operation which has been active prior
to its disconnection. If for example the convector has been in “Heating” mode,
after it has been disconnected and reconnected to the mains, it will continue
operating in the same mode with the same set temperature.
Note: The principle of operation of the electric convector with energy-independent
memory is to store the settings for 90 minutes guaranteed, and up to 150 minutes
not guaranteed.
When the room temperature is lower than the temperature set by the
electronic thermoregulator, the convector will start operating and will
continue operating until the room temperature reaches the set value. When
the room temperature is higher than the temperature set by the electronic
thermoregulator, the convector will automatically go into “Standby” mode.
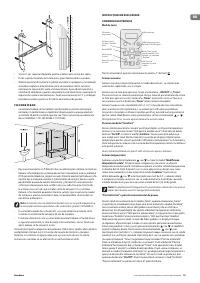
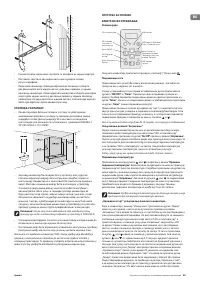
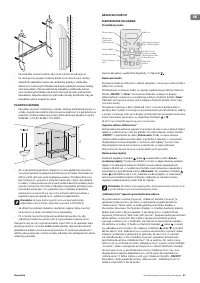
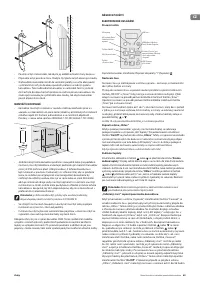
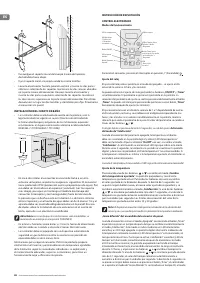
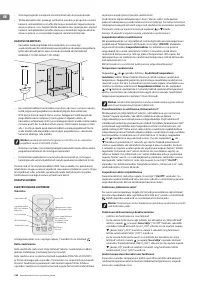
Information presented on panel heater display
Indications when you are not in settings mode:
a. In Off mode – consecutively showing:
• time (hour and minutes)
• measured room temperature
b. In Heating mode – it shows the measured room temperature
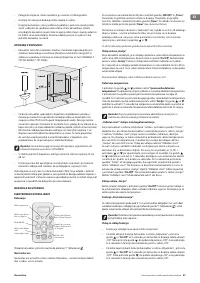
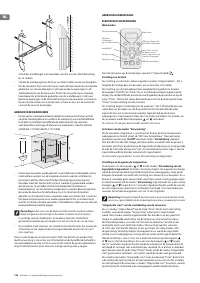
c. In Programming mode – consecutively showing:
• Day of the week, low line and the measured temperature. 6_22
•
Day of the week, low line and the temperature set in the programme
blinking (set for the current hour), which may be also the OFF symbol. 6_23
d. Upon connecting the convector to power supply the display shows:
• Hyphens “----“, if the appliance has been in Off mode before disconnecting
it from the power supply.
• Hyphens “----“, which in 2 seconds will be replaced by the value of the
current temperature, if the appliance has been in On mode before
disconnecting it from the power supply.
e. Two numerals (01÷96) and a blinking yellow LED indicate the remaining time
in hours until the delayed start, if the appliance has been in “Delayed start”
mode before disconnecting it from the power supply.
f. With the purpose of further energy saving, the electronic thermoregulator
reduces the brightness of illumination of all LEDs. Upon pressing any of the
buttons the brightness increases for 8 seconds and it is then reduced again.
g. If the display shows “t1” or “t2“, this means that the self-diagnostic system has
found a problem with the temperature sensor. “t1” indicates a disconnected
cable at the sensor, while “t2” indicates short circuit at the sensor. In this case
the electric convector will be automatically switched off and it can be switched
on again only after the problem has been fixed. The problem has to be handled
by a qualified specialist.
h. Upon switching on the power supply the display will show hyphens “----“ for 2
seconds instead of temperature of time.
i. When the digital display shows the temperature the “Temperature” LED is lit,
and when it shows the time, the “Timer” LED is lit.
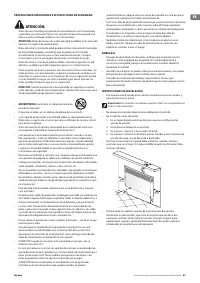
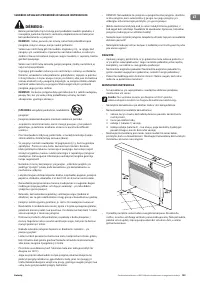
PROTECTION
• The appliance is equipped with a safety thermo turn-off device, which
automatically turns the heater off in cases of extreme temperature of the
panel heater /i.e. overheating of the appliance/.
• The safety thermo turn-off device will automatically restore the heater
operation when the temperature of the appliance falls below the
permissible ultimate values.
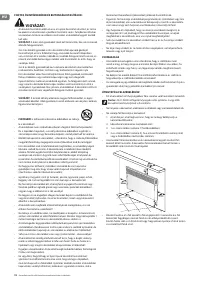
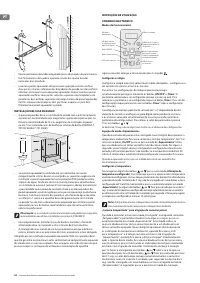
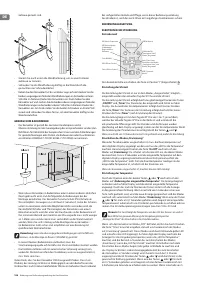
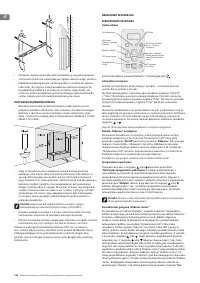
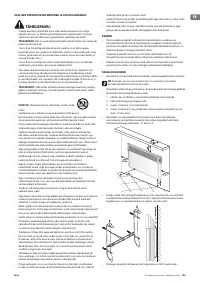
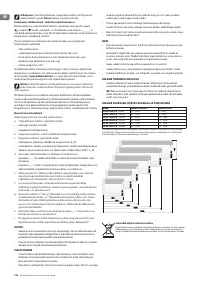
CLEANING
• It is compulsory first to turn off the appliance through its power
switch and to disconnect it from the power socket. Before starting the
cleaning session you should wait until the panel heater cools down in a
disconnected state.
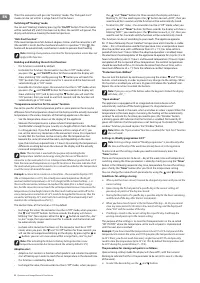
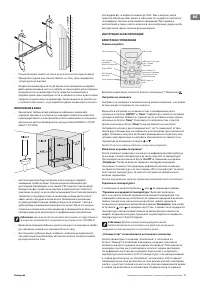
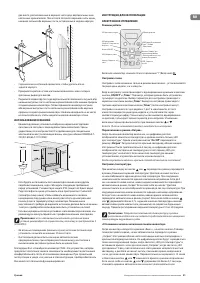
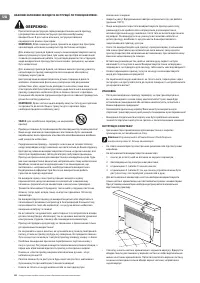
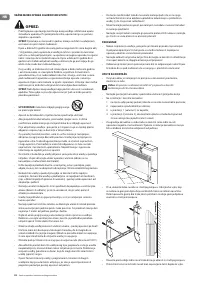
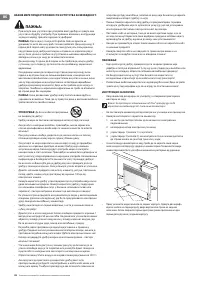
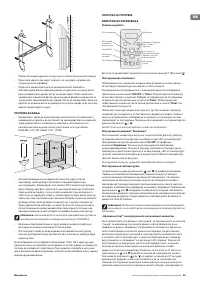
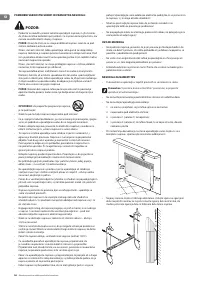
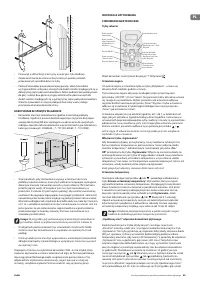
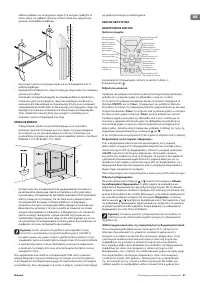
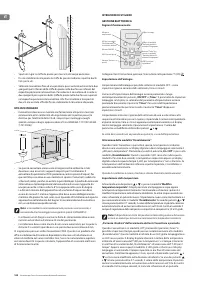
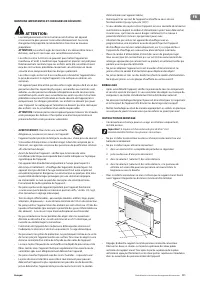
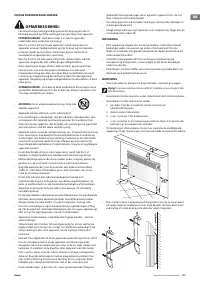
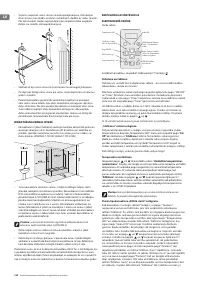
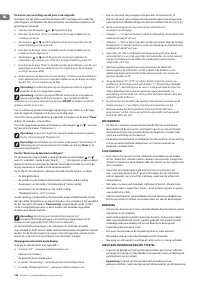
• The panel heater can be cleaned with little efforts at the appliance
rear part – just press the “P”-shaped braces /figure 2/ at the back of the
appliance so that you can dismantle it and consequently you can clean the
rear part of the appliance.
• Clean the heater body with damp cloth, vacuum cleaner or a brush.
• Never immerse the appliance into water – there is danger for your life
from electric shock!
• Never use gasoline, thinner or hard abrasive products to clean the
appliance, because they will damage the appliance coating.
STORAGE
• Before putting the panel heater away let it cool down after you have
disconnected it from the power socket
• Use the appliance original packing to store it, if the panel heater will not
be in use for a long period of time. By storing the product in its original
packing you protect it from excessive dirt and dust accumulation.
• Never put a hot panel heater in its packing!
• It is necessary the product to be stored at a dry and dark place, protected
from direct sun light.
•
It is explicitly forbidden to store the panel heater in damp and wet premises.
MAINTENANCE OPERATIONS OF THE APPLIANCE
• In case of appliance malfunction, please contact the authorized service
center closest to your location. /service centers are indicated in appliance
warranty documents/.
•
Important
: In case of a claim and/or violation of your consumer rights,
please contact the supplier of this appliance at the indicated locations or
via the Internet page of the company: www.tesy.com
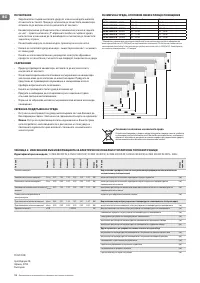
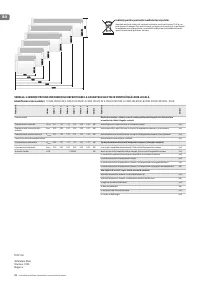
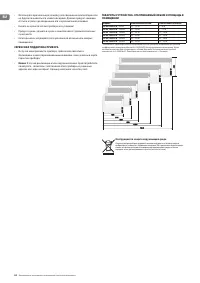
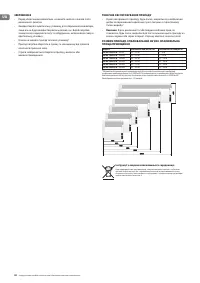
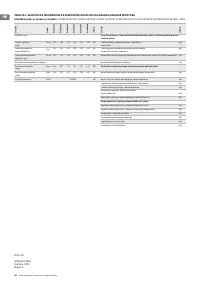
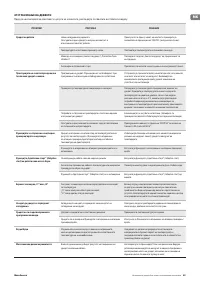
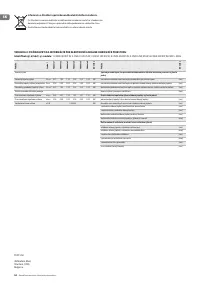
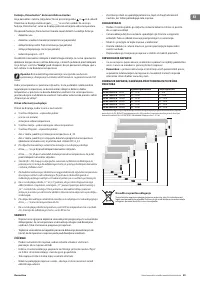
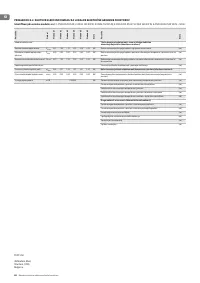
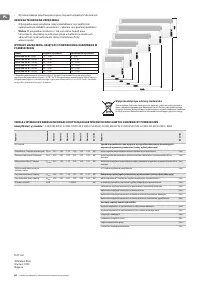
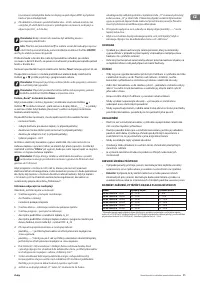
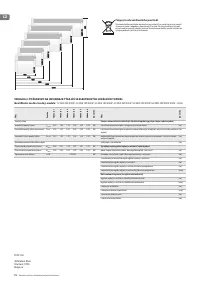
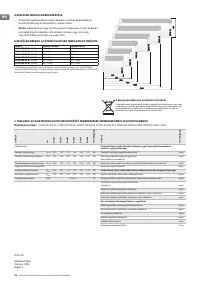
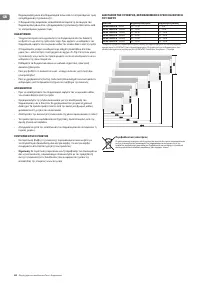
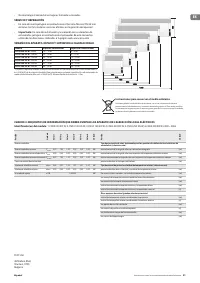
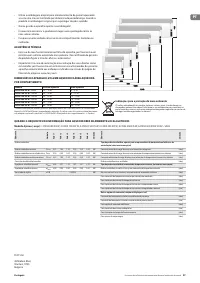
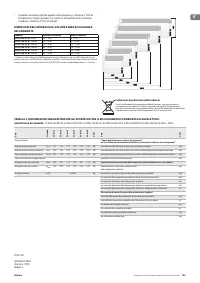
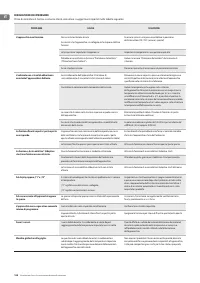
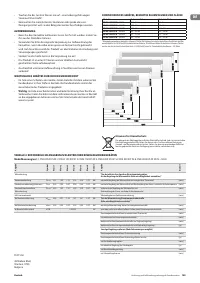
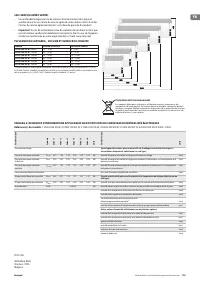
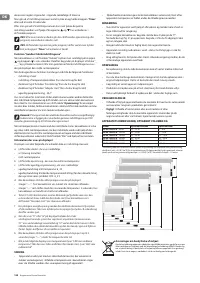
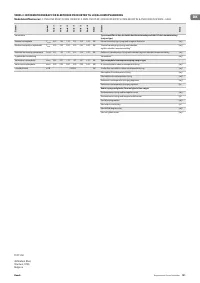
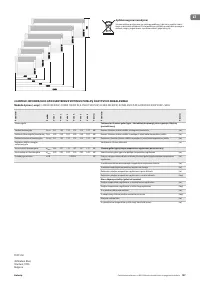
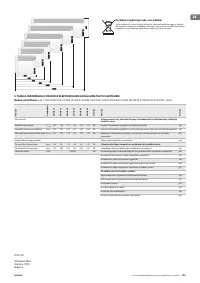
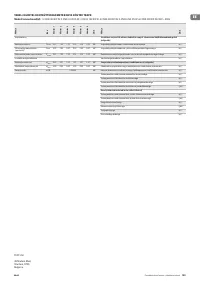
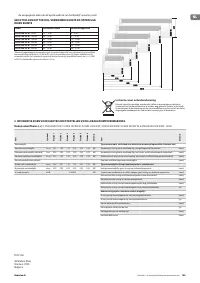
DIMENSIONS OF HEATED VOLUME AND HEATED AREA OF A ROOM /
APPLIANCE MODELS
Model
Heated volume
Heated area
CN 04 050 EIS W
- 500W
10* - 15 m
3
4* - 6 m
2
CN 04 100 EIS W
- 1000W
20* - 30 m
3
8* - 12 m
2
CN 04 150 EIS W
- 1500W
30* - 45 m
3
12* - 18 m
2
CN 04 200 EIS W
- 2000W
40* - 60 m
3
16* - 24 m
2
CN 04 250 EIS W
- 2500W
50* - 70 m
3
20* - 28 m
2
CN 04 300 EIS W
- 3000W
60* - 80 m
3
24* - 32 m
2
* Minimum guaranteed heated volume (area) for heating at an average capacity of heat transmission
factor λ=0.5 W/(m
2
K) for a heated room. Higher values of heated volume (area) can be achieved at an
average value of λ=0.35 W/ (m
2
K). Standard height of heated rooms – 2.5 meters.
Содержание
- 21 Русский; ИСПОЛЬЗОВАНИЕ В ВАННОЙ
- 23 Механизм записи каждой точки следующий:; Функция „Сброс“ до заводских настроек
- 24 • Никога не храните теплый прибор в его упаковке!; СЕРВИСНАЯ ПОДДЕРЖКА ПРИБОРА; • В случае неисправности прибора, просим вас связаться с; : В случае рекламации и/или нарушения ваших прав потребителя,; Модель; Инструкции по защите окружающей среде
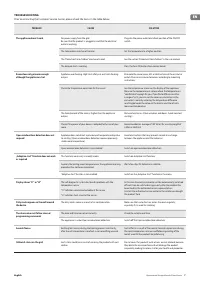
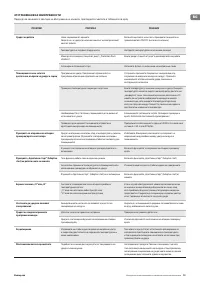
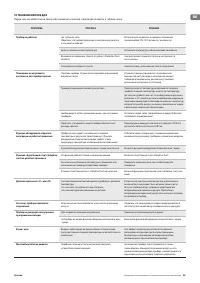
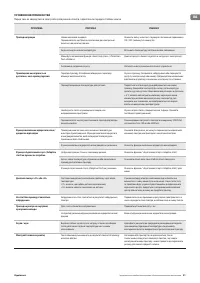
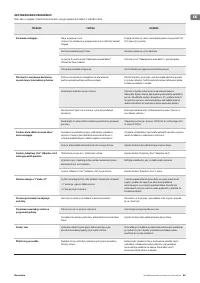
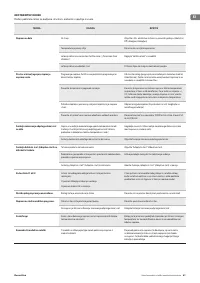
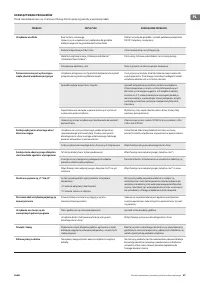
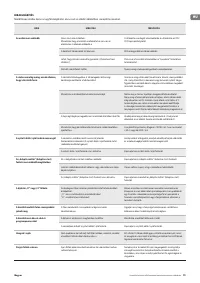
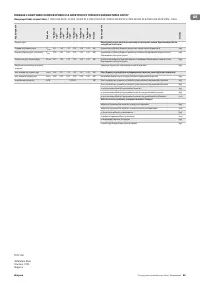
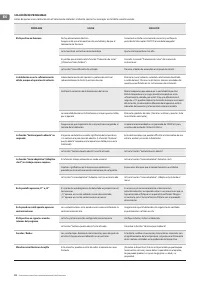
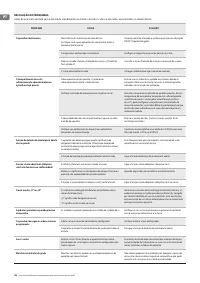
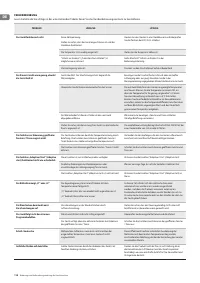
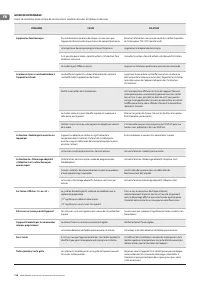
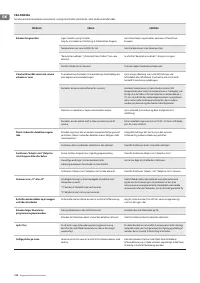
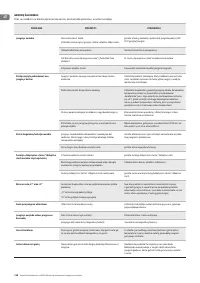
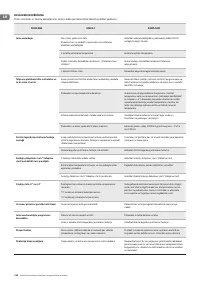
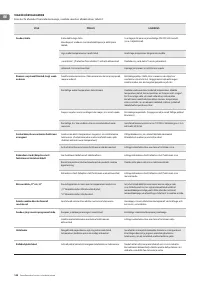
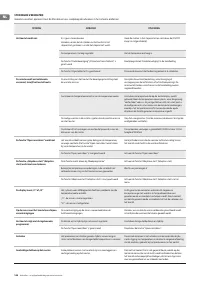
- 25 УСТРАНЕНИЕ НЕПОЛАДОК
Характеристики

Остались вопросы?Не нашли свой ответ в руководстве или возникли другие проблемы? Задайте свой вопрос в форме ниже с подробным описанием вашей ситуации, чтобы другие люди и специалисты смогли дать на него ответ. Если вы знаете как решить проблему другого человека, пожалуйста, подскажите ему :)
