
Обогреватели TESY CN 04 250 EIS W - инструкция пользователя по применению, эксплуатации и установке на русском языке. Мы надеемся, она поможет вам решить возникшие у вас вопросы при эксплуатации техники.
Если остались вопросы, задайте их в комментариях после инструкции.
"Загружаем инструкцию", означает, что нужно подождать пока файл загрузится и можно будет его читать онлайн. Некоторые инструкции очень большие и время их появления зависит от вашей скорости интернета.


EN
Operation and Storage Manual of Panel Heater
3
English
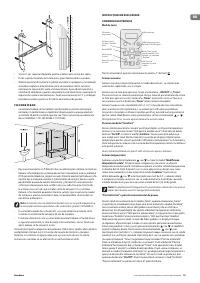
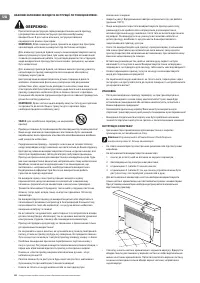
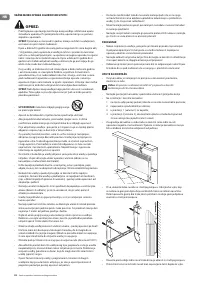
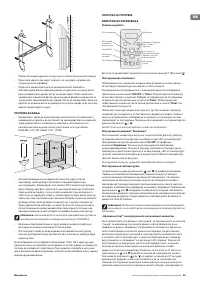
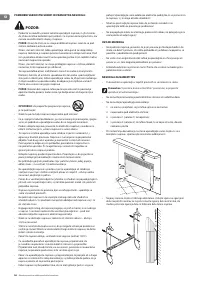
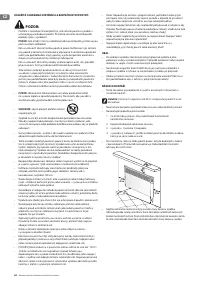
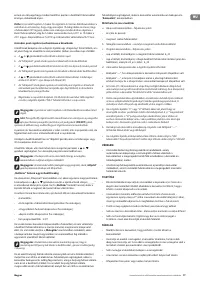
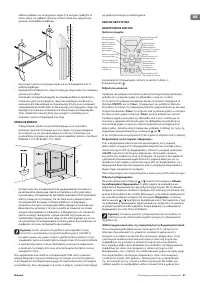
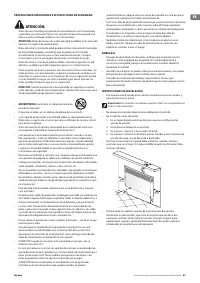
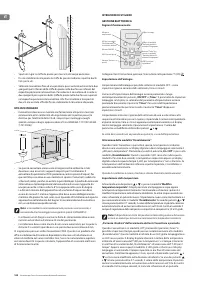
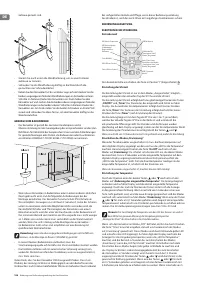
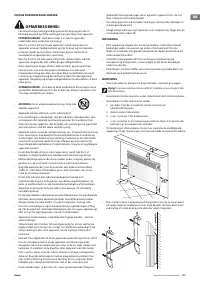
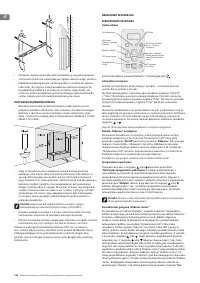
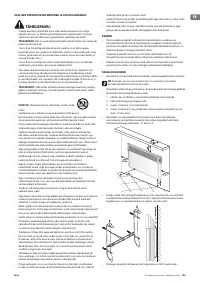
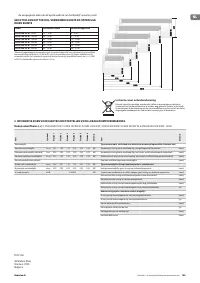
• Slide down the wall brace in order to detach it from the back of the body.
• Attach firmly the wall brace onto a wall through the four screw holes.
• Lift the panel heater up to almost vertical position and insert the two lower
protruding parts of the braces into the two lower openings of the back
cover of the panel heater. Then lift the panel heater and insert the two
upper protruding parts of the wall braces into the two upper openings of
the back cover of the heater. Finally, put the two screws back to their places
and tighten them in order to install the panel heater firmly to the wall.
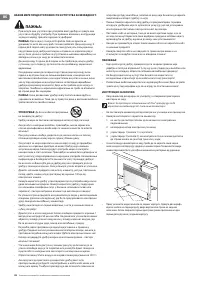
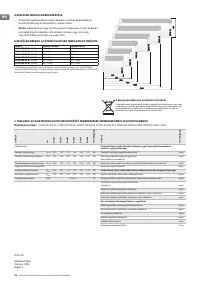
BATHROOM OPERATION
• The panel heater must be installed in accordance with the normal trade
practices and in compliance with the national legislation (EU electricity
directives and regulations concerning special installations and places of
operation including bathrooms, shower cabins HD60364-7-701(IEC 60364-
7-701:2006)).
•
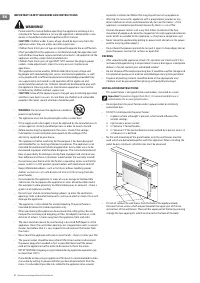
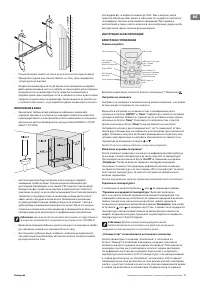
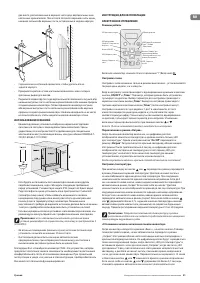
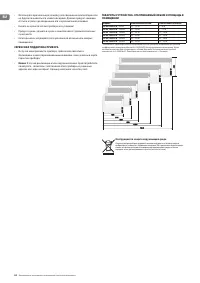
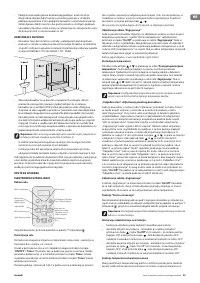
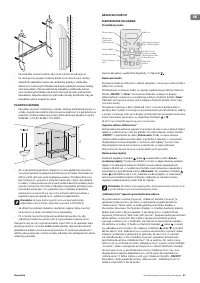
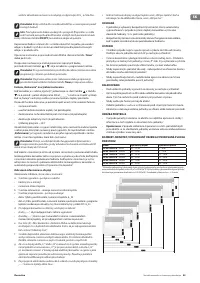
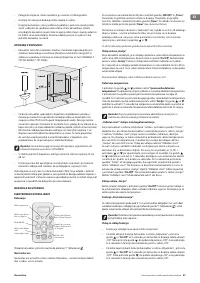
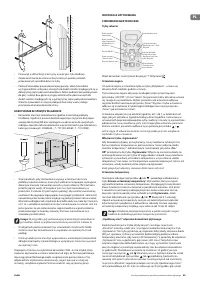
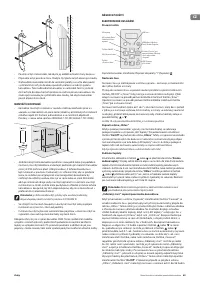
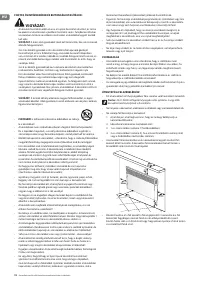
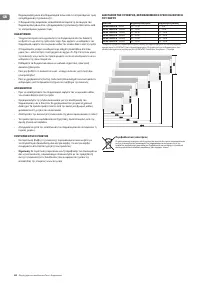
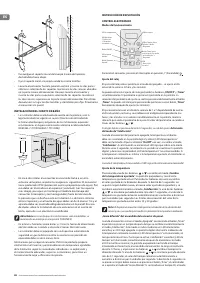
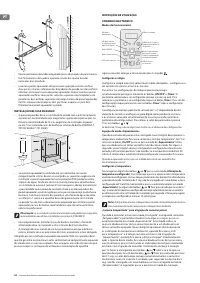
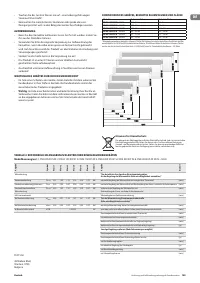
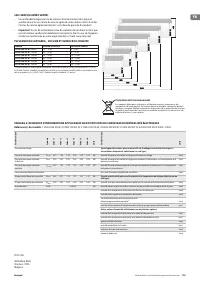
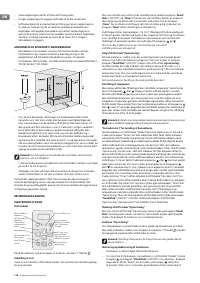
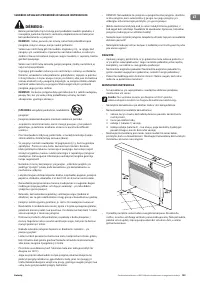
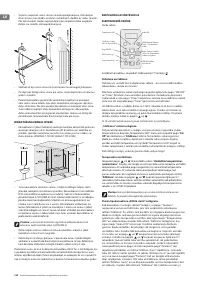
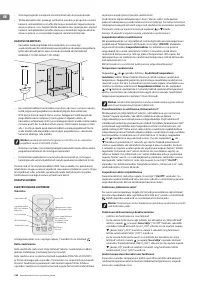
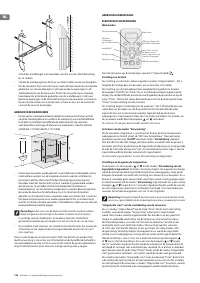
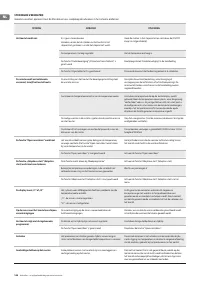
In case this panel heater is to be used in a bathroom or other similar room,
the following installation requirements must be observed: the panel heater
is with IP24 protection (water drops protection). Hence it can be installed in
“Volume 2” (see the diagram below) in order to avoid the risk of the control
board (power switch and thermo regulator) being reached by a person who
is in a shower or a bathtub. The minimum distance between the appliance
and a water source should be not less than 1 meter and it is compulsory the
appliance to be wall-mounted! If you do not feel sure about the installation
of this panel heater in a bathroom, we recommend you to consult a
professional electrician.
Note
: If the above-mentioned instructions cannot be implemented, it is
recommended to install the appliance in “VOLUME 3”.
• In wet premises the power source must be installed at a height of at least
25 cm above the floor (bathrooms and kitchens).
•
The installation must be equipped with a safety fuse, and the distance
between the fuse contacts in disconnected condition should be at least 3 mm.
Thank you for choosing CN04 panel heater. This is a product providing
heating in winter depending on the consumers’ needs for comfortable room
temperature. If operated and taken care of properly in accordance with these
instructions, the appliance will provide you with many years of useful operation.
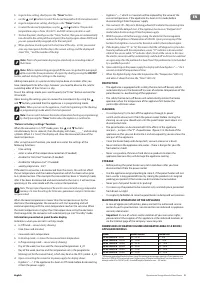
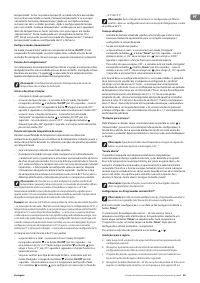
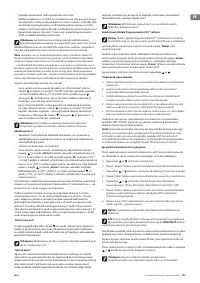
OPERATION INSTRUCTIONS
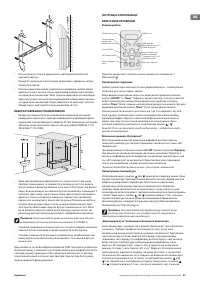
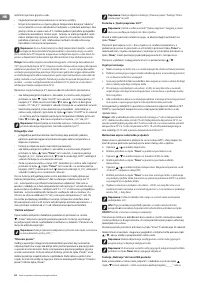
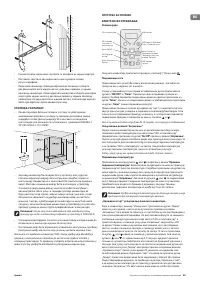
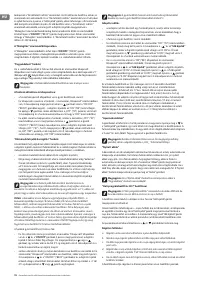
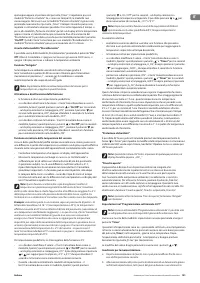
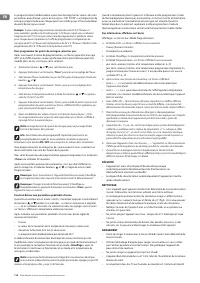
ELECTRONIC CONTROL
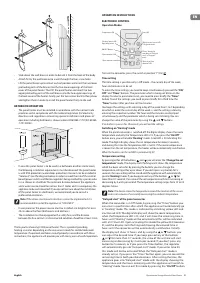
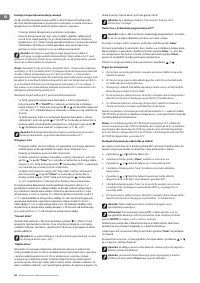
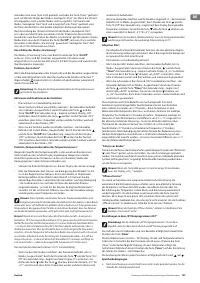
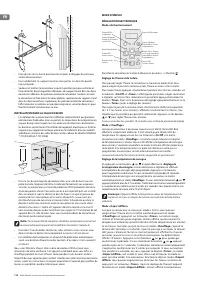
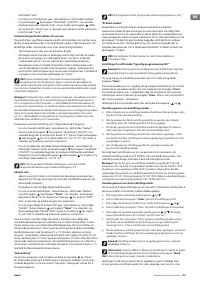
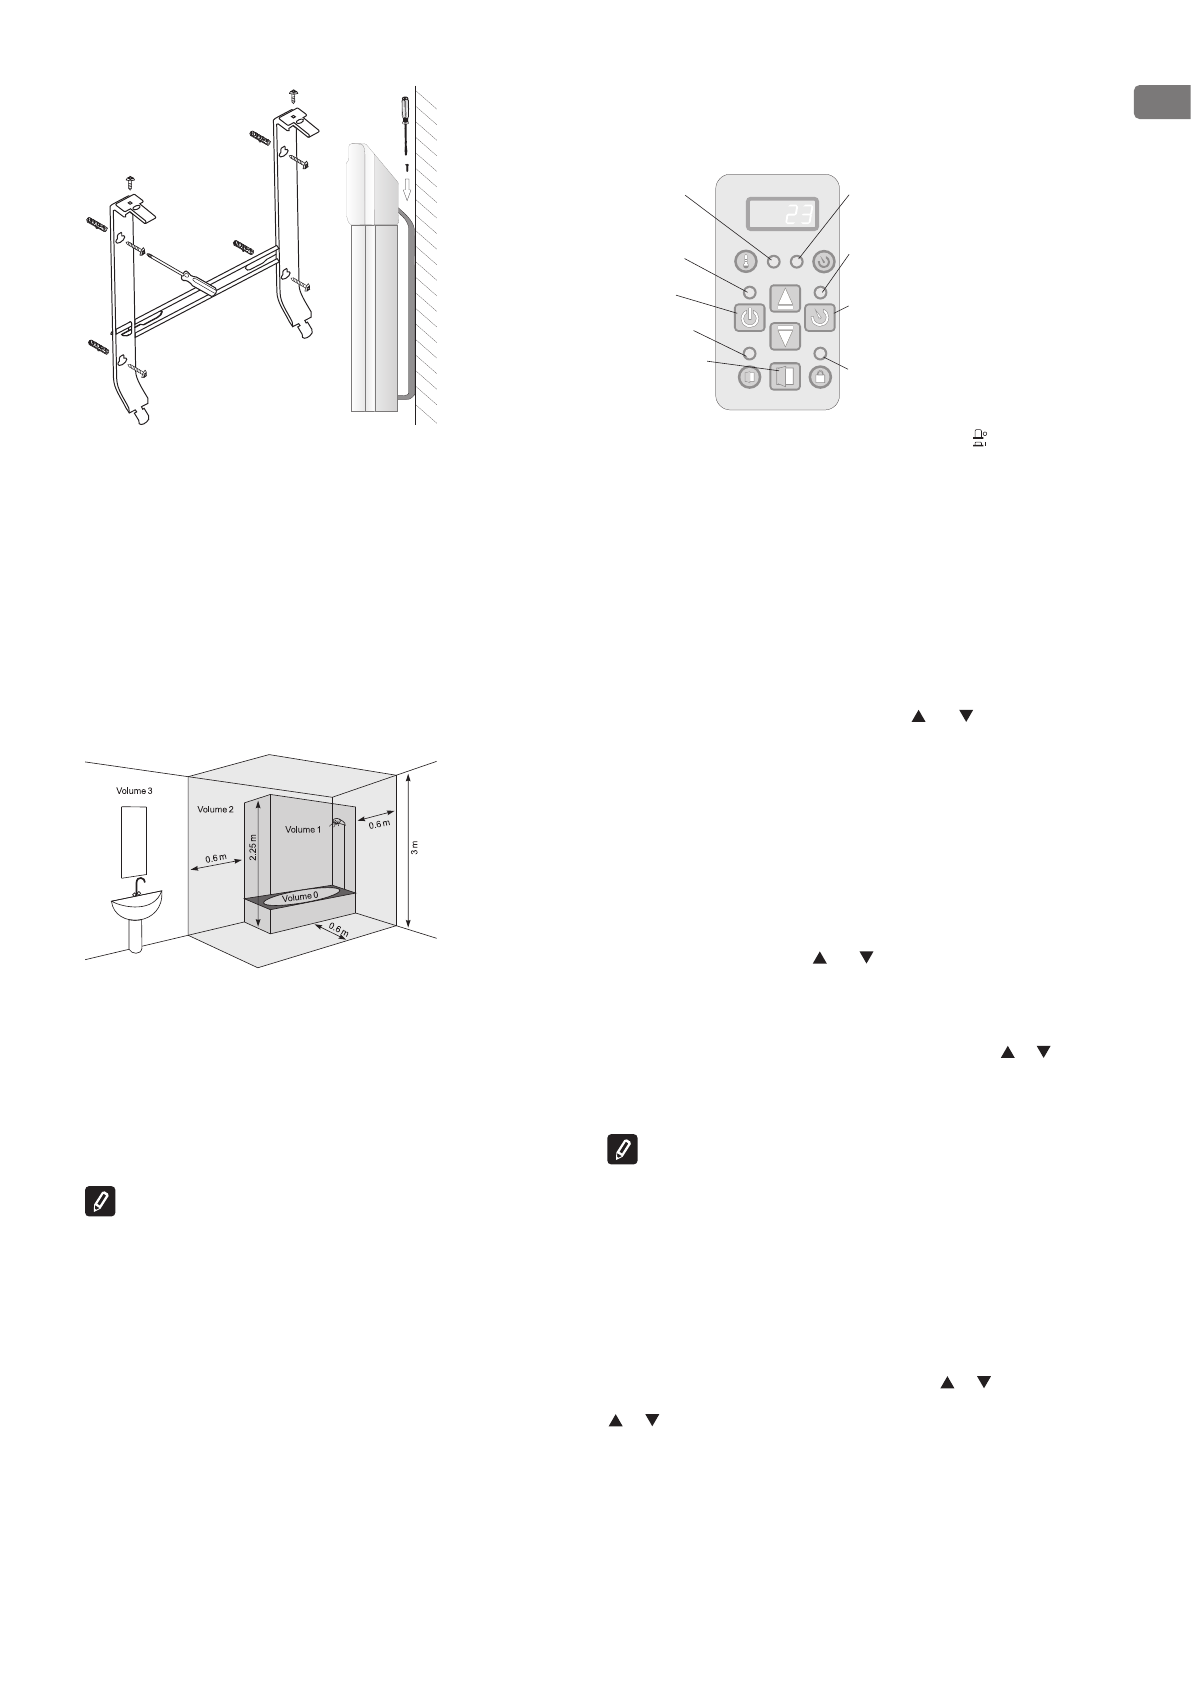
Operation Modes
Temperature LED
Time LED
“Heating” mode LED /
Operating heater
“Delayed start” mode LED
/ “Program” mode
ON/OFF Button
“Timer” button for
switching on “Delayed
start” or “Program”
mode
“Open window” LED
“Protection from
children” LED
“Open window” button
Turn on the convector, press the switch in position “I” (On) .
Time setting
The time setting is possible only in Off mode – the current day of the week,
hour and minutes can be set.
To enter the time settings you need to keep simultaneously pressed the “
ON/
OFF
” and “
Timer
” buttons. The parameter which is being set blinks on the
display. To select a parameter to set, you need to press briefly the “
Timer
”
button. To exit the settings, you need to press briefly for a third time the
“
Timer
” button (after you have set the minutes).
You begin the settings with selecting a day of the week from 1 to 7 depending
on which in order the current day of the week is, and the setting is done by
entering the respective number. The hour and the minutes are displayed
simultaneously and the parameter which is being set is blinking. You can
change the value of the parameter by using the and buttons.
If no button is presses for 10 seconds, you will exit the settings.
Switching on “Heating” mode
When the panel convector is switched off, the digital display shows the room
temperature and only the Temperature LED is lit. If you press the “
On/Off
”
button once, you will enable “
Heating
” mode. A red LED is lit indicating this
mode. The digital display shows the set temperature for about 2 seconds,
and during this time the Temperature LED is not lit. If the room temperature
is lower than the set temperature, the heater will be automatically switched on.
When the heater is on the red LED is permanently lit!
Temperature setting
By pressing either of the buttons and you will enter the “
Change the set
temperature
” mode. The display starts flashing and it shows the temperature
which has been set so far. By pressing the buttons you can change the
temperature setting either up or down. If you don’t press any button for 5
seconds, the new setting will be stored and the appliance with automatically
go into “
Heating
” mode. If you keep pressed any of the buttons or for
more than 0.7 seconds, the value of the set temperature will start increasing or
decreasing by 4 units per second. The temperature setting ranges from 10 to 30
degrees Celsius.
Note:
The device shows the temperature around the location of the sensor
and is not a means of accurately measuring the ambient temperature.
“Delayed start” of the panel convector
When the convector is in Off mode, by pressing the “Timer” button you
can enter a specific time after which the appliance will automatically go
in “Heating” mode. This mode is indicated by a blinking yellow LED and
inactive red LED. The digital display will show the room temperature
when the Temperature LED is lit, and it will show the remaining time in
hours until “Heating” mode will be activated and this will be indicated
with a lit Timer LED. Upon activating this mode the yellow LED becomes
lit, and the display starts flashing and showing the entered time in
hours until the convector will be automatically switched on. Initially
the display will show 12 hours, and by using the or buttons you
can adjust the desired time. If you keep pressed any of the buttons
or for more than 0.7 seconds, the value of the set time will start
increasing or decreasing by 4 units per second. If you don’t press any
button for 5 seconds, or if you press the Timer button, the regulator
will automatically go into “Delayed start” mode. If you enter time 00,
this mode will not be activated. When the “Delayed start” mode is
already active, if you press the “Timer” button again, you can correct the
remaining time in both possible directions. After setting the time, the
appliance goes into “Delayed start” mode with the display showing the
temperature and the hours remaining until the appliance will switch to
“Heating” mode. You can exit this mode by pressing the “
On/Off
” button.
Содержание
- 21 Русский; ИСПОЛЬЗОВАНИЕ В ВАННОЙ
- 23 Механизм записи каждой точки следующий:; Функция „Сброс“ до заводских настроек
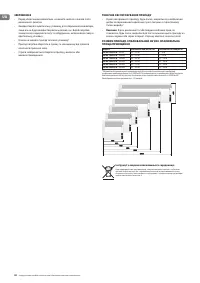
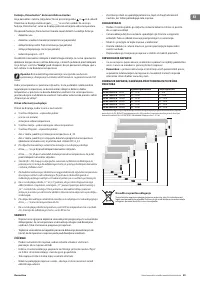
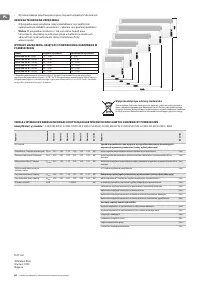
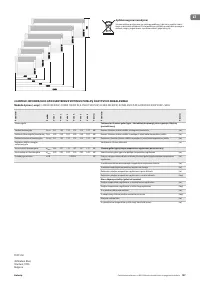
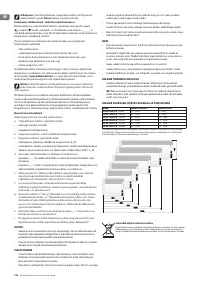
- 24 • Никога не храните теплый прибор в его упаковке!; СЕРВИСНАЯ ПОДДЕРЖКА ПРИБОРА; • В случае неисправности прибора, просим вас связаться с; : В случае рекламации и/или нарушения ваших прав потребителя,; Модель; Инструкции по защите окружающей среде
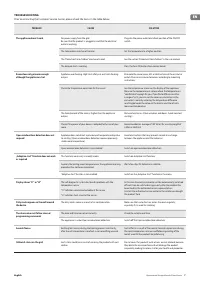
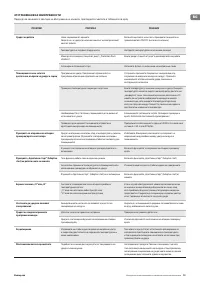
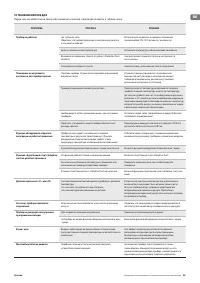
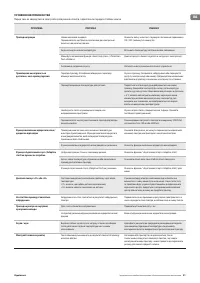
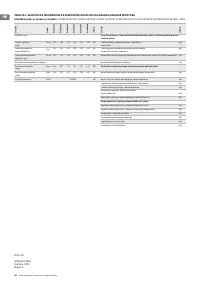
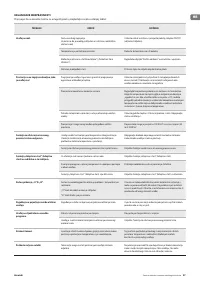
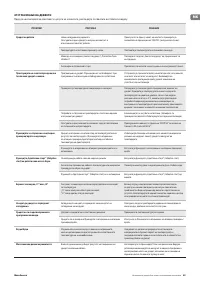
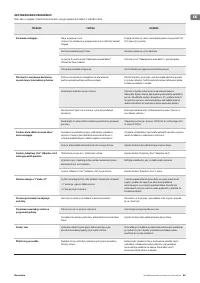
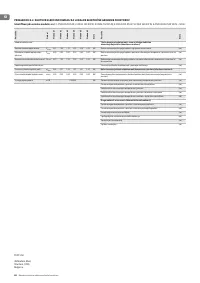
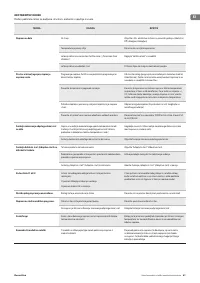
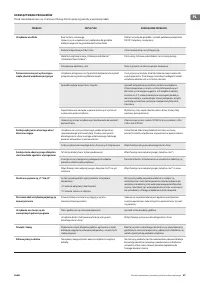
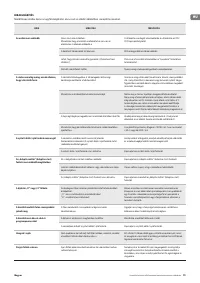
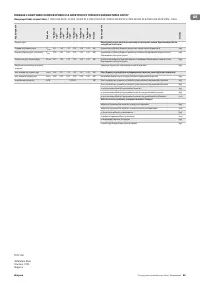
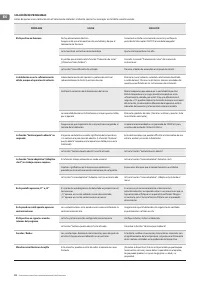
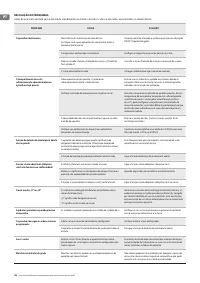
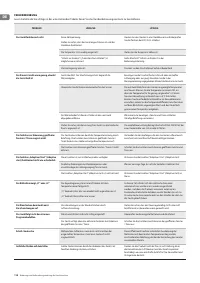
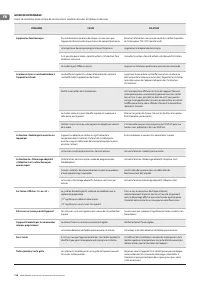
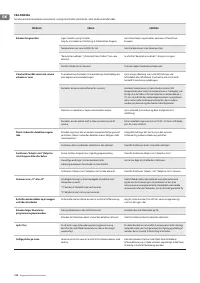
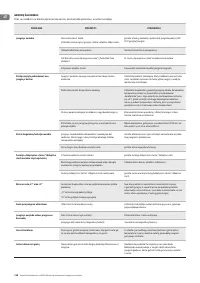
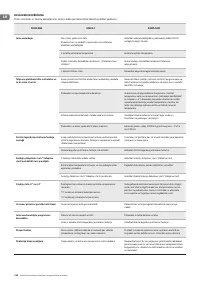
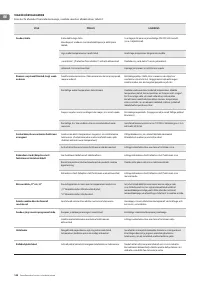
- 25 УСТРАНЕНИЕ НЕПОЛАДОК
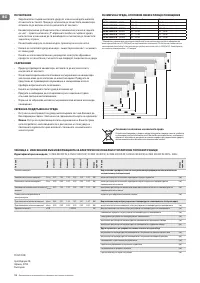
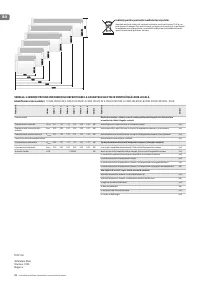
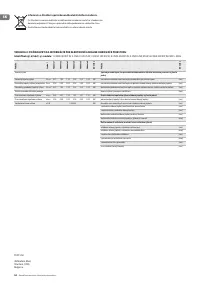
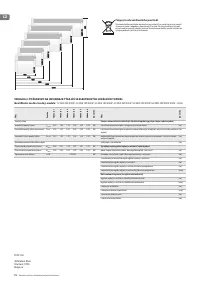
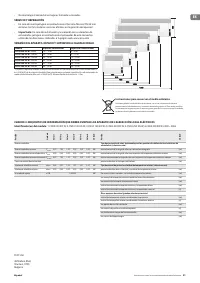
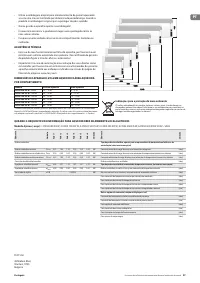
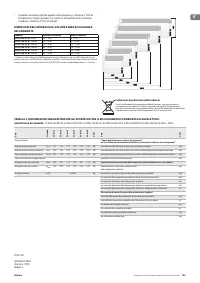
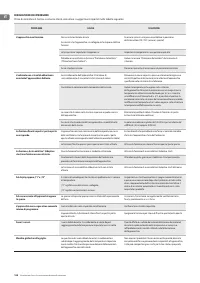
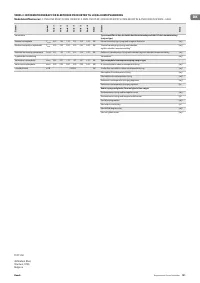
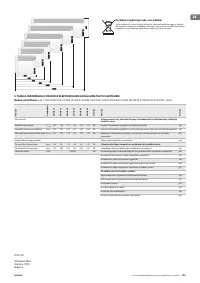
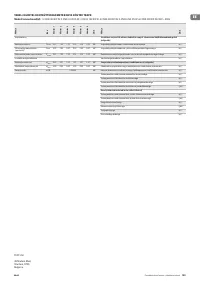
Характеристики

Остались вопросы?Не нашли свой ответ в руководстве или возникли другие проблемы? Задайте свой вопрос в форме ниже с подробным описанием вашей ситуации, чтобы другие люди и специалисты смогли дать на него ответ. Если вы знаете как решить проблему другого человека, пожалуйста, подскажите ему :)
