
Кофемашина Oursson AM6250/DC - инструкция пользователя по применению, эксплуатации и установке на русском языке. Мы надеемся, она поможет вам решить возникшие у вас вопросы при эксплуатации техники.
Если остались вопросы, задайте их в комментариях после инструкции.
"Загружаем инструкцию", означает, что нужно подождать пока файл загрузится и можно будет его читать онлайн. Некоторые инструкции очень большие и время их появления зависит от вашей скорости интернета.


32
33
It is prohibited to touch the coffee-grinder
with fingers or other objects while operation.
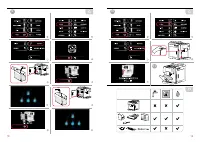
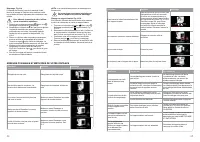
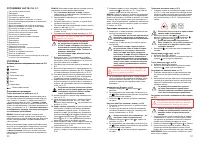
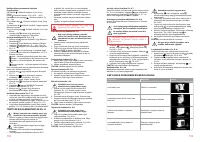
Drinks making, Pic. Е:
1. Ensure that coffee machine is switched on and
contains a sufficient amount of water.
Americano or Espresso, Pic. E-1
1. Choose Americano or Espresso at the display.
2. In order to make two cups of coffee – press
,
button. Coffee machine will automatically prepare the
second cup after the first one.
3. Press , if you want to stop the coffee feeding.
Water heating (for tea etc.), Pic. E-5
1. Press water at the menu.
2. When the required amount of water is reached,
press , to stop the water feeding.
Milk heating or frothing, Pic. E-4
1. Press milk at the menu.
2. When the required amount of milk is reached, press
, to stop the milk feeding.
Adjustment of milk froth, Pic. F-1
1. Open the left door of coffee machine. There is a
regulator of milk froth over the water container.
2. Turn the regulator counter-clockwise to increase the
milk froth, turn the regulator clockwise to decrease
the milk froth.
Grind coffee making, Pic. E-3
1. Open the lid of coffee beans container, Pic. E-3-1,
then open container for grind coffee and pour 1
spoon of grind coffee (flat), use the measuring spoon
(not included), Pic. E-3-3. Close the both lids.
cappuccino or Latte (milk-based drinks), Pic. E-2
1. Connect milk supply pipe to the milk frother hole,
Pic. E-2-1.
2. Put the other end of milk supply pipe to the special
milk container «Oursson» (not included) or cup/milk
package, Pic. E-2-2
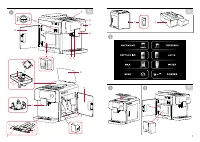
2. Ensure that there is a sufficient amount of coffee
beans in the container.
3. To make a coffee drink – put an empty cup under
the pouring holes, adjust the height of brew unit, Pic.
D-18. Choose the drink at the display and make it
with only one-touch.
•
We recommend you to put an empty cup/
container under pouring holes at startup or
shutdown of coffee machine.
•
Before making cappuccino or latte, ensure
that milk supply pipe is connected and its
other end is in the milk container.
•
In order to get optimal, splendid milk froth,
use the cold milk. We recommend to use
medium-fatty or whole cow milk.
•
It is allowed to put only one spoon of grind
coffee to the container at a time.
• In order to achieve the best taste – use
refrigerated milk only.
•
Beans container shall be used only
for coffee beans. It is prohibited to put
grind coffee, dry coffee extract or other
products to the container for coffee beans,
it will damage the machine components.
Maximum capacity of coffee beans
container is 270 g. Do not use the beans
covered with special cover, sugar, cacao
(caramelized/aromatized).
3. Choose Cappuccino or Latte at the display
menu, Pic.E-2-3.
4. In order to make two cups of coffee – press
,
button. Coffee machine will automatically prepare the
second cup after the first one.
5. Press , if you want to stop the milk feeding.
макС
2. Press
grind coffee at the menu, choose the
drink: Americano, Espresso, Cappuccino,
Latte, Pic. E-3-4
3. Press , if you want to stop the drink feeding.
Adjust the degree of grinding only when in-
built coffee grinder is running, otherwise the
mechanism may be damaged.
• In order not to damage the coffee grinder
mechanism, do not turn the grinding
adjuster more than one grade at a time.
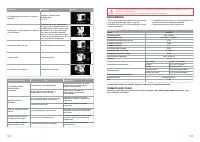
1. To adjust the grinding degree depending of the
coffee sort, put an empty cup under the pouring
holes and open the lid of coffee beans container.
2. Select Americano or Espresso at the menu.
3. When the grinder starts grinding, turn the adjuster to
the left or to the right to one degree. A new taste will
become noticeable after 2 cups of coffee.
NOTE:
The lower grade, the stronger coffee.
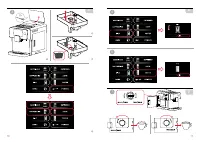
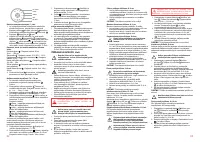
Adjustment the degree of coffee beans grinding,
Pic. F-2
• Do not use frozen coffee beans.
We recommend to use the grade 4-5 (coarse grind) for
coffee beans of dark color, and 1-3 (fine grind) for coffee
beans of light color.
Very small
Small
Middle
Large
Very large
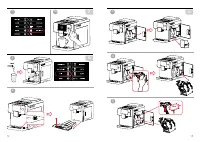
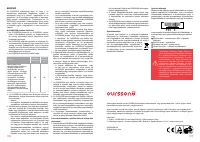
changing of drinks parameters, Pic. F-3
1. In order to adjust parameters of drinks according
to your preferences, press menu at the main
display, then press Settings.
2. Choose the coffee: Americano, Espresso,
Cappuccino or Latte.
3. Depending on the chosen type of coffee, you can
adjust the volume , the temperature , amount
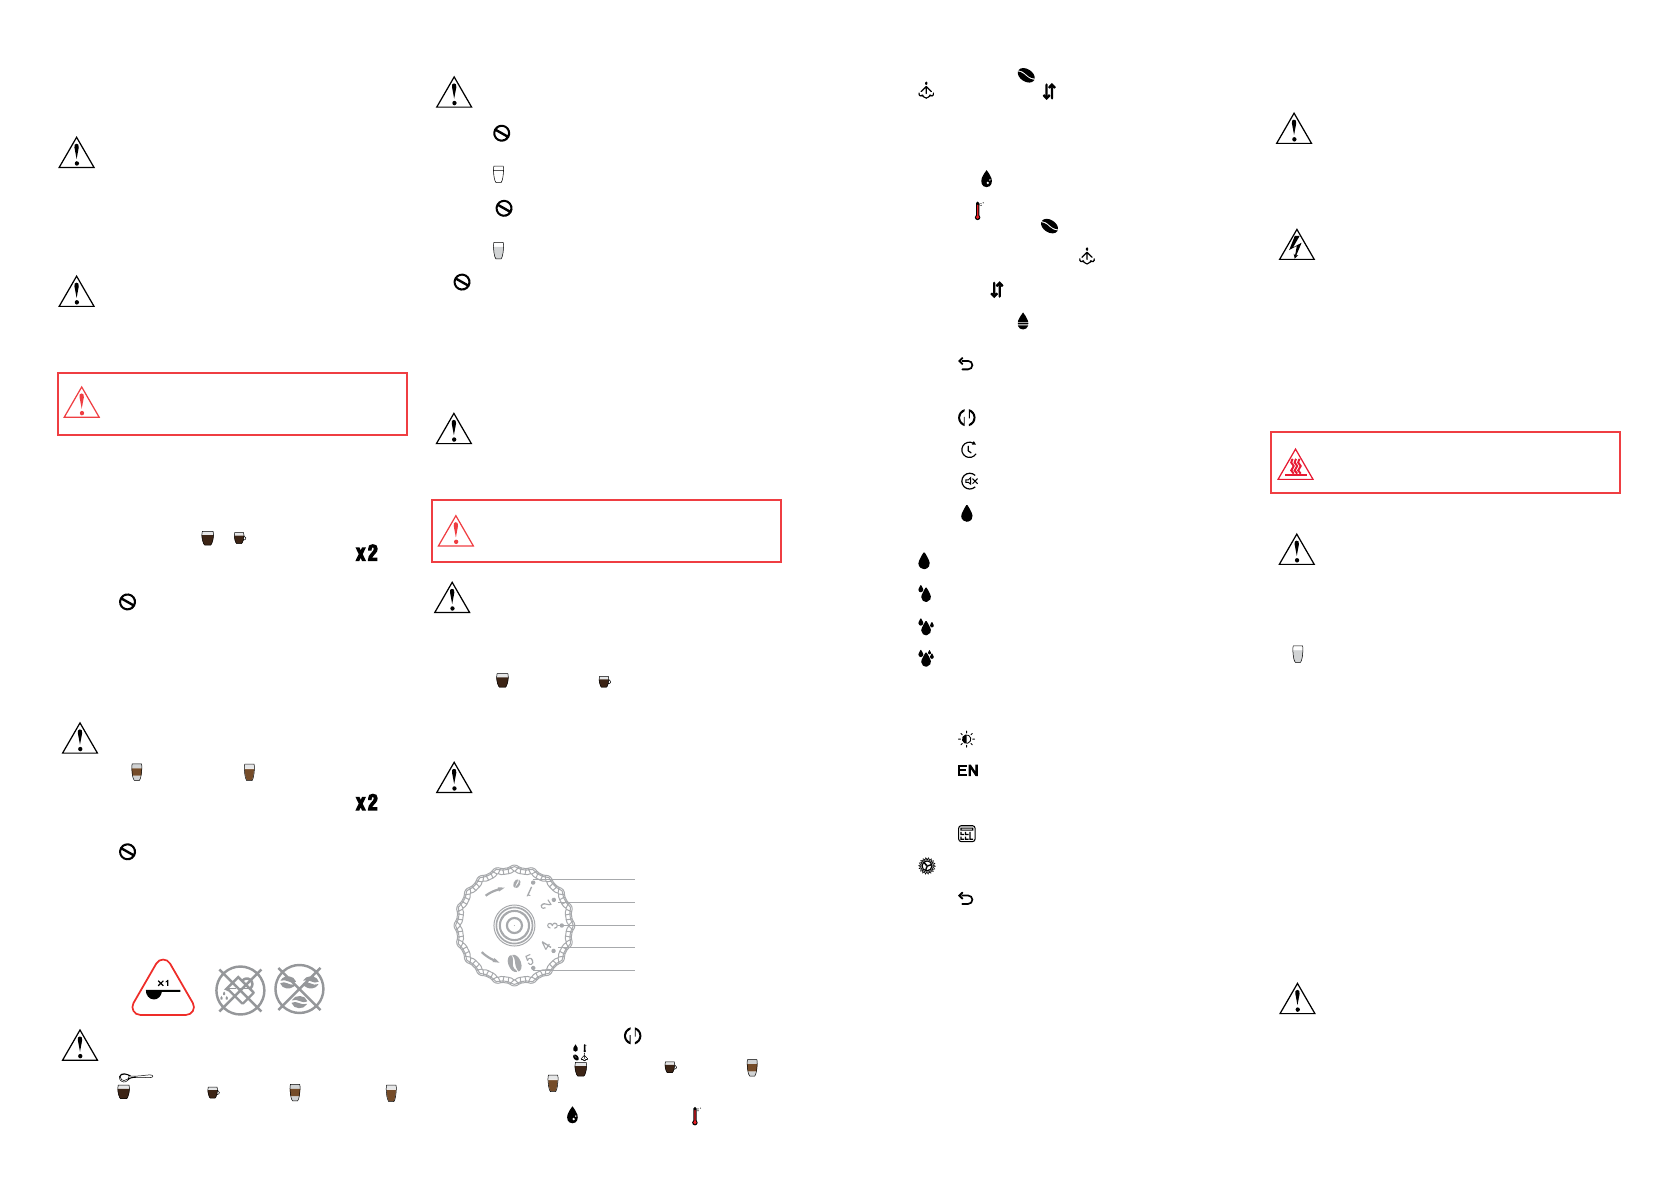
Switching off the coffee machine, Pic. F-10.
1. At the end of exploitation of coffee machine, put an
empty cup under the pouring holes. After a configured
time period, coffee machine will flush the pouring holes
and switch to standby mode.
2. You can switch off the machine in manual mode by
pressing switch on/off button during 2-3 sec at the front
panel, Pic. F-10.
3. For complete switch off the machine, press the tumbler
on the backside, Pic. D-9. After that, disconnect the unit
from the electrical network.
Coffee machine settings, Pic. F-4 – F-8.
1. Press menu at the main display to change the
parameters of the coffee machine.
2. Select timer to set up the timer value. Available
variations: Switch off 0.5h, 1h, … 24 h, Pic. F-4.
3. Select sound to switch on/off sound for display
tapping, Pic. F-5.
4. Select hardness of water to choose descaling
cycles depending on water type, Pic. F-6
Available options:
soft – descaling required after each 880 cups of
coffee;
average - descaling required after each 400 cups
of coffee;
hard - descaling required after each 280 cups of
coffee;
very hard - descaling required after each 240
cups of coffee.
If water is harder than installed by default options, so it
may affect the taste of coffee drinks, as well as lead to
damage of coffee machine.
5. Press display to configure the display brightness,
Pic. F-7.
6. Press
language the required amount of times to
select the menu language, Pic. D-16.
Available options: English, French, German,
Russian.
7. Press counter to see the statistics of the coffee
machine, Pic. F-8.
8.
Calibration is intended for using by authorized
specialists of OURSSON Trademark only, Pic. F-9.
9. Press two times to save the parameters and exit
to the main menu.
Parameters that can be configured depending on the
type of coffee drink:
Drink volume . Available variations: 20 ml, 25 ml, …
250 ml.
Temperature . Available variations: 75°С, 80°С … 95°С.
Amount of coffee beans . Available variations: 7g, 8g
… 12g.
Time (volume) of hot milk froth . Available variations:
15s, 20s … 60s.
Pump pressure . Available variations: high pressure, low
pressure.
Volume of hot water . Available variations: 0 ml, 10ml …
200 ml.
of coffee beans , time (volume) of hot milk froth
, pump pressure . In order to change these
paramters, press them as many times as necessary
until you see the result, Pic. F-3
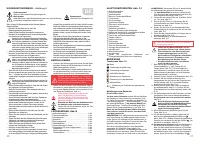
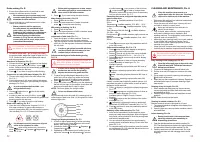
cLEANING AND MAINTENANcE, Pic. H
•
clean the machine components on a
regular basis after the each use. cleaning is
required for stable work of the machine.
• Disconnect the machine from electrical network and
allow it to cool completely.
• Clean the case with a wet cloth. Use only dry and
soft cloth to clean the control panel.
• Never put the machine into water due to
electric shock danger.
• Tray for liquid, water container, measuring spoon
and residue container can be washed in dish
washing machine. The temperature in dish washing
machine shall not exceed 60°С.
• Milk supply pipe, cleaning brush, tray lid are washed
in warm water with washing-up liquids, Рис.H.
• Use a brush to clean hard-to-get places of coffee
machine from grind coffee.
• Clean the bean container with a dry sponge or paper.
• Carefully dry all machine components after cleaning.
Be careful while cleaning in order not to burn
fingers with steam blast or hot water.
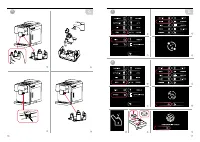
Daily cleaning of milk supply pipe, Pic. G-1
•
clean the milk supply pipe at the end of a day
if the milk was used. Follow the instructions
bellow to avoid burns.
1. Connect milk-feeding pipe to the milk frother hole.
2. Put the other end of the pipe to a container with clean
water.
3. Put an empty cup under the pouring holes and press
milk button at the menu.
4. Empty the cup after completion of cleaning. Repeat the
aforementioned steps for complete cleaning of pipe
from old milk.
Infuser cleaning, Pic. G-4
•
Ensure that the unit is disconnected from
electricity network prior assembling or
dissembling procedures.
1. Open the right door and remove residue container, Pic.
G-3. Then push the lever on the brew unit, pull on the brew
unit and remove it from the coffee machine, Pic. G-4.
2. Carefully wash brew unit with warm water. Dry it (do
not clean the brew unit with a shaggy cloth to avoid
clogging).
cleaning of tray for liquids, Pic. G-2
1. When indicator tray filling pops up, remove the tray,
remove the grating and wash them with warm water
and washing-up liquid.
2. Carefully dry all components and install them to their
positions.
NOTE:
Clean the tray once per week.
cleaning of residue container, Pic. G-3
Residue container volume is designed for 10 cups.
1. The relevant indication will appear at the display if the
container is full.
2. Open the right door, remove residue container, clean it,
and install back.
4. Press two times to save the parameters and exit
to the main menu.
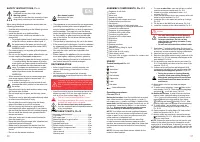
Содержание
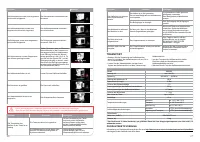
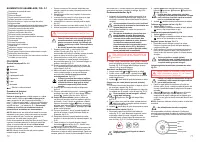
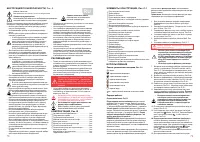
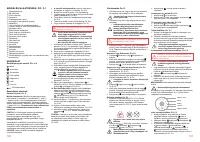
- 40 ИСПОЛЬЗОВаНИЕ; Панель управления сенсорная,; Замену фильтра необходимо проводить; РЕкОмЕНДаЦИИ; • Во время работы прибор нагревается. Не; ИНСТРУкЦИЯ ПО БЕЗОПаСНОСТИ,; Символ опасности; Напоминание пользователю о высоком напряжении.
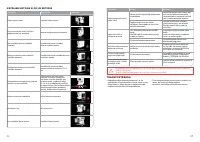
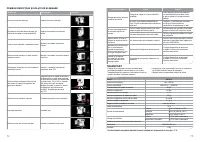
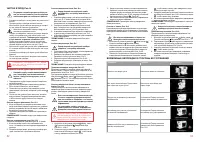
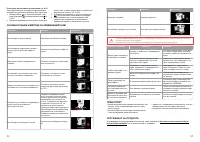
- 42 ВОЗмОЖНЫЕ НЕПОЛаДкИ И СПОСОБЫ ИХ УСТРаНЕНИЯ
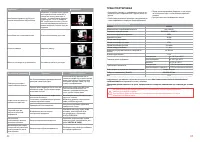
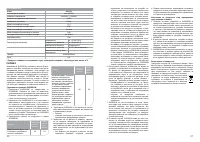
- 43 ТРаНСПОРТИРОВка; Технические характеристики; чИСТка И УХОД
- 44 СЕРВИСНОЕ ОБСЛУЖИВаНИЕ; Условия Гарантийных обязательств
- 45 талон признается недействительным.; ПРЕПОРЪкИ; • Уреда се загрява по време на работа.; Знак за риск от изгаряне; ИНСТРУкЦИИ За БЕЗОПаСНОСТ,


