
Кофемашина Oursson AM6250/DC - инструкция пользователя по применению, эксплуатации и установке на русском языке. Мы надеемся, она поможет вам решить возникшие у вас вопросы при эксплуатации техники.
Если остались вопросы, задайте их в комментариях после инструкции.
"Загружаем инструкцию", означает, что нужно подождать пока файл загрузится и можно будет его читать онлайн. Некоторые инструкции очень большие и время их появления зависит от вашей скорости интернета.


30
31
EN
• This appliance is not intended for use by persons
(including children) with reduced physical, sen
-
sory or mental capabilities, or lack of experience
and knowledge. They can only use the device
under the supervision of the person responsible
for their safety, or after instruction on the safe
use of the device. Do not allow children to play
with the product.
• This product is intended only for use in the home.
• If the power cord is damaged, it must be replaced
by a specialist from the authorized service center
( ASC ) OURSSON AG to avoid danger.
• Use only the tools, which are included in the
product set.
• When cleaning the appliance do not use abra
-
sives and organic cleaners (alcohol, gasoline,
etc.). When cleaning the device it is allowed to
use a small amount of neutral detergent.
When using electrical appliances should take the
following precautions:
• Use the device according to the following instruc
-
tions manual.
• Install the device on a stable surface.
• Use only the tools, which are included in the
product set.
• To protect against risk of electrical shock do
not put the cord in water or other liquid. If
for some reason the water got into the unit,
contact an authorized service center (ASC)
OURSSON AG.
• For power supply, use a power grid with proper
characteristics.
• Do not use the device in areas where the air can
contain vapors of flammable substances.
• Never attempt to open the device by yourself
– it could possibly be the reason of an elec
-
trical shock can lead to product malfunction
and will invalidate the manufacturer’s war
-
ranty. For repair and maintenance, contact
only authorized service centers meant for
repair of products under the trademark
OURSSON.
• When moved from a cool to a warm place and
vice versa unpack it before use and wait 1-2
hours without turning it on.
• In order to prevent electrical shock do not
immerse the entire product or the wires into
the water.
• Be particularly careful and cautious when using
the device near children.
• Do not touch any hot parts, as this may cause
injury.
• The power cord is specially made relatively short
in order to avoid the risk of injury.
• Do not allow the cord to hang over the sharp
edge of the table or touch hot surfaces.
• Do not connect this device to a grid which is
overloaded with other appliances: it can lead to
the fact that the device will not function properly.
• Do not install the device near gas and electric
stoves and ovens.
• After use, make sure to disconnect the device
from the power grid.
• Keep the device from bumps, falls, vibration and
other mechanical influences.
• Make sure to disconnect the device from the
power grid before cleaning or changing acces
-
sories.
• Do not use the device outdoors.
Danger symbol
A reminder to user about high voltage.
Warning symbol
A reminder to user about the necessity of oper
-
ating exactly according to the instructions.
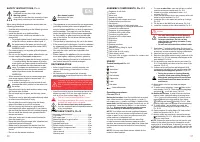
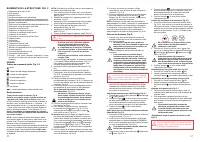
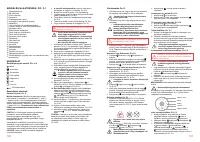
SAFETY INSTRUcTIONS,
Pic. A
REcOMENDATION
• Before using the device, carefully read the user
manual. After reading, please save it for future
reference.
• All illustrations in this manual are schematic
representations of real objects that may differ from
their real images.
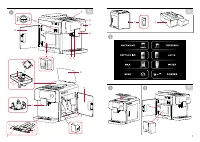
• Install the machine at even horizontal surface at the
distance at least 15-20 cm from walls/furniture, as
well as 10 cm from surface edge, Fig. A-1.
• The unit is heated while operation. Do not
touch the heated parts. Be careful, not to burn
yourself with steam jets or hot water.
•
Do not remove liquid tray while operation.
• Cool the equipment before installation/removal
of any components.
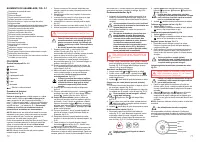
cOMPONENT PARTS,
Pic. В
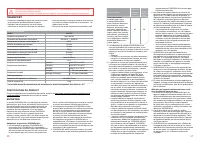
Automatic coffee machine ................................1 pc.
Cup holder .........................................................1 pc.
Milk supply pipe ...............................................2 pcs.
Measuring spoon for grind coffee ......................1 pc.
Cleaning brush ................................................1 pc.
Stainless steel brush .......................................1 pc.
Rubber sealing for brewer ..............................8 pcs.
Spare cap for a cappuccinator ........................1 pc.
Water filter .........................................................1 pc.
User’s manual ...................................................1 pc.
Warranty card ...................................................1 pc.
Operation of this device in no way implies the
application of physical force to it, as this may
lead to product breakage due to the user’s
fault.
Burn hazard symbol
Reminder to the user
about the heat.
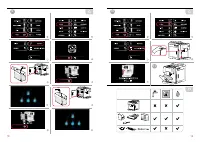
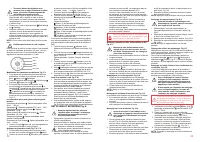
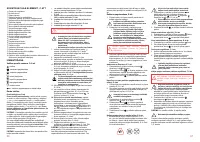
ASSEMBLY cOMPONENTS, Pic. c-1
Regulator of milk froth
Left door
Water tank
Heated cup holder
Main display with control touch pad
Coffee machine on/off button
Sub display
Hole for connection of milk supply pipe
Holes for pouring out of ready-to-drink coffee
Container for coffee beans
Regulator of grinding degree
Container lid for grind coffee
Container for grind coffee
Container lid for coffee beans
Milk frother
Right door
Brew unit
Residue container
Tray grating
Indicator of tray filling for liquid
Tray for liquid
Pipe holder for milk supply
Power supply switch
Tray-base with a bigger container for residue and
liquid (not included)
12
13
14
15
16
17
18
19
20
21
22
23
24
USAGE
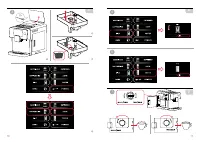
control touch pad,
Pic. С-2
- Menu
- Americano
- Espresso
- Hot milk/froth
- Cappuccino
- Latte
- Hot water
- Grind coffee drinks
Operating procedures:
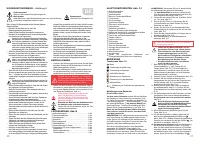
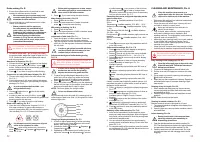
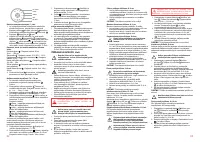
First start, Pic. D
Before the first start,
clean the machine with a dry soft
cloth. Water container, measuring spoon , brush ,
milk supply pipe , metallic cup holder wash out with
warm water
and dishwashing liquid. Carefully dry out all
components. Install the cup holder to the machine,
Pic. D-1.
Disconnect the unit from power sources
prior assembling or dissembling procedures.
NOTE:
Your coffee machine was completed industrial
trials that is why it may contain a slight amount of grind
coffee or water. In any event, we guarantee that your
coffee machine is completely new.
You may use coffee machine without a water filter.
In order to prevent scale formation inside the coffee
machine, we recommend using a water filter. Water filter
also decrease the required amount of scale cleaning
cycles.
NOTE:
Use only water filters that are suitable for the
model of coffee machine.
1. To install
a water filter
, open the left door of coffee
machine and remove water tank, Pic. D-2.
2. Unpack a new filter, and shake it within ~3-5
seconds, Pic. D-3
3. Invert the filter and put him in any reservoir with cold
water for a few seconds, Pic. D-4.
4. Install the filter to the water tank as far as it can go,
Pic. D-5.
5. Fill the tank to the MAX level with water, Pic. D-6.
6. Install the container to the coffee machine, Pic. D-7.
Water filter shall be replaced once per 2
months.
•
Use only clean/bottled noncarbonated
cold water or lukewarm water (23-24°c)
for water container. Do not use any
other liquids, including hot water. It may
damage the unit.
• Do not use coffee machine without water.
• During the process of cleaning/flushing,
a portion of hot water will be discharged
through the pouring holes. Be careful and
avoid contacts with hot water in order to
avoid burns.
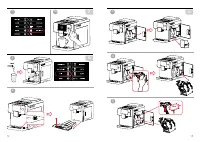
7. Cap holder is heated while using. Put cups on it,
Pic. D-17. We recommend you to heat the coffee cup
preliminary in order to achieve the best coffee taste.
8. Insert two-pin plug to the socket, Pic.D-8.
9. Switch on the coffee machine using a switcher at the
backside, Fig. D-9. An indication shall appear at the
both displays, Pic.D-10.
10. Put an empty cup under the pouring out holes, Pic.
D-11. Press switch on button at the front side of the
machine, Pic.D-12.
11. Coffee machine will perform self-diagnosis of all
components and switch to the operation state.
Do
not interrupt self-diagnosis process
, Pic.D-13.
12. Empty water out of the cup after self-diagno,
Pic.D-14.
13. To switch menu language – press Menu at the
main display, Pic.D-15. Then choose the language
and press , to exit the menu, Pic.D-16.
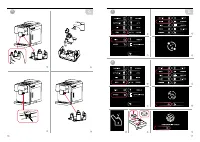
14.
Before the first use,
in order to achieve the best
taste of coffee, perform flushing of pouring holes
– 2 or 3 cycles of coffee making. In order to do so,
press Menu at the main display, then select
Cleaning and press flushing, Pic.G-7. After
flushing, Main menu will appear at the main display.
15. To make coffee – put an empty cup under the
pouring holes and adjust the height of brew unit,
Pic. D-18.
16. Open container for coffee beans, fill it with coffee
beans and close the lid, Pic. D-19.
17. Make a coffee with one-touch, choose Americano
at the display, Pic. E-1. After that, make a coffee
drink two more times.
NOTE:
Choose the side at which you will use the milk
frother. At the default, the hole for connection of milk
supply pipe is at the left side. If required, you may use
a right one. In order to do so – remove the cap from the
right side of milk forther and install it at the left one, Pic.
D-20.
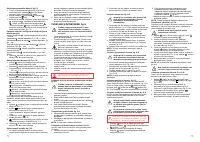
Содержание
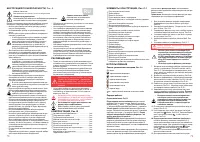
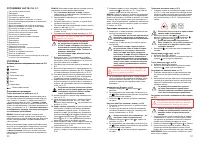
- 40 ИСПОЛЬЗОВаНИЕ; Панель управления сенсорная,; Замену фильтра необходимо проводить; РЕкОмЕНДаЦИИ; • Во время работы прибор нагревается. Не; ИНСТРУкЦИЯ ПО БЕЗОПаСНОСТИ,; Символ опасности; Напоминание пользователю о высоком напряжении.
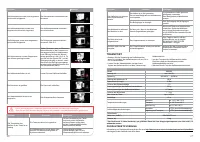
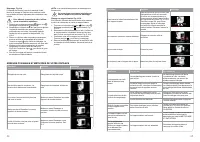
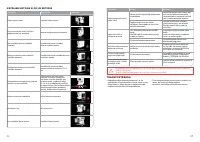
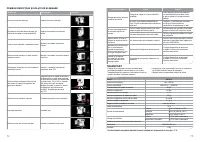
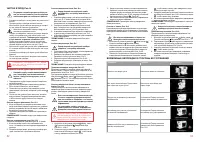
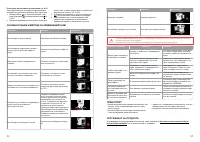
- 42 ВОЗмОЖНЫЕ НЕПОЛаДкИ И СПОСОБЫ ИХ УСТРаНЕНИЯ
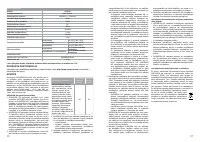
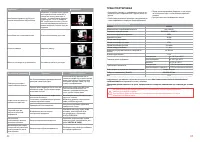
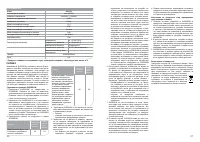
- 43 ТРаНСПОРТИРОВка; Технические характеристики; чИСТка И УХОД
- 44 СЕРВИСНОЕ ОБСЛУЖИВаНИЕ; Условия Гарантийных обязательств
- 45 талон признается недействительным.; ПРЕПОРЪкИ; • Уреда се загрява по време на работа.; Знак за риск от изгаряне; ИНСТРУкЦИИ За БЕЗОПаСНОСТ,


