
Газонокосилки STIGA TWINCLIP 950 SQ AE 294513898/ST1 - инструкция пользователя по применению, эксплуатации и установке на русском языке. Мы надеемся, она поможет вам решить возникшие у вас вопросы при эксплуатации техники.
Если остались вопросы, задайте их в комментариях после инструкции.
"Загружаем инструкцию", означает, что нужно подождать пока файл загрузится и можно будет его читать онлайн. Некоторые инструкции очень большие и время их появления зависит от вашей скорости интернета.


EN - 7
1.
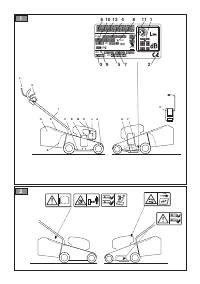
Lift the rear discharge guard (Fig.12.A).
2.
Remove the chute plug (Fig.12.B).
6.1.3
Cutting height adjustment
Adjust the cutting height as indicated in (par. 5.6).
6.1.4
Handle height adjustment
Carry out this operation when the cutting means
is stationary.
The height of the handle can be adjusted in 3
different positions, indicated by the indicator
at the base of the handle (Fig.13.A).
To adjust the height of the handle, operate both levers on
the sides of the handle (Fig.13.B), and hold them in place.
Carefully bring the handle to the desired
height and release the two levers.
The handle can be also folded from the operating position
in closed position, for storage purposes (par. 9.1).
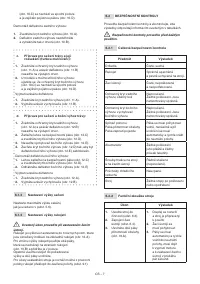
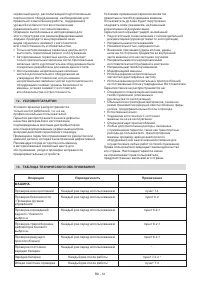
6.2 SAFETY CHECKS
Perform the following safety checks and check that the
results correspond to those outlined on the tables.
Always carry out the safety checks before use.
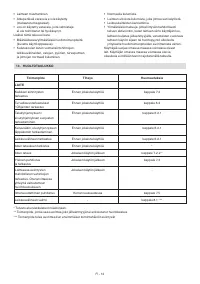
6.2.1
General safety check
Object
Result
Grips
Clean, dry.
Handle
Fixed firmly to the machine.
Cutting means
Clean, not damaged
or worn.
Rear discharge guard;
grass catcher
Good condition. No
damage. Properly installed.
Side discharge guard;
side discharge chute
Good condition. No
damage. Properly installed.
Switch command
Operator presence lever
Drive ON lever
The lever must move
freely, it must not need
forcing and should
return automatically
and rapidly back to
the neutral position.
Battery
No damage to the casing,
no liquid leakage.
Screws/nuts on the
machine and on the
cutting means
Correctly tightened
(not loose).
Cooling air ducts
Not clogged.
Machine
No signs of damage
or wear.
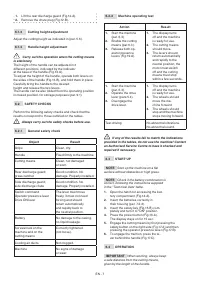
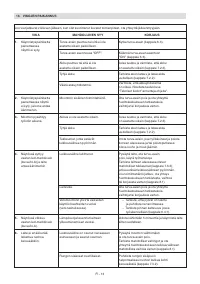
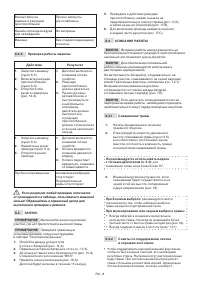
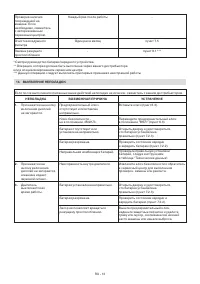
6.2.2 Machine operating test
Action
Result
1.
Start the machine
(par. 6.3).
2.
Enable the cutting
means (par.6.3 ).
3.
Release both op
-
erator presence
levers (Fig.19.A).
1.
The display turns
off and the machine
is ready for use.
2.
The cutting means
should move.
3.
The levers should
return automatically
and rapidly to the
neutral position, the
motor must switch
off and the cutting
means must stop
within a few seconds.
1.
Start the machine
(par. 6.3).
2.
Operate the drive
lever (para 5.4).
3.
Disengage the
drive lever.
1.
The display turns
off and the machine
is ready for use.
2.
The wheels should
move the ma
-
chine forward.
3.
The wheels should
stop and the machine
stops moving forward.
Test driving
No abnormal vibrations.
No abnormal sound.
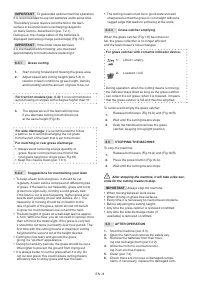
If any of the results fail to match the indications
provided in the tables, do not use the machine! Contact
an Authorised Service Centre to have it checked and
repaired if necessary.
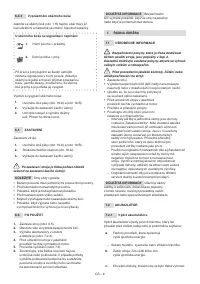
6.3
START-UP
NOTE
Start up the machine on a flat
surface without obstacles or high grass.
NOTE
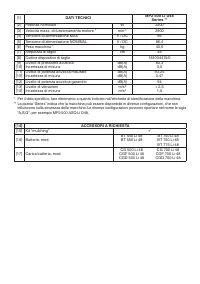
Check if the battery combination is
correct, following the instructions supplied
in the "Technical data" table.
1.
Open the hatch for accessing the bat
-
tery compartment (Fig.14.A).
2.
Insert the batteries correctly in
their housing (par. 7.2.3).
3.
Insert the safety key (Fig.15.B) com
-
pletely and turn it to "ON" position.
4.
Press the power button (Fig.16.A).
The display stays on for 15 sec.
5.
Engage the cutting means by first pressing the
safety button on the right side (Fig.17.A) and then
pressing the operator presence lever (Fig.17.B).
6.
To engage the traction, press the le
-
ver behind the handle (Fig.17.C).
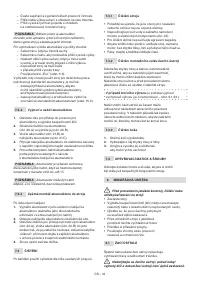
6.4 OPERATION
IMPORTANT
When working, always keep
a safe distance from the cutting means,
given by the length of the handle.


