
Газонокосилки Makita PLM5113N - инструкция пользователя по применению, эксплуатации и установке на русском языке. Мы надеемся, она поможет вам решить возникшие у вас вопросы при эксплуатации техники.
Если остались вопросы, задайте их в комментариях после инструкции.
"Загружаем инструкцию", означает, что нужно подождать пока файл загрузится и можно будет его читать онлайн. Некоторые инструкции очень большие и время их появления зависит от вашей скорости интернета.


13
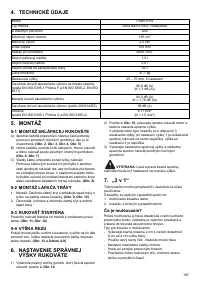
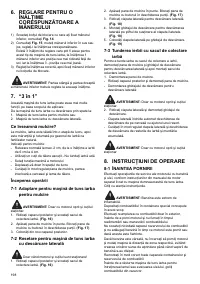
3. To change the height of cut, squeeze adjuster lever
toward the wheel, moving up or down to selected
height. All wheels will be in the same height of cut.
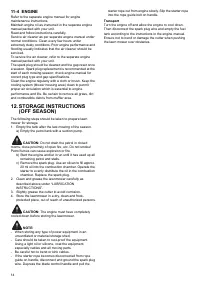
9. MAINTENANCE
INSTRUCTIONS
SPARK PLUG
Use only original replacement spark plug. For best results,
replace the spark plug every 100 hours of use. (refer to
ENGINE OWNER’S MANUAL)
BRAKE PADS
Check and/or replace the engine brake pads in service
agent regularly, only original parts can be used as
replacement.
10. LUBRICATION INSTRUCTIONS
CAUTION:
DISCONNECT SPARK PLUG
BEFORE SERVICING.
1. WHEELS-Lubricate the ball bearings in each wheel at
least once a season with a light oil.
2. ENGINE-Follow engine manual for lubrication
instructions.
3. STOP CONTROL-Lubricate the pivot points on the
stop control handle and the brake cable at least once
a season with light oil. The stop control must operate
freely in both directions.
11. CLEANING
CAUTION:
Do not hose engine. Water can
damage engine or contaminate the fuel system.
1. Wipe deck with dry cloth.
2. Hose under deck by tilting the mower so that the spark
plug is up.
11-1 ENGINE AIR CLEANER
CAUTION:
Do not allow dirt or dust to clog the air
filter foam element.
The engine air cleaner element must be serviced
(cleaned) after 25 hours normal mowing. The foam
element must be serviced regularly if the mower is used in
dry dusty conditions. (refer to ENGINE OWNER’S
MANUAL)
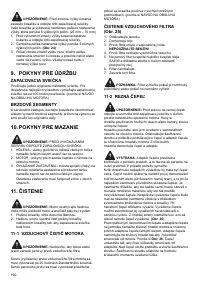
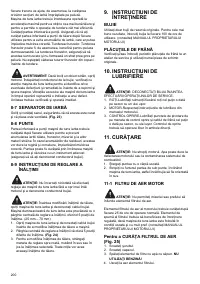
To CLEAN AIR FILTER (Fig. 25)
1. Remove screw.
2. Remove cover.
3. Wash filter element in soap water.
DO NOT USE
GASOLINE!
4. Air dry filter element.
5. Place a few drops of SAE30 oil on the foam filter and
squeeze tightly to remove any excess oil.
6. Reinstall filter.
7. Close the filter cover.
NOTE:
Replace filter if frayed, torn, damaged or
unable to be cleaned.
11-2 CUTTING BLADE
CAUTION:
Be sure to disconnect and ground the
spark plug wire before working on the cutting blade to
prevent accidental engine starting. Protect hands by using
heavy gloves or a rag to grasp the cutting blades.
Tip mower as specified in separate engine manual.
Remove the hex bolt and washer which hold the blade
and blade adapter to the engine crankshaft. Remove the
blade and adapter from the crankshaft.
WARNING:
Periodically inspect the blade
adapter for cracks, especially if you strike a foreign object.
Replace when necessary.
For best results your blade should be sharp. The blade
may be resharpened by removing it and either grinding or
filing the cutting edge keeping as close to the original
bevel as possible. It is extremely important that each
cutting edge receives an equal amount of grinding to
prevent an unbalanced blade. Improper blade balance will
result in excessive vibration causing eventual damage to
the engine and mower. Be sure to carefully balance blade
after sharpening. The blade can be tested for balance by
balancing it on a round shaft screwdriver. Remove metal
from the heavy side until it balances evenly.
(Fig. 26)
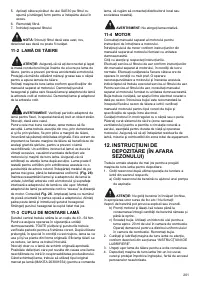
Before reassembling the blade and the blade adapter to
the unit, lubricate the engine crankshaft and the inner
surface of the blade adapter with light oil. Install the blade
adapter on the crankshaft with the “star” away from the
engine. Refer to
Fig. 26
. Place the blade with the part
number facing away from the adapter. Align the washer
over the blade and insert the hex bolt. Tighten the hex bolt
to the torque listed below.
11-3 BLADE MOUNTING TORQUE
Center Bolt must be tightened to 40 – 54 Nm torque. To
insure safe operation of your unit. ALL nuts and bolts must
be checked periodically for correct tightness. After
prolonged use, especially in sandy soil conditions, the
blade will become worn and lose some of the original
shape. Cutting efficiency will be reduced and the blade
should be replaced.
Replace with an approved factory replacement blade only.
Possible damage resulting from blade unbalance
condition is not the responsibility of the manufacturer.
When you change the blade, must use the original type
marked on the blade (MAKITA 263001554) (for order the
blade, pls. contact your local dealer or call our company).
WARNING:
Do not touch rotating blade.


