
Фрезеры Bosch 0.601.613.608 - инструкция пользователя по применению, эксплуатации и установке на русском языке. Мы надеемся, она поможет вам решить возникшие у вас вопросы при эксплуатации техники.
Если остались вопросы, задайте их в комментариях после инструкции.
"Загружаем инструкцию", означает, что нужно подождать пока файл загрузится и можно будет его читать онлайн. Некоторые инструкции очень большие и время их появления зависит от вашей скорости интернета.


18
| English
1 619 929 J79 | (23.11.11)
Bosch Power Tools
The machine can be plugged directly into the receptacle of a
Bosch all-purpose vacuum cleaner with remote starting con-
trol. The vacuum cleaner starts automatically when the ma-
chine is switched on.
The vacuum cleaner must be suitable for the material being
worked.
When vacuuming dry dust that is especially detrimental to
health or carcinogenic, use a special vacuum cleaner.
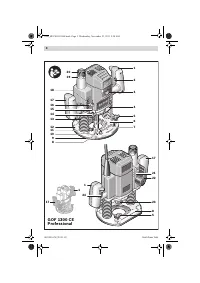
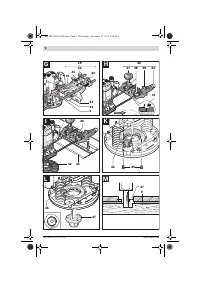
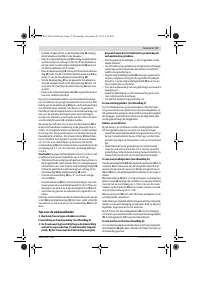
Mounting the Chip Shield (see figure C)
Insert the chip shield
6
from the front into the guide in such a
manner that it engages. To remove the chip shield, grasp it by
the sides and pull it off toward the front.
Operation
Starting Operation
f
Observe correct mains voltage! The voltage of the pow-
er source must agree with the voltage specified on the
nameplate of the machine. Power tools marked with
230 V can also be operated with 220 V.
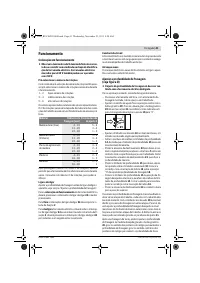
Preselecting the Speed
The required speed can be preselected with the thumbwheel
3
(also while running).
1 – 2
low speed
3 – 4
medium speed
5 – 6
high speed
The values shown in the chart are standard values. The neces-
sary speed depends on the material and the operating condi-
tions, and can be determined by practical testing.
After longer periods of working at low speed, allow the ma-
chine to cool down by running it for approx. 3 minutes at max-
imum speed with no load.
Switching On and Off
Adjust the depth-of-cut before switching on or off; see Sec-
tion “Adjusting the Depth-of-cut”.
To
start
the machine, press the On/Off switch
24
and keep it
pressed.
To lock the
pressed
On/Off switch
24
, press the lock-on but-
ton
2
.
To
switch off
the machine, release the On/Off switch
24
or
when it is locked with the lock-on button
2
, briefly press the
On/Off switch
24
and then release it.
Constant Electronic Control
Constant electronic control holds the speed constant at no-
load and under load, and ensures uniform working perform-
ance.
Soft Starting
The electronic soft starting feature limits the torque upon
switching on and increases the working life of the motor.
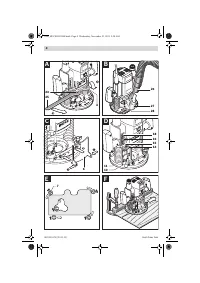
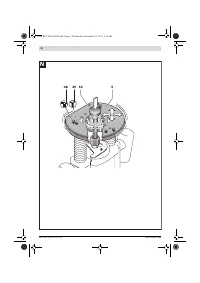
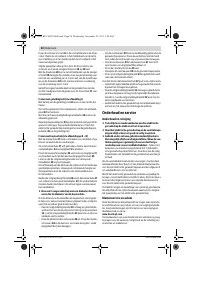
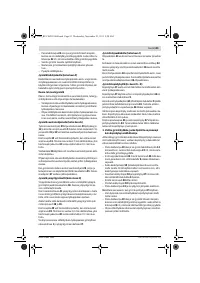
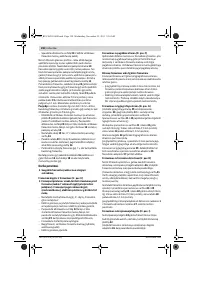
Adjusting the Depth-of-cut (see figure D)
f
The adjustment of the depth-of-cut may only be carried
out when the router is switched off.
For coarse adjustment of the depth-of-cut, proceed as follows:
– Place the machine with the router bit mounted on the
workpiece to be machined.
– Set the fine-adjustment path to the centre position with
the adjustment knob
20
. For this, turn the adjustment
knob
20
until the marks
21
match as shown in the figure.
Afterwards, set the scale
19
to “0”.
– Set the step buffer
10
to the lowest position; the step buff-
er engages noticeably.
– Loosen the wing bolt for the depth stop
14
so that the
depth stop
15
can be moved freely.
– Push the release lever
22
downward and slowly lower the
plunge router until the router bit
7
touches the surface of
the workpiece. Let go of the release lever
22
again to lock
this plunging depth.
– Push the depth stop
15
downward until it rests on the step
buffer
10
. Set the slide with the index mark
16
to the “0”
position on the scale for the depth-of-cut adjustment
18
.
– Set the depth stop
15
to the required depth-of-cut and
tighten the wing bolt for the depth stop
14
. Pay attention
not to misadjust the slide with the index mark
16
again.
– Push the release lever
22
and guide the plunge router to
the uppermost position.
For deep cuts, it is recommended to carry out several cuts,
each with little material removal. By using the step buffer
10
,
the cutting process can be divided into several steps. For this,
adjust the desired depth-of-cut with the lowest step of the
step buffer and select the higher steps first for the initial cuts.
The clearance of the steps can be changed by screwing the
adjusting screws
11
further in or out.
After a trial cut, the depth-of-cut can be set exactly to the de-
sired measure by turning the adjustment knob
20
; turn in
clockwise direction to increase the cutting depth and in anti-
clockwise direction to decrease the cutting depth. The scale
19
can be used for guidance. One full turn corresponds with a
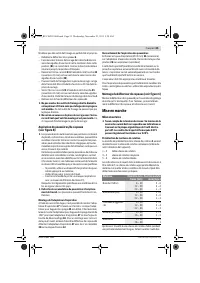
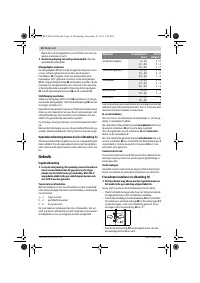
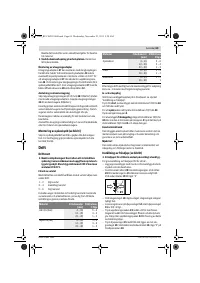
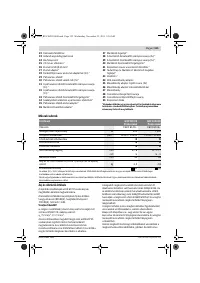
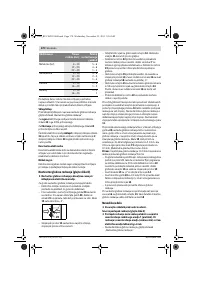
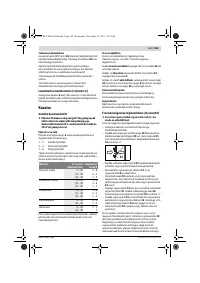
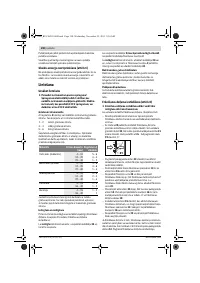
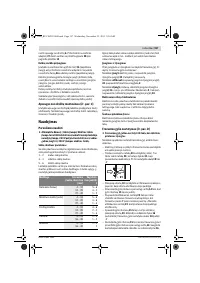
Material
Router bit
diameter (mm)
Thumb-
wheel 3
Hardwood (Beech)
4 – 10
12 – 20
22 – 40
5 – 6
3 – 4
1 – 2
Softwood (Pine)
4 – 10
12 – 20
22 – 40
5 – 6
3 – 6
1 – 3
Particle Board
4 – 10
12 – 20
22 – 40
3 – 6
2 – 4
1 – 3
Plastics
4 – 15
16 – 40
2 – 3
1 – 2
Aluminium
4 – 15
16 – 40
1 – 2
1
21
OBJ_BUCH-203-004.book Page 18 Wednesday, November 23, 2011 9:50 AM
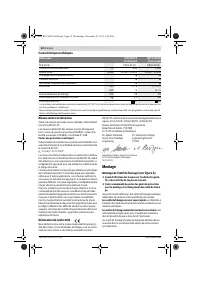
Характеристики

Остались вопросы?Не нашли свой ответ в руководстве или возникли другие проблемы? Задайте свой вопрос в форме ниже с подробным описанием вашей ситуации, чтобы другие люди и специалисты смогли дать на него ответ. Если вы знаете как решить проблему другого человека, пожалуйста, подскажите ему :)


