
Духовые шкафы AEG BER352110M - инструкция пользователя по применению, эксплуатации и установке на русском языке. Мы надеемся, она поможет вам решить возникшие у вас вопросы при эксплуатации техники.
Если остались вопросы, задайте их в комментариях после инструкции.
"Загружаем инструкцию", означает, что нужно подождать пока файл загрузится и можно будет его читать онлайн. Некоторые инструкции очень большие и время их появления зависит от вашей скорости интернета.


Width of the back of the
appliance
559 mm
Depth of the appliance
567 mm
Built in depth of the appli‐
ance
546 mm
Depth with open door
1027 mm
Ventilation opening mini‐
mum size. Opening placed
on the bottom rear side
560 x 20 mm
Mains supply cable length.
Cable is placed in the right
corner of the back side
1500 mm
Mounting screws
4 x 25 mm
2.2 Electrical connection
WARNING!
Risk of fire and electric shock.
• All electrical connections should be made
by a qualified electrician.
• The appliance must be earthed.
• Make sure that the parameters on the
rating plate are compatible with the
electrical ratings of the mains power
supply.
• Always use a correctly installed
shockproof socket.
• Do not use multi-plug adapters and
extension cables.
• Make sure not to cause damage to the
mains plug and to the mains cable.
Should the mains cable need to be
replaced, this must be carried out by our
Authorised Service Centre.
• Do not let mains cables touch or come
near the appliance door or the niche
below the appliance, especially when it
operates or the door is hot.
• The shock protection of live and insulated
parts must be fastened in such a way that
it cannot be removed without tools.
• Connect the mains plug to the mains
socket only at the end of the installation.
Make sure that there is access to the
mains plug after the installation.
• If the mains socket is loose, do not
connect the mains plug.
• Do not pull the mains cable to disconnect
the appliance. Always pull the mains plug.
• Use only correct isolation devices: line
protecting cut-outs, fuses (screw type
fuses removed from the holder), earth
leakage trips and contactors.
• The electrical installation must have an
isolation device which lets you disconnect
the appliance from the mains at all poles.
The isolation device must have a contact
opening width of minimum 3 mm.
• This appliance is supplied with a main
plug and a main cable.
2.3 Use
WARNING!
Risk of injury, burns and electric
shock or explosion.
• This appliance is for household (indoors)
use only.
• Do not change the specification of this
appliance.
• Make sure that the ventilation openings
are not blocked.
• Do not let the appliance stay unattended
during operation.
• Deactivate the appliance after each use.
• Be careful when you open the appliance
door while the appliance is in operation.
Hot air can release.
• Do not operate the appliance with wet
hands or when it has contact with water.
• Do not apply pressure on the open door.
• Do not use the appliance as a work
surface or as a storage surface.
• Open the appliance door carefully. The
use of ingredients with alcohol can cause
a mixture of alcohol and air.
• Do not let sparks or open flames to come
in contact with the appliance when you
open the door.
• Do not put flammable products or items
that are wet with flammable products in,
near or on the appliance.
WARNING!
Risk of damage to the appliance.
• To prevent damage or discoloration to the
enamel:
– do not put ovenware or other objects
in the appliance directly on the
bottom.
ENGLISH
5
Содержание
- 39 Общая безопасность
- 40 УКАЗАНИЯ ПО БЕЗОПАСНОСТИ; Подключение к электросети
- 42 Внутреннее освещение
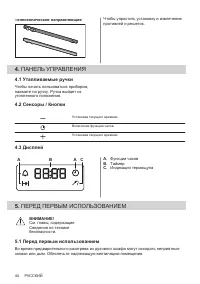
- 44 Телескопические направляющие; Утапливаемые ручки; C. Индикация термощупа; ПЕРЕД ПЕРВЫМ ИСПОЛЬЗОВАНИЕМ; Перед первым использованием
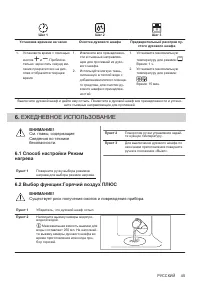
- 45 ЕЖЕДНЕВНОЕ ИСПОЛЬЗОВАНИЕ; Сведения по технике; Способ настройки Режим; Существует риск получения ожогов и повреждения прибора.
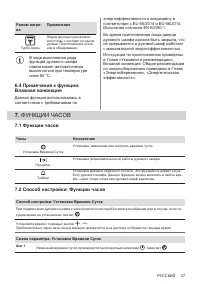
- 47 Влажная конвекция
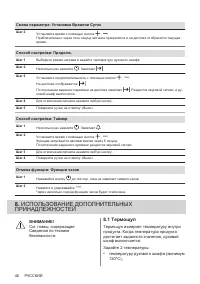
- 48 ИСПОЛЬЗОВАНИЕ ДОПОЛНИТЕЛЬНЫХ; ПРИНАДЛЕЖНОСТЕЙ
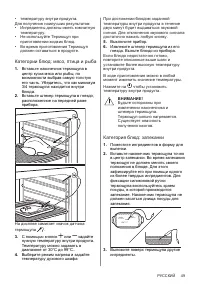
- 49 Категория блюд: запеканки
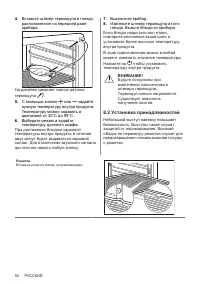
- 50 расположенное на передней раме; С помощью кнопок или задайте; нужную температуру внутри продукта.; Выберите режим и задайте; температуру духового шкафа.; Извлеките штекер термощупа из его; Установка принадлежностей
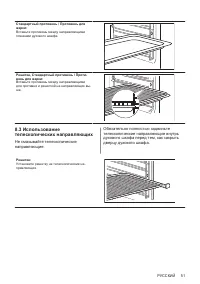
- 51 телескопических направляющих; Не смазывайте телескопические
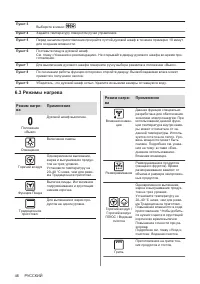
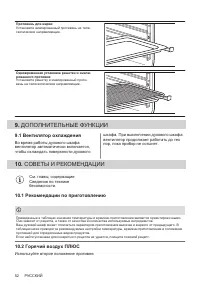
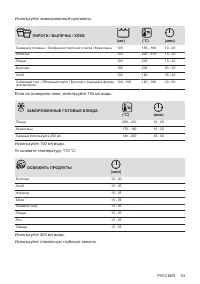
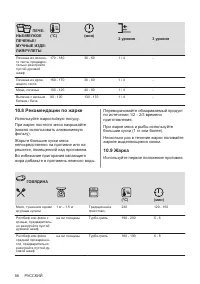
- 52 ДОПОЛНИТЕЛЬНЫЕ ФУНКЦИИ; Вентилятор охлаждения; СОВЕТЫ И РЕКОМЕНДАЦИИ; Рекомендации по приготовлению; Горячий воздух ПЛЮС
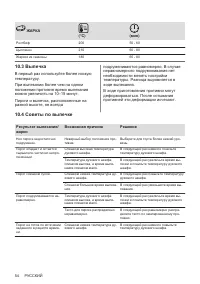
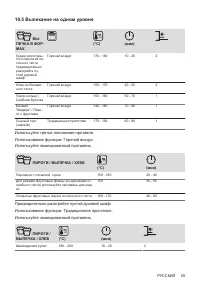
- 54 ЖАРКА; Советы по выпечке; жарки
- 55 Выпекание на одном уровне; ВЫ‐
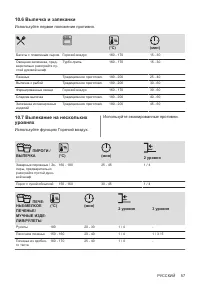
- 57 Выпечка и запеканки; Используйте первое положение противня.; Выпекание на нескольких; Используйте функцию Горячий воздух.
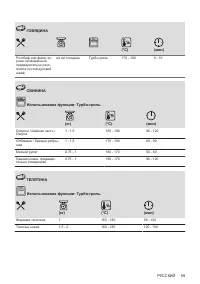
- 58 Рекомендации по жарке; ГОВЯДИНА
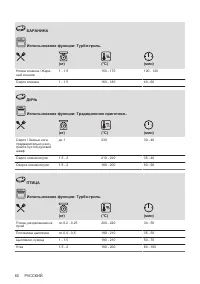
- 61 ПТИЦА; Хрустящая выпечка при; ПИЦЦА
- 63 Замороженные продукты; РАЗМОРАЖИВАНИЕ
- 64 воздух
- 67 Влажная конвекция - рекомендуемые аксессуары; тепло, чем емкости светлых цветов и отражающая посуда.; Для достижения оптимальных результатов; тестирующих организаций
- 69 Примечание относительно очистки
- 70 Очищайте выемку от известкового налета,; Снятие направляющих для; Для очистки духового шкафа извлеките
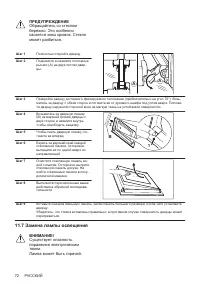
- 72 ПРЕДУПРЕЖДЕНИЕ; Замена лампы освещения
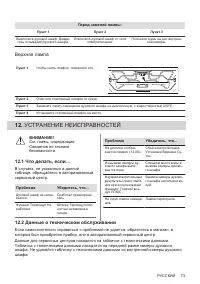
- 73 Верхняя лампа; УСТРАНЕНИЕ НЕИСПРАВНОСТЕЙ; Данные о техническом обслуживании
- 74 Рекомендуем записать их здесь:; ТЕХНИЧЕСКИЕ ДАННЫЕ; Технические данные; ЭНЕРГЕТИЧЕСКАЯ ЭФФЕКТИВНОСТЬ
- 75 Экономия электроэнергии; вентилятора; ОХРАНА ОКРУЖАЮЩЕЙ СРЕДЫ
Характеристики

Остались вопросы?Не нашли свой ответ в руководстве или возникли другие проблемы? Задайте свой вопрос в форме ниже с подробным описанием вашей ситуации, чтобы другие люди и специалисты смогли дать на него ответ. Если вы знаете как решить проблему другого человека, пожалуйста, подскажите ему :)


