Водонагреватели Electrolux NPX 6 Sensomatic - инструкция пользователя по применению, эксплуатации и установке на русском языке. Мы надеемся, она поможет вам решить возникшие у вас вопросы при эксплуатации техники.
Если остались вопросы, задайте их в комментариях после инструкции.
"Загружаем инструкцию", означает, что нужно подождать пока файл загрузится и можно будет его читать онлайн. Некоторые инструкции очень большие и время их появления зависит от вашей скорости интернета.
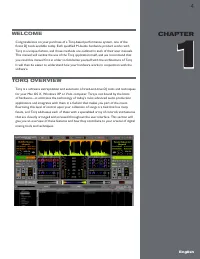

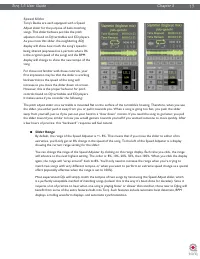


Torq 1.5 User Guide
Chapter 1
15
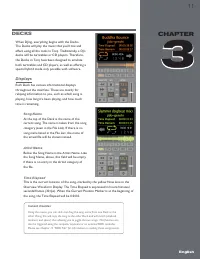
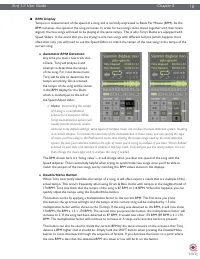
Torq 1.5 User Guide
Chapter 3
15
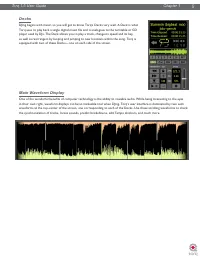
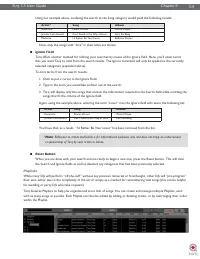
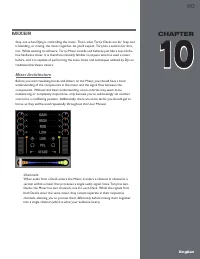
Looping
Technology is always evolving, thus DJing is always evolving. With the introduction of DJ CD players, DJs gained many
new exciting capabilities that were unavailable to them when working within the confines of vinyl records. One of those
features is looping, which is merely the act of repeating a section of a song.
The creative aspect of DJing suggests that a simple trick such as looping can be exploited in a variety of ways. Indeed, you
can use looping to “remix” a song by changing the arrangement—extending your favorite parts of the song. You can also
use looping as a “safety net” allowing the end of a song to play infinitely, giving you more time to mix into the next song.
Looping can also be used to isolate a section of the song, such as the breakbeat, for layering on top of other songs.
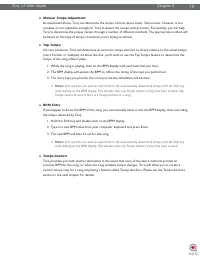
Torq offers you two different ways to loop audio. You can specify the start and end points of the loop manually, or you
can capture loops of a specific length using the QuickLoop buttons. Furthermore, Torq will help you make the perfect
loop every time by automatically matching your loop points to the tempo of the song.
<
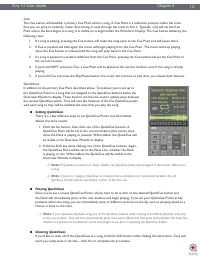
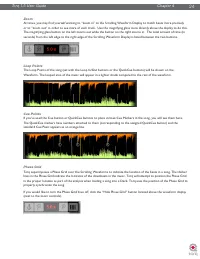
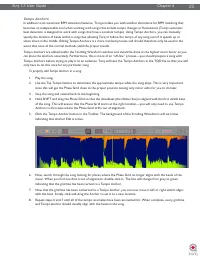
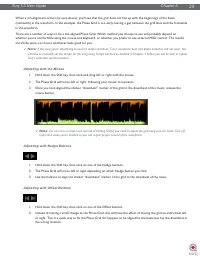
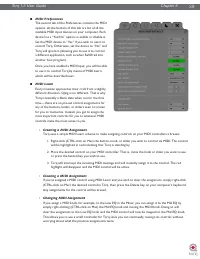
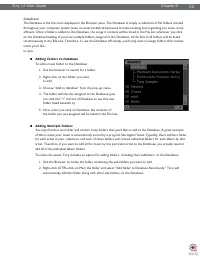
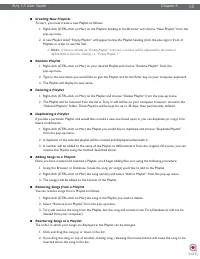
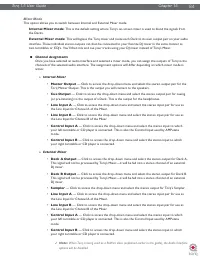
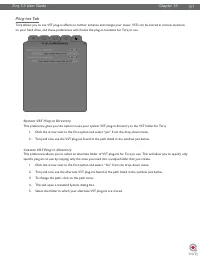
Loop In/Out
Looping an entire song doesn’t have much benefit for a DJ, so Torq allows you to move the Loop Markers by
using the Loop In and Loop Out buttons:
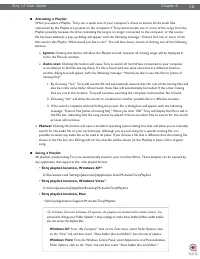
1. Load a song into a Deck and press Play. The song will begin to play.
2. When playback reaches the beginning of the section you want to loop, click the Loop In button. This will
place a Loop In Marker at the Now Line (shown as a yellow marker line in the scrolling and overview
waveforms) and the song will continue to play. If the Quantize button is on, Loop In marker will snap to the
beginning of the nearest 16th-note in the song’s waveform.
3. When playback reaches the end of the section you want to loop, click the Loop Out button. This will place
a Loop Out Marker at the Now Line, which will also snap to the nearest 16th-note (this behavior can be
changed in the Preferences). At the same time, the Loop On/Off button will automatically be activated
causing playback to jump back to the Loop In Marker. The music will now loop between these two points
indefinitely.
4. When you’re finished looping this section of the song, you can click the Loop On/Off button to turn it off.
Now, when playback reaches the Loop Out Marker, it will simply pass it and proceed playing the rest of
the song.
✓
Note:
If you reposition playback using one of the QuickCue buttons while Looping is activated, playback will
jump to the new location. Torq will then automatically place the Loop In Marker at that point and will place
the Loop Out Marker in a position to maintain the same loop length in use prior to pressing the QuickCue
button.
<
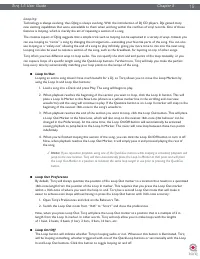
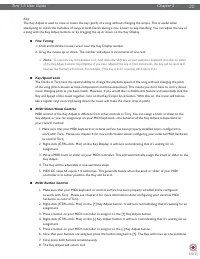
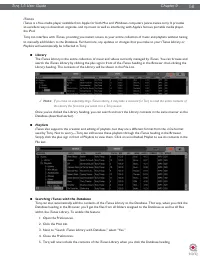
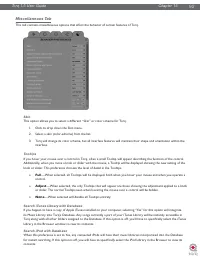
Loop Out Preference
By default, Torq will always quantize the position of the Loop Out marker to a location that results in a quantized
16th-note length from the position of the Loop In marker. This requires that you press the Loop Out marker
within a 16th-note of where you want the loop to end. Torq has a second Loop Out mode that will make it
easier to achieve even loops without having to press the Loop Out button with 16th-note accuracy:
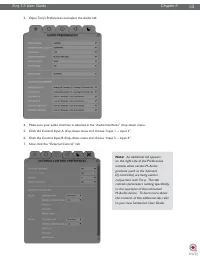
1. Open Torq’s Preferences and click on the Behaviors Tab.
2. Switch the Loop Out mode from “16th” to “Smart” and close the preferences.
Now, when you press Loop Out, Torq will place the Loop Out marker at a position that is a multiple of 2 in
length from the Loop In marker. In other words, Torq will only allow you to make loops with the lengths
of 1 beat, 2 beats, 4 beats (1 bar), 2 bars, 4 bars, 16 bars, etc.
<
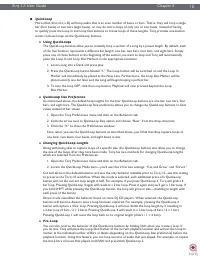
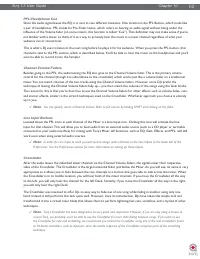
Loop On/Off
The Loop button will indicate whether Torq is looping audio or not. Whenever this button is illuminated, Torq
will be looping something, whether triggered with one of the QuickLoop buttons or set manually with the Loop
In and Loop Out buttons. Click this button to toggle looping on and off.


