Усилители Yamaha R-S500 - инструкция пользователя по применению, эксплуатации и установке на русском языке. Мы надеемся, она поможет вам решить возникшие у вас вопросы при эксплуатации техники.
Если остались вопросы, задайте их в комментариях после инструкции.
"Загружаем инструкцию", означает, что нужно подождать пока файл загрузится и можно будет его читать онлайн. Некоторые инструкции очень большие и время их появления зависит от вашей скорости интернета.


21
Ru
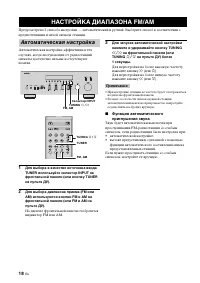
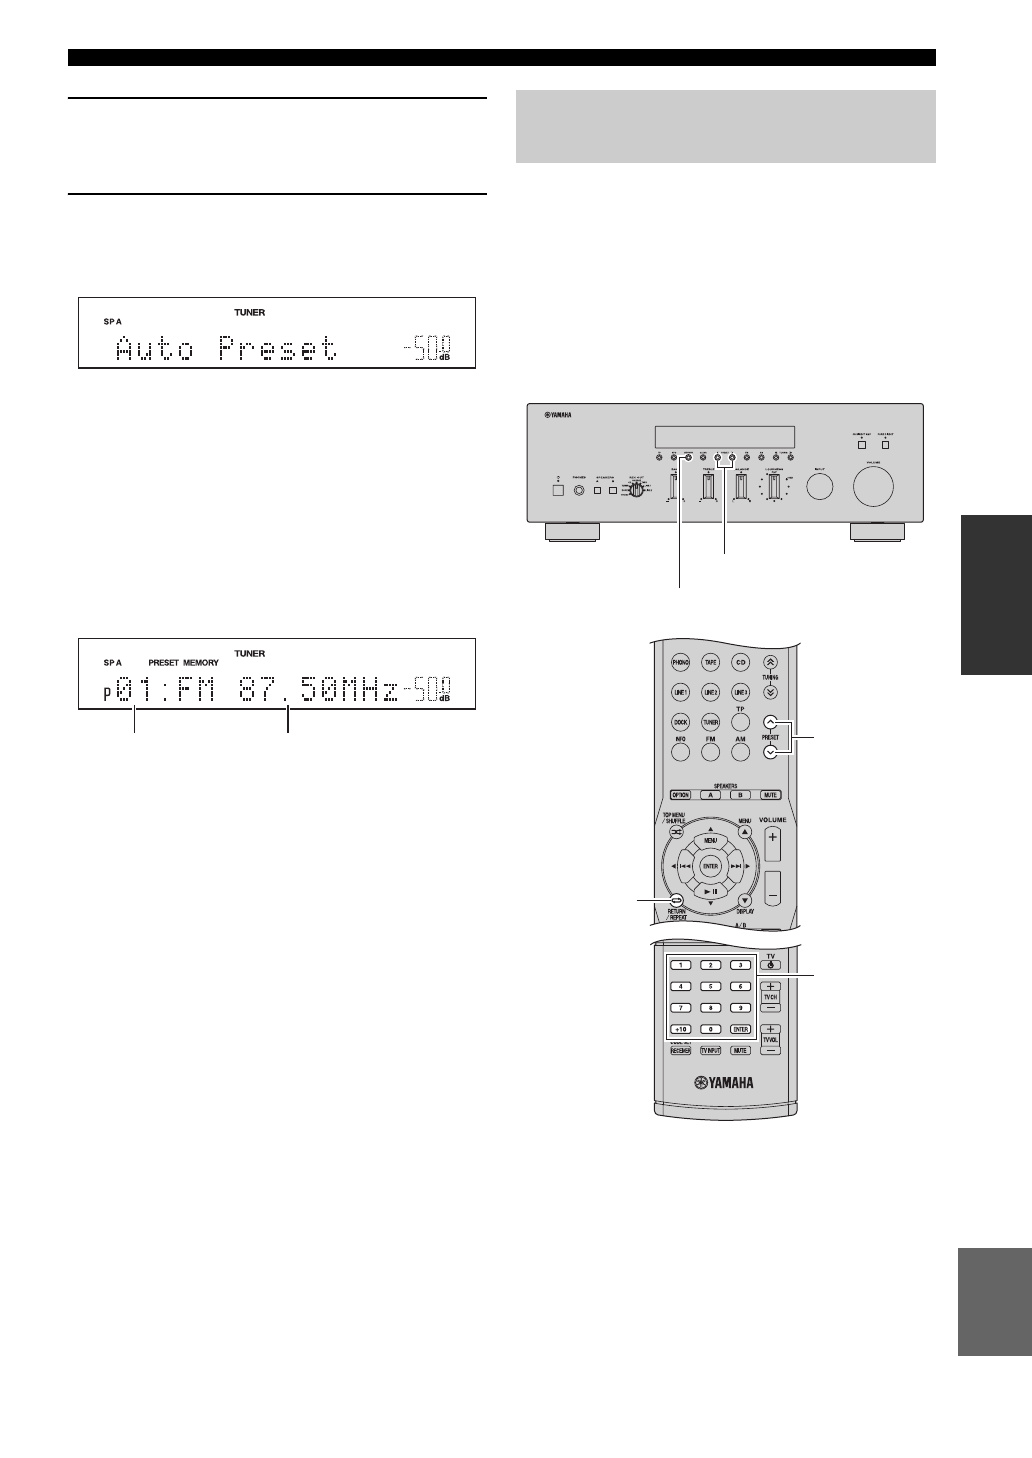
НАСТРОЙКА ДИАПАЗОНА FM/AM
ОСНОВНЫЕ
Ф
У
Н
КЦИИ
Р
усс
кий
3
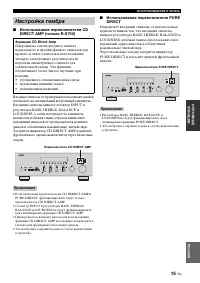
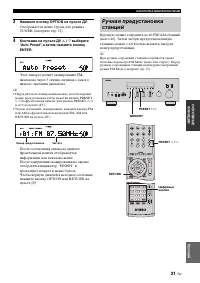
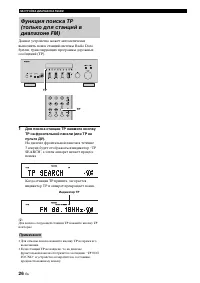
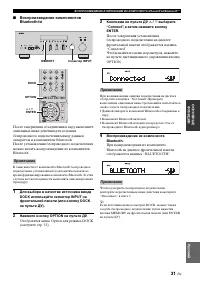
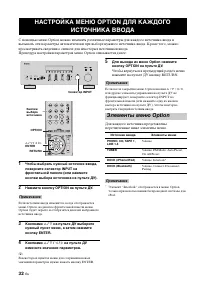
Нажмите кнопку OPTION на пульте ДУ.
Отображается меню Option для режима
TUNER (смотрите стр.
4
Кнопками на пульте ДУ
B
/
C
выберите
“Auto Preset”, а затем нажмите кнопку
ENTER.
Этот аппарат начнет сканирование FM-
диапазона через 5 секунд, начиная с самого
низкого значения диапазона.
y
• Перед началом сканирования можно указать первый
номер предустановки путем нажатия кнопок PRESET
j
/
i
на фронтальной панели (или кнопок PRESET
F
/
G
и
B
/
C
на пульте ДУ).
• Чтобы остановить сканирование, нажмите кнопку FM
или AM на фронтальной панели (или FM, AM или
RETURN на пульте ДУ).
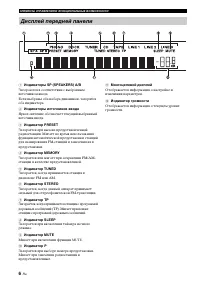
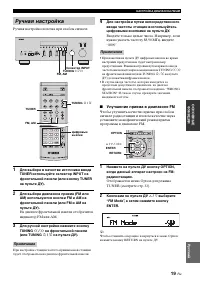
После составления списка на дисплее
фронтальной панели отображается
информация, как показано выше.
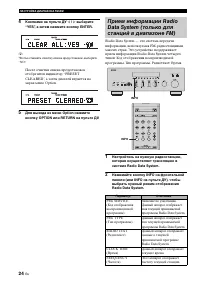
После завершения сканирования на экране
отобразится индикатор “FINISH” и
произойдет возврат в меню Option.
Чтобы вернуть дисплей в исходное состояние,
нажмите кнопку OPTION или RETURN на
пульте ДУ.
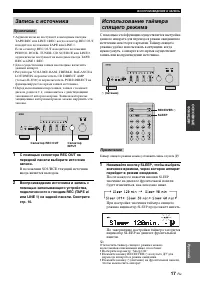
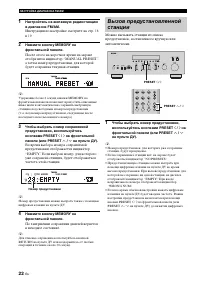
Вручную можно сохранить до 40 FM/AM-станций
(всего 40). Затем любую предустановленную
станцию можно с легкостью вызвать, выбрав
номер предустановки.
y
При ручном сохранении станций сохраняется также
значение параметра FM Mode (моно или стерео). Перед
ручным сохранением станций подтвердите выбранный
режим FM Mode (смотрите стр. 19).
Номер предустановки
Частота
Ручная предустановка
станций
MEMORY
PRESET
j
/
i
PRESET
F
/
G
RETURN
Цифровые
кнопки
Содержание
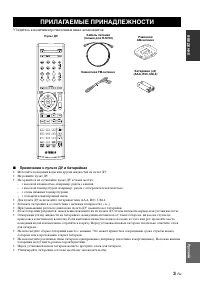
- 3 RADIO DATA SYSTEM; CONTENTS; INTRODUCTION
- 4 Sophisticated AM/FM tuner; FEATURES
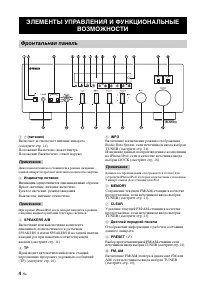
- 5 INTR; Press to control the input source of Zone 2.; Remote control sensor; Receives infrared signals from the remote control.; Front panel display; CONTROLS AND FUNCTIONS; Front panel; Note
- 6 Increases or decreases the sound output level.
- 7 Lights up when this unit is in the automatic tuning mode.; Europe model only; A B
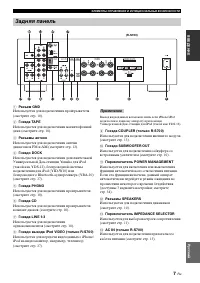
- 8 Connect a subwoofer with built-in amplifier.; Asia and General models only; Rear panel
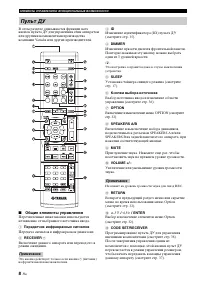
- 9 Sends infrared signals.
- 10 CODE SET; Sets the sleep timer.; MUTE; Notes
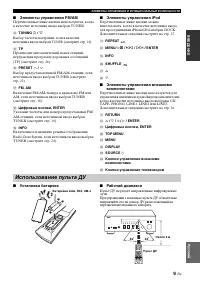
- 11 Notes on batteries; Open the battery compartment cover.; Handling the remote control; Installing batteries in the remote control
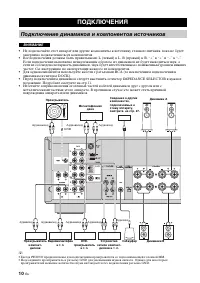
- 12 CONNECTIONS; CAUTION
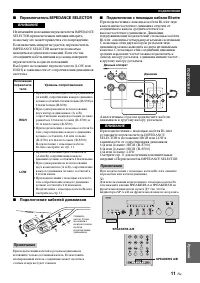
- 13 PREP; Connecting the banana plug; IMPEDANCE SELECTOR; Connecting speakers
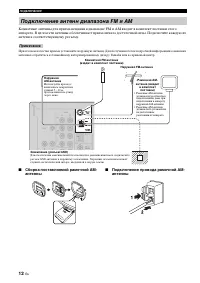
- 14 Connecting the AM and FM antennas
- 15 Connecting the AM loop antenna; Set up the AM loop antenna.
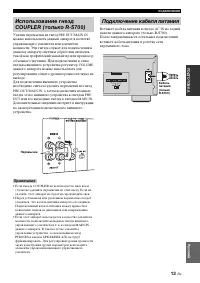
- 16 Main Zone of this unit turns on.; Connecting the power supply cord; Turning on and off this unit
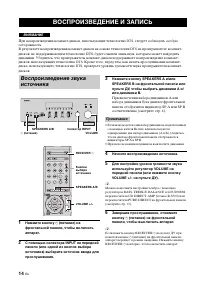
- 17 BA; PLAYING AND RECORDING; Playing a source
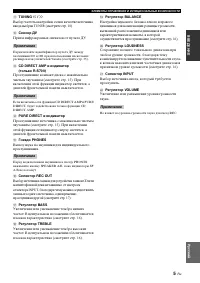
- 18 Adjusting the BALANCE control; Adjust the high and low frequency response.; BASS; Increases or decreases the low frequency response.; TREBLE; Increases or decreases the high frequency response.; Adjusting the LOUDNESS control; Adjusting the tonal quality
- 19 Play the selected source to record from.; Recording a source
- 20 Start playback on the selected input source.; Using the sleep timer
- 21 Muting the sound output
- 22 FM or AM appears in the front panel display.; Press TUNING; Press; Automatic tuning
- 23 Manual tuning is effective when station signals are weak.; Hold down the button to continue tuning search.; Manual tuning
- 24 FM appears in the front panel display.; Automatic preset tuning
- 25 Customized automatic preset tuning
- 26 Manual preset tuning
- 27 Selecting preset stations; Exchanging preset stations
- 28 See “EON function” on page 28.
- 29 PTY SEEK function
- 30 • The unit stops searching when it finds a station; To cancel this function; POP M; EON function
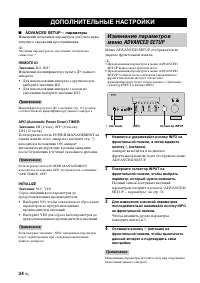
- 31 ADVANCED SETUP menu parameters; Factory presets; PRESET; CANCEL; • Select CANCEL if you do not want the parameters of; Remote; REMOTE; Tuner; TU; ADVANCED SETUP
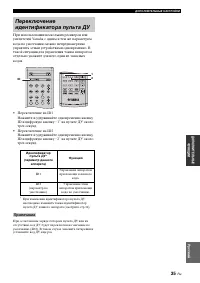
- 32 Switching the remote control ID
- 33 Multi-room configuration and connections; Connecting the Zone 2 components
- 34 Press ZONE 2 CONTROL on the front panel; Controlling Zone 2
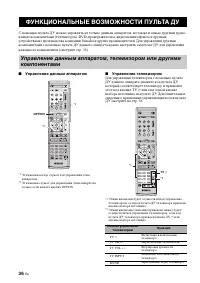
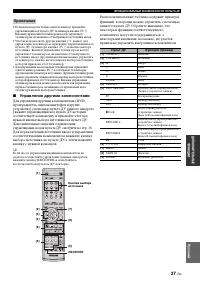
- 35 Controlling this unit; The shaded areas below can be used to control this unit.; Controlling other components; REMOTE CONTROL FEATURES; Control area
- 37 Remote control code default settings; Setting remote control codes
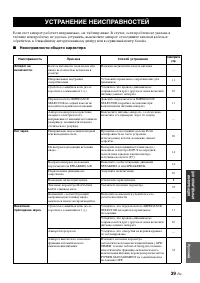
- 38 General; TROUBLESHOOTING
- 39 ADDITION
- 41 FM SECTION; GENERAL; SPECIFICATIONS
- 42 ATTENTION: VEUILLEZ LIRE CE QUI SUIT AVANT D’UTILISER; AVERTISSEMENT
- 43 RADIO DATA SYSTEM (MODÈLE POUR; PARTICULARITÉS DE LA; TABLE DES MATIÉRES
- 44 Amplificateur intégré à 2 voies; PARTICULARITÉS
- 45 Appuyez pour régler la source d’entrée de Zone 2.; Capteur de télécommande; Il reçoit les signaux émis par le boîtier de télécommande.; Afficheur de la face avant; Il fournit des informations relatives à l’état de l’appareil.; COMMANDES ET FONCTIONS; Face avant; Remarque; Secours de la mémoire; Remarques
- 46 Ces touches augmentent ou diminuent le niveau sonore.
- 47 S’allume lorsque Zone 2 est activé.; Modèle pour l’Europe seulement
- 55 Raccordements de l’antenne cadre AM; Raccordements de l’antenne cadre AM.


