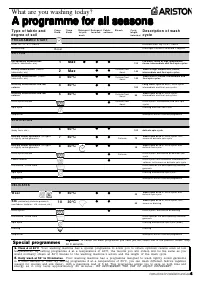
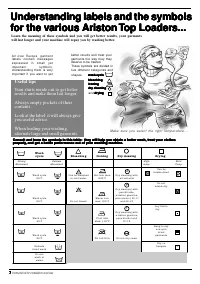
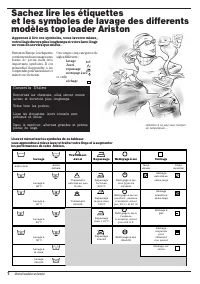
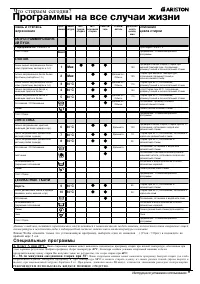
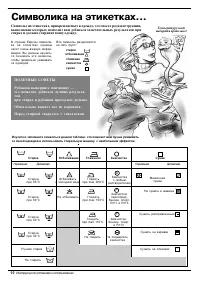
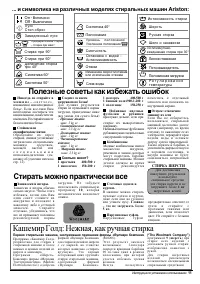
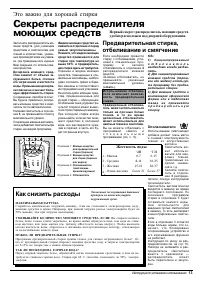
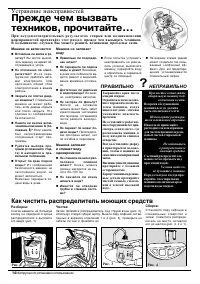
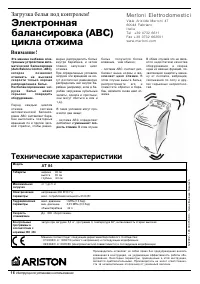
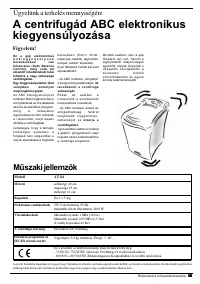
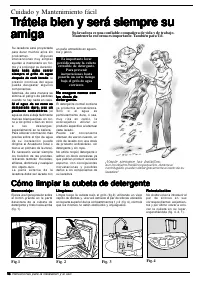
Стиральная машина Ariston AT 84 - инструкция пользователя по применению, эксплуатации и установке на русском языке. Мы надеемся, она поможет вам решить возникшие у вас вопросы при эксплуатации техники.
Если остались вопросы, задайте их в комментариях после инструкции.
"Загружаем инструкцию", означает, что нужно подождать пока файл загрузится и можно будет его читать онлайн. Некоторые инструкции очень большие и время их появления зависит от вашей скорости интернета.


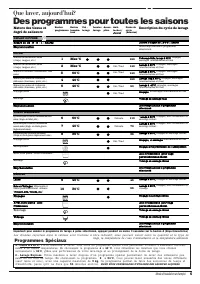


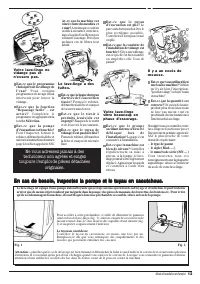


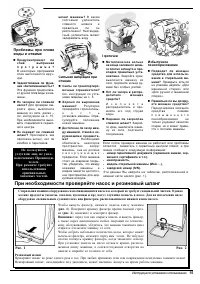


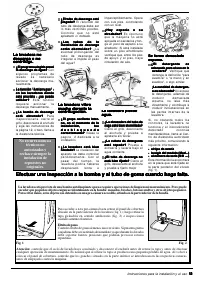
The hook to be used in case the
drain hose ends at a height
below 60 cm.
If the hose drains into a tub or
sink, apply the plastic guide
and tie it to the tap.
The guide for draining into tubs
and sinks.
The hose must never
The hose must never
The hose must never
The hose must never
The hose must never
remain immer
remain immer
remain immer
remain immer
remain immersed in water
sed in water
sed in water
sed in water
sed in water.....
Extensions are inadvisable. In
c a s e o f a b s o l u t e n e e d , t h e
extension must have the same
diameter as the original hose
and must not exceed 150 cm
i n l e n g t h . I n c a s e o f w a l l
draining pipes, their efficiency
must be checked by a qualified
technician. If the dwelling is on
one of the upper floors of a
building, there may be drain
t r a p p r o b l e m s c a u s i n g t h e
washing machine to load and
unload water continuously.
I n o r d e r t o a v o i d s u c h a n
inconvenience, special anti-
drain trap valves are available
in shops.
Connection to the water
Connection to the water
Connection to the water
Connection to the water
Connection to the water
mains
mains
mains
mains
mains
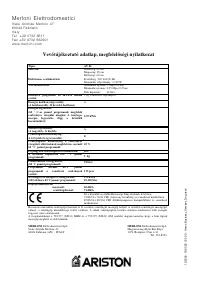
Water pressure must range
within the values indicated on
the data plate on the rear of
y o u r w a s h i n g m a c h i n e .
C o n n e c t t h e i n l e t h o s e
(situated unassembled inside
the drum) to a cold water tap
with a 3/4 gas threaded mouth.
If the water pipes are new or
left unused, run the water until
it is clear and free of debris.
A t t a c h t h e h o s e t o t h e
a p p l i a n c e , i n l i n e w i t h t h e
appropriate water pipe inlet at
the top right.ù
Connecting the drain hose
Connecting the drain hose
Connecting the drain hose
Connecting the drain hose
Connecting the drain hose
On the back of the appliance,
towards the top, you will find a
hook onto which you should
f a s t e n t h e d r a i n h o s e i f
necessary. Insert the other end
in a wall draining duct or place
it on the edge of a sink or tub
avoiding excessive kinks and
bending. It should be placed
It should be placed
It should be placed
It should be placed
It should be placed
at a height ranging from 60 to
at a height ranging from 60 to
at a height ranging from 60 to
at a height ranging from 60 to
at a height ranging from 60 to
100 cm.
100 cm.
100 cm.
100 cm.
100 cm.
In case it is necessary to fix the
end of the hose at a height
below 60 cm from the ground,
i t m u s t b e f i x e d i n t h e
appropriate hook placed on
the back panel as mentioned
above.
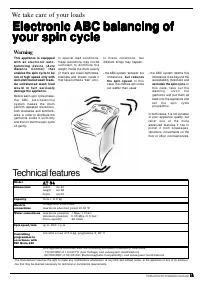
Instructions for installation and use
2
2
2
2
2
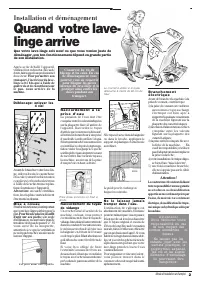
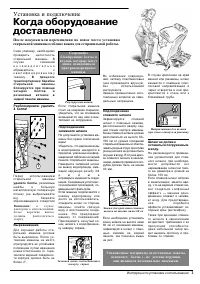
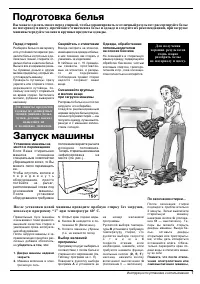
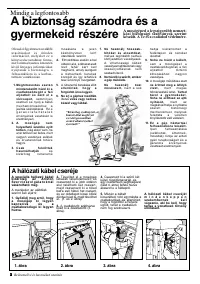
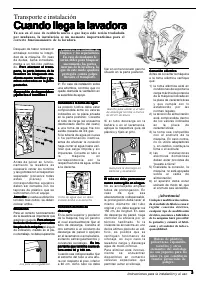
Installation and removal
When the
When the
When the
When the
When the
appliance arrives
appliance arrives
appliance arrives
appliance arrives
appliance arrives
Whether new or just transported to a new house, installation is extremely
important for the correct functioning of your washing machine.
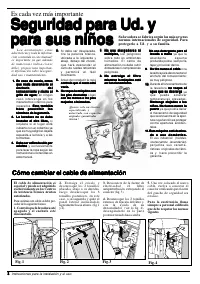
Electric connection
Electric connection
Electric connection
Electric connection
Electric connection
B e f o r e c o n n e c t i n g t h e
a p p l i a n c e t o t h e e l e c t r i c
socket, be sure that:
1) the electric socket is able
to sustain the appliance's
m a x i m u m p o w e r l o a d
indicated on the data plate
and in compliance with the
law;
2 ) t h e s u p p l y v o l t a g e i s
included within the values
i n d i c a t e d o n t h e d a t a
plate;
3) the socket is compatible
with the appliance's plug.
If not, do not use adapters,
b u t r e p l a c e e i t h e r t h e
socket or the plug;
4) electric household appli-
ances must be equipped
with an "earthing" system,
5) that the machine is not
placed on top of the power
s u p p l y c a b l e o n c e t h e
c o n n e c t i o n h a s b e e n
made.
Warning!
Any modifications made to the
factory settings or an irregu-
lar electric connection, any
electrical, mechanical or hy-
draulic modification whatso-
ever to the appliance shall
render the guarantee invalid
and shall relieve the manufac-
turer and retailer of any and
all liability.
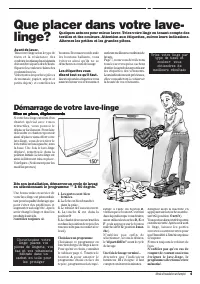
The feet are adjustable.
Water hose inlet to be fitted to
the top right.
Unblocking: remove
Unblocking: remove
Unblocking: remove
Unblocking: remove
Unblocking: remove
the 4 screws!
the 4 screws!
the 4 screws!
the 4 screws!
the 4 screws!
Plastic bags, polystyrene
foam, screws and other
packaging parts are not
children's toys, and are
potentially dangerous.
2
1
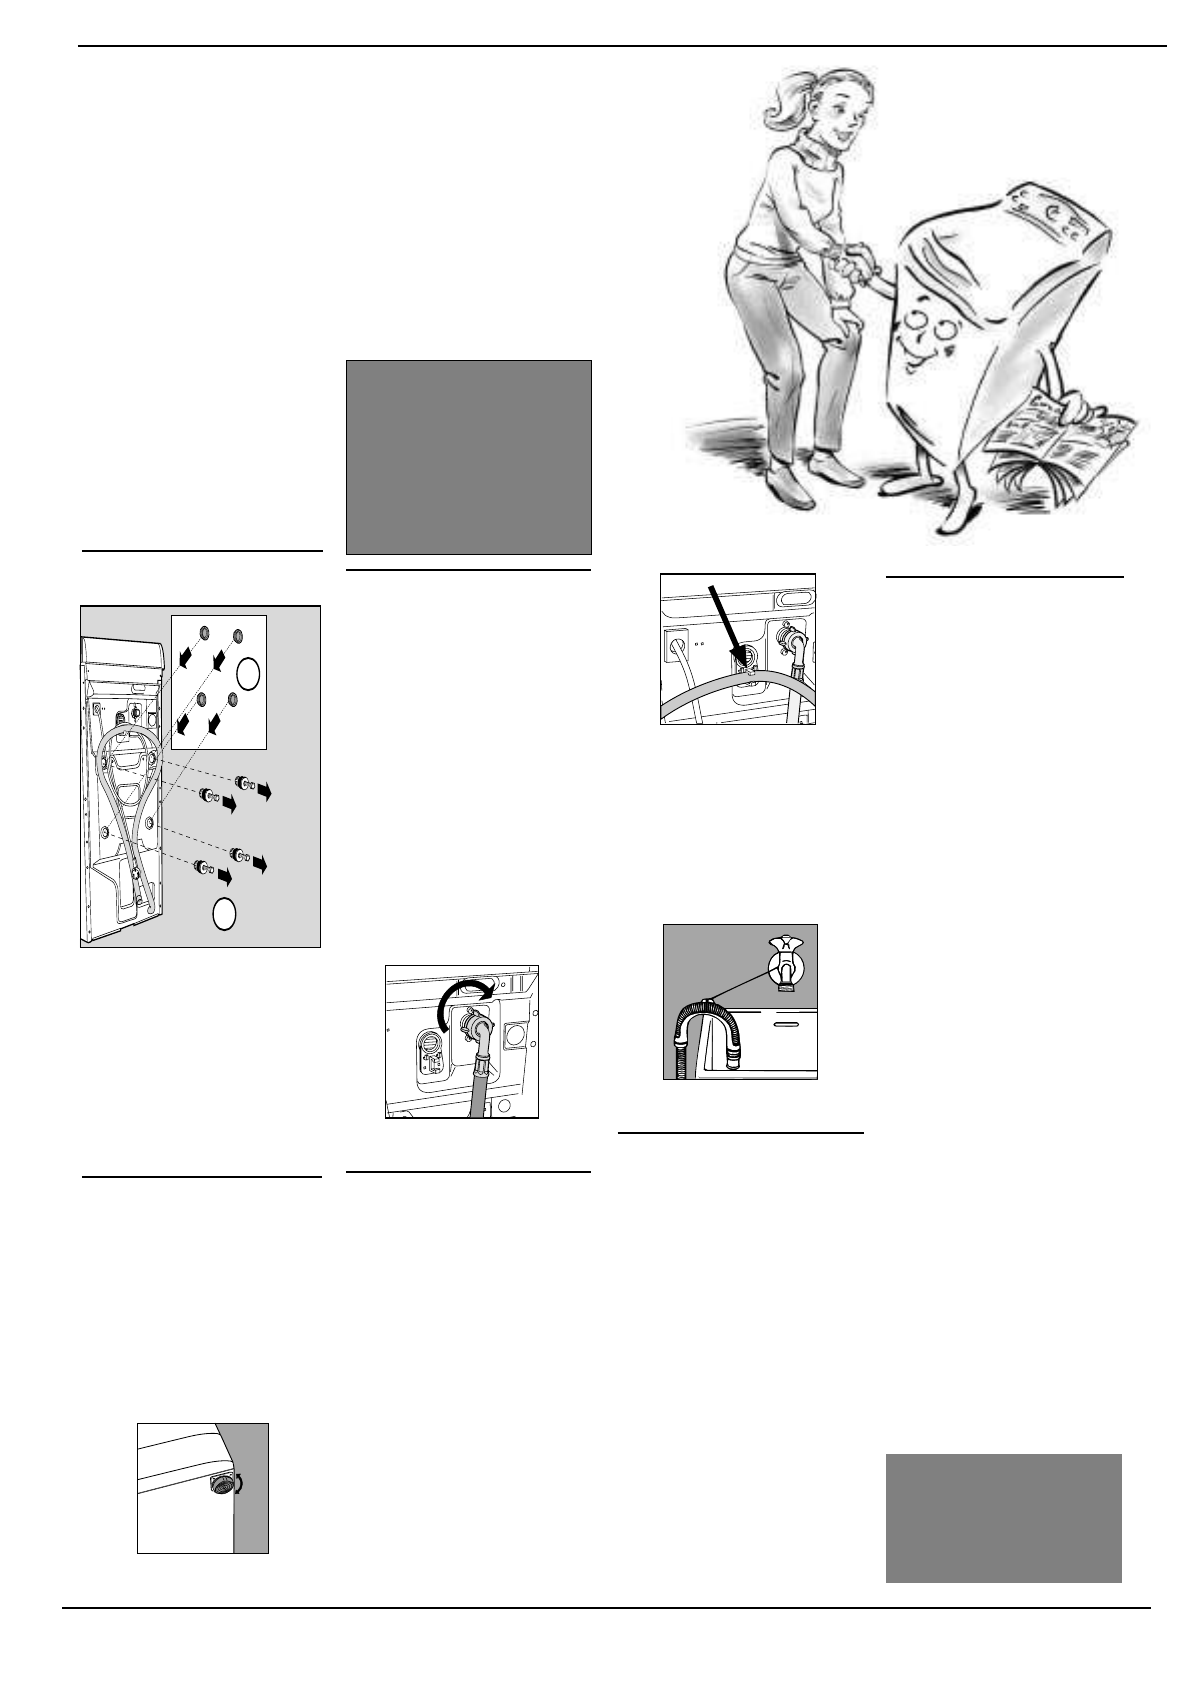
After removing the appliance
from its packaging, check that
it is intact. If in doubt, contact
a q u a l i f i e d t e c h n i c i a n
immediately.
The inside of the
The inside of the
The inside of the
The inside of the
The inside of the
m a c h i n e i s b l o c k e d , f o r
m a c h i n e i s b l o c k e d , f o r
m a c h i n e i s b l o c k e d , f o r
m a c h i n e i s b l o c k e d , f o r
m a c h i n e i s b l o c k e d , f o r
t r a n s p o r t a t i o n , b y f o u r
t r a n s p o r t a t i o n , b y f o u r
t r a n s p o r t a t i o n , b y f o u r
t r a n s p o r t a t i o n , b y f o u r
t r a n s p o r t a t i o n , b y f o u r
screws and rubber washers
screws and rubber washers
screws and rubber washers
screws and rubber washers
screws and rubber washers
on the back panel.
on the back panel.
on the back panel.
on the back panel.
on the back panel.
B e f o r e u s i n g t h e w a s h i n g
m a c h i n e ,
r e m o v e t h e
r e m o v e t h e
r e m o v e t h e
r e m o v e t h e
r e m o v e t h e
screws
screws
screws
screws
screws, remove the rubber
w a s h e r s w i t h t h e r e l a t i v e
spacer (keeping all the parts)
a n d u s e t h e p l a s t i c t a b s
provided to fill in the holes.
Warning:
Warning:
Warning:
Warning:
Warning: should the screws
be re-used, make sure you
fasten the shorter at the top.
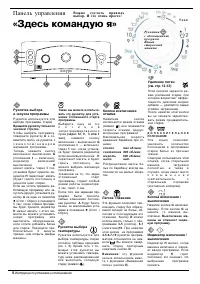
Levelling
Levelling
Levelling
Levelling
Levelling
The washing machine must be
levelled appropriately in order to
guarantee its correct functioning.
T
T
T
T
To le
o le
o le
o le
o level the appliance
vel the appliance
vel the appliance
vel the appliance
vel the appliance,,,,, the f
the f
the f
the f
the feet
eet
eet
eet
eet
must be adjusted
must be adjusted
must be adjusted
must be adjusted
must be adjusted; the angle of
inclination, measured according
to the worktop, must not exceed
2°. When placed on fitted carpet,
make sure the ventilation is not
obstructed within its surroundings.
Do not throw the blocking
screws and the spacers
away. In the event of a
removal, they can be used
to block the components
inside the appliance again
and so protect it during
transport.


