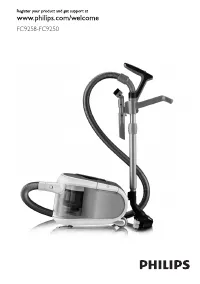
Пылесос Philips FC9256 - инструкция пользователя по применению, эксплуатации и установке на русском языке. Мы надеемся, она поможет вам решить возникшие у вас вопросы при эксплуатации техники.
Если остались вопросы, задайте их в комментариях после инструкции.
"Загружаем инструкцию", означает, что нужно подождать пока файл загрузится и можно будет его читать онлайн. Некоторые инструкции очень большие и время их появления зависит от вашей скорости интернета.


2
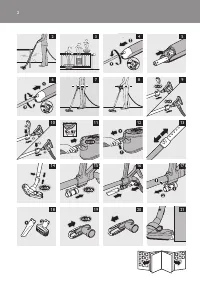
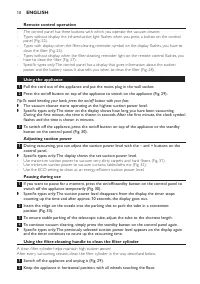
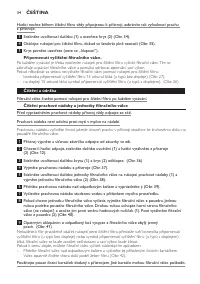
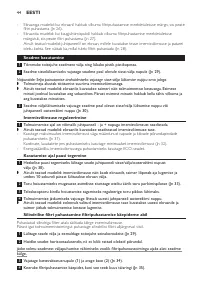
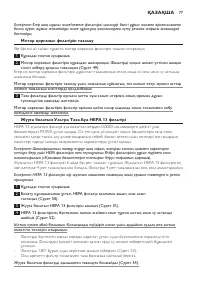
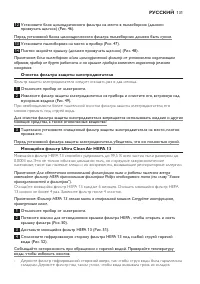
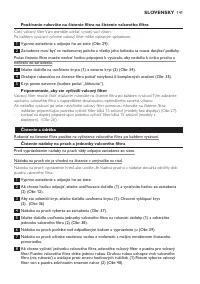
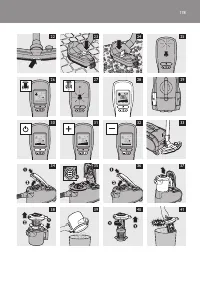
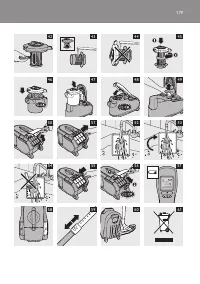
Grab the release tabs of the HEPA filter cover to open and remove the filter cover (Fig. 50).
3
Take out the washable HEPA 13 filter (Fig. 51).
4
Rinse the pleated side of the HEPA 13 filter under a hot slow-running tap (Fig. 52).
Be careful with hot water. Always check if the water is not too hot, to prevent your hands from
getting burnt.
- Hold the filter in such a way that the pleated side points upwards and the water flows parallel
to the pleats. Hold the filter at an angle so that the water washes away the dir t inside the pleats.
- Turn the filter 180° and let the water flow along the pleats in the opposite direction (Fig. 53).
- Continue this process until the filter is clean.
Never clean the washable filter with a brush (Fig. 54).
Note: Cleaning does not restore the original colour of the filter, but does restore its filtration power.
5
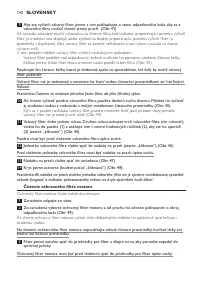
Carefully shake the water from the surface of the filter.
6
Let the HEPA filter dry completely.
7
Place the dry HEPA filter back into the appliance (Fig. 55).
8
Reattach the top of the filter cover (1) and then close the cover (2) (‘click’) (Fig. 56).
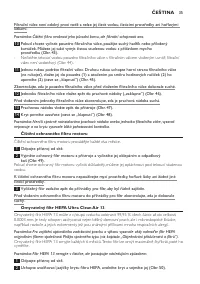
Cleaning the fabric-covered area on top of the appliance (specific types only)
The fabric has been treated to make it dir t repellent. If you would like to clean it anyway, follow the
steps below:
- Clean the fabric-covered area on top of the appliance with a moist cloth.
- If the stains are hard to remove, use a mild cleaning agent, water and a moist cloth to clean the
fabric of the appliance.
Do not use aggressive or flammable cleaning agents such as bleach or alcohol.
replacement
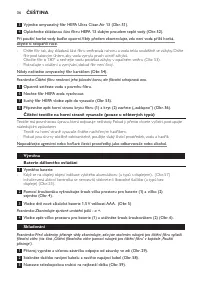
Batteries of remote control
1
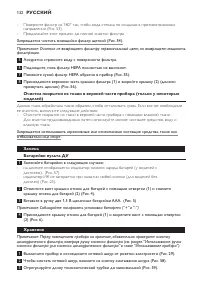
Replace the batteries when:
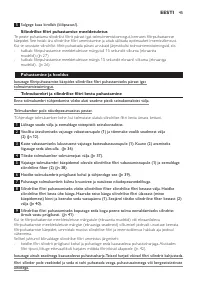
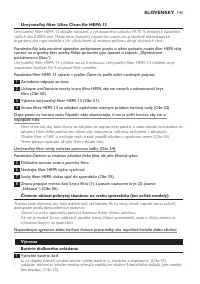
- the batter y-low indication appears on the display (for types with display). (Fig. 57)
- the infrared-active light does not light up when you press any button (for types without
display) (Fig. 25).
2
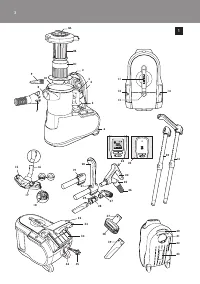
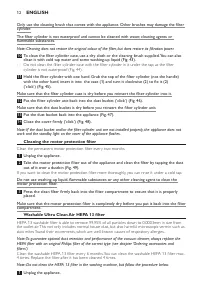
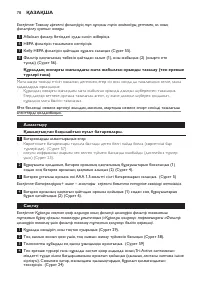
Use a screwdriver to remove the screw of the battery compartment lid (1) and remove the
battery compartment lid (2) (Fig. 4).
3
Insert two new AAA 1.5-volt alkaline batteries into the handle. (Fig. 5)
Note: Make sure that the - and + poles point in the right direction.
4
Reattach the battery compartment lid (1) and fasten the screw with a screwdriver (2) (Fig. 6).
storage
Note: Before you store the appliance, always make sure you have cleaned the filter cylinder by turning
the filter-cleaning handle (see section ‘Using the filter-cleaning handle to clean the filter cylinder’ in
chapter ‘Using the appliance’).
1
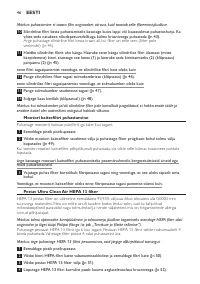
Switch off the appliance and remove the mains plug from the wall socket (Fig. 29).
2
Press the cord rewind button to rewind the mains cord (Fig. 58).
English
13
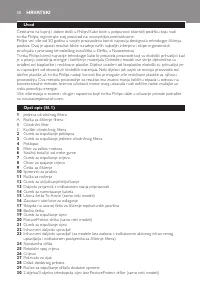
Содержание
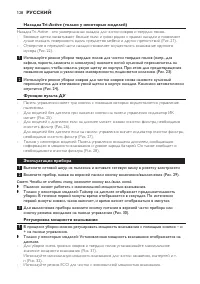
- 126 Перед использованием; перед использованием прибора. Срок службы батареек - не менее 2 лет.; Подготовка устройства к работе; рука, держащая стандартную ручку, находилась на уровне бедра.; ручка PostureProtect
- 128 Пылесос начнет работать с максимальной мощностью всасывания.; регулировка мощности всасывания
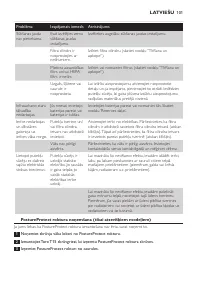
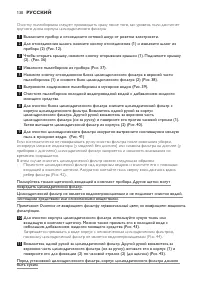
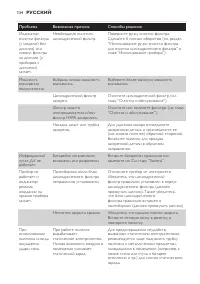
- 129 Пауза при уборке; трубки до минимальной.; фильтра; колеса касаться пола.; напоминание об очистке цилиндрического фильтра; оптимальную мощность всасывания.; Чистка и уход; Пылесборник нельзя мыть в посудомоечной машине.
- 131 Очистка фильтра защиты электродвигателя; Фильтр защиты электродвигателя следует очищать раз в два месяца.; Моющийся фильтр ultra Clean air hEPa 13; 3 можно не более 4 раз. Замените фильтр после 4 очисток.
- 132 замена; Заменяйте батарейки в следующих случаях:; Хранение
- 133 ребро насадки в ячейку для закрепления трубки.; заказ принадлежностей и фильтров; стране или ознакомьтесь с гарантийным талоном.; защита окружающей среды; или обратитесь в Центр поддержки потребителей Philips в вашей; Поиск и устранение неисправностей; поддержки потребителей в вашей стране.
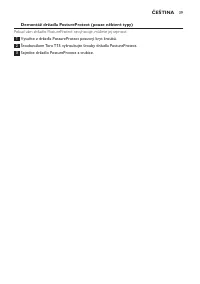
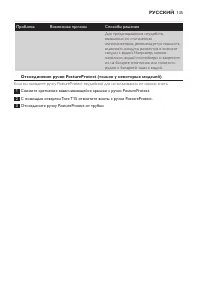
- 135 Отсоединение ручки PostureProtect (только у некоторых моделей); Отсоедините ручку PostureProtect от трубки.


