Пароварки Philips HD9171 - инструкция пользователя по применению, эксплуатации и установке на русском языке. Мы надеемся, она поможет вам решить возникшие у вас вопросы при эксплуатации техники.
Если остались вопросы, задайте их в комментариях после инструкции.
"Загружаем инструкцию", означает, что нужно подождать пока файл загрузится и можно будет его читать онлайн. Некоторые инструкции очень большие и время их появления зависит от вашей скорости интернета.


6
Introduction
Congratulations on your purchase and welcome to Philips! To fully benefit from the suppor t that
Philips offers, register your product at www.philips.com/welcome.
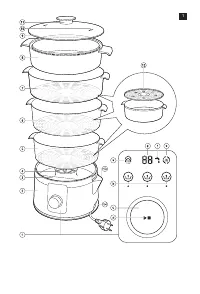
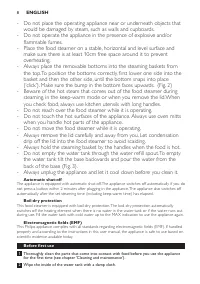
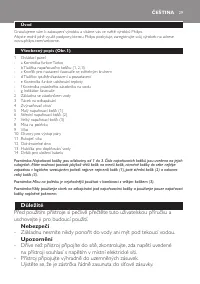
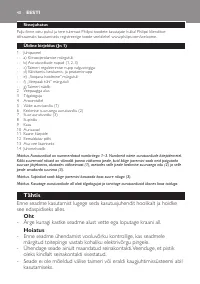
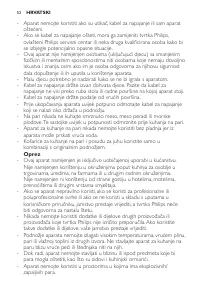
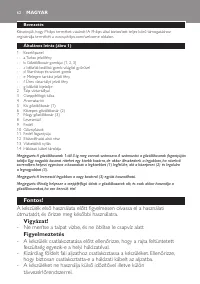
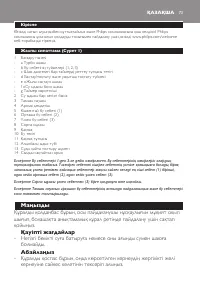
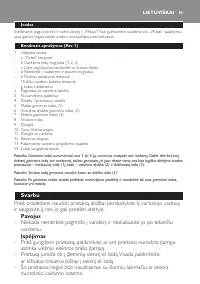
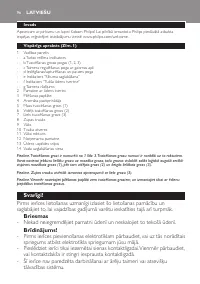
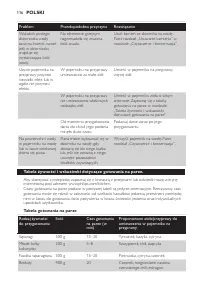
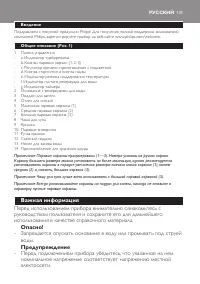
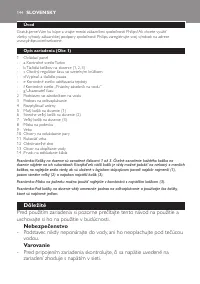
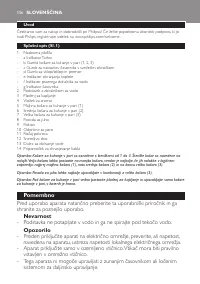
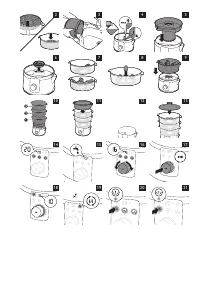
General description (Fig. 1)
1 Control panel
- a Turbo light
- b Steaming basket buttons (1, 2, 3)
- c Timer adjustment knob with light ring
- d Star t/stop and pause button
- e ‘Keep-warm’ light
- f ‘Water tank empty’ light
- g Timer indication
2 Base with water tank
3 Drip tray
4 Aroma infuser
5 Small steaming basket (1)
6 Medium steaming basket (2)
7 Large steaming basket (3)
8 Soup bowl
9 Lid
10 Steam vents
11 Lid handle
12 Removable bottom
13 Water refill spout
14 Cord storage facility
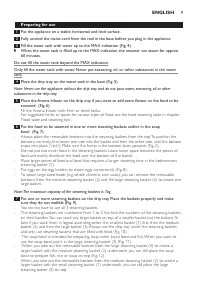
Note: The steaming baskets are numbered from 1 to 3. You find the numbers of the steaming baskets on
their handles. You can stack any larger basket on top of a smaller basket, but the baskets fit best if you
stack them in logical ascending order: the smallest basket (1) first, then the medium basket (2) and then
the large basket (3).
Note: The soup bowl can best be used in combination with the large basket (3).
Note: Always use the drip tray under the steaming baskets and only use steaming baskets that are filled
with food.
Important
Read this user manual carefully before you use the appliance and save it for
future reference.
Danger
- Never immerse the base in water or rinse it under the tap.
Warning
- Check if the voltage indicated on the appliance corresponds to the local
mains voltage before you connect the appliance.
- Only connect the appliance to an ear thed wall socket. Always make
sure the plug is inser ted firmly into the socket.
- This appliance is not intended to be operated by means of an external
timer or a separate remote-control system.
ENGLISH
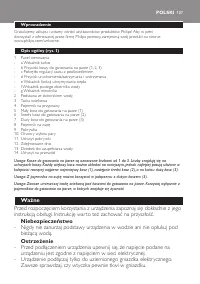
Содержание
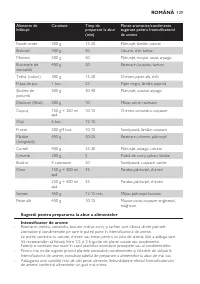
- 134 прибора, заполните резервуар холодной водой до отметки MAX.; Перед первым использованием; воды до максимального уровня.
- 135 Использование прибора; В пароварке предусмотрено 2 режима приготовления на пару:; Общие рекомендации; Вставьте вилку сетевого шнура в розетку электросети.
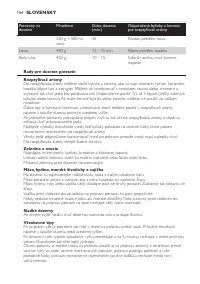
- 136 Ручной режим; Используйте этот режим для быстрого включения пароварки.
- 137 Режим комплексного приготовления
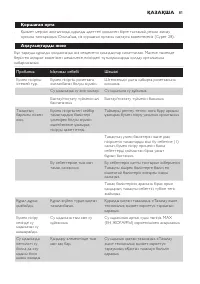
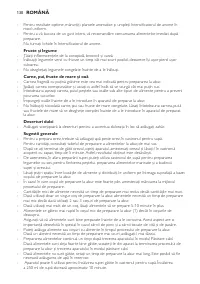
- 138 Очистка и уход; незначительному помутнению пластика.; Очистка от накипи; проводить очистку от накипи.
- 139 Хранение
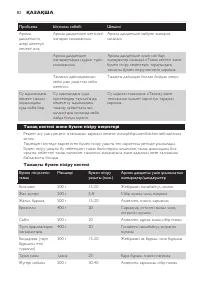
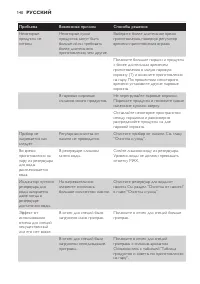
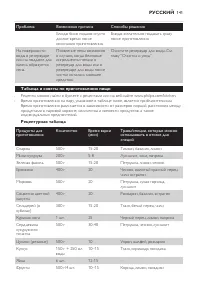
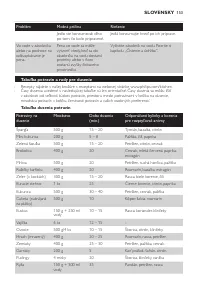
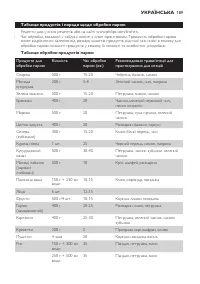
- 142 Овощи и фрукты


