Кондиционеры Daikin ATYN-L - инструкция пользователя по применению, эксплуатации и установке на русском языке. Мы надеемся, она поможет вам решить возникшие у вас вопросы при эксплуатации техники.
Если остались вопросы, задайте их в комментариях после инструкции.
"Загружаем инструкцию", означает, что нужно подождать пока файл загрузится и можно будет его читать онлайн. Некоторые инструкции очень большие и время их появления зависит от вашей скорости интернета.


English
1-7
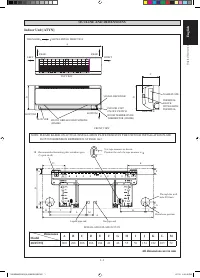
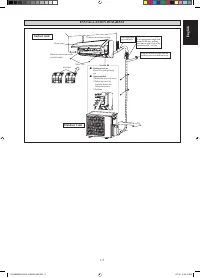
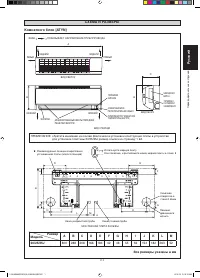
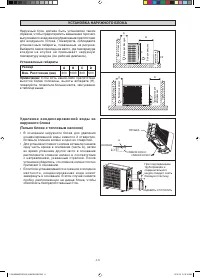
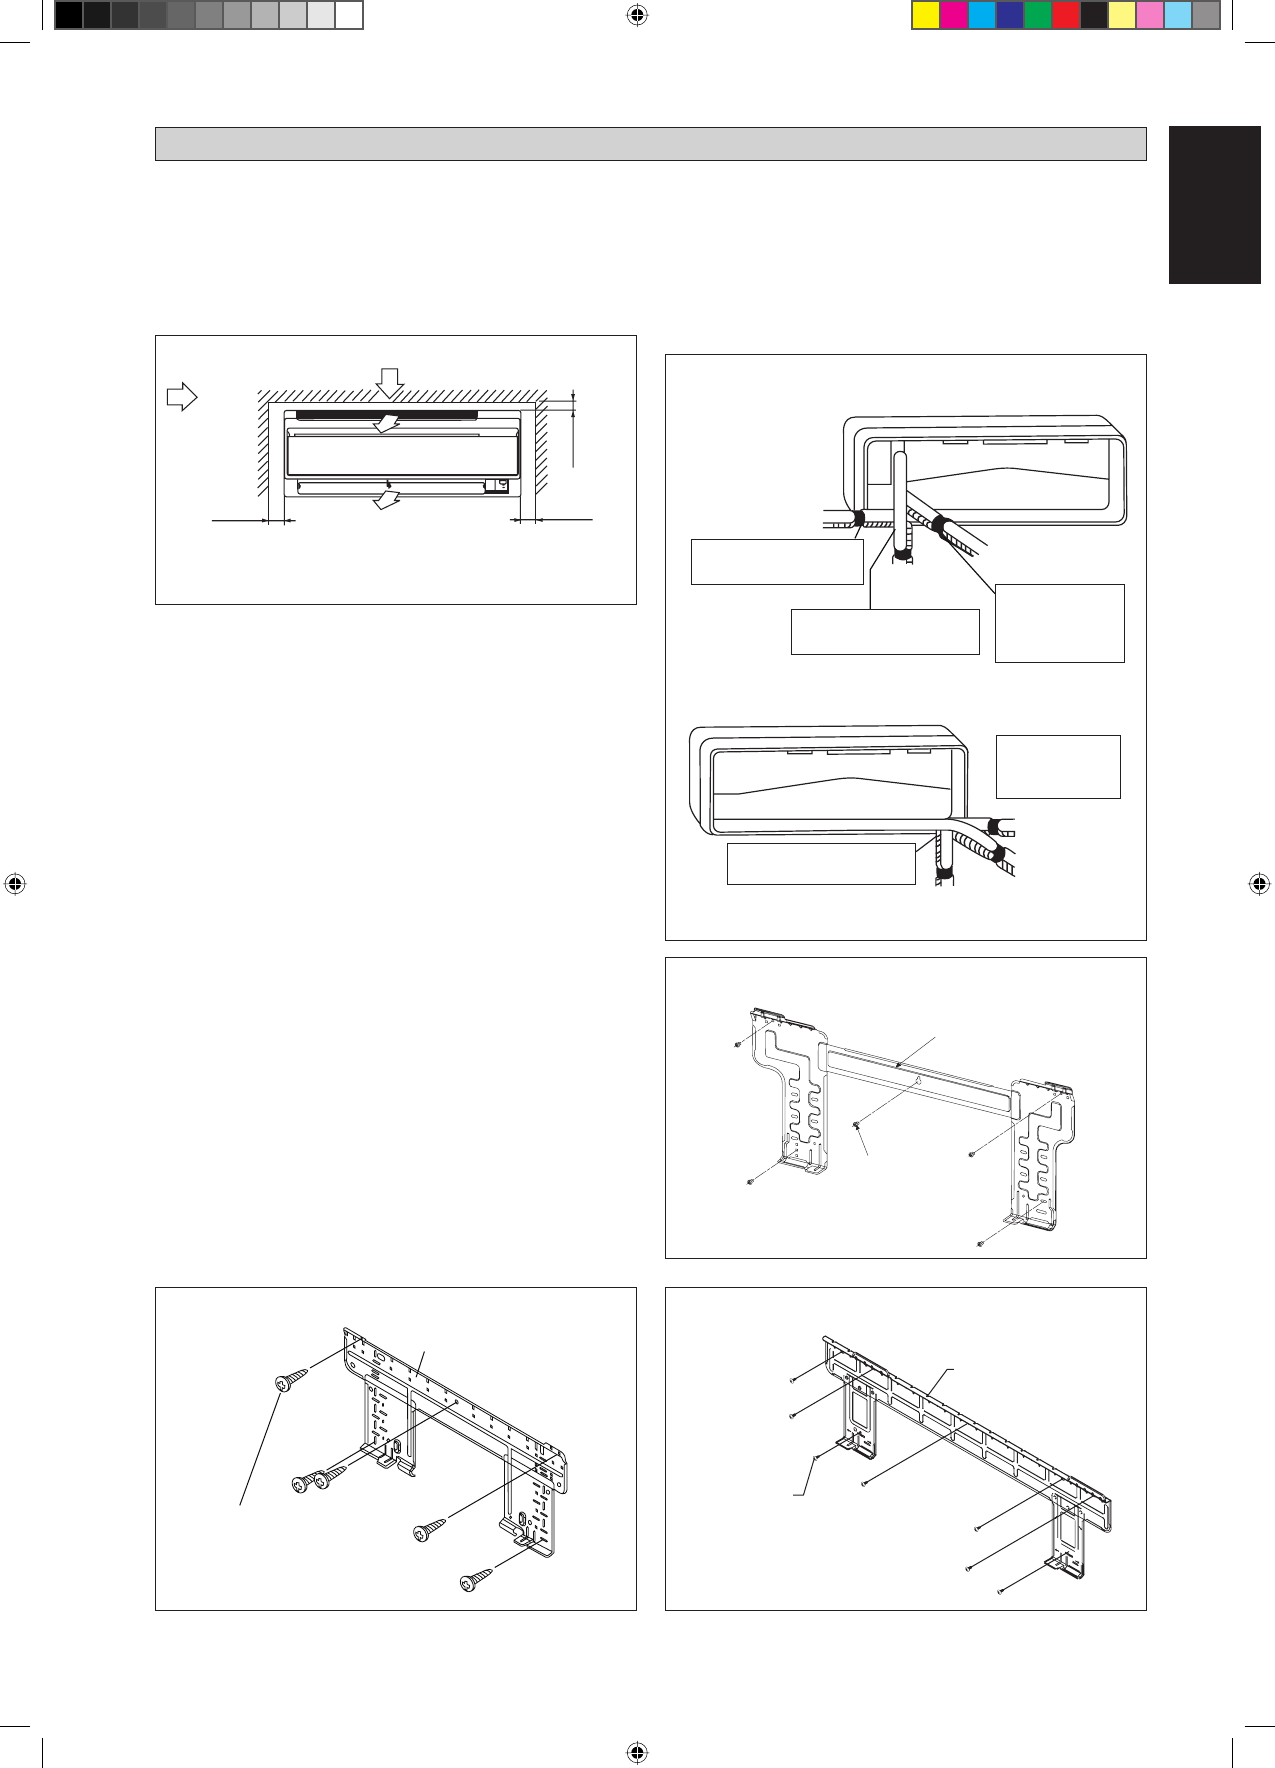
The indoor unit must be installed in such a way so as to prevent
short circuit of the cool discharged air with the hot return air.
Please follow the installation clearance shown in the figure. Do
not place the indoor unit where there could be direct sunlight
shining on it. Also, this location must be suitable for piping
and drainage, and be away from doors or windows.
min. 50
(Space for
maintenance)
Air flow
(Indoor)
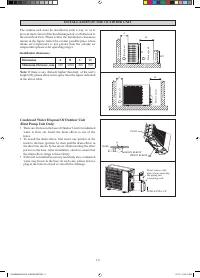
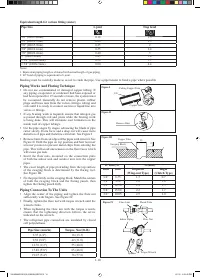
The refrigerant piping can be routed to the unit in a number
of ways (left or right from the back of the unit), by using the
cut-out holes on the casing of the unit (see figure). Bend the
pipes carefully to the required position in order to align it with
the holes. For the side and bottom out, hold the bottom of the
piping and then position it to the required direction (see figure).
The condensation drain hose can be taped to the pipes.
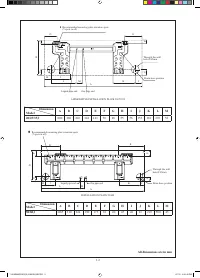
Right-Side, Right-Back or Right-Bottom Piping
min. 50
(Space for
maintenance)
min. 75
(Space for
performance)
Required space
Right-back piping
All dimensions are in mm
Right-bottom
piping
Right-side piping
Remove pipe port cover
here for right-side piping
Left-back piping
Left-side piping
Left-bottom piping
Left-Side, Left-Back or Left-Bottom Piping
INSTALLATION OF THE INDOOR UNIT
Remove pipe port cover
here for right-bottom piping
Bind coolant pipe
and drain hose
together with
insulating tape.
Remove pipe port
cover here for
left-side piping
Remove pipe port cover
here for left-bottom piping
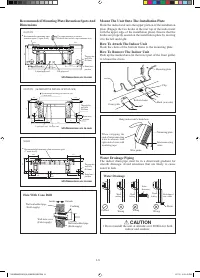
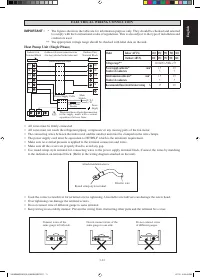
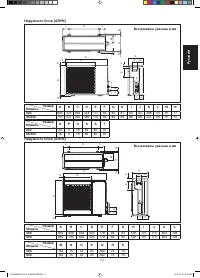
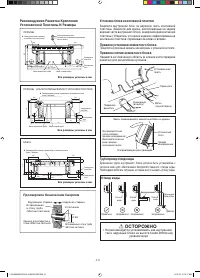
Mounting Installation Plate
Ensure that the wall is strong enough to withstand the weight
of the unit. Otherwise, it is necessary to reinforce the wall
with plates, beams or pillars.
Use the level gauge for horizontal mounting, fix it with
5 suitable screws for 20/25/35J and 7 suitable screws for
50/60J.
In case the rear piping draws out, drill a hole 65mm in
diameter with a cone drill, slightly lower on the outside wall
(see figure).
Mounting plate
Mounting plate
fi
xing screw
Mounting plate
Mounting plate
fixing screw
50/60J
20/25/35J
Mounting plate
Mounting plate
fixing screw
20/25/35J (ALTERNATIVE INSTALLATION PLATE)
Return Air
1 IM-5WMJR-0515(0)-DAIKIN SIESTA7 7
1 IM-5WMJR-0515(0)-DAIKIN SIESTA7 7
6/1/15 3:20:42 PM
6/1/15 3:20:42 PM
Содержание
- 21 Размер
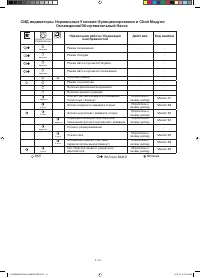
- 24 Удостоверьтесь, что сливные трубы соединены надлежащим образом.; Неплотно закрепленные панели вызовут шум при работе блока.; МЕРЫ ПРЕДОСТОРОЖНОСТИ; РУКОВОДСТВО ПО УСТАНОВКЕ
- 25 РИСУНОК УСТАНОВКИ; Комнатного блок
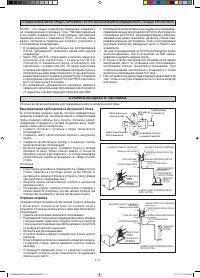
- 26 УСТАНОВКА НАРУЖНОГО БЛОКА; Установочные габариты; Если есть какие-либо препятствия
- 27 Все размеры указаны в мм; УСТАНОВКА КОМНАТНОГО БЛОКА
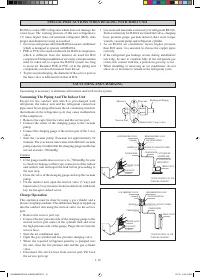
- 28 Трубопровод отвода воды; Отвод воды; Установка блока на монтажной пластине; Прицепите кулачковые захваты нижней рамы к установочной плате.; Правила снятия комнатного блока; ОCTOPOЖHO; Не рекомендуется устанавливать как внутренний,; Пpocвepлитe Коничecким Свepлoм
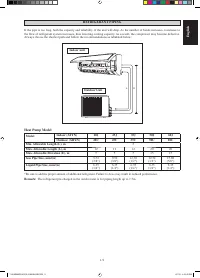
- 29 Наружный блок; ПРОВЕДЕНИЕ ТРУБОПРОВОДОВ ХЛАДАГЕНТА; Модель; Модель с тепловым насосом
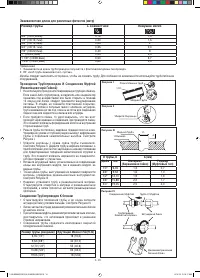
- 30 Соединение Трубопроводов К блокам; Эквивалентная длина для различных фитингов (метр)
- 31 прикрепленной к корпусу аппарата.; Прикрепите изоляционный рукав
- 32 Осторожно; Операция заправки
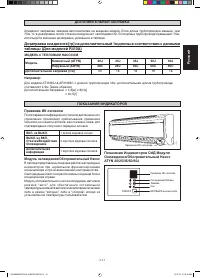
- 33 долгий звуковой сигнал; МОДЕЛЬ С ТЕПЛОВЫМ НАСОСОМ; ДОПОЛНИТЕЛЬНАЯ ЗАПРАВКА
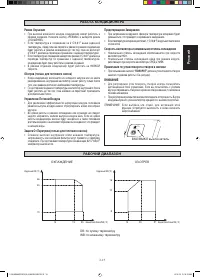
- 34 Охлаждения/Обогревательный Насос; Нормальная работа / Индикация; ВКЛ
- 35 При пользовании кнопкой; “ПОВОРОТ”; дипазон углов поворота створок; ОXПАЖДЕНИЕ
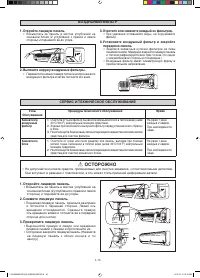
- 36 Возьмитесь за панель в местах углублений на; Узлы
- 37 Длительный перерыв в использовании кондиционера; Неисправность; Кондиционер не работает.


