Кондиционеры Daikin ATYN-L - инструкция пользователя по применению, эксплуатации и установке на русском языке. Мы надеемся, она поможет вам решить возникшие у вас вопросы при эксплуатации техники.
Если остались вопросы, задайте их в комментариях после инструкции.
"Загружаем инструкцию", означает, что нужно подождать пока файл загрузится и можно будет его читать онлайн. Некоторые инструкции очень большие и время их появления зависит от вашей скорости интернета.


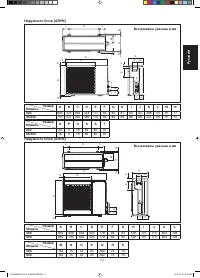


1-8
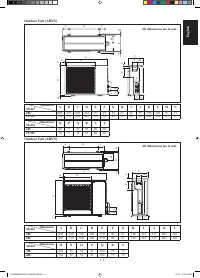
190
173
61
310
61
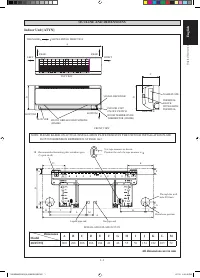
Gas pipe end
Liquid pipe end
48
45
580
1065
219
40
40
91
45
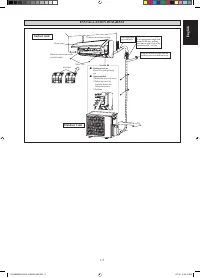
Inside
Caulking
Outside
Wall embedded pipe
(Field supply)
Wall hole cover
(Field supply)
Wall embedded pipe
(Field supply)
Ø 65
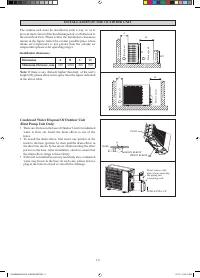
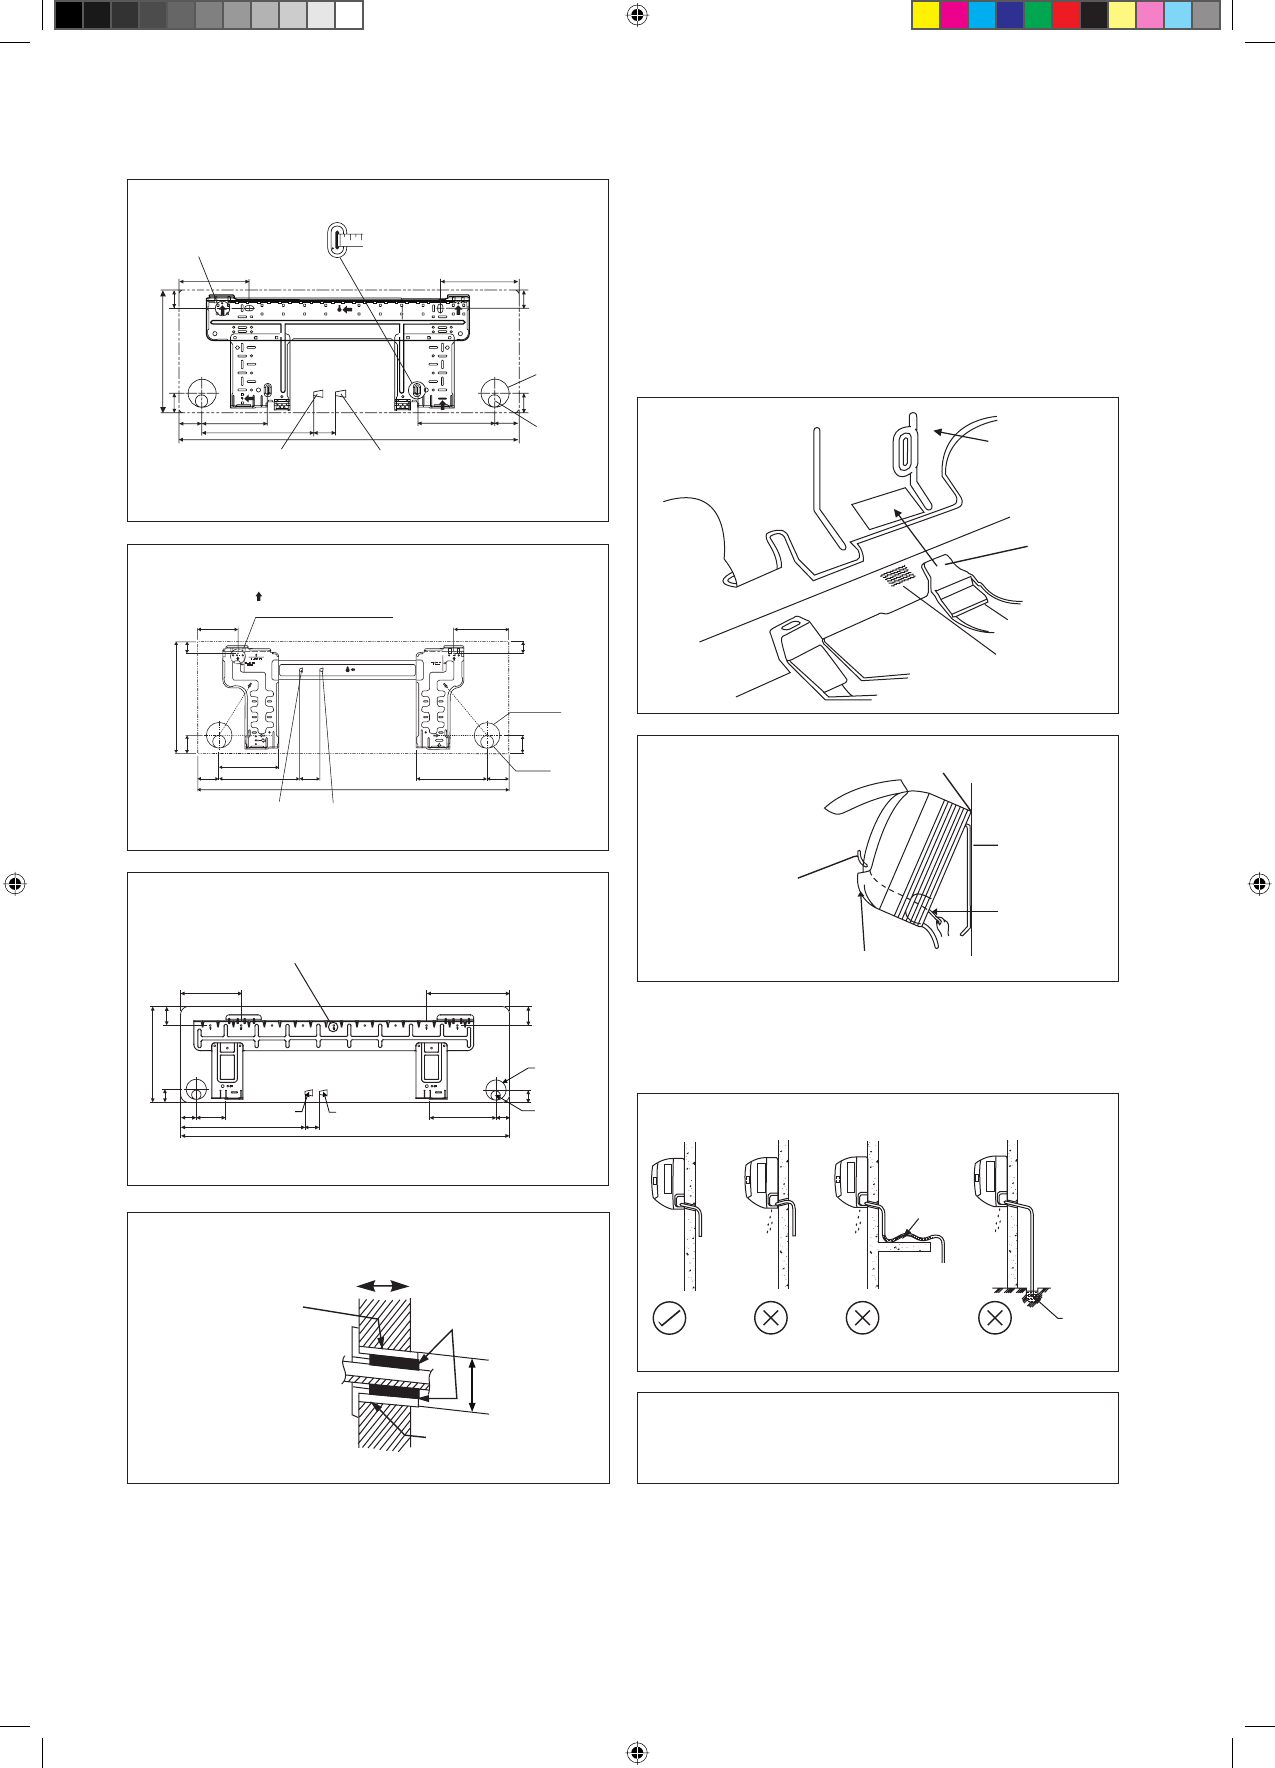
Water Drainage Piping
The indoor drain pipe must be in a downward gradient for
smooth drainage. Avoid situations that are likely to cause
water to leak.
End dipped
into water
Water
leaking
Water
leaking
Water
leaking
Wrong
Wrong
Wrong
Drain
Water Drainage
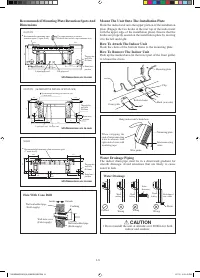
Mounting plate
Clip
Mark (rear side)
Bottom frame
Front grille
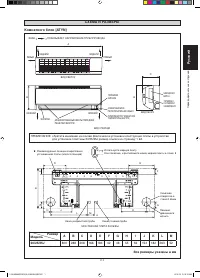
Mount The Unit Onto The Installation Plate
Hook the indoor unit onto the upper portion of the installation
plate (Engage the two hooks at the rear top of the indoor unit
with the upper edge of the installation plate). Ensure that the
hooks are properly seated on the installation plate by moving
it to the left and right.
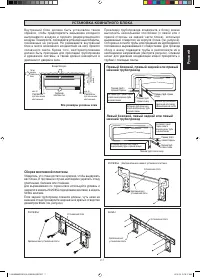
How To Attach The Indoor Unit
Hook the claws of the bottom frame to the mounting plate.
How To Remove The Indoor Unit
Push up the marked area (at the lower part of the front grille)
to release the claws.
Mounting plate
Interconnecting
wires
Hang indoor unit’s hook here.
Wire guide
W h e n s t r i p p i n g t h e
ends of interconnecting
wires in advance, bind
right ends of wires with
insulating tape.
Through the
wall hole
Ø 65mm
Drain hose
position
Gas pipe end
Liquid pipe end
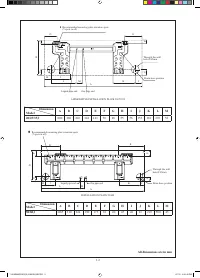
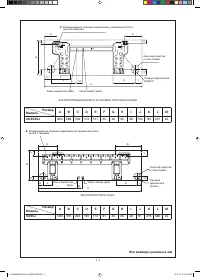
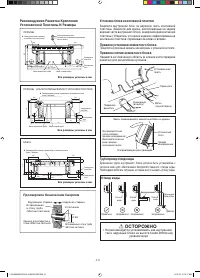
Recommended Mounting Plate Retention Spots And
Dimensions
166
184
181.7
55.5
54.5
153.8
263
51.9
800
45.9
42.2
288
42.2
45.9
Hole With Cone Drill
Water
Retention
All dimensions are in mm
Correct
50/60J
20/25/35J
!
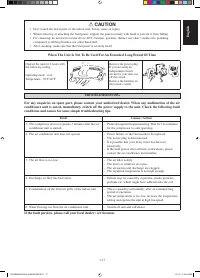
CAUTION
• Do not install the unit at altitude over 2000m for both
indoor and outdoor.
«
Recommended mounting plate
retention spots (5 spots in all)
Use tape measure as shown.
Position the end of a tape measure at
Ñ
Through the
wall hole
Ø 65mm
Drain hose
position
«
Recommended mounting plate retention spots
(7 spots in all)
Gas pipe end
Liquid pipe end
Through the
wall hole
Ø 65mm
Drain hose
position
Recommended mounting plate retention spots
(5 spots in all)
104
141
30
46
56
181
800
55
207
52
153
46
30
288
20/25/35J (ALTERNATIVE INSTALLATION PLATE)
All dimensions are in mm
All dimensions are in mm
1 IM-5WMJR-0515(0)-DAIKIN SIESTA8 8
1 IM-5WMJR-0515(0)-DAIKIN SIESTA8 8
6/1/15 3:20:42 PM
6/1/15 3:20:42 PM
Содержание
- 21 Размер
- 24 Удостоверьтесь, что сливные трубы соединены надлежащим образом.; Неплотно закрепленные панели вызовут шум при работе блока.; МЕРЫ ПРЕДОСТОРОЖНОСТИ; РУКОВОДСТВО ПО УСТАНОВКЕ
- 25 РИСУНОК УСТАНОВКИ; Комнатного блок
- 26 УСТАНОВКА НАРУЖНОГО БЛОКА; Установочные габариты; Если есть какие-либо препятствия
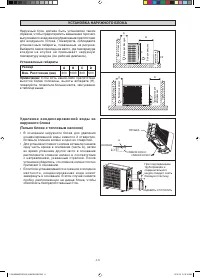
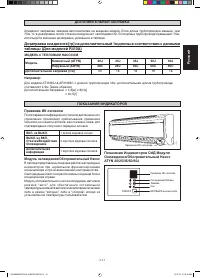
- 27 Все размеры указаны в мм; УСТАНОВКА КОМНАТНОГО БЛОКА
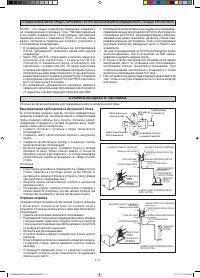
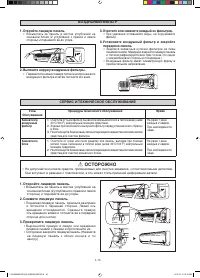
- 28 Трубопровод отвода воды; Отвод воды; Установка блока на монтажной пластине; Прицепите кулачковые захваты нижней рамы к установочной плате.; Правила снятия комнатного блока; ОCTOPOЖHO; Не рекомендуется устанавливать как внутренний,; Пpocвepлитe Коничecким Свepлoм
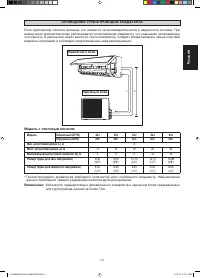
- 29 Наружный блок; ПРОВЕДЕНИЕ ТРУБОПРОВОДОВ ХЛАДАГЕНТА; Модель; Модель с тепловым насосом
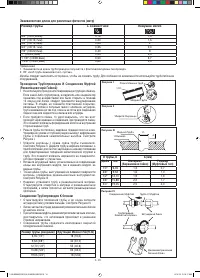
- 30 Соединение Трубопроводов К блокам; Эквивалентная длина для различных фитингов (метр)
- 31 прикрепленной к корпусу аппарата.; Прикрепите изоляционный рукав
- 32 Осторожно; Операция заправки
- 33 долгий звуковой сигнал; МОДЕЛЬ С ТЕПЛОВЫМ НАСОСОМ; ДОПОЛНИТЕЛЬНАЯ ЗАПРАВКА
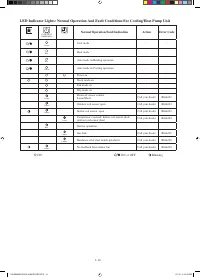
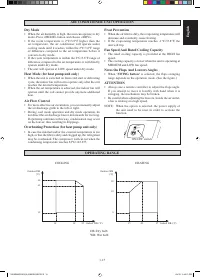
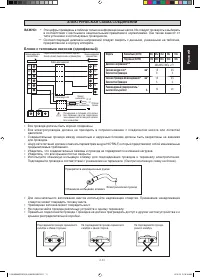
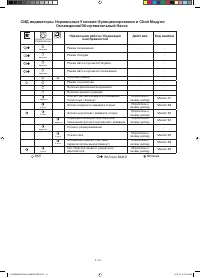
- 34 Охлаждения/Обогревательный Насос; Нормальная работа / Индикация; ВКЛ
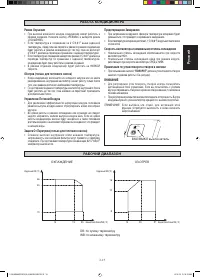
- 35 При пользовании кнопкой; “ПОВОРОТ”; дипазон углов поворота створок; ОXПАЖДЕНИЕ
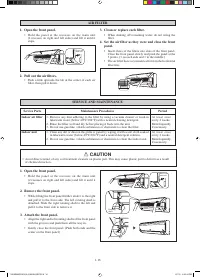
- 36 Возьмитесь за панель в местах углублений на; Узлы
- 37 Длительный перерыв в использовании кондиционера; Неисправность; Кондиционер не работает.


