
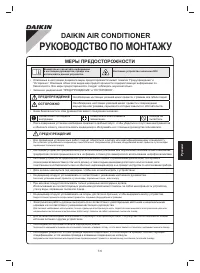
Кондиционеры Daikin ATXC60B/ARXC60B 104366 - инструкция пользователя по применению, эксплуатации и установке на русском языке. Мы надеемся, она поможет вам решить возникшие у вас вопросы при эксплуатации техники.
Если остались вопросы, задайте их в комментариях после инструкции.
"Загружаем инструкцию", означает, что нужно подождать пока файл загрузится и можно будет его читать онлайн. Некоторые инструкции очень большие и время их появления зависит от вашей скорости интернета.


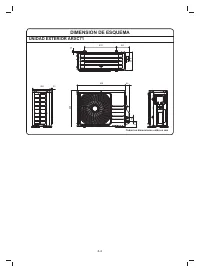


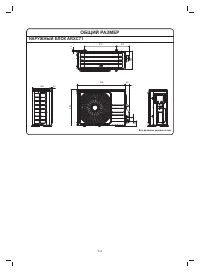


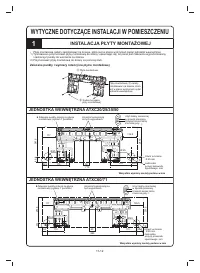


1-14
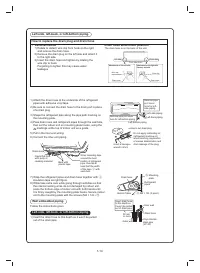
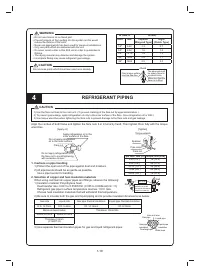
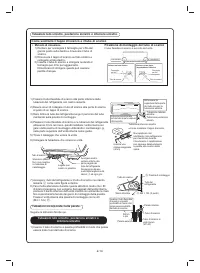
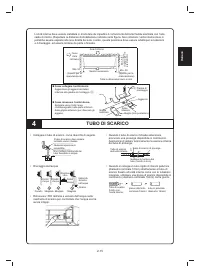
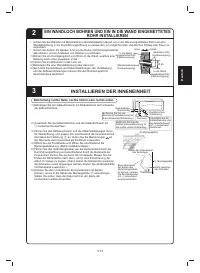
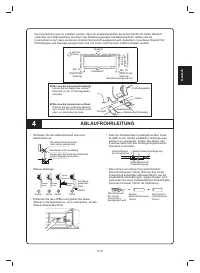
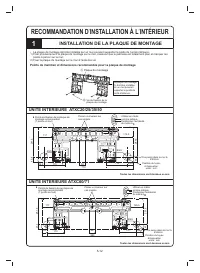
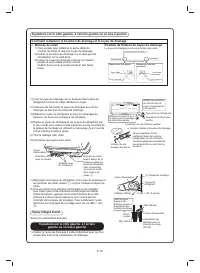
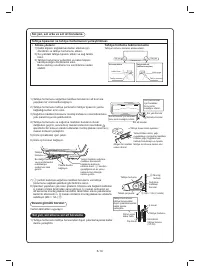
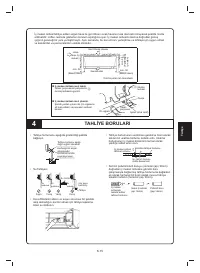
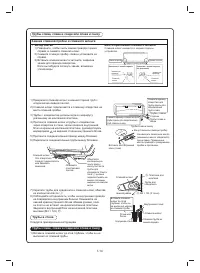
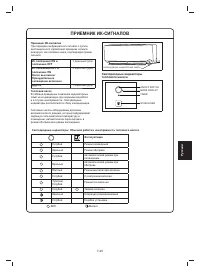
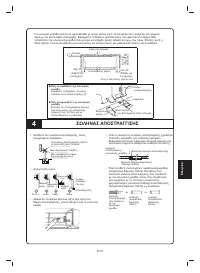
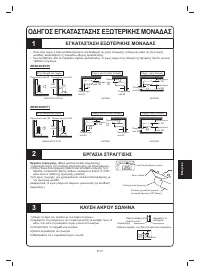
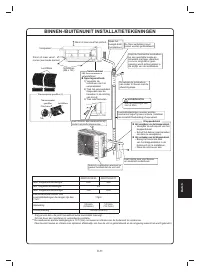
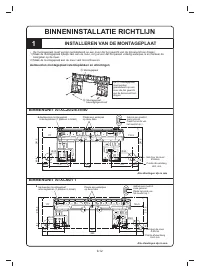
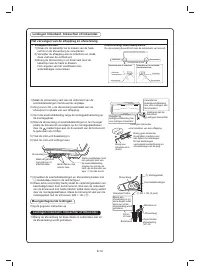
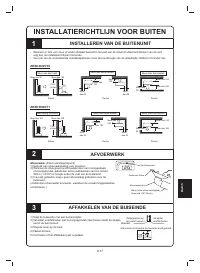
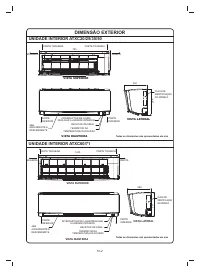
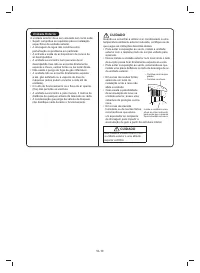
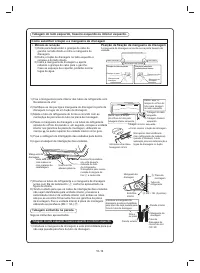
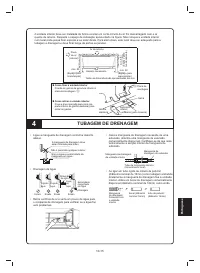
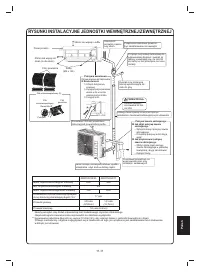
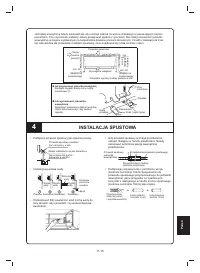
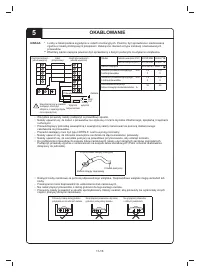
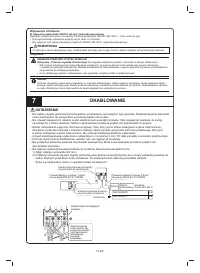
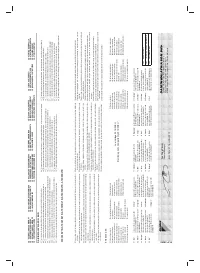
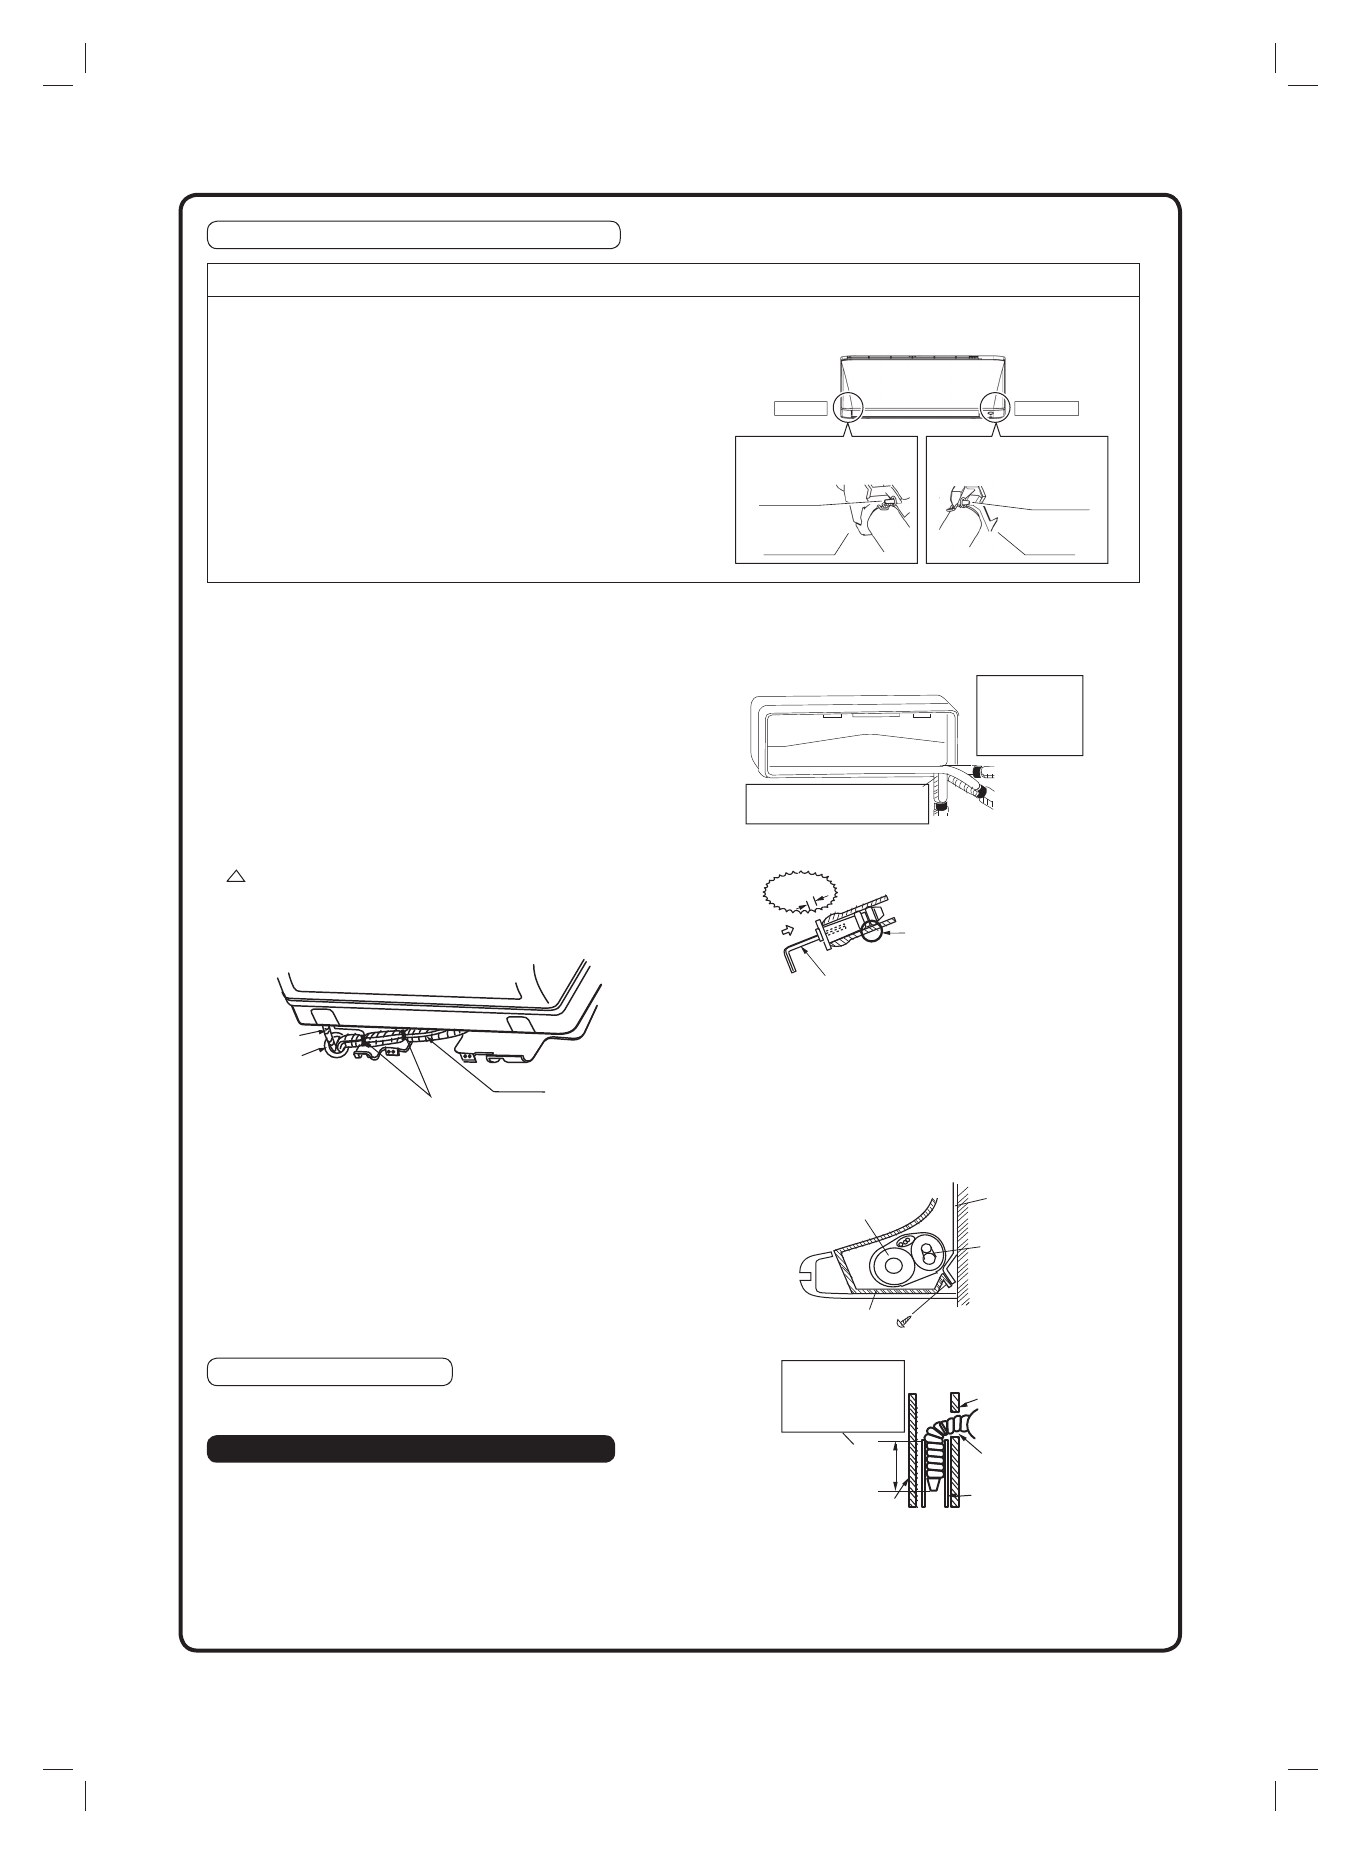
Left-side, left-back, or left-bottom piping.
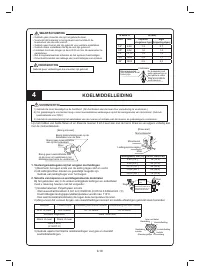
How to replace the drain plug and drain hose
• Removal method
1) Rotate to detach wire clip from hook on the right
and remove the drain hose.
2) Remove the drain plug on the left side and attach it
to the right side.
3) Insert the drain hose and tighten by rotating the
wire clip to hook.
Forgetting to tighten this may cause water
leakages.
Drain hose attachment position
The drain hose is on the back of the unit.
Wire clip
Left side
Right side
Front side of unit
Attachment on the left side
Attachment on the right side
(factory default)
Drain hose
Drain hose
Wire clip
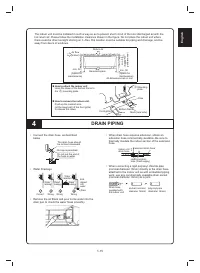
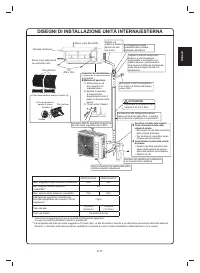
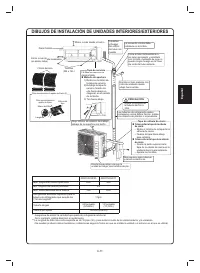
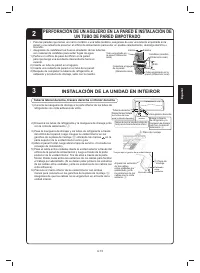
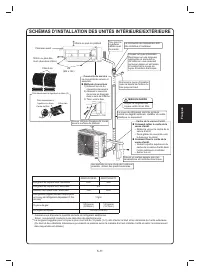
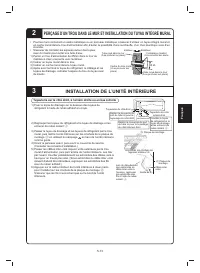
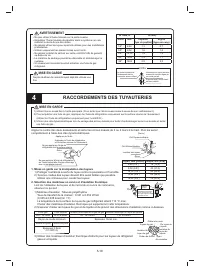
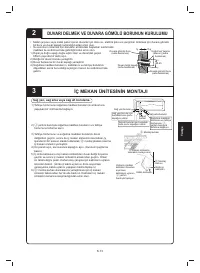
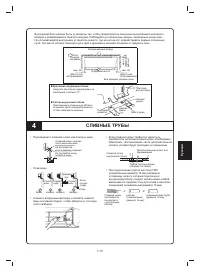
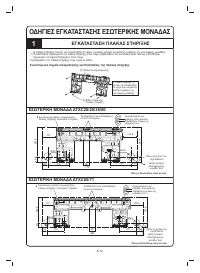
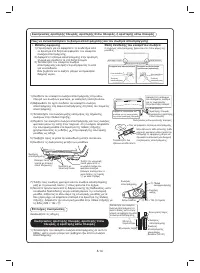
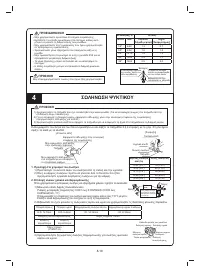
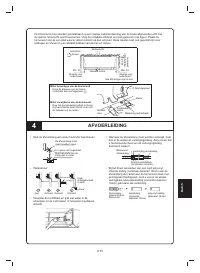
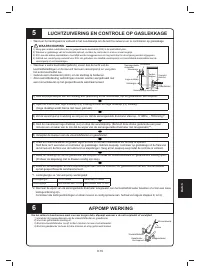
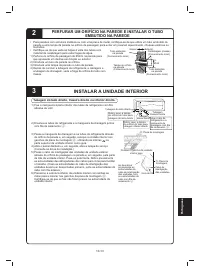
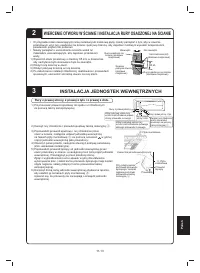
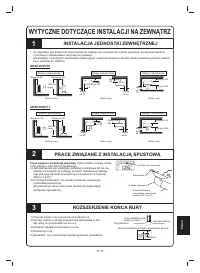
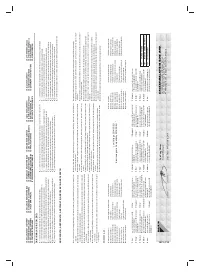
1) Attach the drain hose to the underside of the refrigerant
pipes with adhesive vinyl tape.
2) Be sure to connect the drain hose to the drain port in place
of a drain plug.
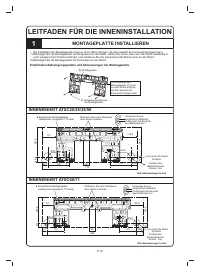
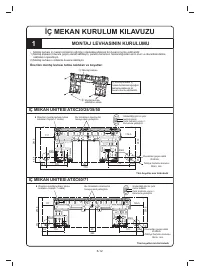
3) Shape the refrigerant pipe along the pipe path marking on
the mounting plate.
4) Pass drain hose and refrigerant pipes through the wall hole,
then set the indoor unit on mounting plate hooks, using the
markings at the top of indoor unit as a guide.
5) Pull in the inter-unit wiring.
6) Connect the inter-unit piping.
7) Wrap the refrigerant pipes and drain hose together with
insulation tape as right
fi
gure.
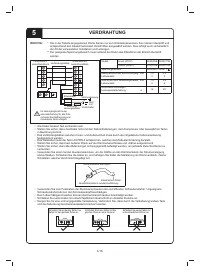
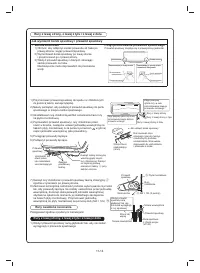
8) While take extra care while going through activities so that
the interconnecting wires do not damaged by indoor unit,
press the bottom edge of indoor unit with both hands until
it is
fi
rmly caught by the mounting plate hooks. Secure indoor
unit to the mounting plate with the screws (M4 × 12L)
.
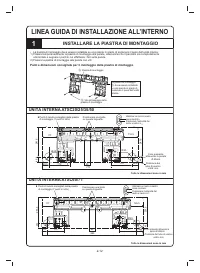
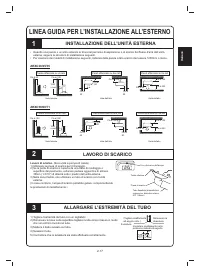
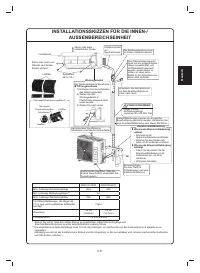
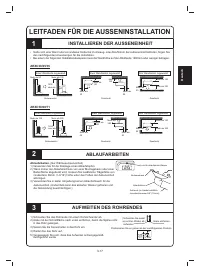
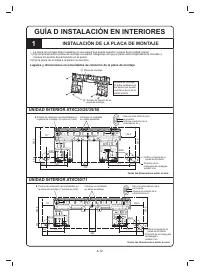
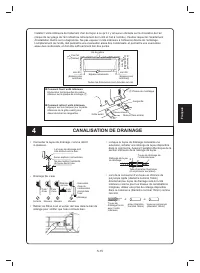
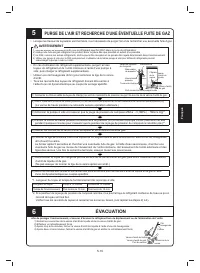
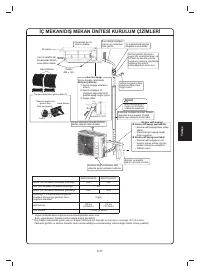
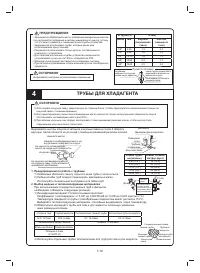
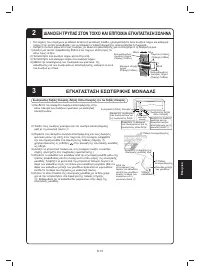
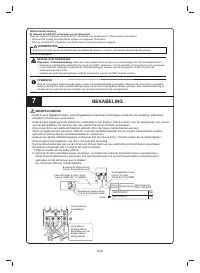
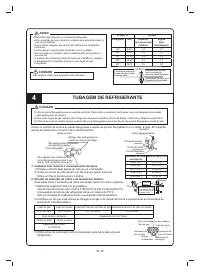
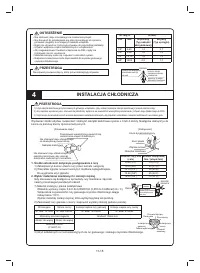
Wall embedded piping.
Follow the instructions given
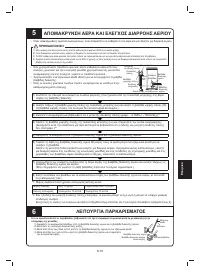
Left-side, left-back, or left-bottom piping
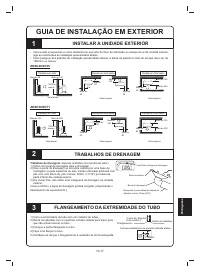
1) Insert the drain hose to this depth so it won’t be pulled
out of the drain pipe.
Drain hose
Caulk this hole
with putty or
caulking material.
Bind with
plastic tape.
Mounting plate
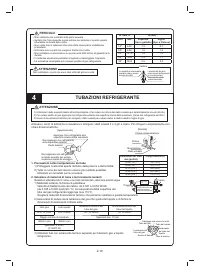
Wrap insulating tape
around the bent
portion of refrigerant
pipe. Overlap at
least half the width
of the tape
with
each turn.
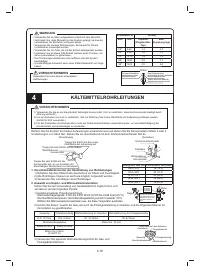
Do not apply lubricating oil
(refrigerant machine oil)
when inserting. Application
of causes deterioration and
drain leakage of the plug.
Left-side piping
Remove pipe
port cover
here for left-
side piping.
Remove pipe port cover
here for left-bottom piping.
Left-back piping
Left-bottom piping
●
How to set drain plug
Insert a hexagon
wrench (4mm)
No gap
Drain hose
Drain hose
Outer wall
50 mm
or more
Vinyl chloride
drain pipe
(VP-30)
Inner wall
Insert drain hose
to this depth so
it won’t be pulled
out of drain pipe.
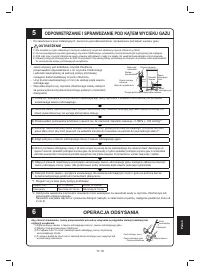
Refrigerant
pipes
M4 × 12L (2 point)
Mounting
plate
Bottom frame


