
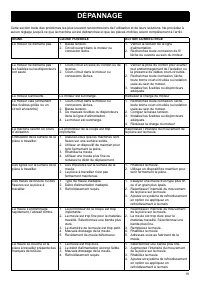
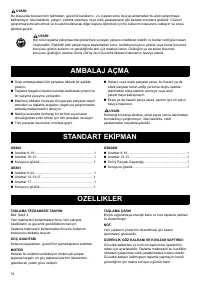
Заточные станки Makita GB 801 - инструкция пользователя по применению, эксплуатации и установке на русском языке. Мы надеемся, она поможет вам решить возникшие у вас вопросы при эксплуатации техники.
Если остались вопросы, задайте их в комментариях после инструкции.
"Загружаем инструкцию", означает, что нужно подождать пока файл загрузится и можно будет его читать онлайн. Некоторые инструкции очень большие и время их появления зависит от вашей скорости интернета.


8
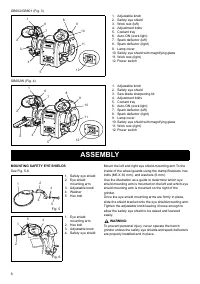
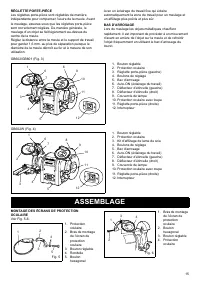
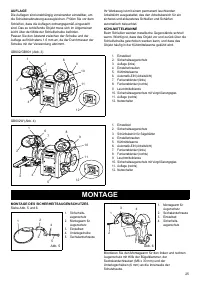
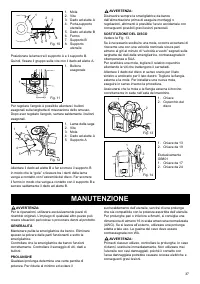
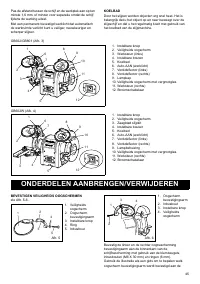
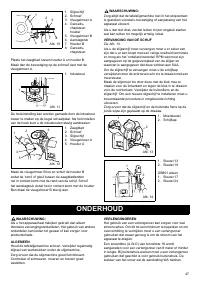
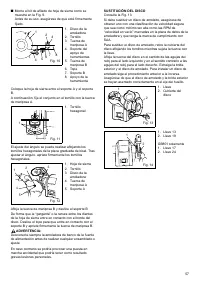
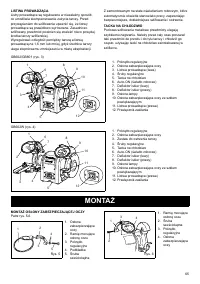
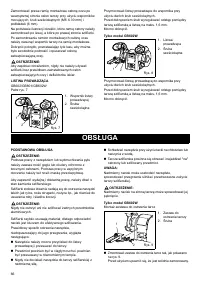
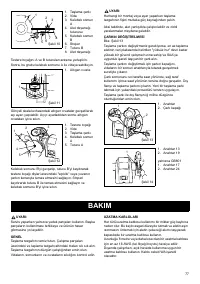
1. Saw blade
2. Screw
3. Grinding wheel
4. Wing nut A
5. Holder A
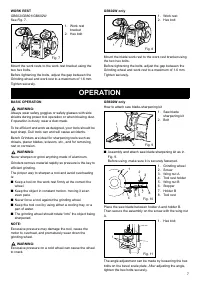
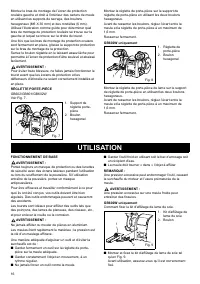
Loosen the wing nut B and slide the holder B so that the
“gullet” or slot between the saw blade Teeth just comes in
contact with the edge of the Wheel. Slide the stopper so
that it comes in contact with the holder B and tighten the
wing nut B securely.
WARNING:
Always disconnect the bench grinder from the power
source before performing any assembly or adjustment.
Failure to do so could result in accidental starting resulting
in possible serious personal injury.
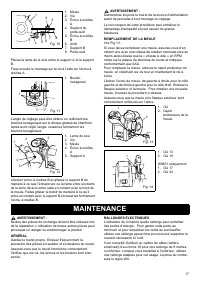
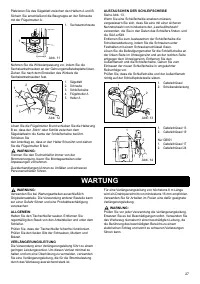
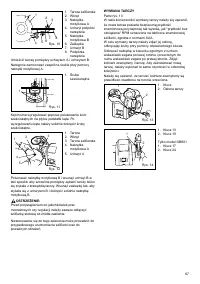
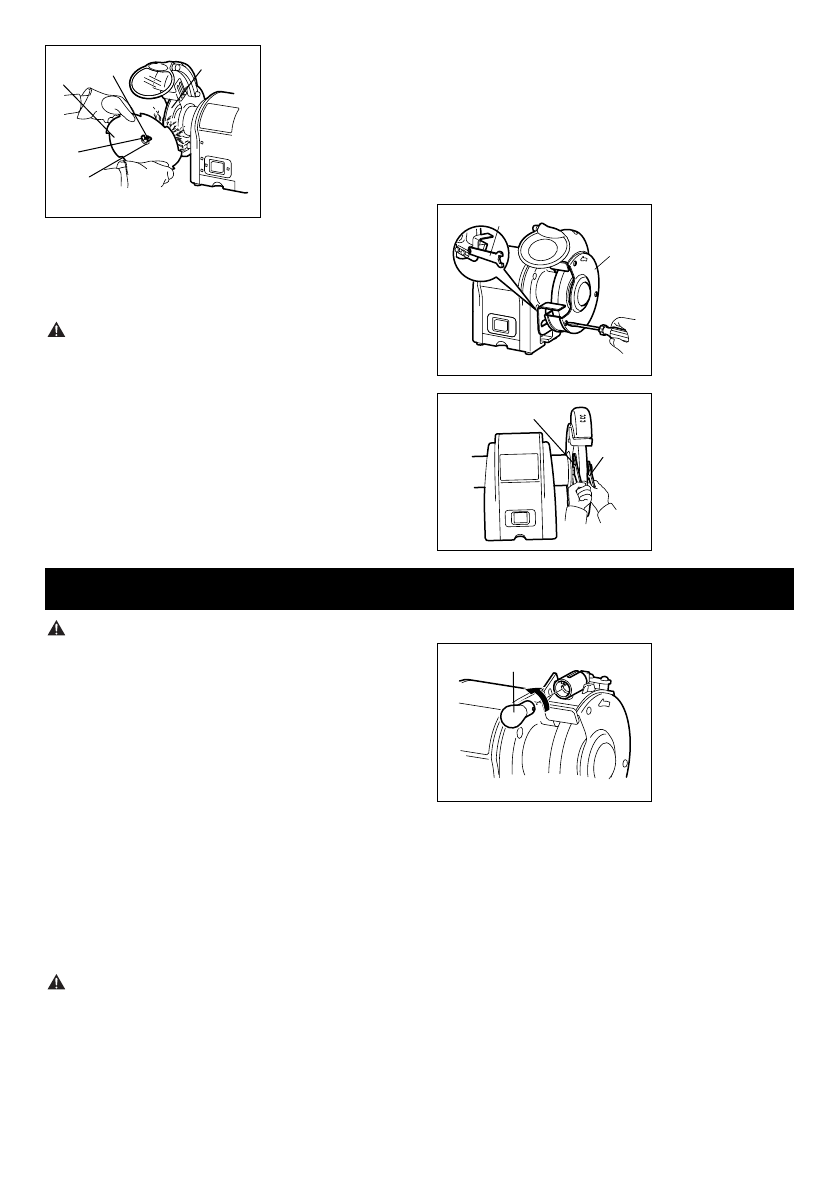
WHEEL REPLACEMENT
See Fig.13.
If you must replace a grinding wheel, be sure to obtain
one with a safe rated speed at least as high as the “no
load speed” RPM marked on the data plate of the grinder
and which is marked to comply with EN12413.
To replace the grinding wheel, remove the wheel cover by
loosening the screws with holding the nut wrench.
Loosen the wheel nut in a clockwise direction for the left
side and a counterclockwise direction for the right side
using the correct wrench. Remove the outer flange and
grinding wheel. To install a new grinding wheel, reverse
the above procedure.
Be sure the grinding wheel and outer flange are properly
seated on the spindle shaft.
1. Wrench
2. Wheel cover
1. Wrench 13
2. Wrench 19
GB801 only
1. Wrench 17
2. Wrench 24
WARNING:
When servicing, use only manufacturers recommended
replacement parts. Use of other part may create a hazard
and cause product damage.
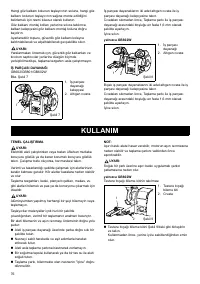
GENERAL
Keep the bench grinder clean. Remove dust from working
parts and beneath the grinder frequently.
Make sure the bench grinder operates properly. Check
screws, nuts, and bolts for tightness.
EXTENSION CORDS
The use of any extension cord will cause some loss of
power. To keep the loss to a minimum and to prevent tool
overheating, use an extension cord that is heavy enough
to carry the current the tool will draw.
An extension lead of cross sectional area of at least
1.5 mm
2
is recommended for an extension cord 8 meters
or less in length. When working outdoors, use an
extension cord that is suitable for outdoor use.
WARNING:
Check extension cords before each use. If damaged,
replace immediately. Never use tool with damaged cord
since touching the damaged area could cause electrical
shock resulting in serious injury.
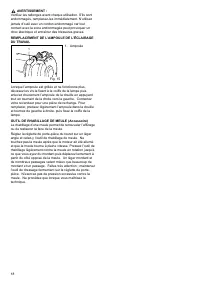
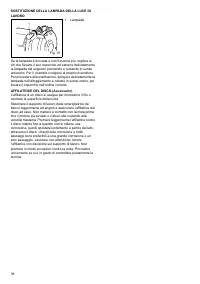
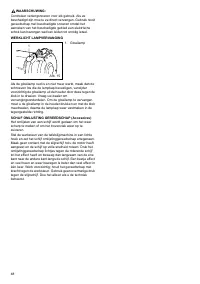
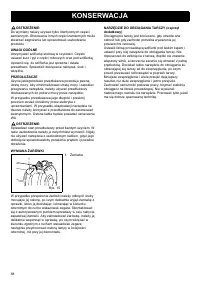
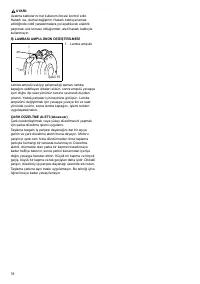
WORKLIGHT BULB REPLACEMENT
1. Light bulb
When the light bulb is worn out and no longer working,
unfasten the screws which fix the lamp cover, then gently
remove the bulb from the holder by pushing in and turning
anticlockwise. Contact your dealer for replacement part.
To replace, gently push the light bulb into the insert and
turn clockwise, then fix the lamp cover in the revise order.
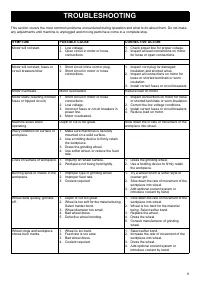
WHEEL DRESSING TOOL (Accessory)
Dressing a wheel is done to renew sharpness or to true up
the face of the wheel.
Set the work rest of the bench grinder at a slight angle
and brace the wheel-dressing tool against it. Do not make
contact with the grinding wheel until after you have turned
on the motor and the wheel is rotating at full speed. Press
the dressing tool slightly against the rotating wheel until
you get a bite, then move slowly from side to side across
the wheel. A small bite and many passes are better than a
big bite and one pass. Work cautiously; hold the dresser
with force on the work rest. Do not use excessive
pressure against the grinding wheel. Proceed slowly until
you master the technique.
1
2
3
4
5
Fig. 12
2
1
Fig. 13
1
2
Fig. 14
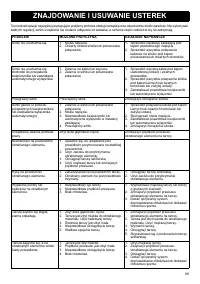
MAINTENANCE
1
Fig. 15
Характеристики

Остались вопросы?Не нашли свой ответ в руководстве или возникли другие проблемы? Задайте свой вопрос в форме ниже с подробным описанием вашей ситуации, чтобы другие люди и специалисты смогли дать на него ответ. Если вы знаете как решить проблему другого человека, пожалуйста, подскажите ему :)


