Смартфоны LG KG200 - инструкция пользователя по применению, эксплуатации и установке на русском языке. Мы надеемся, она поможет вам решить возникшие у вас вопросы при эксплуатации техники.
Если остались вопросы, задайте их в комментариях после инструкции.
"Загружаем инструкцию", означает, что нужно подождать пока файл загрузится и можно будет его читать онлайн. Некоторые инструкции очень большие и время их появления зависит от вашей скорости интернета.


32
!
Note
Java MIDlet suit must contain .jad and .jar file format in
order to function application or play Java games normally.
Options of Application includes:
1.
Launch
: Allows you to launch the Java game or
application you have selected.
2.
Setting
: Allows you to define the permission level
when using Java applications. Permission levels are
“ Allow”, “Prompt always”, and “Never”. There are
four different permission can be configured when you
are using Java application including:
– Network access: allows you to decide when to
connect the network.
– Auto invocation: allows you to decide whether
automatically launched by push SMS.
– Messaging: allows you to decide how to receive/send
message.
– Recording: allows you to decide how to record audio.
3.
Information
: Allows you to check and read the
information of Java games and application including:
name of application, memory size, application
version, name of vendor and authorized source.
4.
Delete
: Allows you to delete Java games and
application downloaded from WAP or saved from
local.
!
Note
Default Java game of this handset can not be deleted.
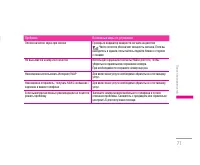
Settings [Menu 4-1-3]
1.
Network profiles
: Please refer to Browser
➝
WAP
➝
Settings
➝
Edit profile for detail introduction.
2.
Memory status
: Indicates the total memory, used and
free memory.
3.
Information
: Provides information of Java, CLDC and
MIDP version.
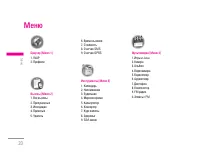
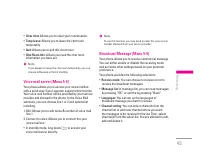
Camera [Menu 4-2]
You can use this phone in taking photos with the
phone’s built-in camera and adjust its settings. Your
phone supports horizontal OSD type operation style and
only supports vertical type in 128x160 images size.
The camera lens is on the back of the phone, and the
display of the phone works as a viewfinder. If there’s
not enough memory for camera, you need to delete old
photos to free some spaces for new photos or you can
choose to save photos in memory card. The status of
your video camera setting will be displayed on the top
of preview mode.
!
Note
Do not use this feature when it violates local laws.
Multimedia
|
Multimedia
To start using Camera
1. In Multimedia menu, select
Camera
and press
OK
.
2. Press
Options
to personalize your camera setting
otherwise you might take the picture by pressing
S
talk key or long pressing
Q
quick key (right
down side key).
To zoom screen in and out, please press volume key
(right up 2 side keys).
!
Note
The photo will be saved in the folder called Photo of My
stuff menu. You can also view the picture from by selecting
Album from option list and you will jump to Image viewer.
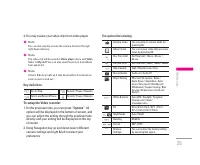
To setup the Camera
1. On the preview mode, you can press “
Options
”. All
options will be displayed in the bottom of screen, and
you can adjust the setting through the preview mode
directly and your setting will be displayed on the top
of screen.
2. Using Navigation key right/left to select different
camera settings and up/down to select your
preference.
The options list including:
Video Camera
mode
You can jump to video camera mode
by pressing OK
Album mode
You can review pictures you have
taken by pressing OK
Image Size
128x160, 160x128, 320x240, 640x480,
1280x1024
Quality
Normal / Low / High
Delay Timer
Time Off / 5, 10, 15 sec.
Continue Shot
1 Shot / 3 Shot / 5 Shot / 9 Shot
Effect Setting
Effect off / Grayscale / Sepia /
Sepia Green / Sepia Blue / Color
Invert / Gray Invert / Blackboard /
Whiteboard / Copper Carving / Blue
Carving / Embossment / Contrast
& Sketch
White Balance Auto WB / Daylight / Tungsten /
Fluorescent / Cloud/Incandescence
EV
EV-4 / EV-3 / EV-2 / EV-1 / EV 0 / EV+1 /
EV+2 / EV+3 / EV+4
Scene Mode
Auto / Night
Bonding
50 / 60 Hz
Sound
Sound Off / Sound 1 / Sound 2 /
Sound 3
Restore
Settings
You can restore the factory setting by
selecting this option.
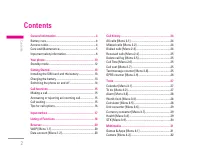
Содержание
- 2 И Н С Т Р У К Ц И Я П О Л Ь З О В А Т Е Л Я
- 5 Общая информация; Использование аккумулятора; Код телефона; Уход и техническое обслуживание; Уход за изделием
- 7 Информация по технике безопасности; Радиочастотное излучение
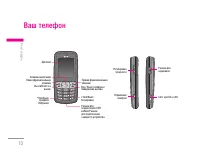
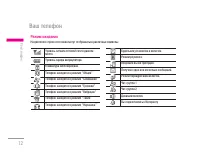
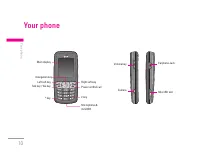
- 11 Ваш телефон
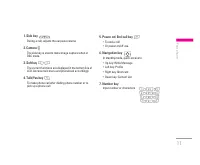
- 12 Функциональные клавиши
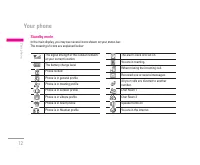
- 13 Подготовка; Режим ожидания
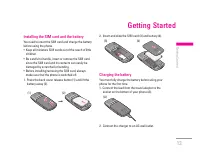
- 14 Установка SIM-карты и аккумулятора
- 15 Включение и выключение телефона
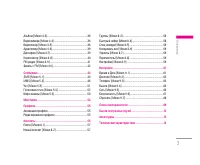
- 16 Функции вызова; Вызовы из меню Контакты; Ответ или отмена входящего вызова; Ответ на входящий вызов
- 18 Выбор режима ввода; Ввод пробела; Английский
- 19 Ввод текста в режиме T9
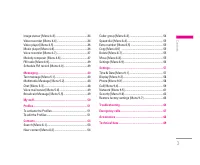
- 23 Домашняя
- 25 Опции браузера; GSM данные
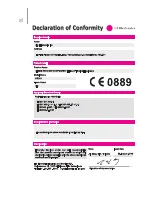
- 26 Сертификаты
- 30 Инструменты
- 31 Индекс массы
- 33 Женский календарь
- 34 Мультимедиа
- 35 Профили сети; Использование фотокамеры; Настройка фотокамеры
- 37 Настройка видеокамеры; Использование видеокамерой
- 38 Назначение клавиш
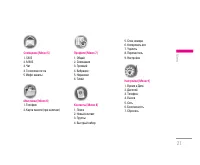
- 43 Сообщения
- 45 Отправка сообщения
- 47 Отправка MMS-сообщения
- 51 Общение в чате
- 52 Фильтры; Профиль сервера
- 55 Активация профиля; Мои папки
- 57 Контакты
- 61 Настройки
- 62 Установить город
- 67 Автоматически; OK
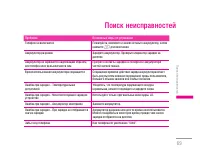
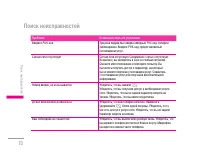
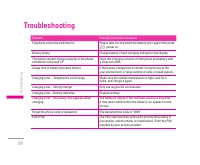
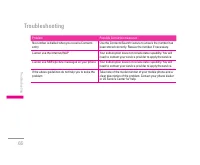
- 69 Поиск неисправностей
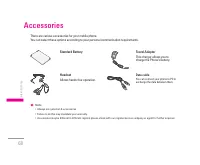
- 73 Вызов экстренных служб; Аксессуары
- 74 Стандартная батарея; Сетевое зарядное устройство; USB кабель для передачи
- 75 Технические характеристики; Общие


