Шлифмашины Bosch GWS 1400 - инструкция пользователя по применению, эксплуатации и установке на русском языке. Мы надеемся, она поможет вам решить возникшие у вас вопросы при эксплуатации техники.
Если остались вопросы, задайте их в комментариях после инструкции.
"Загружаем инструкцию", означает, что нужно подождать пока файл загрузится и можно будет его читать онлайн. Некоторые инструкции очень большие и время их появления зависит от вашей скорости интернета.


22
| English
1 609 929 K94 • 20.12.06
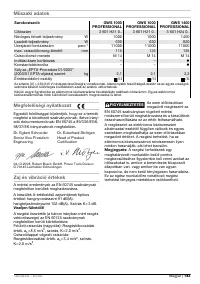
The vibration emission level given in
this information sheet has been meas-
ured in accordance with a standard-
ised test given in EN 60745 and may be used to
compare one tool with another.
The vibration emission level will vary because of the ways
in which a power tool can be used and may increase
above the level given in this information sheet. This could
lead to a significant underestimate of exposure when the
tool is used regularly in such a way.
Note:
To be accurate, an estimation of the level of expo-
sure to vibration experienced during a given period of
work should also take into account the times when the
tool is switched off and when it is running but not actually
doing the job. This may significantly reduce the exposure
level over the total working period.
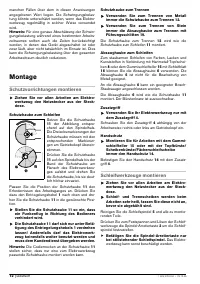
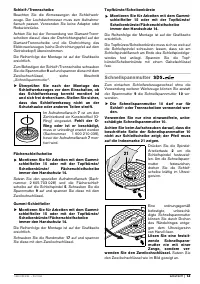
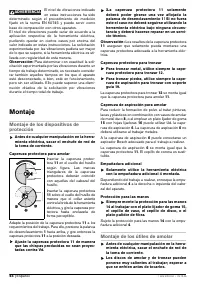
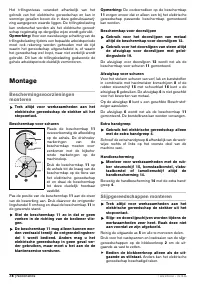
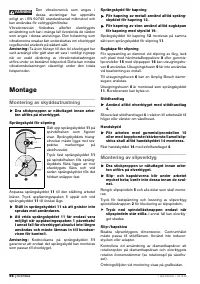
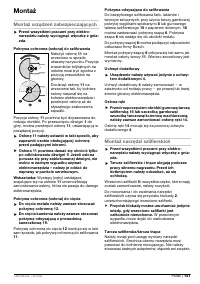
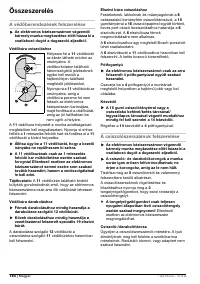
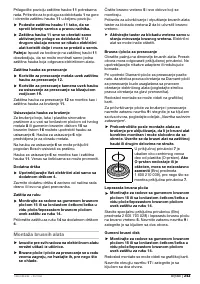
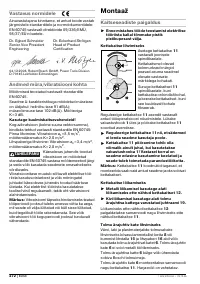
Assembly
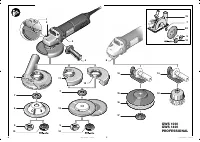
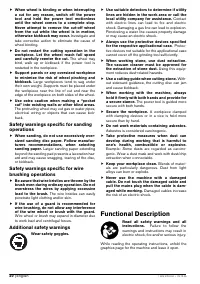
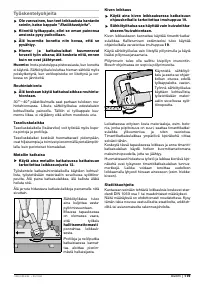
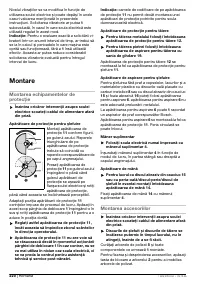
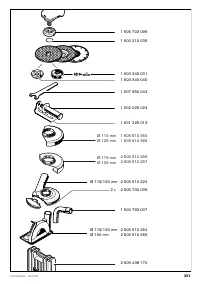
Mounting the Protective Devices
f
Before any work on the machine itself, pull
the mains plug.
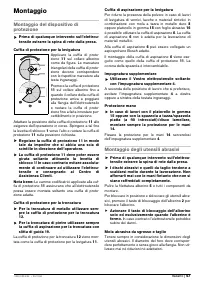
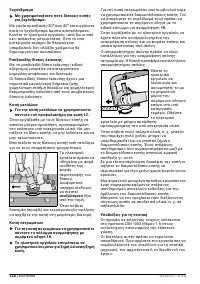
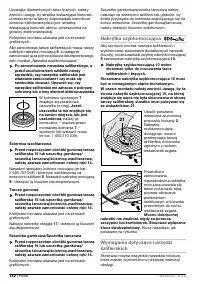
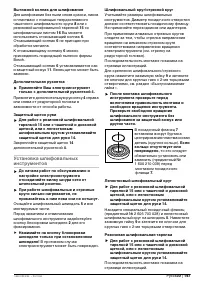
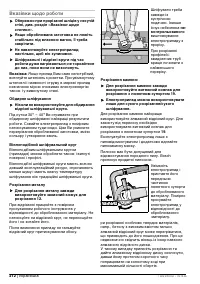
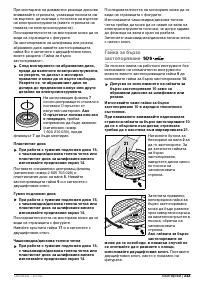
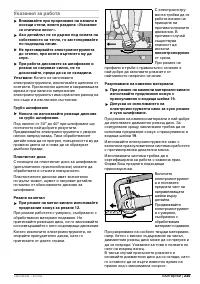
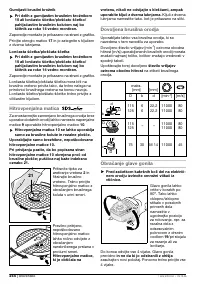
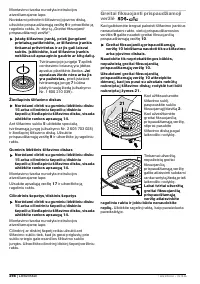
Protection Guard for Sanding
Place the protection guard
11
onto the spindle collar as
shown in the illustration. The
triangle marks on the protec-
tion guard must correspond
with the respective marks on
the gear case.
Press the protection guard
11
onto the spindle collar until the
shoulder of the protection
guard is seated against the
flange of the machine, and
turn the protection guard until
it can clearly be heard to
engage.
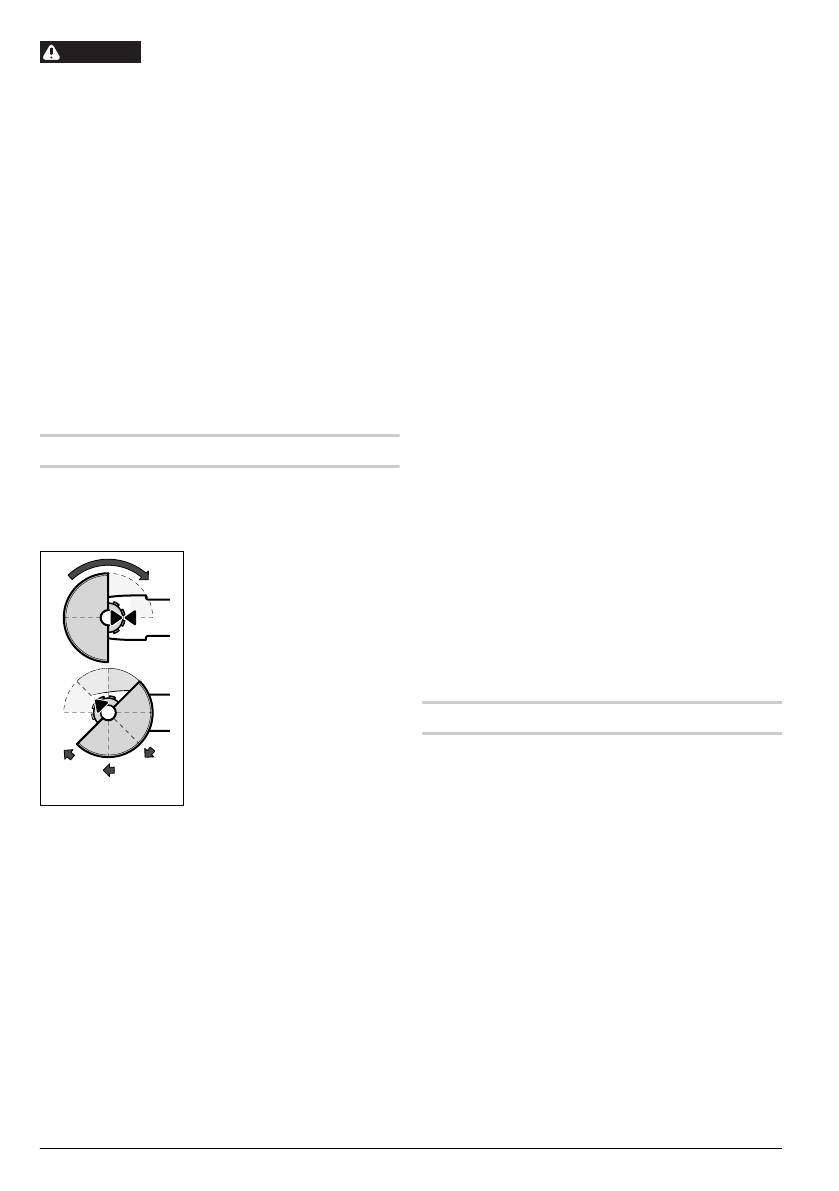
Adjust the position of the protection guard
11
to the
requirements of the work process. For this, press the
release lever
1
upward and turn the protection guard
11
to the required position.
f
Adjust the protection guard 11 in such a
manner that sparking is prevented in the
direction of the operator.
f
The protection guard 11 may be turned only
upon actuation of the release lever 1! Other-
wise the power tool may not continue to be
used under any circumstances and must be
taken to an after-sales service agent.
Note:
The encoding keys on the protection guard
11
ensure that only a protection guard that fits the
machine type can be mounted.
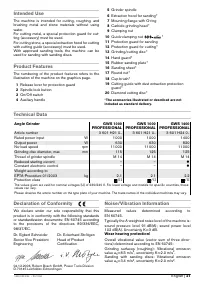
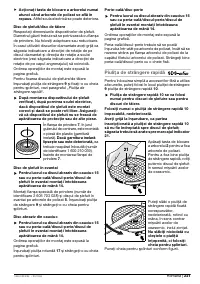
Protection Guard for Cutting
f
For cutting metal, always work with the pro-
tection guard for cutting 12.
f
For cutting stone, always work with the cut-
ting guide with dust extraction protection
guard 19.
The protection guard for cutting
12
is mounted in the
same manner as the protection guard for sanding
11
.
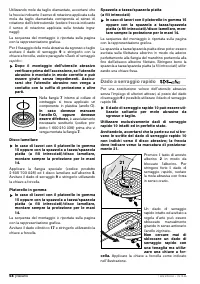
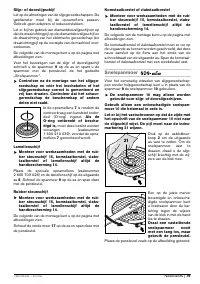
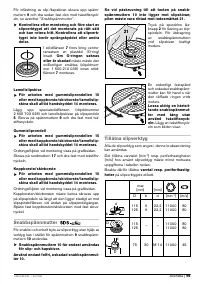
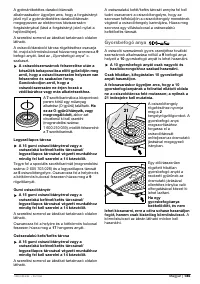
Extraction Hood for Sanding
The extraction hood
6
can be used for low-dust sand-
ing of paint, varnish and plastics in conjunction with
the carbide grinding head
8
or the rubber sanding
plate
15
with a sanding sheet
16
. The extraction hood
6
is not suitable for working metals.
A suitable Bosch vacuum cleaner can be connected
to the extraction hood
6
.
The extraction hood
6
is mounted in the same manner
as the protection guard
11
. The brush collar is
exchangeable.
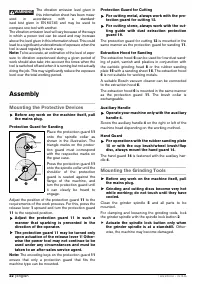
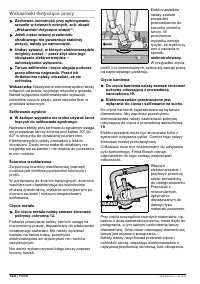
Auxiliary Handle
f
Operate your machine only with the auxiliary
handle 4.
Screw the auxiliary handle
4
on the right or left of the
machine head depending on the working method.
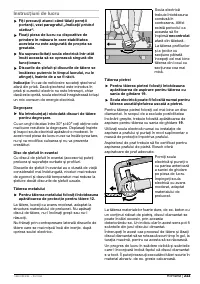
Hand Guard
f
For operations with the rubber sanding plate
15 or with the cup brush/wheel brush/flap
disc, always mount the hand guard 14.
The hand guard
14
is fastened with the auxiliary han-
dle
4
.
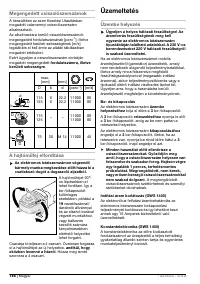
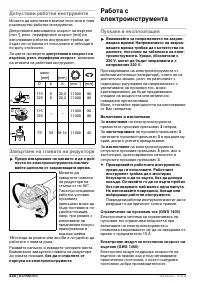
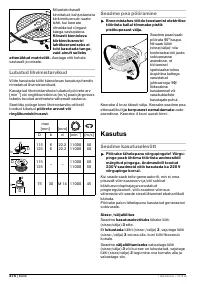
Mounting the Grinding Tools
f
Before any work on the machine itself, pull
the mains plug.
f
Grinding and cutting discs become very hot
while working; do not touch until they have
cooled.
Clean the grinder spindle
5
and all parts to be
mounted.
For clamping and loosening the grinding tools, lock
the grinder spindle with the spindle lock button
2
.
f
Actuate the spindle lock button only when
the grinder spindle is at a standstill.
Other-
wise, the machine may become damaged.
WARNING
OBJ_BUCH-310-001.book Page 22 Wednesday, December 20, 2006 9:31 AM


