
Плита Bertazzoni PRO90 6 MFE S XT - инструкция пользователя по применению, эксплуатации и установке на русском языке. Мы надеемся, она поможет вам решить возникшие у вас вопросы при эксплуатации техники.
Если остались вопросы, задайте их в комментариях после инструкции.
"Загружаем инструкцию", означает, что нужно подождать пока файл загрузится и можно будет его читать онлайн. Некоторые инструкции очень большие и время их появления зависит от вашей скорости интернета.


11
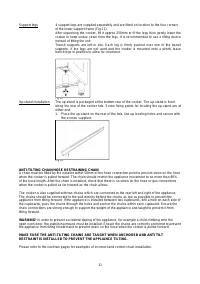
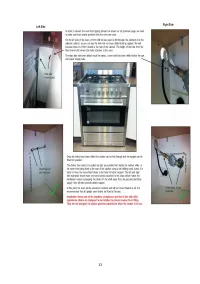
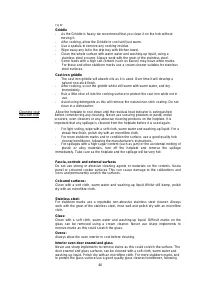
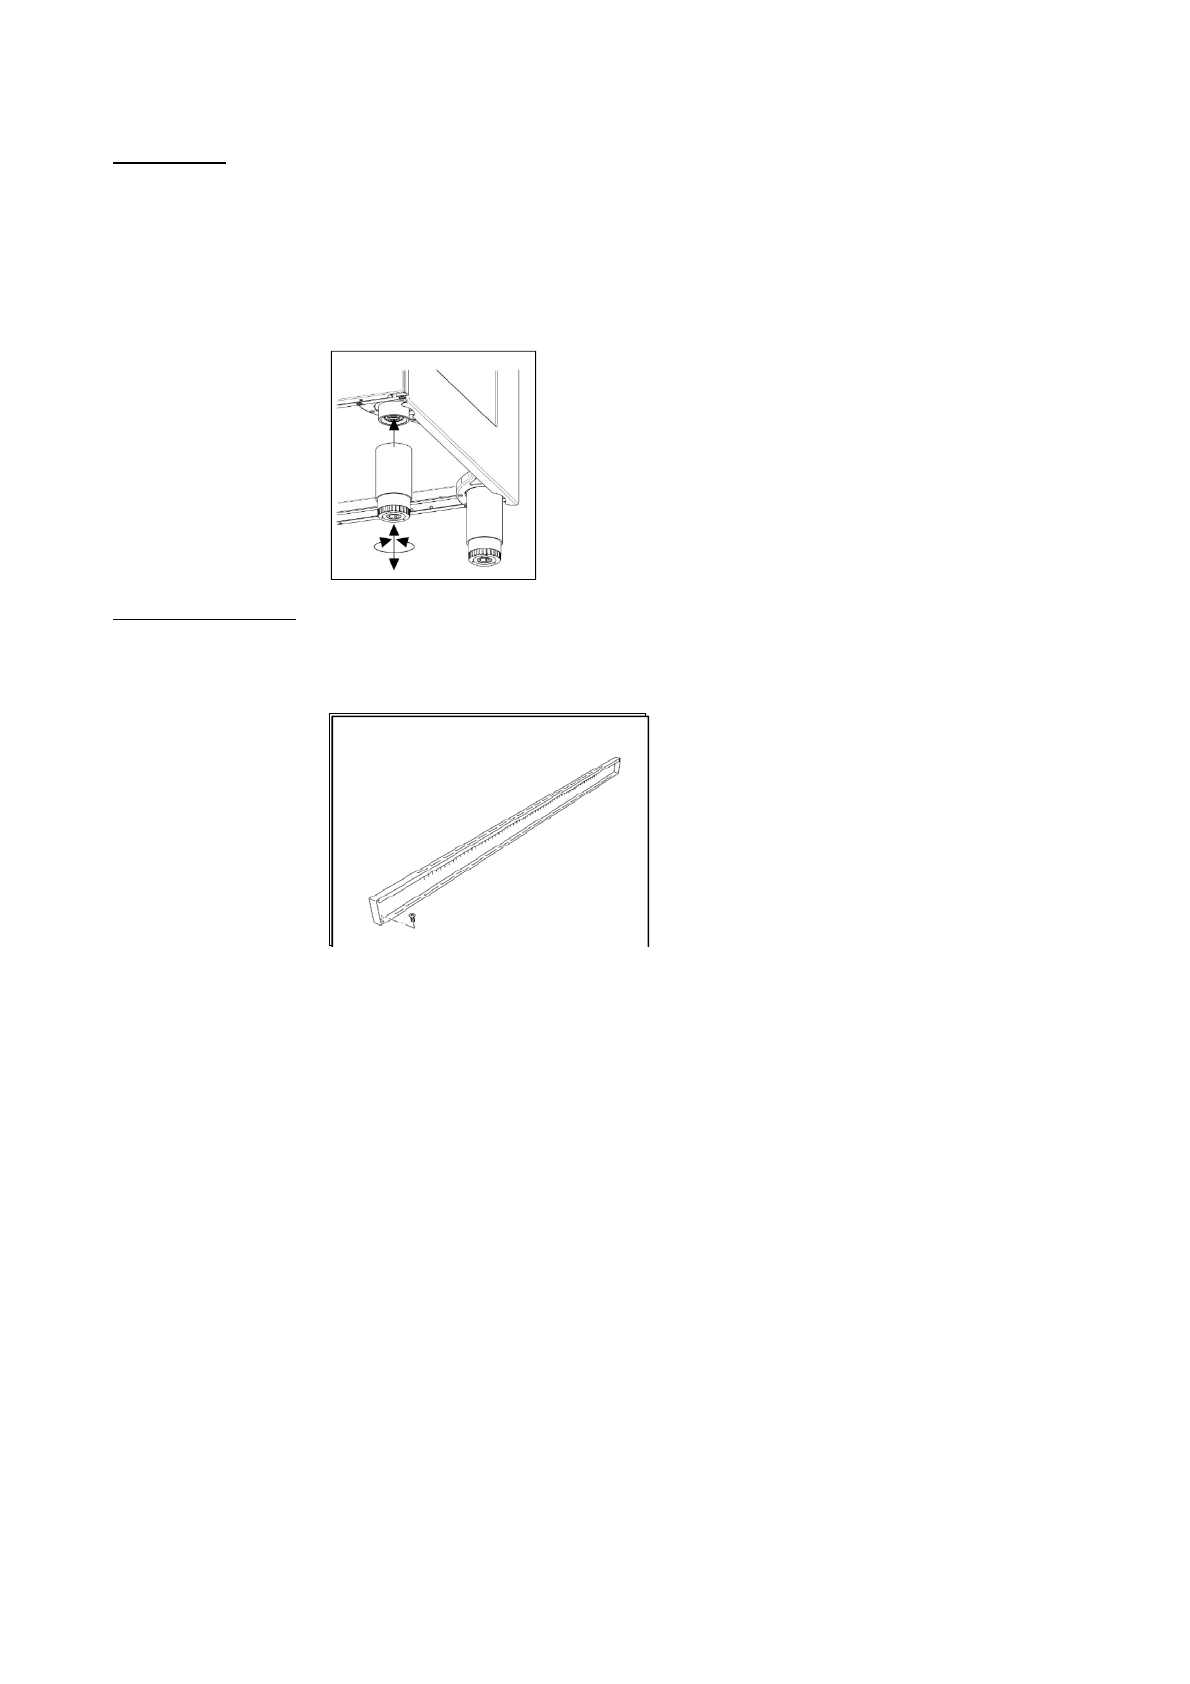
Support legs 4 support legs are supplied separately and are fitted on location to the four corners
of the lower support frame (Fig.11)
After unpacking the cooker, lift it approx 250mm to fit the legs then gently lower the
cooker to keep undue strain from the legs. It is recommended to use a lifting device
instead of tilting the unit.
Transit supports are left in situ. Each leg is firmly pushed over one of the transit
supports. If the legs are not used and the cooker is mounted onto a plinth, leave
transit legs in position to allow for clearance.
Fig 11
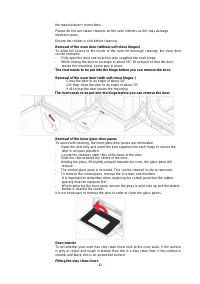
Up-stand Installation The up-stand is packaged at the bottom rear of the cooker. The up-stand is fixed
along the rear of the cooker hob. Screw fixing points for locating the up-stand are at
either end.
1. Place the up-stand on the rear of the hob, line up locating holes and secure with
the screws supplied.
F
ig 12
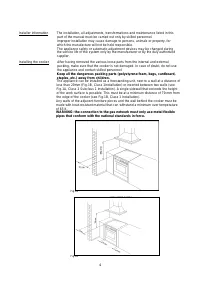
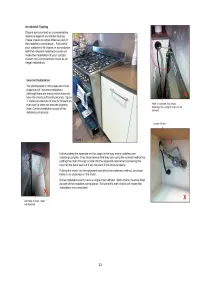
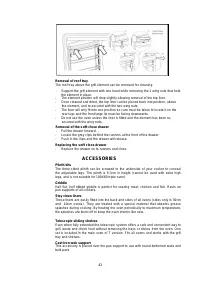
ANTI-TILTING CHAIN/HOSE RESTRAINING CHAIN
A chain must be fitted by the installer within 50mm of the hose connection point to prevent strain on the hose
when the cooker is pulled forward. The chain should restrict the appliance movement to no more than 80%
of the hose length. After the chain is installed, check that there is no strain on the hose or gas connections
when the cooker is pulled as far forward as the chain allows.
The cooker is also supplied with two chains which are connected to the rear left and right of the appliance.
The chains should be connected to the wall directly behind the chains as low as possible to prevent the
appliance from tilting forward. If the appliance is installed between two cupboards, drill a hole on each side of
the cupboards, pass the chains through the holes and anchor the chains within each cupboard. Ensure the
chain connections are strong enough to support the weight of the appliance and taught to prevent it from
tilting forward.
WARNING!
In order to prevent accidental tipping of the appliance, for example a child climbing onto the
open oven door, the stabilising means must be installed. Ensure the chains are correctly anchored to prevent
the appliance from tilting forward and to prevent strain on the hose when the cooker is pulled forward.
MAKE SURE THE ANTI-TILTING CHAINS ARE TAUGHT WHEN ANCHORED AND ANTI TILT
RESTRAINT IS INSTALLED TO PREVENT THE APPLIANCE TILTING.
Please refer to the next two pages for examples of incorrect and correct chain installation.
Характеристики

Остались вопросы?Не нашли свой ответ в руководстве или возникли другие проблемы? Задайте свой вопрос в форме ниже с подробным описанием вашей ситуации, чтобы другие люди и специалисты смогли дать на него ответ. Если вы знаете как решить проблему другого человека, пожалуйста, подскажите ему :)


