Магнитолы Pioneer MVH-150UI - инструкция пользователя по применению, эксплуатации и установке на русском языке. Мы надеемся, она поможет вам решить возникшие у вас вопросы при эксплуатации техники.
Если остались вопросы, задайте их в комментариях после инструкции.
"Загружаем инструкцию", означает, что нужно подождать пока файл загрузится и можно будет его читать онлайн. Некоторые инструкции очень большие и время их появления зависит от вашей скорости интернета.


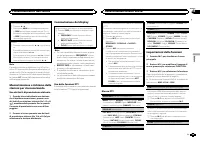


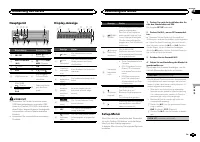
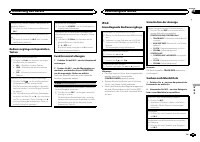

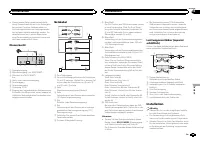


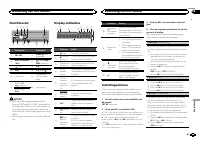


DEVICELIST
(connecting or disconnecting a de-
vice from the device list)
!
When no device is selected in the device list,
this function is not available.
1
Press
M.C.
to display the setting mode.
2
Turn
M.C.
to select the name of a device you
want to connect/disconnect.
!
Press and hold
M.C.
to switch the
Bluetooth device address and device
name.
3
Press
M.C.
to connect/disconnect the selected
device.
If the connection is established,
*
is indicated
on the device name.
DEL DEVICE
(deleting a device from the device
list)
!
When no device is selected in the device list,
this function is not available.
1
Press
M.C.
to display the setting mode.
2
Turn
M.C.
to select the name of a device you
want to delete.
!
Press and hold
M.C.
to switch the
Bluetooth device address and device
name.
3
Press
M.C.
to display
DELETE YES
.
4
Press
M.C.
to delete a device information from
the device list.
!
While this function is in use, do not turn off
the engine.
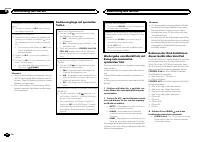
ADD DEVICE
(connecting a new device)
1
Press
M.C.
to start searching.
!
To cancel, press
M.C.
while searching.
!
If this unit fails to find any available cellular
phones,
NOT FOUND
is displayed.
2
Turn
M.C.
to select a device from the device
list.
!
If the desired device is not displayed, select
RE-SEARCH
.
!
Press and hold
M.C.
to switch the
Bluetooth device address and device
name.
3
Press
M.C.
to connect the selected device.
!
To complete the connection, check the de-
vice name (
Pioneer BT Unit
) and enter the
PIN code on your device.
!
PIN code is set to
0000
as the default. You
can change this code.
!
6-digit number appears on the display of
this unit. Once the connection is estab-
lished, this number disappears.
!
If you are unable to complete the connec-
tion using this unit, use the device to con-
nect to the unit.
!
If three devices are already paired,
DEVICE-
FULL
is displayed and it is not possible to
perform this operation. In this case, delete
a paired device first.
A. CONN
(connecting to a Bluetooth device auto-
matically)
1
Press
M.C.
to turn automatic connection on or
off.
VISIBLE
(setting the visibility of this unit)
To check the availability of this unit from other de-
vices, Bluetooth visibility of this unit can be turned
on.
1
Press
M.C.
to turn the visibility of this unit on
or off.
PIN CODE
(PIN code input)
To connect your device to this unit via Bluetooth
wireless technology, you need to enter a PIN code
on your device to verify the connection. The default
code is
0000
, but you can change it with this func-
tion.
1
Press
M.C.
to display the setting mode.
2
Turn
M.C.
to select a number.
3
Press
M.C.
to move the cursor to the next posi-
tion.
4
After inputting PIN code, press and hold
M.C.
!
After inputting, pressing
M.C.
returns you
to the PIN code input display, and you can
change the PIN code.
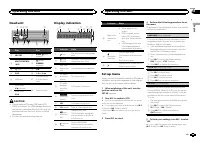
DEV. INFO
(Bluetooth device address display)
1
Press
M.C.
to display the setting mode.
2
Turn
M.C.
to display the device information.
Device name
—
Bluetooth device address
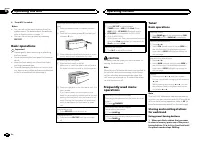
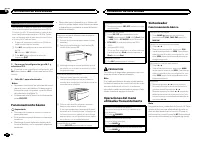
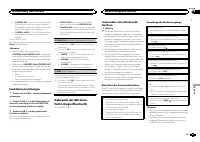
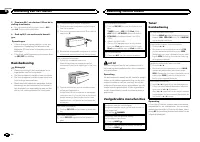
Phone menu operation
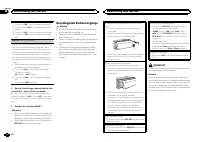
Important
Be sure to park your vehicle in a safe place and
apply the parking brake when performing this
operation.
1
Press
to display the phone menu.
#
When
PW SAVE
is on, you cannot display the
phone menu. For details about the settings, refer to
2
Turn M.C. to select the function.
Once selected, the following functions can be
adjusted.
MISSED
(missed call history)
DIALLED
(dialed call history)
RECEIVED
(received call history)
1
Press
M.C.
to display the phone number list.
2
Turn
M.C.
to select a name or phone number.
3
Press
M.C.
to make a call.
PHONE BOOK
(phone book)
!
The phone book in your cellular phone will be
transferred automatically when the phone is
connected to this unit.
!
Depending on the cellular phone, the phone
book may not be transferred automatically. In
this case, operate your cellular phone to trans-
fer the phone book. The visibility of this unit
should be on. Refer to
1
Press
M.C.
to display
SEARCH
(alphabetical
list).
2
Turn
M.C.
to select the first letter of the name
you are looking for.
!
Press and hold
M.C.
to select the desired
character type.
TOP
(alphabet)
–
ΟΛΑ
(Greek alphabet)
–
-
ВСЕ
(Cyrillic alphabet)
3
Press
M.C.
to display a registered name list.
4
Turn
M.C.
to select the name you are looking
for.
5
Press
M.C.
to display the phone number list.
6
Turn
M.C.
to select a phone number you want
to call.
7
Press
M.C.
to make a call.
PRESET 1-6
(preset phone numbers)
1
Press
M.C.
to display the setting mode.
2
Turn
M.C.
to select the desired preset number.
3
Press
M.C.
to make a call.
!
You can also use the preset number but-
tons
1
/ to
6
/
to recall a preset phone
number.
For more details about storing phone num-
bers, refer to
PHONE FUNC
(phone function)
You can set
A. ANSR
,
R.TONE
and
PB INVT
from
this menu. For details, refer to
English
Operating this unit
9
Section
Operating this unit
En
02
Содержание
- 130 Сведения об этом устройстве; ВНИМАНИЕ; Сведения об этом руководстве; Перед началом эксплуатации
- 131 Основное устройство; Индикация на дисплее; Установочное меню; Управление данным устройством
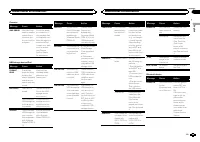
- 132 YES; Меню системы; SRC; Основные операции
- 133 Тюнер; SEEK; AF; Переключение дисплея; FREQUENCY; Использование функций; Список; Настройка функций; FUNCTION
- 134 TRACK INFO; дорожек из списка
- 135 Поиск композиции
- 136 Только для
- 137 Настройки для громкой связи
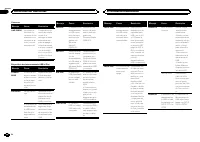
- 138 Использование меню соединения; Использование меню телефона
- 139 Функции и их назначение; аудио
- 140 Регулировки параметров звука; AUDIO
- 142 PW SAVE
- 143 Стартовое меню; Меню систе
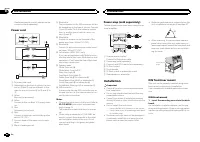
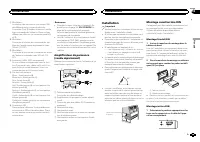
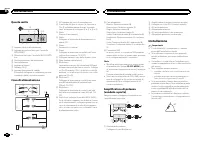
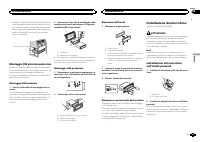
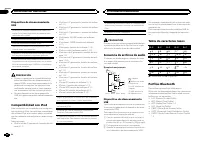
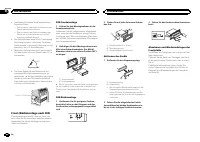
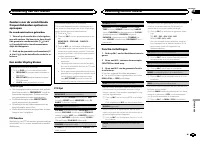
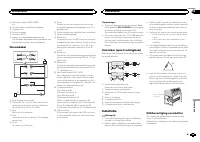
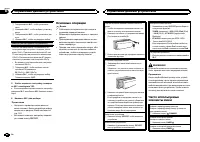
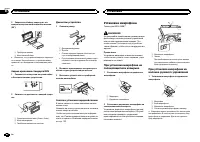
- 144 Соединения; Важно; Данное устройство; Установка
- 145 настройка выхода заднего канала и; Усилительмощности; RCA; Переднее; Переднее крепление стандарта; Вставьте монтажную обойму в пере
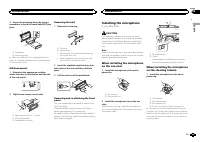
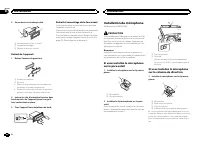
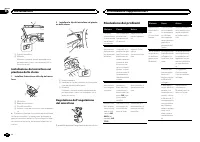
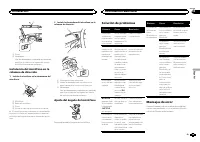
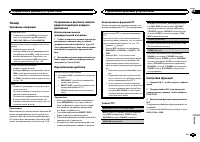
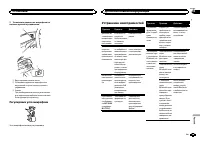
- 146 Установка микрофона
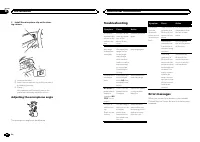
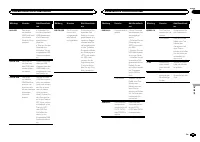
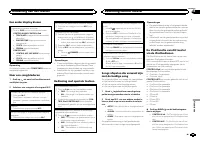
- 147 Регулировка угла микрофона; Угол микрофона можно регулировать; Устранение неисправностей; Дополнительная информация
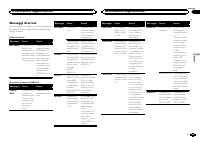
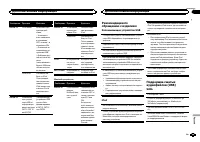
- 148 Сообщения об ошибках; Прежде чем обратиться к торговому пред
- 149 Запоминающее устройство
- 150 Поддержка
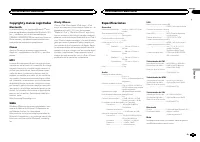
- 151 Профили
- 152 Технические характеристики


